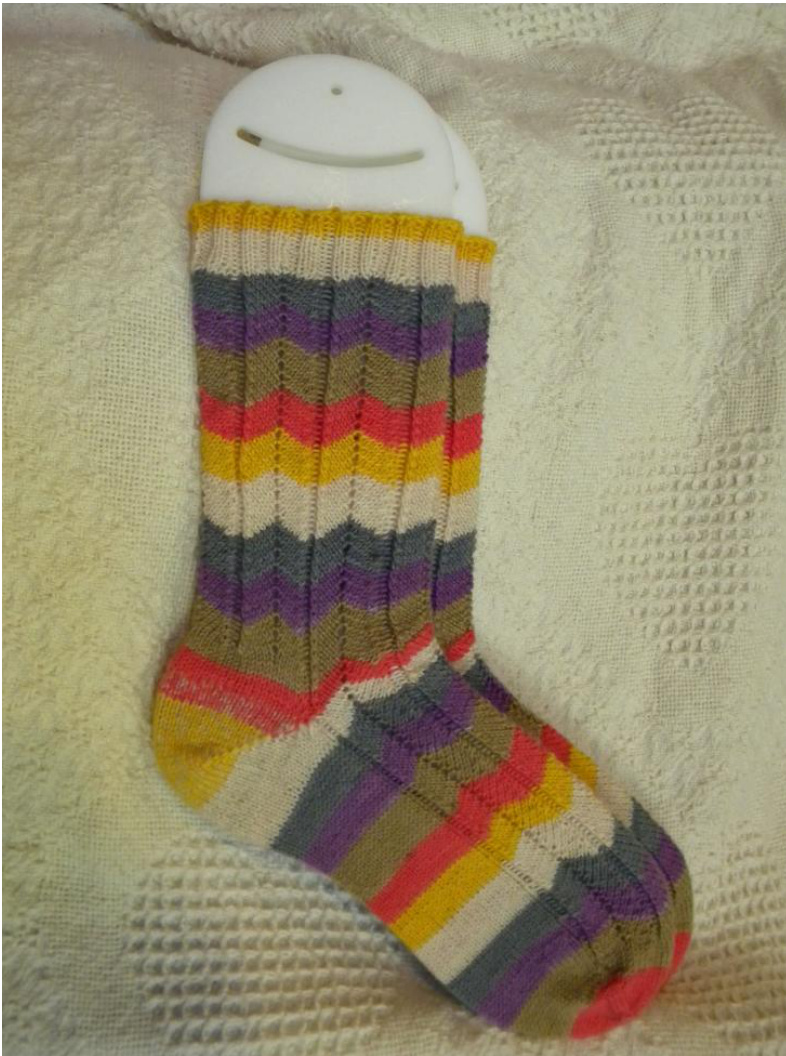
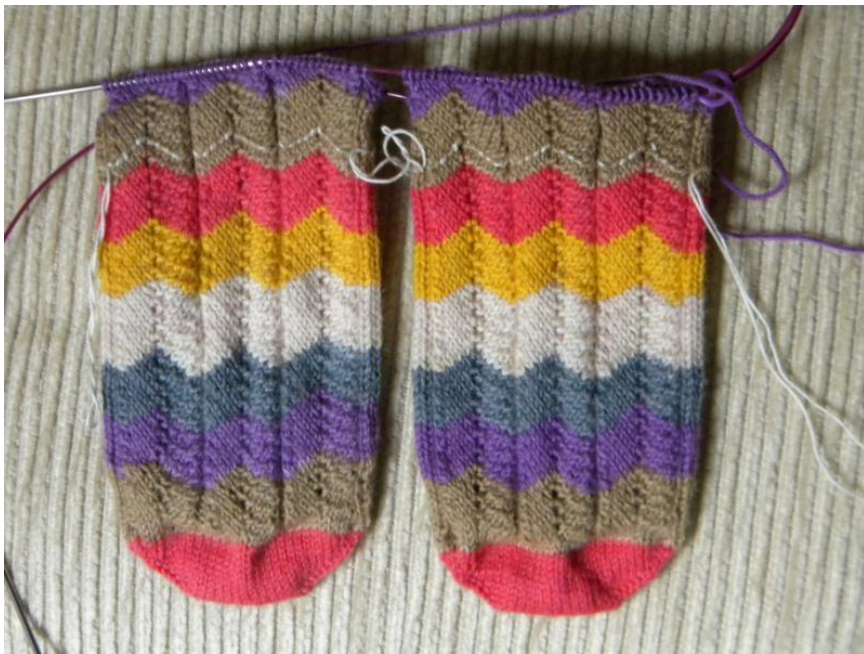
Toe-Up Chevron Lace Socks
Pattern by Gayle Pounds Yarn: Striped Sock Yarn (l used KnitPicks Felici In Time Traveler colorway) Needles: US 0 (2.0 mm) See Notes on last page with Chevron Charts for Needle/Size Options Size: Size Narrow (Medium, Wide, X-Wide)\* \*Size refers to circumference at ball of foot not shoe size - 8.5" (9", 9.5", 10)
Casting On Using Judy's Magic Cast On:
There are also links to YouTube videos but I don't have them. You can search for them if you need to see the process. 1. Hold your needles (2 if you are using dpns ... both needles if you are using a circular) together horizontally in your right hand. If you're using circulars, the cable will be off to the right of your right hand. 2. With about a 15" to 18" tail, drape the tail of your yarn over the back (or top needle depending on how you're holding your needles) needle to hang behind the needle. The yarn from your skein (working yarn) will be on the inside hanging between the two needles. 3. Using your left hand, drape the tail over your left index (pointer) finger and the working yarn over your left thumb making a "v" then hold the two of them together with your other fingers. It's the same way you hold yarn for a long-tail cast on which is the most common cast on. 4. Hoiding the yarn taut on the needle and over your thumb/forefinger, take the front (or bottom depending on how you're holding the needles) needle up and over the yarn on your forefinger and bring the yarn down between the 2 needles. You should now have 2 sts ... one on each needle. 1) the stitch formed by draping the yarn over the back needle and 2) the one you just made using the front needle. 5. Now, take the back (top) needle over and up into the 'V between bringing the yarn on your thumb down between the two needles to form stitch #3. 6. Repeat steps 4 and 5 until you have the correct number of stitches on each needle, in this case 13(15,17,19) stitches on each needle.
First Knit Row
1. With your two cast on needles in your left hand, make sure to turn them so the last stitches you cast on (and the working yarn) are on the right side so you can pick up the working yarn on the bottom needle. 2. If you are using Magic Loop, carefully pull the bottom needle (Needle 2) out so you have the top stitches on the needle (Needle1) but the bottom stitches are now on the cable. Pull Needle 2 out so you have enough cable to use the Needle 2 to knit the stitches off Needle 1 but still have a “loop' of cable on the left side between the two rows of stitches. 3. Take the yarn tail and put it over the working yarn then hold the yarn tail on the bottom of the needles and the working yarn coming back over the yarn tail so the tail is secured when you work the first stitch. You are holding the tail flat against the bottom of the cast on stitches until you knit that first stitch or two. It's a little tight but you want it that way. 4. With Needle 2, knit the stitches off of Needle 1. 5. Turn the needles so the bottom Needle 2 is on the top and, again, the yarn is coming out on the right side of Needle 1 on the bottom. Again, carefully pull the cable so that Needle 2 has just the tip of the needle showing and Needle 1 has enough cable that you can comfortably use it to knit the stitches off Needle 2. 6. ALERT!! The first row of stitches on the 2nd needle must be knit through the back loop! Only this row then all the stitches will be mounted correctly. Again, with Needle 1, knit the stitches off Needle 2, being careful to knit in the back loop on this row ONL Y. PS: If you are using dpns, whenever it is comfortable for you to separate the stitches onto 3 or 4 dpns, do so.1 knit using one long circular so you will have to decide when you're ready to do this. If you need to do it immediately after your cast on, just do it and go from there. TIP 1: If or when the yarn tail is in your way, I usually fold it a couple of times and tie a very loose knot in it so it stays up out of my way.
First Increase Row
1. Knit a stitch in the front and back (kfb) of the first stitch ... one stitch increase. Knit across the row to the next -to-last stitch and kfb in that stitch then knit the last stitch ... total of 2 increases. You should have 15(17,19,21) stitches on this needle now. (lf you have a pointed foot, increase every other row until you reach the next to last row of increases. Then, jump to #4 below. If you have a rounded foot, follow directions for a round toe in #2 & #3 following, then continue to #4) 2. Repeat above on the 2nd row of stitches. You should now have 15(17,19,21) stitches on each row of stitches 3.Repeat increases as in 1 & 2 above every row for about 1/2 of your increase rows. 4. When you have 29(35,41,47) sts on each needle, knit the next round then increase on the instep stitches. only and knit the sole stitches without increases. You will have 31(37,43,49) instep sts and 29(35,41,47) solests. With this pattern, I don't put a marker on the front since it is obvious where the front is ... You have 2 more stitches on the front than the back and as soon as the toe is completed, you'll do one round then start the lace patternon thefront. Chevron Pattern is a 2-row pattern with a 10(12,14,16) stitch repeat + Purl 1 at the end of the row on the instep, only: Row 1: Purl 1, Knit 2 together; Knit 2(3,4,5); (knit 1, yarn over, knit 1, ) in next stitch, slip all off left needle to right needle together; knit 2(3,4,5); SSK (Slip knitwise next 2 sts and knit through the back loop); repeat from beginning 2 more times then Purl 1 at end of row. Row 2: Purl the purls and knit the knits around. NOTE: I cannot stress too strongly the importance of using lifelines on lace or patterned socks. If you drop a stitch or make a mistake in the pattern within decreases (SSKs or K2tog) or increases, k1,yo,k1 in one stitch, it is next to impossible to correct it without taking out rows. Lifelines make
that easier, especially if your mistake is several rows down. I try to put a lifeline at least every 10 rows, 5 might be even better but I get lazy. I use crochet thread and my smallest yarn needle to make lifelines in this case in a pattern row, not a knit row. Crochet thread Begin Chevron pattern on instep and plain knit on the sole. Continue until you are 2 to 2.5 inches less than your total foot or whatever measurement works for the type of heel you choose. However, if your choice is Wrap & Turn, and if you have a high instep as I do, beginning about 1 or 1.5 inches before you start your heel decreases, 8 to 10 stitches from each side of the row, do a Make 1 (M1 in the bar between the stitches) every 2 or 3 rows to increase the area that will stretch over your instep. These do not show as gusset increases at the sides of the row do but will give you that little bit extra to ease over a high instep. In this pattern, you'll want to take into account which pattern repeat you are using so the extra stitches wil work into the pattern when you start the Chevron on the back of the leg above the heel. You'll want it to be a seamless continuation with both sides of the instep pattern. Begin the heel of your choice. I prefer a Double Wrap & Turn heel but a gusset will work just as well Everyone has a preferred heel so the choice is yours. In this pattern, I've given directions for both a Double Wrap & Turn heel and a gusset heel.
Double Wrap & Turn Heel:\*
NOTE: I use Stoeller Stahl Fortissima Socka Darning Thread for reinforcement on my heels. It's not feasible to reinforce using the Gusset Heel but is with any short row heel. It is available at Elizabeth's Fiber & Yarn (www.fiber2yarn.com) for about \$3 per card. One card is enough for 2 heels except when you are making larger socks, then you'll need about 1.5 cards. I start using this reinforcement yarn in the very first stitch of the heel row. I leave about 1 12 -2" then start knitting. After the first stitch, I bring that 'tail' up with both yarns and knit it in so there's no tail dangling. \*For wonderful , detail explanations and illustrations of Wrap & Turn heels, I highly recommend Janet Rehfeldt's Toe-Up Techniques for Hand-Knit Socks. Heel Decreases: (If you want to do Single Wrap & Turn, in this section, you'll just slip stitches rather than wrap them. You'll only wrap in the next Increase section) On Sole Stitches Only: · Knit across to the last 3 stitches (l leave 2 stitches on each side unworked because I believe it makes a neater join when you go back to in the round knitting); Bring yarn to the front, slip 1 stitch purlwise from the left needle to the right needle; ·Bring yarn to the back of the work and slip the stitch back onto the left needle, place marker; You have just wrapped a slipped stitch .. this is how you eliminate holes in the heel. I usually use a different colored stitch marker on each end of the row to separate the wrapped stitches from the stitches waiting to be wrapped. You have 3 stitches on the left side of the knit stitches unworked ... the unworked 2 stitches and the wrapped slipped stitch. Turn your work to the purl (inside the sock) side and purl back across the row until you have 3 stitches unworked. Put yarn to the back, slip the next stitch purlwise · Bring yarn to the front of the work and slip the stitch back onto the left needle, place marker. You now have 3 stitches out of work (the 2 unworked stitches and 1 wrapped stitch) on each side of the row. As you knit and purl rows, wrap the last stitch on the row as outlined above, depending on whether you are on a knit row or a purl row. When you have approximately 1/3 of the stitches left unwrapped in the center of the sole stitches, and ending on a purl row so you have an equal number of wrapped stitches on each side, it's time to begin increasing back to your original number of stitches. I usually leave a little more than 1/3 of the stitches because I have a wide heel at the back part of my foot and I like for the start of these heel-turning stitches to be to the sides of my heal not to the backof it. NOTE: When bringing these wrapped stitches back into work, you need to remember on the Knit Side, slip the stitch as if to purl (purlwise) and on the Purl Side, slip the stitch as if to knit (Knitwise).
Working the First Wraps:
· After you have wrapped the last Purl Row stitch, turn your work and knit to the marker Remove the marker and work the first wrapped stitch. This first wrapped stitch will ONLY have one wrap as will the first one on the purl row. To work the wrapped stitch, slip the stitch purlwise (not the wrap but the stitch) to the right needle With the left needle, pick up the wrap onto the left needle. Keeping the order of the wrap and the stitch, slip the stitch onto the left needle and knit the two together through the back loop. This stitch is now back with the working stitches. Wrap the next stitch on the left needle ... that stitch is now double-wrapped, place the marker and turn yourwork Purl across to the next marker Remove the marker and work the first wrapped stitch which also only has 1 wrap. Note: Make sure the yarn stays to the front throughout all steps of working the wrapped stitch process. To work the wrapped purl stitch, slip the stitch knitwise (not the wrap but the stitch) to the right needle With the left needle, pick up the wrap onto the left needle Again, keeping the order of the wrap and the stitch, slip the stitch onto the left needle and purl the two together as you would purl any stitch, from the front of the work. Wrap the next stitch on the left needle ... that stitch is now double-wrapped, place the marker and turn yourwork Knit across to the next marker
Working the Double Wraps:
· Remove the marker and work the first double-wrapped stitch. To work the double-wrapped stitch, slip the stitch purlwise (not the wraps but the stitch) to the right needle With the left needle, pick up the wraps onto the left needle. Keeping the order of the wraps and the stitch, slip the stitch onto the left needle and knit the three together through the back loop. This stitch is now back with the working stitches. Wrap the next stitch on the left needle ... that stitch is now double-wrapped, place the marker and turn your work Purl across to the next marker Remove the marker and work the first double-wrapped stitch. Note: Make sure the yarn stays to the front throughout all steps of working the wrapped stitch process. To work the double-wrapped purl stitch, slip the stitch knitwise (not the wraps but the stitch) to the right needle With the left needle, pick up the wraps onto the left needle Again, keeping the order of the wraps and the stitch, slip the stitch onto the left needle and purl the three together as you would purl any stitch, from the front of the work. Wrap the next stitch on the left needle ... that stitch is now double-wrapped, place the marker and turn yourwork Knit across to the next marker Continue in this manner until you have worked the last double-wrapped stitch on the knit side (left) of youl work. You still have one double-wrapped stitch on the right side of the work but you'll take care of that after you knit around the instep stitches. If you have a gap between the last double-wrapped stitch that you just worked and the 2 stitches left unworked throughout the heel process, I pick up either a bar between the stitches or the left leg of a stitch 1 or 2 rows below the last double-wrapped stitch and twist it so it helps to fillthe gap, then knit i together with the next stitch ... then knit the last stitch on the needle. If you have not gap, knit the two last stitches normally. If you are knitting 2-at-a-time, continue to the next sock heel and repeat all steps to this point. If not, go on to the next section.
Finishing the Heel(s):
· Knit in pattern around the instep stitches At the beginning of the heel stitches, you still have 2 unworked stitches plus the last wrapped stitch Knit the 1st stitch If you have a gap between the 2nd stitch and the last double-wrapped stitch, slip the 2nd stitch purlwise and pick up a stitch (see above) and knit them together, through the back loop. If not, knit the stitch normally. Now, it gets a little tricky but I have found the best way to knit this last double-wrapped stitch is to turn my work and actually do the purl thing with it, as I did with all of the other wrapped stitches on this side of the work. So, turn your work, pick up the wraps onto the left needle, slip the stitch knitwise, remove the marker, then purl the three together as you did the other wraps. Since your yarn is on the opposite side of your knitting with this stitch, it's a little trickier to get that yarn through the three but it can be done so persevere and you'll get there. Slip the worked double-wrap back onto the left needle so when you turn back to continue the row, it's on the correct needle. Turn your work back to the knit side, being careful not to let your hard-earned stitches slip off the needle and continue working in the round. When you have your work to the point you want to start the pattern on the back of the leg, start your pattern so that it corresponds to the pattern on the insole or front of the sock. I usually knit %2 to 1" before starting the pattern on the back.
Gusset Heel:
Increases: Increase 1 stitch on each side of SOLE STITCHES ONLY. You can use the kfb for this. That works very nicely and is probably the easiest way to do it. I'm for using the simplest, easiest method when learning then you can branch out and try new techniques after you have the total toe up sock experience mastered. After you have reached 2 to 2.5" less than your total sock length (you may want to do 1 increase in 1 row ONLY in the center of your sole stitches so you have an even number of stitches for this type of heel. If you do this, be sure to remember to decrease 1 stitch at the end of the heel so you have your original uneven number of stitches which should be 2 stitches less than your instep stitches when you start the Chevron pattern on the back of the leg: 1. a) Knit in Chevron pattern across instep stitches; b) On the first sole stitch, kfb and knit across to the nextto-last stitch, kfb ki exactly as you did in the toe increases except all of these willbe every other row. This will be 1 increase on each side for a total of 2 st increases every other row. 2.Knit around 3. Repeat gusset increase rows 1 & 2 until you have a total of 2 stitches less than the total stitches around the sock on all needles before you started your increases, you will be ready to turn the heel. If your total is 48 stitches on all needles before starting increases, youll do the increases until you have 46 stitches; 52 stitches, you'd knit until you have 50 stitches, etc.
Turning the Heel
TIP 3: Unless otherwise noted, always slip stitches purlwise whether you are on the knit side or purl side. If stitches are to be slipped knitwise, it will be so noted in the pattern. Otherwise, they should always be slipped purlwise. Row 1: a.Knit in Chevron pattern across instep stitches b. Knit to the center of the sole stitches (if 46(50,54) total stitches, knit 23(25,27) sts C. Placemarker d. Knit 2 e. Slip 1 st (remember unless otherwise noted, always slip purlwise), k 1, PSSO (pass slipped stitch over knitted stitch) f. Knit 1 g.Turn Work Row 2: a. Slip 1 b. Purl to marker, remove marker (or you can leave it if it helps you count as you knit) C. Purl 2 past marker d. Purl 2 together (be sure to keep your yarn taut at both this point and the PSSO on the knit side) e. Purl 1 f.Turn Work. Row 3: a. Slip one, knit to 1 stitch before gap (on the other side of the center/marker) b. Slip 1 st, k1, Psso, k1, Turn iow 4: a. Slip one, purl to 1 st before gap b. Purl 2 together, p1 Turn Repeat Rows 3 & 4 until all stitches on the last knit row are worked. You will have 2 unworked stitches on the right side of the work but you'll deal with them after the heel is worked on the next round after the instep stitches are worked. TIP 4: Remember, while knitting and purling the heel turn (short rows) the knit side will be an uneven number of stitches worked and the purl side will be an even number. In other words, after the first two setup rows, you have a total of 9 stitches worked from the point you turn your work; on the purl row, you'll have 10 from the point you turn yourwork. TIP 5: To prevent holes in the heels, always keep your yarn tension a little tighter when turning the heels, especially at the sides where you are either wrapping and turning, making SSKs or SSPs, or PSSO or knit or purl 2 together. This is especially true when using larger needles.
Final Heel Decreases & Knitting the Leg
After you have turned the heel and before starting up the leg, you have a few more decreases to get back to your original number of stitches — the number of total stitches on all needles before beginning the gusset increases: Round 1: 1. Knit in Chevron pattern across instep stitches 2. Beginning on the first stitch of the sole stitches, k1, SSK (slip 2 stitches as if to purl, knit the slipped stitches together through the back loop) 3. Knit across to the last 2 stitches, PSSO. Round 2: 1. Knit in Chevron pattern across instep stitches 2. SSK 3.Knit across
Round 3:
Knit in the round, continuing the Chevron pattern on the front and knit even on the back, for 1/2" to 1" then begin Chevron pattern on back of the leg until the leg of the sock is the height of your preference then begin 2 x 2 ribbing for 1-1.5 inches. Bind off using a stretchy bind-off of your choice. Jenny's Stretchy Bind-off can be found online in the Knitty archives or on You Tube as well.
Another Stretchy Bindoff:
Work two stitches in pattern, then slide them both back over to the left needle and knit them together through the back loops. Work the next stitch, slide the two active stitches back to the left hand needle and knit them together through the back loop. Continue until finished. Weave in ends.
Gayle's Chevron Sock Pattern Chart
Adjust needle size or number of stitches (as shown below) for perfect fit. You can add or remove stitches between the center increases and the side decreases (either side of the center) Small 60 total sts .. 31 on instep; 29 on sole (based on US 0 needle) Pattern repeat 10 sts + 1 (on last repeat)
| p | p | 2 1 | |||||||||
| p | n | / | p | ||||||||
| +1 | 10 | 9 | 8 | 7 | 6 | 5 | 4 | 3 | 2 | 1 |
Medium 72 total sts . 37 on instep; 35 on sole (based on US 0 needle) Pattern repeat 12 sts + 1 (on last repeat)
| p | P | 2 | |||||||||||
| p | n | / | p | 1 | |||||||||
| +1 | 12 | 11 | 10 9 | 8 | 7 | 6 | 5 | 4 | 3 | 2 | 1 |
Large 84 total sts ... 43 on instep; 41 on sole (based on US 0 needle) Pattern repeat 14 sts + 1 (on last repeat)

X-Large 96 total sts ... 49 on instep; 47 on sole (based on US 0 needle) Pattern repeat 16 sts + 1 (on last repeat)
| p | p | |||||||||||||||||
| p | u | P | 2 1 | |||||||||||||||
| +1 | 16 | 151413121110 | 9 | 8 | 76 | 5 | 4 | 3 | 2 | 1 |
Chart Key Knit PPurl SSK (Slip\*, Slip\*, Knit) UKnit 1, YO, Knit 1 in same stitch, slip all off left needle to right needle together Knit 2 Together \*Slip as if to knit (Knitwise) NOTE: Grey boxes are space savers only for the 2nd pattern row representing the two decreases from SSK & K2tog on 1t pattern row. On the 1't pattern row, they are disregarded. SockWorksheet Measurements Foot Circumference (FC): inches (widest part from base of toes) Circumference (SC): inches (Subtract .25" to .50" from FC for a snug fit Length of Foot (LF): inches (Measure along sole of foot, from tip of toe to back of heel) Multiply LF: by .73 for distance to gusset or short row heel beginning: inches(A) Desired length of sock leg: inches (B) (from %2 to 1" above final heel sts) Gauge: stitches per inch Multiply SC by Gauge: stitches Adjust this number to multiple of 4 makes 1x1 or 2x2 ribbing even. This adjusted number will be the "Key Number" for your sock; it is the number of stitches on which most of the sock will be worked, and the other numbers which follow will be calculated from this number. Key Number: (C) Determine number of stitches for Instep & Sole Needles: Divide C by 2: (D) circular needles; Divide C by 4 for DPNs ; if C or D is odd, round to nearest even number: (E)
At a Glance:
A: B: C: D: E: Pattern: Yarn Used: Yarn Size: Needle Size: DateCompleted: Compiled by Gayle Pounds gpounds@poundworks.com


