Swatch Mitts
watching. I love it. How else are you supposed to get to know your yarn? Embarking upon a full project without swatching is like getting married without dating. The first few stitches may bring thrills and excitement, but soon enough you'll wake up next to a half-finished sweater that has betrayed you, wondering how on earth you got there. Yet many feel that swatching is treading water when they're ready to swim the English Channel. Hence the Swatch Mitts, designed to give you the full swatching experience, while also producing a simple, useful pair of fingerless mitts. We tend to knit tighter in the round than we do when working back and forth, which is why it's important to swatch flat for any projects that are knit flat. You'll find instructions on how to knit these mitts both flat or in the round so that you can choose the technique that best suits your swatching needs. This pattern is intended as a starting point for far greater adventure. Listen to the yarn and do what it asks, whether it's changing a needle size or adding some ribbing or a simple cable. After you've worn the mitts for just one busy day, you'll have a much more complete sense of what the yarn can and cannot do. If you add these mitts to your swatching regimen, by the end of the year you'll have a whole basket of beautiful finished fingerless mitts. Your hands will never be lonely or cold again.
YARN
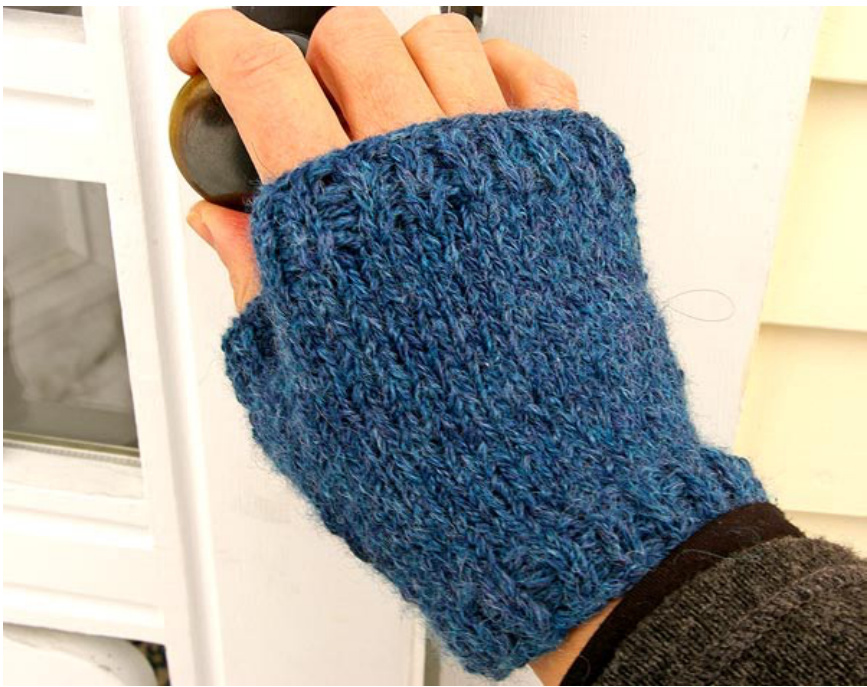
80 yards (73m) of worsted- or Aran-weight yarn. Because these mitts require so little yarn, they're particularly useful for low-yardage, one-skein treats such as Schulana Cashmere Moda, Lobster Pot Worsted Hand-Dyed Cashmere, Jade Sapphire 8-Ply Cashmere, Fibre Company Road to China, or Rowan Lima (shown on this page). The mitts are also fantastic swatching exercises for any happy wool yarn, such as Brooklyn Tweed Shelter and Quince & Co. Lark, or a wool-based blend like Berroco Blackstone Tweed (shown on the following pages) whose companion fibers will encourage a lovely bloom in the wash. If yardage is tight, be sure to divide your skein equally into two smaller balls-a kitchen scale is helpful for this. I've successfully squeezed a pair of mitts out of just 73 yards (67m) by omitting a few rows on each cuff.
FINISHED SIZE
As written, these mitts will have an approximate circumference of 7.5" to 8" (19-20cm) and a length of 5" (13cm). If you're having fun and have extra yarn at hand, by all means make the mitt longer. Simply knit a longer cuff before you begin the Thumb Edge detail. You can also extend the Top Border if you'd like to cover more of your hand.
GAUGE
Since these are swatch mitts, part of their purpose is to help you find your gauge. The pattern is written to work with any yarn knitting up at approximately 20 sts / 26 rows per 4 inches (10cm). This can be done comfortably in any worsted-weight or Aran-weight yarn, the latter producing a slightly thicker, heavier fabric that can be ideal for keeping hands warm. Since you begin at the wrist and bind off at the fingertips, consider starting with larger needles and gradually moving to smaller ones so that you can see how the yarn behaves at a full spectrum of suitablegauges.
NEEDLES
These mitts will help you find your ideal needle size, most likely within the US 6-8 (4-5mm) range. If working the mitts fat, you can use any kind of needle. To work the mitts in the round, you'll need four DPNs. In both cases, you'll need four DPNstofinishthethumb.
NOTIONS
One darning needle. If working in the round, you'll also need one stitch holder and two stitch markers. ① Clara Parkes 2010. This pattern is for personal use only. Allrights reserved.
Instructions for Knitting Flat
Cast on 38 sts using your favorite cast-on technique, leaving a generous 6" (15cm) tail.
Cuff Border
Row 1 (RS): (Slip 1 stitch purlwise with yarn held in back, p1) to end. Row 2: (P1, k1) to end. Repeat these 2 rows 2 more times, until a total of 6 rows have been worked, ending having completed Row 2.
Swatch Body
Work stockinette stitch (knit 1 row, purl 1 row) for 6 rows, ending having completed a purl row.
Thumb Edge Detail
Row 1: K1, slip 1 stitch purlwise, knit to the last 2 stitches, slip 1, k1. Row 2: Purl all stitches. Work Rows 1 and 2 until piece measures 4" (10cm) or the desired length from the cuff to the top of the thumb opening
Top Border
Work Cuff Border a total of 3 times, or until swatch measures the desired total length for your mitt. Bind off all stitches, leaving a generous tail.
Finishing
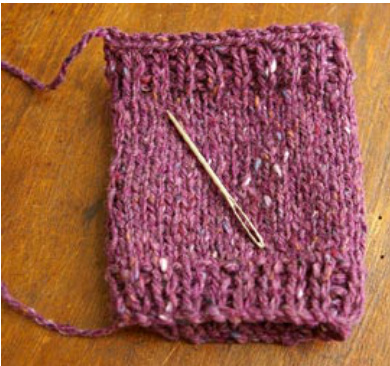
Fold the swatch in half so that the bind-off edge is along the top and the cast-on edge is along the bottom. Those edges represent the top and bottom of your mitt. Thread the bind-off tail through a darning needle and seam together the top of the side edges using Mattress Stitch until you've reached the top of the Thumb Edge Detail. Weave in the end.
Now, move your darning needle to the bottom of the swatch, thread it with the cast-on tail, and seam together the bottom of the side edges until you've reached the beginning of the Thumb Edge Detail. Weave in the end.
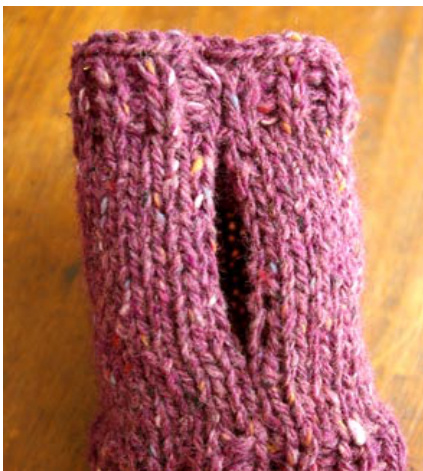
At this point you have a tube with a simple opening where, in just a few moments, a thumb will magically appear.
Thumb
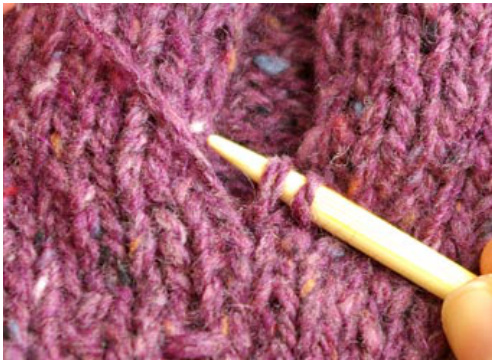
The thumb is worked from the bottom up by picking up and working 1 stitch on each side of the thumb opening every other row. This creates an ever-widening thumb gusset. Once you've reached the top of the thumb opening, you'll pick up several stitches across the top, join in the round, and work a few more rounds of the thumb before binding off. Let's start. Row1: Pick up and knit 1 stitch from within the first slipped stitch on the right edge of the thumb opening, 1 stitch from the center of the thumb opening, and 1 stitch from the first slipped stitch on the left edge of the opening. The slipped stitches on each end will be easy to spot because they're twice as big as the others. Row 2 (WS): Purl all stitches.
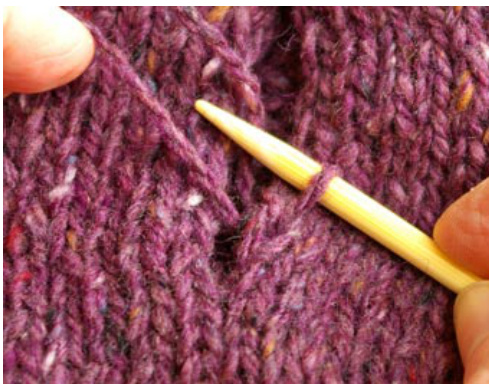
Picking up the stitch along the right edge
Picking up the middle stitch
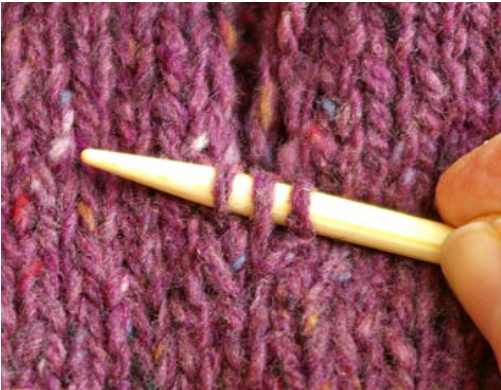
Picking up the first stitch along the left edge
Thumb (continued)
Row 3: Pick up and knit 1 stitch from the slipped stitch in the next row up on the right edge of the thumb opening, knit across all stitches, then pick up and knit 1 stitch from the slipped stitch in the next row up on the left edge of the thumb opening. Row 4: Purl all stitches. Continue Rows 3 and 4, working your way up the thumb hole and widening it as you go along until all but one stitch has been picked up along either side of the thumb gap. The number of stitches on your needle will depend on your row gauge, but they should average between 13 to 15 sts. Just know that the more stitches you have, the wider your thumb will be. End having worked Row 3.
This thumb offers perfect practice for knitting backwards, if you've ever wanted to try it. This handy technique is useful when working just a few stitchesonarowbecauseiteliminatestheneed to turn your work. You're ready to knit backwards after having completed a right-side row. Your right needleis holding theworked stitches and your left needle is empty.
The left needle becomes your working needle. Insert that needleinto the back of the first stitch on your right needle, from left to right. Wrap the working yarn over the left needle so that it falls off the right and to the back, then slide the worked stitch off the rightneedleandonto theleft needle. It feels awkward at first, like writing with your non-dominant hand, but the more you try it, the easieritbecomes. Divide the thumb stitches evenly onto two DPNs. With a third DPN, pick up and knit 3 stitches across the top of the thumb opening. This marks the beginning of the round. Work three rounds in stockinette. If you don't have much yarn left, you can bind off all stitches here and darn in the ends. If you have a little more yarn to play with, finish by working rounds 1 and 2 of the Cuff Border 3 times. Bind off all stitches, darn in ends, and admire what you've just made.
Swatching Secrets
I hope that the process of knitting these mitts gave you some useful insight about how your chosen yarn behaves, what it wants to be, and how you should handle it. You've tried it with knits and purls, slipped stitches, cast-ons and bind-offs alike, and you've knit it flat as well as in the round. But the adventure doesn't stop there. First, the washing. With the exception of some particularly fussy silks, nearly all yarns should be comfortable dunked in a warm sudsy bath. To help see what happens in the bath, I recommend washing swatches in a clear glass bowl. Fill this bowl with warm water (100 to 110 degrees Fahrenheit, or 38 to 43 degrees Celsius) and add a slosh of your favorite mild woolwash or shampoo. But don't wash both swatches at once! Set one mitt aside as a control subject. You'll be able to compare both fabrics, the washed and unwashed, side by side, and see just how much the fabric has (or hasn't) changed during wash. Did it bloom? Did the color fade or change slightly? What about the stitch and row gauge, are they the same? Similar? Now, gently submerge the mitt in its sudsy bath, giving it a few gentle taps and squeezes to help the water penetrate the fabric fully. Let it rest, then give it a squeeze and lift the mitt out of the water. Hold the bowl up to the light. What color is it? Depending on how the yarn was processed, it may release a faint grey color. But do you see anything more? Empty the bowl and refill it with water of the same temperature. Drop your mitt back in, swish, tap, squeeze, and lift again. Repeat until the water runs absolutely clear. Lay this mitt flat on a towel and blot out the excess moisture. When the mitt has dried completely, take a close look at the washed and unwashed mitts to note any changes. Did the fabric stretch? Tighten? Develop a halo? Not change one single bit? Keep all this in mind for any future projects with that yarn. Once you've taken a close look at both fabrics and noted any changes, you can wash the second mitt as you did the first. If these mitts are gifts, the experimentation ends here. It's time to wrap them up and deliver them to their lucky recipient. But if they're for your own personal enjoyment, consider one more step in the adventure: the wearing. Most of us tend to use our hands quite a lot throughout the day. Cover those hands with a material and it, too, will show signs of wear and tear by the end of the day. Which makes these mitts a perfectly logical way to see how this yarn will behave on an average day, in good times and in bad, in sickness and in health. Have fun!
Instructions for Knitting in the Round
If your goal is to swatch for a project that's knit in the round, your swatch will also need to be knit in the round to give you the most accurate gauge and comparable knitting experience. Here's how to knit Swatch Mitts in the round. The biggest difference is that you'll work the thumb as you go along instead of seaming the swatch and adding it later. Note that you'll need DPNs and a stitch holder. If you've never worked a thumb gusset before or simply need some hand-holding, you'll also need two stitch markers. Cast on 38 sts using your favorite cast-on technique, leaving a generous 6" (15cm) tail. Divide stitches evenly onto 3 DPNs. Join to work in the round, taking care not to twist the stitches. Place marker at the beginning of the round.
Cuff Border
Round 1 (RS): (Slip 1 stitch purlwise with yarn in back, p1) to end of round. Round 2: (K1, p1) to end of round. Repeat these 2 rounds 2 more times, until a total of 6 rounds have been worked, ending having completed Round 2.
Mitt Body
Knit every round for 6 rounds.
Thumb Gusset
The Thumb Gusset is worked by increasing 2 stitches every other round. A slipped-stitch detail on either side of the increases lends a sculptural effect to the thumb opening, but if you find it too fussy simply knit the stitch instead. I've also added optional instructions for stitch marker placement in case you need a little handholding for your first few mitts. Round 1: Slip 1 stitch, place marker, M1R (by picking up the bar between stitches from back to front and knitting into the front of the picked-up stitch), k1, M1L (by picking up the bar between stitches from front to back and knitting into the back of the picked-up stitch), place marker, slip 1 stitch, knit to end of round. Round 2: Knit all stitches. Round 3: Slip 1 stitch, slip marker, M1R, k3, M1L, slip marker, slip 1 stitch, knit to end of round. Round 4: Knit all stitches. Round 5: Slip 1 stitch, slip marker, M1R, k5, M1L, slip marker, slip 1 stitch, knit to end of round. Round 6: Knit all stitches. Notice how the number of stitches you knit between increases grows by 2 stitches every other row? You're creating an everwider V that will become the thumb. Continue working increases in this same way, alternating an increase round with a knit round until you have 13 stitches between markers. Finish that round and work one knit round.
Thumb Gusset (continued)
Next round: K1, cast on 3 stitches onto your right needle using the backwards-loop cast-on. Place the next 13 stitches onto a stitch holder. Then knit to the end of the round, ignoring the stitches on the stitch holder—we'll come back to those later. Work 1 knit round.

Casting on 3 stitches using the backwards-loop cast-on
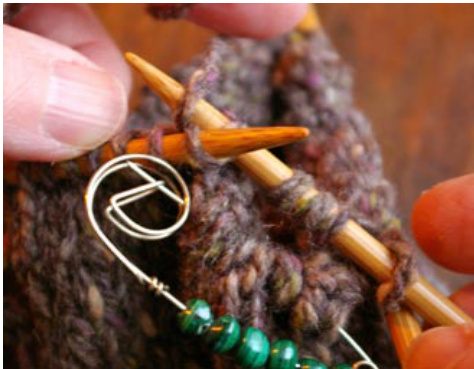
Placing the next 13 stitches onto a holder, then resuming knitting in the round Decrease round: K1, slip 2 stitches as if to knit them together, k1, pass the slipped stitches together over the stitch you just worked, then knit to the end. You've just tightened up the gap over the thumb hole to help the mitts stay snug on your hand. Knit 5 rounds.
Top Border
Work rounds 1 and 2 Cuff Border a total of 3 times, or until the piece measures the desired total length for your mitt. Bind off all stitches, leaving a generous tail.
Thumb
Place the 13 stitches from the holder onto two DPNs. With a third DPN, pick up and knit 3 stitches across the top of the thumb opening. This marks the beginning of the round. Knit 3 rounds. If you don't have much yarn left, you can bind off all stitches here and darn in the ends. If you have a little more yarn to play with, finish by working rounds 1 and 2 of the Cuff Border 3 times. Bind off all stitches, darn in ends, and admire what you've just made!


