Heel Stitch Beret or Ski Cap By Janis Cortese
Materials:
· A set of dpns and a 12" or 16" circular needle, both size US7 · Two skeins of Lion Brand Amazing in Mauna Loa colorway, or whatever yarn floats your boat. ?Ayarnneedle
Notes:
This pattern is written very generally and can be adapted to just about any size needles and weight of yarn. This is a nice, somewhat roomy, very warm hat, especially good for people with very long hair who need something that willfit over a bun. The heel stitch band around the head is especially warm over the ears.

Seen from the top, blocked around a dinner plate.
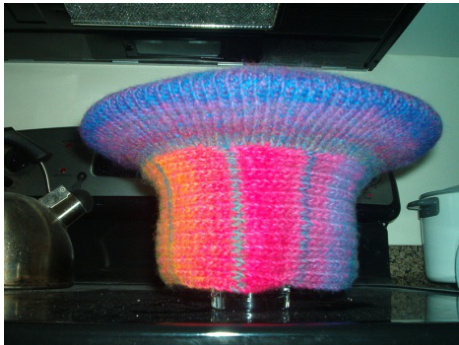
Seen from the bottom.
Directions for headband part:
Using the long-tail method, cast 24 stitches onto one of the dpns. Be sure to leave a long enough tail to use later on to graft the ends of the headband part together; 24" of leftover tail is about right. Using two dpns, repeat the following rows: Row 1: (Sl1, k1) to end. Row 2: Sl1, purl to end. Strictly speaking, you can use the circs to do this as well, but I find it a bit easier to use the dpns. If you'd rather not, that's fine. You will want to repeat these two rows seventy times OR enough times to go comfortably around your head as a headband. When you finish, do NOT cut the yarn. Use the end of the long-tail cast-on to graft the ends together in pattern. Weave the tail into the inside of theband. If you end here, it makes a really nice headband, although you do have to block it to make sure it doesn't roll up on itself.
Directions for the hat part:
Using the working yarn, pick up one stitch per "chain" along the edge of the headband. Place a stitch marker at the start of the round. Here's where you can decide whether to make a ski cap or a beret. If you'd like to make a ski cap, skip the Beret Setup Round. Beret Setup Round: (K2, k1p1) into same stitch around. If this doesn't work out exactly evenly, no big deal. Round 1: K even around. Keep repeating Round 1 until you've done 3-4" of rows, depending on how deep you want the hat or beret to be. For a close-fitting ski cap, I would recommend only 3".
Directions for crown part:
These directions apply for both the Beret and Ski Cap versions. Count your stitches. If you have a multiple of 7, you're set. If you do not have a multiple of 7, you need to knit one more round and make a few evenly spaced decreases around until you do have the nearest multiple of 7. Say, if you count and find that you have 115 stitches, you'll want to decrease 3 stitches s0 that you end up with 112, which is 7x16. After you do this, recount your total stitches, which should be a multiple of 7 now. Put your total number of stitches into the first blank space in the following formula: And subtract 2 from the number in the second blank. This is the number of stitches N that you put into Round1 below. For example, if you have 112 stitches, then you wind up with: Subtract 2 from 16, and you get N=14. Now, you want to do the following: Round 1: (K N stitches, k2tog) around. In my example above, this would be "K 14 and then k2tog around." Round 2: K even around. Basically you're setting up seven decrease points evenly spaced around the crown, and making decreases every other row. Repeat these two rows, knitting one fewer stitch between the k2togs each time you repeat Round 1, until you have approximately half the number of stitches you started with. It's only approximate, so don't sweat it if it's not exactly half. Now, you will continue with Round 1 only - continuing to make seven evenly spaced decreases around the crown with No work-even rounds between. Continue until you have 14 stitches left. Cut the yarn, and using your yarn needle, run the tail through these 14 stitches and pull tight. Again, using the yarn needle, poke the end through to the inside of the hat and weave the end in to make it fast.
Block:
For Beret or Ski Cap, turn the hat inside out and just block it lightly using a steam iron to keep the headband part from rolling. For Beret, you will then want to pop the thing over a dinner plate and center it up around the plate nicely, then block lightly using a steam iron around the plate. Let the hat sit until it's dry and cool. If it's around a dinner plate, just do what I did in the pictures and set the plate on a tumbler so that the headband hangs underneath it. There you go. Enjoy! These work up really fast too, Ike a day or two, so they're great gift knitting. They're also great airplane knitting because after you've made one, the pattern is pretty self-evident.


