Mystery Knit-a-Long Neckwarmer Pattern January 2015 Lita Wallace First Clue: 2 Pages
Overview:
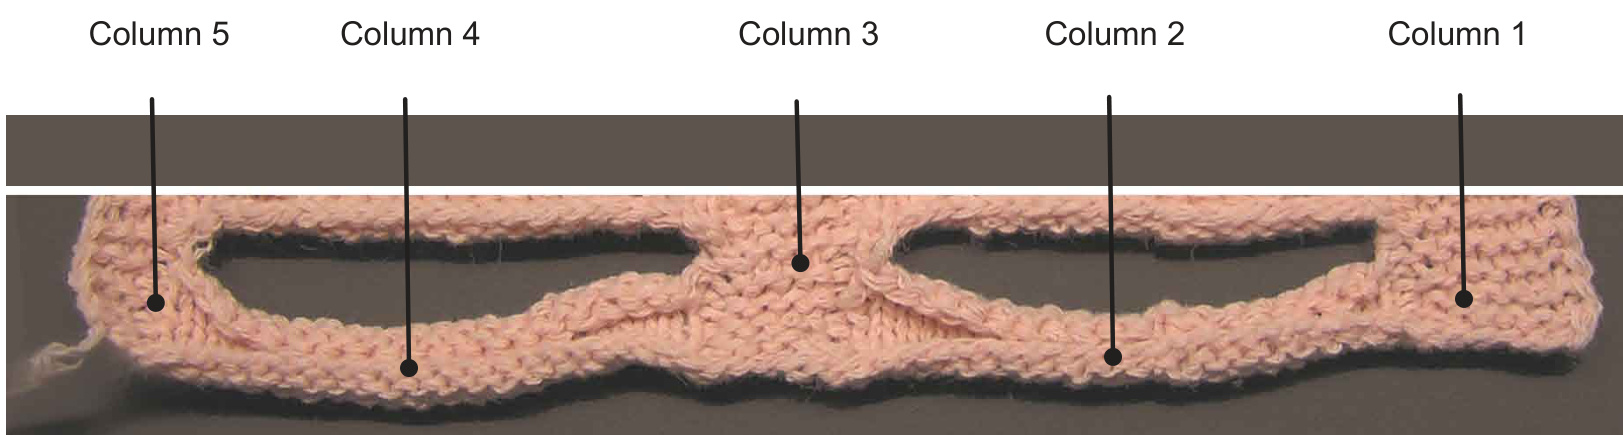
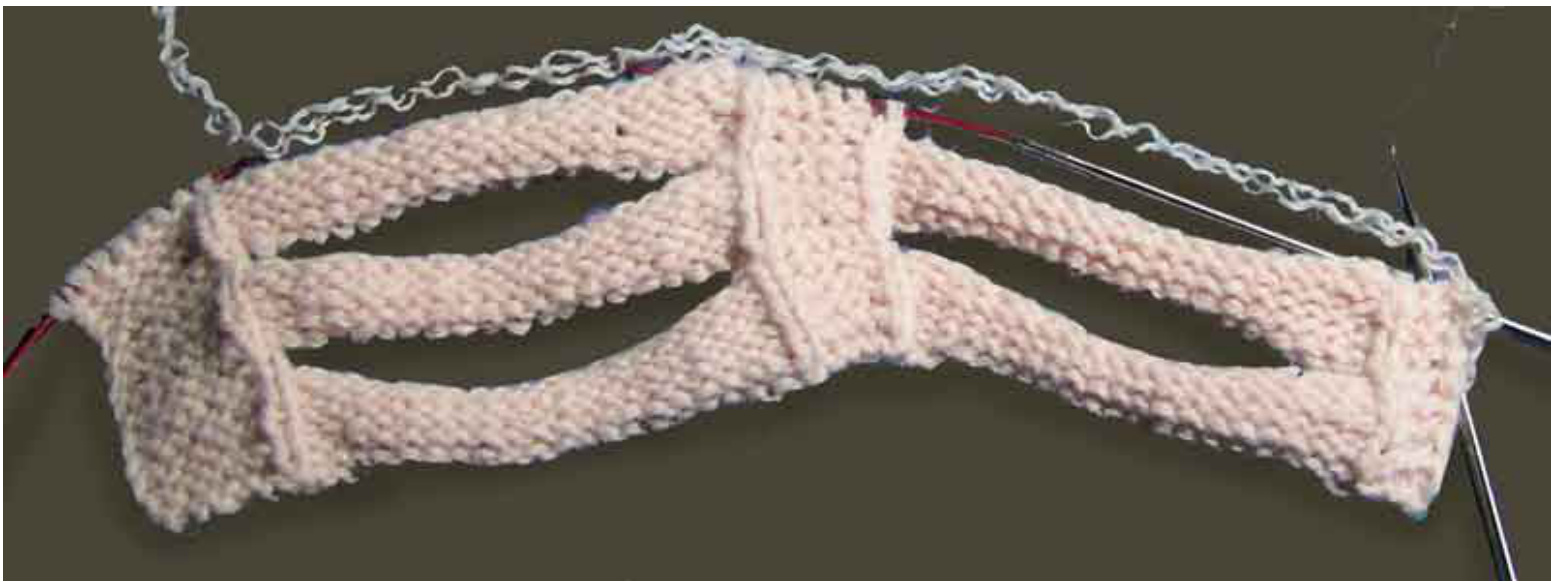
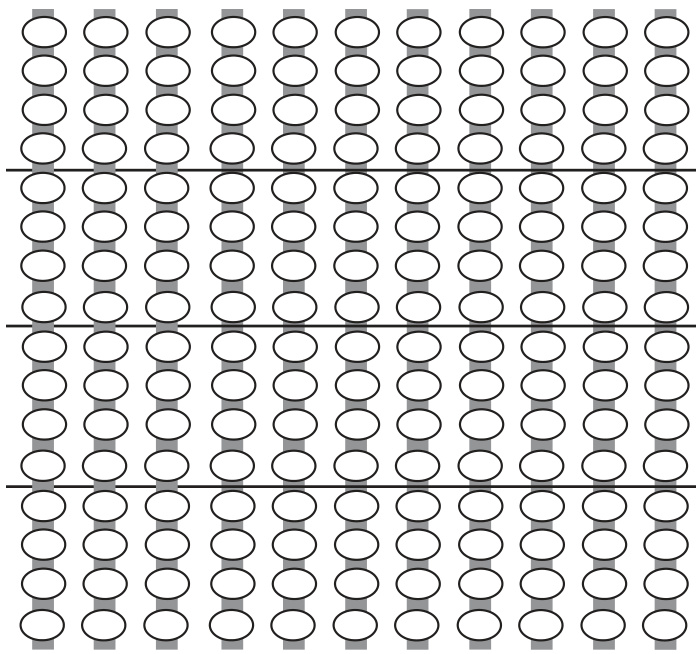
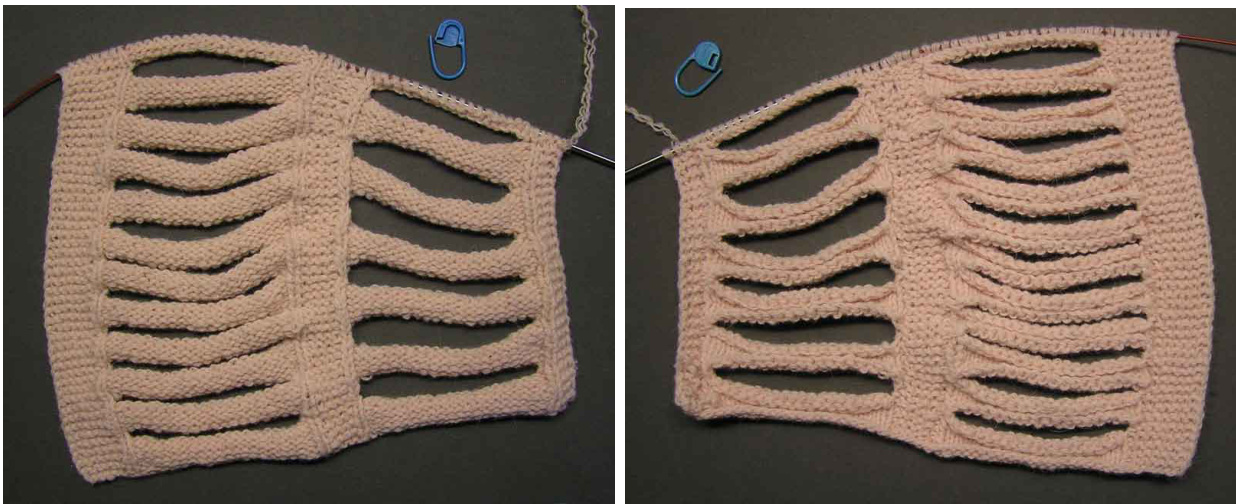
This item is comprised of five vertical columns. Each column has its own pattern that is consistent, but the way these columns line up sometimes changes, so the rows are not all identical across. Row count will be determined by Column 1. Columns 1, 3 & 5 are basically garter stitch: 8, 6 and 4 stitches wide. Columns 2 & 4 are sections of stockinette stitch, 20 stitches wide. From the Knit Side:
Yarn: Sport Weight to Bulky, your choice (neutral or classic colors, solid or semi-solid). Would the edge of this pressed against your neck be comfortable? Needle size and yarn weight are not critical. The examples in the photos were done with worsted-weight yarn (9 w.p.i.) on a Size 7 circular needle. Straights also can be used. Style: Classic/structural (That's why we want to knit a soft gauge.) Difficulty: Beginner/lntermediate (Cast on, bind off, knit, purl, learn EASY German short rows and a surprise technique transforms the piece at the end.) Always slip the first stitch of every row, as if to purl, with yarn in front. At the end of the row, knit the last stitch. Purl Row and Knit Row refer to the stockinette sections. Where the garter stitch sections meet the stockinette sections, there is a one-stitch rib (part of the garter section), which is knitted on the purl side and purled on the knit side. This serves to help shape the finished item and during the knitting acts as a built-in stitch marker so when working on the purl side we can see the edges of thesections.
Set-up:
provisional (without the waste yarn), long-tail. It does not need to be stretchy Row 1: Purl Row Row 2: Knit Row Row 3. Purl Row Row 4. Knit Row Row 5: Purl Row Row 6: Knit Row Row 7: Purl Row Row 8: Split Row Basic Purl Row (odd-numbered rows): Slip 1 pw wyif \*, knit 3, purl 20, knit 6, purl 20, knit 8 Basic Knit Row (even-numbered rows): Slip 1 pw wyif, knit 6, purl 1, knit 20, purl 1, knit 4, purl 1, knit 20, purl 1, knit 3 \* Purlwise, with yarn in front The first couple of rows it will be necessary to count stitches, then you should be able to see the changes in columns by watching for the V's of the marker stitches.
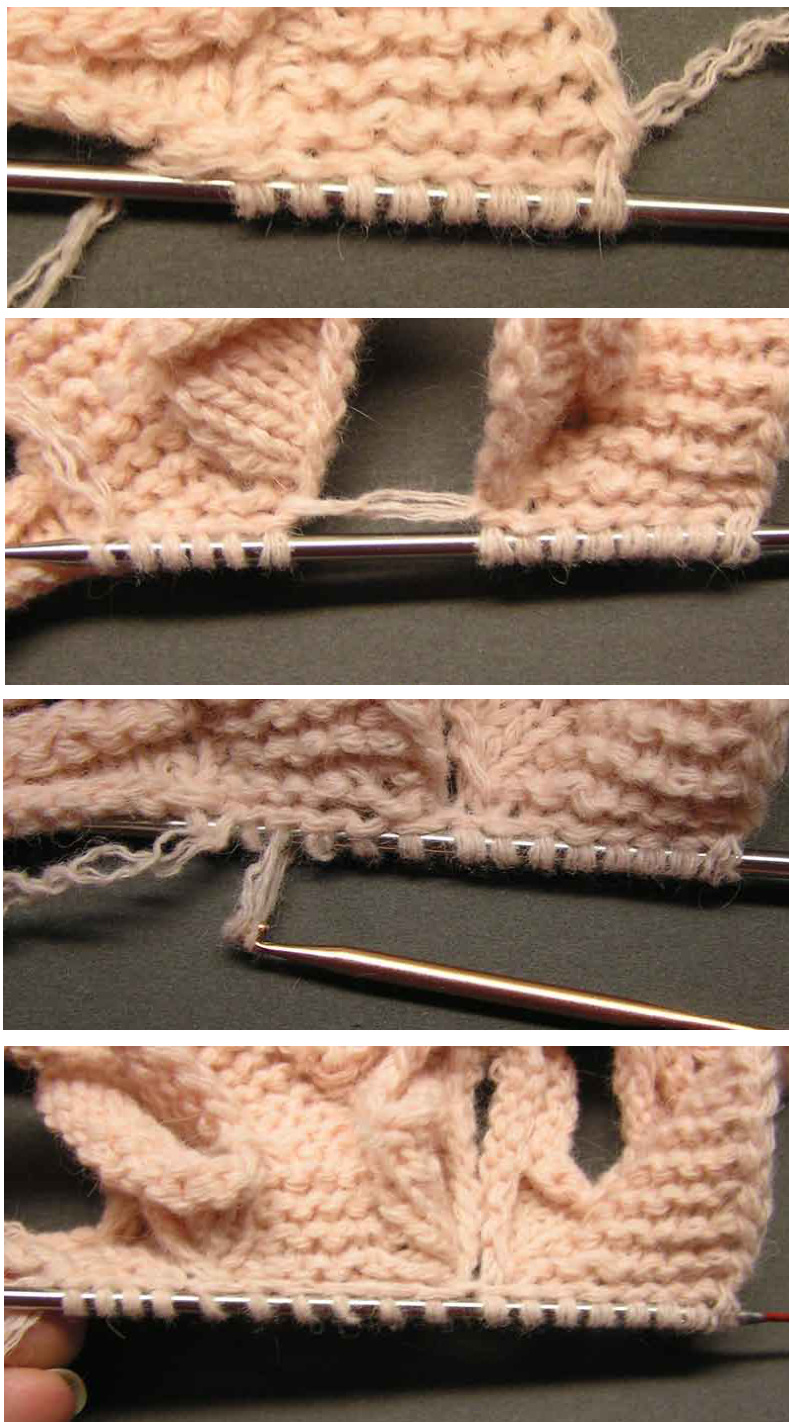
The Basic Split Row
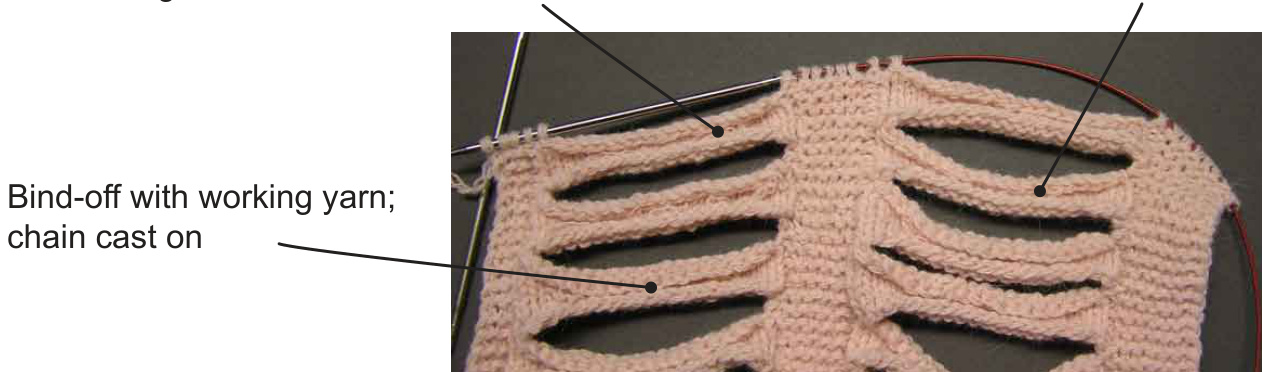
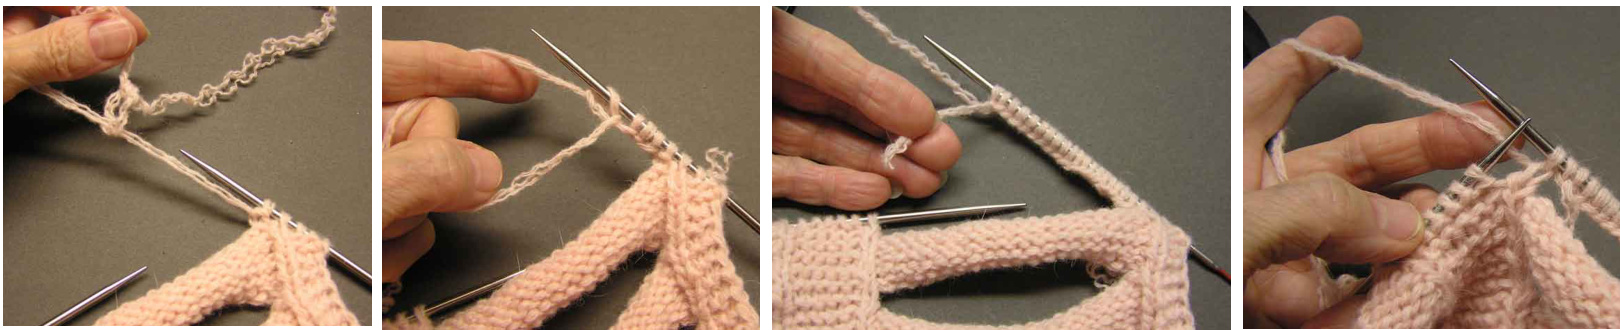
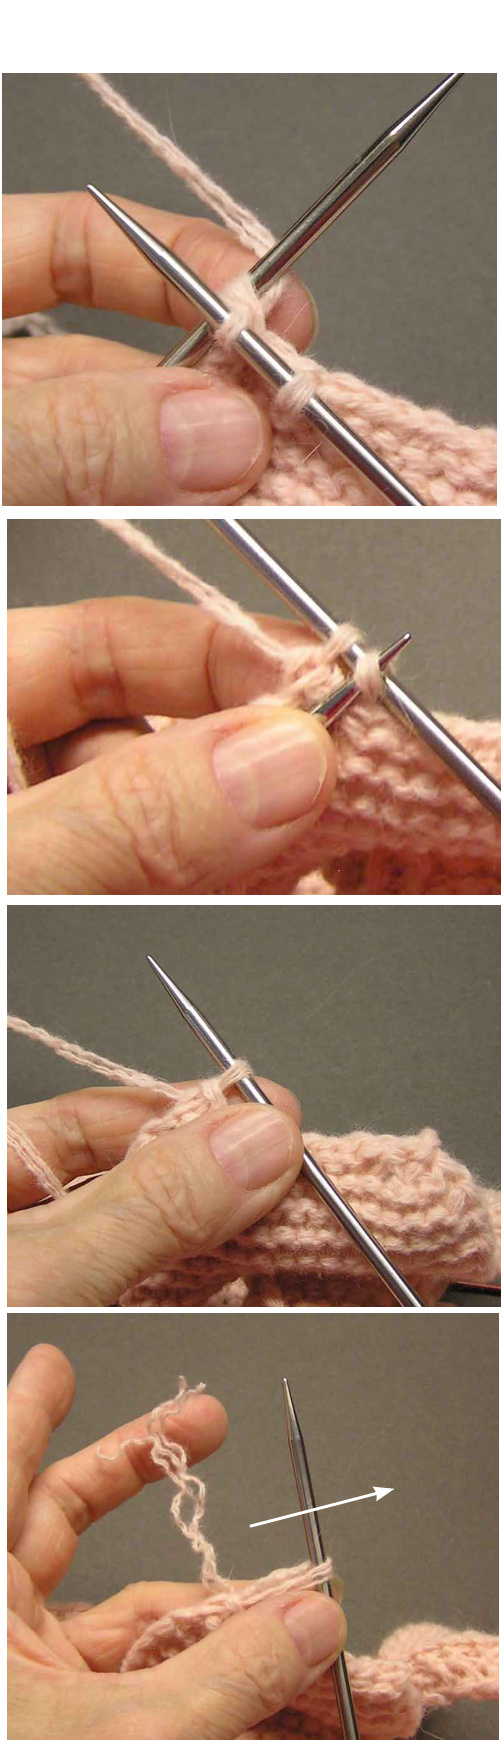
Weknitacrosswewillbebindinaoffthestitchesinthestockinettecoluumnsandimmediat stingbackon,creatihgasplltintheworkthat,whenrepeated,createshorizontalstripsin lumns2and4Thistechniauewillbeuse ecolumnatatrr Slip 1 pw wyif, knit 6, purl 1, drop working yarn in front
Slip first 2 sts of stockinette column onto right needle, pw. Pass the right stitch over the left and off the needle. Slip next st, pass over. Repeat till there is one stitch of the stockinette column left on the needle. Slip back to needle in left hand.

Turn work. Pick up working yarn and use knitted or cable cast on to cast on 20 sts. Turn work. Slip last stitch from the cast-on back on to right. Pass live stitch (the one on the right) over the left stitch and off. Tighten yarn. his attaches cast on stitches to the row. (This method of binding offis tighter than the cast on edge. This is fine and actually a design feature. It's okay!) knit 4, purl 1; bind off and cast on 20 for split as just described. Purl 1, knit
Split Rows: Two Variations
Bind-off with working yarn; Long-tail cast-on with free end of ball hepulointhepreeedin
During the test knits there were experiments with other styles of bind-offs/cast-ons. Above you can see all three variations, yet in the finished neckwarmer there is no apparent difference when manipulating the ribs. You can try one or both of the alternates without having to frog back and redo your work. Both of the alternates shown here bind off with the working yarn, which continues across the columns all the way to the end. The cast-ons happen in the purl row on the return trip. ' a crochet hook or the tips of your needles. Bind-offs are always on a knit ro
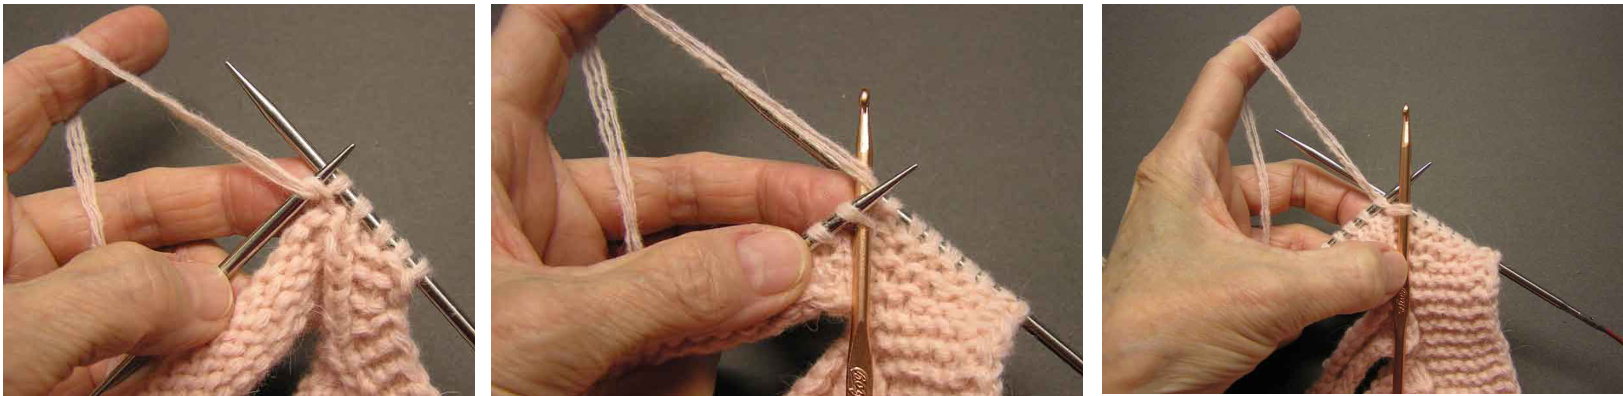
Bind-off with Working Yarn (Faster with a crochet hook)
Work stitches for Column 1 as usual. Put your hook through the first stockinete stitch of column 2 and draw through a loop of the working yarn. Drawup the loop.

Put your hook through the second stitch and draw the working yarn through both loops. Repeat. Leave the last stitch on your right needle (arrow) and continue with the next column as usual.
Cast-on with Working Yarn (no photos)
Bind off with working yarn as shown on previous page. Begin working Purl Row as instructed across column. Put the remaining stitch of bound-off stockinette on your crochet hook and cast on 19 stitches with a chain-edge cast-on. Transfer the last loop from your hook to the needle. This is the same as a provisional cast-on without the waste yarn. There are many instructions on line, both with graphics and videos.
Long-Tail Cast-on with Working Yarn
Bind off with working yarn as shown on previous page. Begin working Purl Row as instructed across column. Free up a foot or two of yarn from the other end of your working ball. Tie it to your working yarn with an overhand knot and snug it up to the last stitchesworked.

Begin a standard long-tail cast-on. When you have a total of 20 stitches, leave 2" and cut yarn. Continue your Purl Row, pulling the first stitch tightly so there's no slack between stitches. Later, snug up the tails and let them lie in the curl of the rib. They won't go anywhere.
Second Clue
We'll be repeating previous work, except adding (always on a knit row) short rows after the third knit stitch in Column 3, wrapping and turning the work (or doubling/twinning that stitch) and going back over Columns 3, 2 and 1 with a purl row. Now because of those short rows, Columns 1, 2, & 3 are going to get ahead of Columns 4 and 5, and continue getting further ahead every short row sequence, until they get back in synch at the end of the increase section. Rows 9-24 complete one increase repeat. ig on which split technique you use, you may not see bare cables at this stag
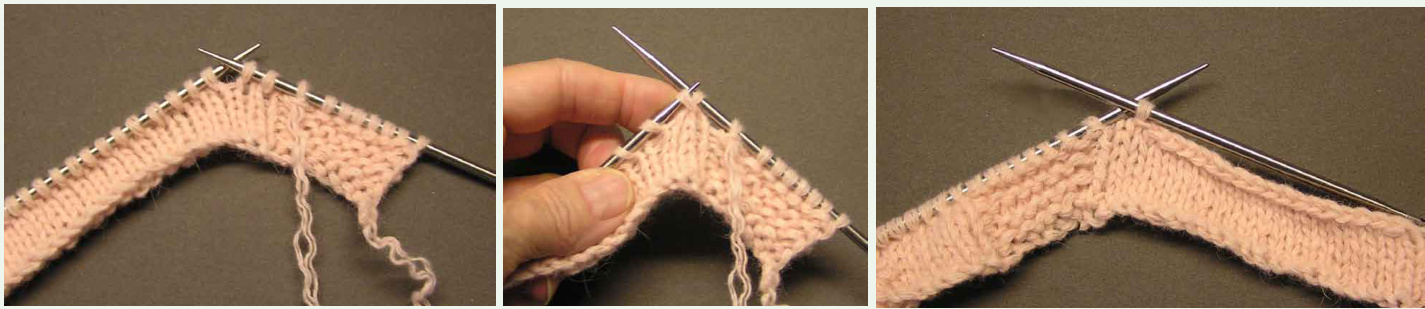
There are several methods for turning to work a short row. The basic method sometimes leaves a hole in the work and other methods can be easier and less visible. You can use whatever method you'd like in this project. I promised to tell you about the German short row method which I've learned recently. It is sometimes called the Doubled Stitch. Here's a link that explains it: https://www.youtube.com/watch?v=i_6Pj120zKA Knit to the point you are directed to turn. Turn your work (the yarn is now in front)) Slip the next stitch (the last one you knitted) as if to purl. Grab the working yarn and firmly pull it over the right needle (not between them) until it is in the back, then continue knitting. As you do this, it transforms that stitch into sort of an X-shaped “double stitch". (The yarn should be pulled straight up until that X is on the top of the stitch/needle.) When you come back and cross the turning point, you will knit the double stitch as if it was one. That's it!
| SI1K6P1 | 8 | SI1K6P1 | 8 | SI1K6P1 | SI1K6P1 8 | SI1K6P1 | 8 | SI1K6P1 | SI1K6P1 | 8 | SI1K6P1 | 8 | ||||
| Split | P20 | K20 | P20 | 20 | P20 | 20 P20 | Split | P20 | K20 | P20 | 0 | P20 | K20 | P20 | ||
| 3 | P1K3trn | 6 | P1K4P1 | 3 | P1K3trn | 6 | P1K4P1 | 3 | P1K3trn 6 | P1K4P1 | 3 | P1K3trn | 6 | |||
| ds! | P20 | K20 | P20 | P20 | K20 | P20 | ||||||||||
| SI1 K3 | P1 K3 | SI1 K3 | P1 K3 | Sl1 K3 | P1 K3 | SI1 K3 | ||||||||||
| 个 | 个 | 个 | ↑ | 个 | 个 | 个 | 个 | |||||||||
| 4 | 3 | 12 | 0 | 9 |
Please refer to instructions above for the full versions.
If you mark off rows as you go, you may need less or more of these guide bubbles. Row 9 Purl row Row 10 Short row (Knit): turn on third knit stitch of Column 3 Row 11 Purl row back to edge Row 12 Knit row Row 13 Purl row Row 14 Short row (Knit) Row 15 Purl row back to edge Row 16 Split row Column 2, Knit row Column 4 Row 17 Purl row Row 18 Short row (Knit) Row9 Pur! Row10 Sh Row 19 Purl row back to edge Row 11 Pu1 Row1 Kn Row 20 Knit row Row13 Pu Row14 Sh Row 21 Purl row Row15 Pu Row16 SF Row 22 Short row (Knit) Row 17 Pt Row18 Sh Row 23 Purl row Row19 P Row20 K Row 24 Split row, Columns 2 & 4 ROW22 Repeat until Column 4 = 11 ribs
Third Clue
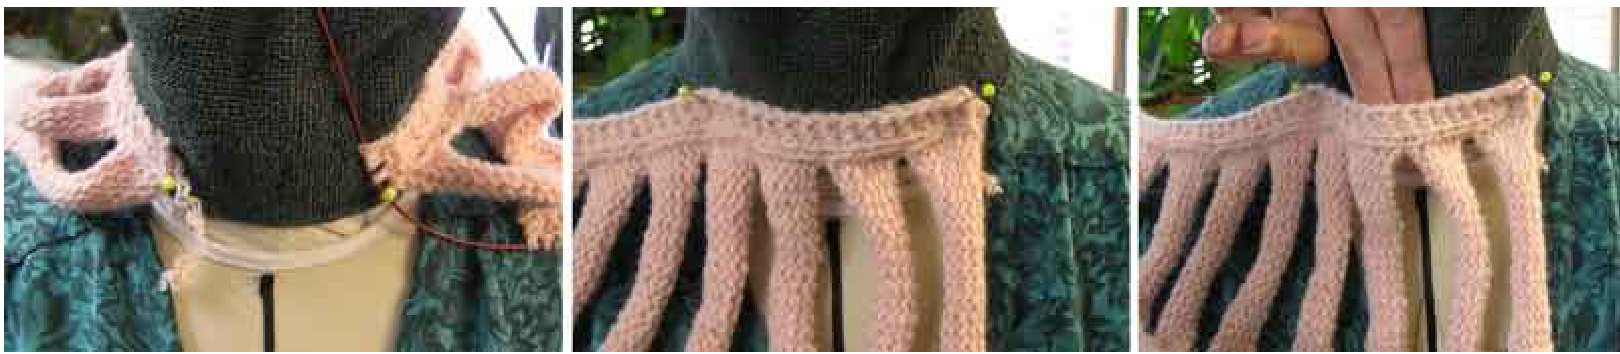
"How long do I keep making repeats?" Start checking after you've got 11 ribs on the shorter side, particularly if your gauge is loose and your neckwarmer ribs are drapey. Try the smallest column around your neck about halfway up. This sample is at the firm end of the scale. It will need at least four ribs added on top to have the ends touch. The wrap should be barely tight enough to stay in place: the manipulation will pull it in. When you think you're there, don't bind off yet. If you're using a cable that you can stand to have out of commission, leave the neckwarmer on the cable. If it's long enough you can use its needles for the tab without moving anything. If you're using straights or DPNs, it'll be easier to transfer the live stitches to a pieceof wasteyarn. At right: Work in progress. "When starting a short row, hooking a marker at the turning point will remind you to work it rather than chug on past it." - - Carol
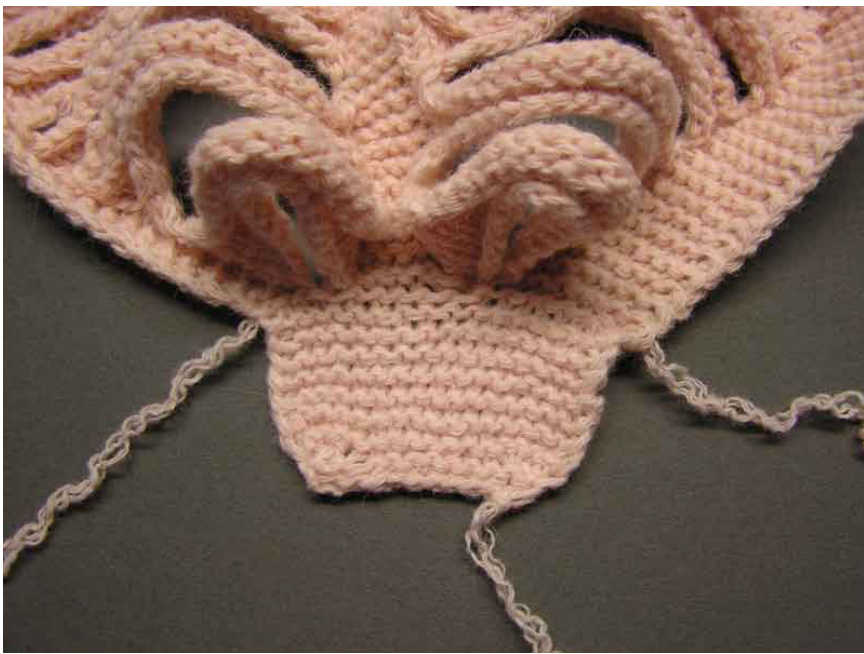
The Tab
This doesn't take much, so you can use the other end of your working yarn if you wish. Flip your neckwarmer to the other end and lay with the knitting side of the ribs up. You'll be working from the side opposite the tail of the original cast-on. Starting with your slipped stitch on the right side, pick up 1 stitch for each garter stitch in Column 1. Skip the stockinette column and pick up the stitches from Column 3. If there's a float of yarn between the sections, snug it up. Repeat with the final stitches from Column 5. Work back and forth in garter stitch for 14 rows (7 ridges), slipping the first stitch of each row as before.
Left Photos: ready for decreases Row 15 (middle photo): Slip 1 wyif, slip-slip-knit (ssk), ssk, knit until 5 stitches are left on the needle. Knit 2 together (k2tog), k2tog, knit last stitch. Row 16 (bottom photo): Slip 1 wyif, ssk, knit until 3 stitches are left, k2tog, knit. Right Photos:
The Finished Tab
Row 17 (top photos): Bind off until 2 stitches are left, k2tog, slip stitch on right over stitch on left. Last photos: Pull tail through to secure last stitch and work in ends.
If you think you've figured out the surprise ending, DO NOT talk about it or post photos of it on the MKAL thread! Send it toLita in a Private Message!


