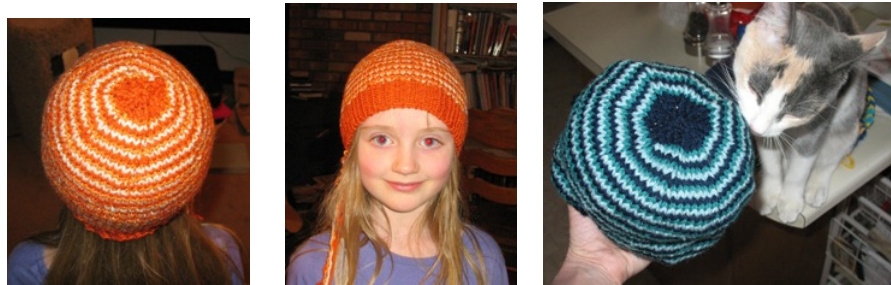
"Dreamsicle" colorway "Maritime" Copyright 2008 by Deborah Swift of MountainMom Designs
3-Color Spiral Cap
Skill Level: Intermediate/Advanced Beginner
Materials:
3 colors of worsted weight yarn: about 20-25 grams of Main Color (MC), and 15 grams each of 2 coordinating Contrast Colors (CC1 and CC2) [I have had good success with TLC Essentials Solid for MC, combined with other TLC yarns, Patons Décor yarn, Bernat CottonTots, and other mystery yarns. Only one CC should be of cotton or other inelastic fiber.] four $7"$ double-pointed knitting needles (dpns) in size US 7/ $4.5\;\mathrm{mm}$ two $16"$ circular needles: one each in sizes US 7/ 4.5 mm and US $6/\,4.0\;\mathrm{mm}$ yarn-needle for darning in ends. Gauge: 18 sts $\mathrm{~x~}28~\mathrm{rds}=4"$ , or 4.5 st/in Sizes: $13^{\circ}$ cap, to fit head $13+^{\circ}-15^{\circ}$ (small child) - 60 sts $15^{\circ}$ cap, to fit head $15+^{\circ}-17^{\circ}$ (small to sm-medium child) - 66 sts $16"$ cap, to fit head $18"-20"$ (medium child). - 72 sts $17+^{\circ}$ fits $19^{\circ}-21^{\circ}$ (medium to med-large child or youth) - 78 sts $19^{\circ}$ fits youth to small adult - 84 sts $20^{\circ}$ fits adult - 90 sts $21+^{\circ}$ fits large adult - 96 sts To achieve the desired texture and size, take the time to check your gauge.
Abbreviations:
Inc $=$ increase Dec $=$ decrease $\mathrm{St}(\mathrm{s})=$ stich(es) $\mathbf{Rd}=$ round $\mathbf{M}1=$ make 1, or inc of your choice ("pinhole' $\mathrm{\Delta\Psi}=\mathrm{YO}$ and work it tbl on next round.) ${\mathrm{Tbl}}={}$ through the back ioop, to twist the stitch and make it tighter ${\mathrm{YO}}=$ yarn over the needle, also called “yarn forward'
Special Techniques - Circular Cast-ons and Flexible Bind-offs:
Emily Ocker's Circular Beginning" Elizabeth Zimmermann describes this technique in her Knitter's Almanac, p. 141. Judy Gibson describes it here: http://jgibson.cts.com/knitting/ocker.htm Theresa of \*Spelling Tuesday" has how-to photos here: http://www.spellingtuesday.com/circular_co.html "Lighter Circular Beginning' Eunny Jang's instructions are at the bottom of this page: http://www.eunnyjang.com/knit/2006/03/23/ I demonstrate both of these cast-ons in a YouTube video: http://www.youtube.com/watch?v=0gK7yn-M7Yg “"Tubular Bind Off\* In print: Montse Stanley's Knitter's Handbook, p. 87-88, or Nancie M. Wiseman's The Knitter's Book of Finishing Techniques, pp. 54-55, Online: http://techknitting.blogspot.com/2008/01/tubular-cast-off-its-pretty.html (note: I work only 2 rounds of double-knitting for this, rather than 4 rds.) Elizabeth Zimmermann's “Sewn Bind Off" Knitting Without Tears, p. 23
Instructions:
Using the circular cast-on of your choice, cast 6 stitches of MC onto 3 dpns. If you use a non-circular cast-on, join your stitches into a circle to begin knitting in the round, being careful not to twist the stitches.
Crown:
Rd 1: Knit even, and tighten up the cast-on as needed. Rd 2-4: Increase 6 stitches, evenly spaced, in each round. In rd 2, this means (M1, k1) repeated around, until you have 12 sts. In rd 3, you will (M1, k2) around. -- 18 sts. In rd 4, (M1, k3) around. -- 24 sts. Here we begin the stripes. You will also be continuing to increase, alternating plain rounds and inc rds. You should increase 6 stitches, evenly spaced, every other round, until you have 60 (66, 72, 78, 84, 90, 96) sts total. Rd 5: Drop MC but don't cut it. Slip the first stitch on the first needle (if you're using the “pinhole” inc, this st is a YO). Join in CC1 and work the rest of rd 5 even.
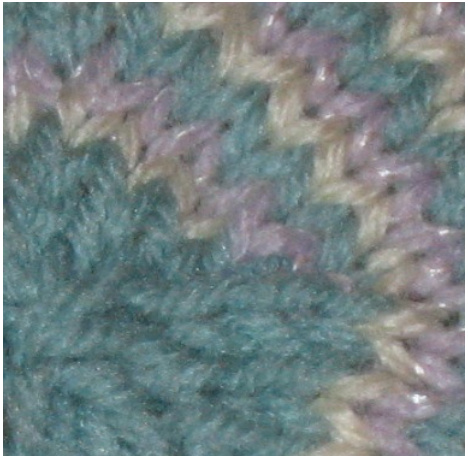
Rd 6: (an inc rd) Drop CC1 and begin CC2. M1, then knit the MC st you slipped on rd 5 (if it's a YO, then ktbl), k3 more CC1 sts. Continue to (M1, k4) around. Rd 7: Pick up the strand of MC that you left hanging at the end of rd 4, not twisting the strands in any way but just picking up the MC as if nothing had happened and going on with it. Knit rd 7 even. (beginning of spiral on “Easter Eg” cap)
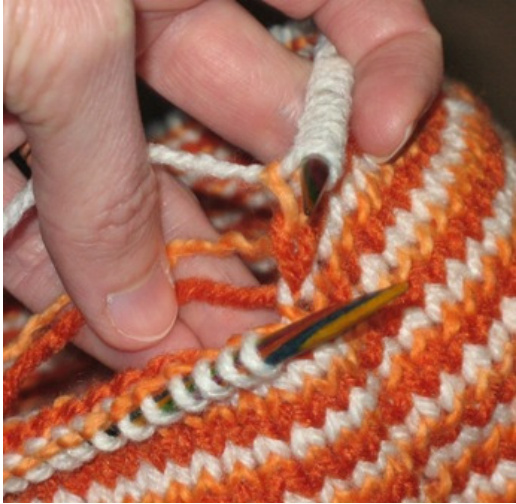
(In right photo, I'm at the end of a \*"Dreamsicle” CC2 round & about to begin a MC round.)
Continue on in this way, striping and increasing, until you have the desired number of sts.
Cap Sides:
Switchto the $16"$ circular needle, if desired. Knit even, continuing to change colors each round, until cap measures approximately $2\,3/4^{"}(3\,^{1}\!/4^{"},\,3\,^{3}\!/4^{"},\,4\,^{1}\!/2^{"},\,5\!-\!6^{"},\,6^{"},\,6+^{"})$ from your last increase round. If you want a turned-up brim, you may add another inch before ending the stripes. Have your last rd be a MC round. Ending the spiral: With CC1, knit 2 sts. Slip them back onto the left ndl, positioning yourself back at the beginning of the round. Cut both CC1 and CC2, leaving each about $6^{\circ}$ of tail to darn in later. You will be using only MC from here on. On this next rd, decrease about $10\%$ of your stitches, ending with an even number. 60 sts: (k8, k2tog) around - 54 sts 66 sts: (k9, k2tog) around - 60 sts 72 sts: (k7, k2tog) around - 64 sts 78 sts: (k8, k2tog) 7 times, k6, k2tog - 70 sts 84 sts: (k8, k2tog) 8 times, k4 - 80 sts 90 sts: (k7, k2tog) around - 80 sts 96 sts: [(k7, k2tog), (k8, k2tog)twicel] twice, [(k7,k2tog), (k8, k2tog)] twice -86 sts Work 1" to $1\;^{1}\!/\!\!_{2}\!\!\!>$ of kl-p1 ribbing in MC. Bind off with a flexible finish. I favor a tubular/grafing bind-off, but EZ's "sewn bindoff" is another neat and stretchy alternative. See “Special Techniques”’ section, above, for places to find instructions for these techniques. $\copyright$ 2008 by Deborah Swift and MountainMom Designs. For personal, noncommercial use only. If you want to sell a cap made from this pattern, please ask me first. Thank you!


