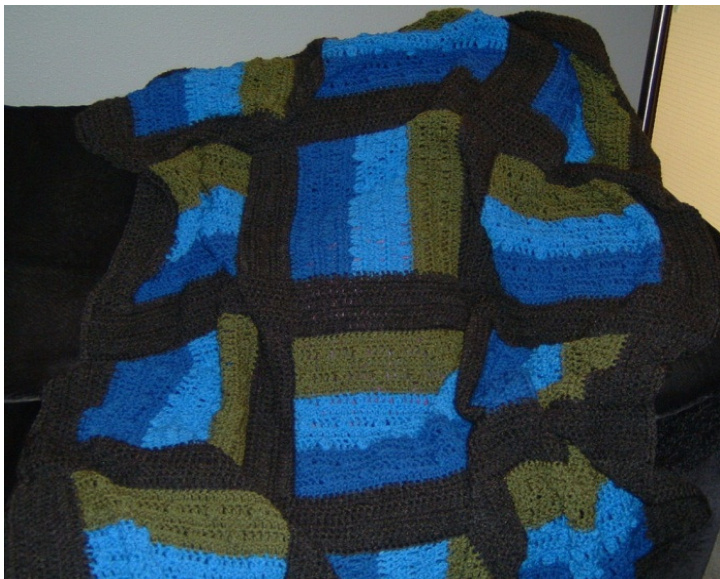
COZY AFGHAN, OREGON STYLE 55"W x 65"L
Materials needed:
· 2 skeins Red Heart Royal Blue, color A · 2 skeins Red Heart Blue, color B · 2 skeins Red Heart Medium Thyme, color C ·8 skeins Vanna's Choice Charcoal Grey Heather, color D · Size I crochet hook · tapestry needle
POPCORN SITCH(PC) = Work 4 DC in stitch indicated, remove hook from last DC worked, insert hook in 1 DC worked, (1st DC of the group of 4), insert hook back into the 4th DC worked and pull loop through 2nd loop on hook, (the loop from the 1st DC worked) SPECIAL INSTRUCTIONS: Ch3 counts as a DC in this pattern
INSTRUCTIONS FOR SQUARE, MAKE 2:
Row 1: With A ch 36, DC in 4th ch from hk and in ea ch across. Ch 3, turn. (This is the wrong side orWS). Row 2: DC in next 2 sts, ch1, skip next st, \*PC in next st, ch1, DC in next 3 sts, ch1\*. Rpt from \* to \* 3 times. PC in next st, ch1, skip next st, DC in last 4 sts. Ch3, turn. (This is the right side or RS). Row 3: DC in ea st & ch across. Ch3, turn. Row 4: DC in next 5 sts, ch1, skip next st, \*PC in next st, ch1, DC in next 3 sts, ch1\*. Rpt from \* to \* 3 times. PC in next st, ch1, skip next st, DC in last st. Ch3, turn. Row 5: DC in ea st across. Fasten off. Row 6: With RS facing, attach B with a ch3, DC in next 2 sts, ch1, skip next st, \*PC in next st, ch1, DC in next 3 sts, ch1\*. Rpt from \* to \* 3 times. PC in next st, ch1, skip next st, DC in last 4 sts. Ch3, turn. Row 7: Rpt Row 3. Row 8: Rpt Row 4. Row 9: Rpt Row 3. Row 10: Rpt Row 2. Fasten off. Row 11: With WS facing, attach C with a ch3, DC across. Ch3, turn. Row 14: Rpt Row 4. Row 15: DC in ea st across. Fasten off.
INSTRUCTIONS FOR RECTANGLE 1, MAKE 2:
Follow instructions for SQUARE for ROWS 1 - 15. Fasten off. Row 1:With RS facing turn work so that Color C is to your right and Color A is to your left, join D with a Ch3. Evenly DC across to end. Ch3, turn. Rows 2 - 5: DC in ea st across. Ch3, turn. At end of Row 5 fasten off.
INSTRUCTIONS FOR RECTANGLE 2, MAKE 2:
Follow instructions for SQUARE for ROWS 1 - 15. Fasten off. Row 1: With RS facing turn work so that Color A is to your right and Color C is to your left, join D with a Ch3. Evenly DC across to end. Ch3, turn. Rows 2 - 5: DC in ea st across. Ch3, turn. At end of Row 5 fasten off.
INSTRUCTIONS FOR RECTANGLE 3, MAKE 6:
Row 1: With D ch 36, DC in 4th ch from hk and in ea ch across. Ch 3, turn. Rows 2 - 5: DC in ea st across. Ch3, turn. At end of Row 5 fasten off. Row 6: Join A with a Ch3, DC in ea st across. Ch3, turn. Row 7: DC in next 2 sts, ch1, skip next st, \*PC in next st, ch1, DC in next 3 sts, ch1\*. Rpt from \* to \* 3 times. PC in next st, ch1, skip next st, DC in last 4 sts. Ch3, turn. (This is the right side or RS). Row 8: DC in ea st & ch across. Ch3, turn. Row 9: DC in next 5 sts, ch1, skip next st, \*PC in next st, ch1, DC in next 3 sts, ch1\*. Rpt from \* to \* 3 times. PC uin next st, ch1, skip next st, DC in last st. Ch3, turn. Row 10: DC in ea st across. Fasten off. Row 11: With RS facing, attach B with a ch3, DC in next 2 sts, ch1, skip next st, \*PC in next st, ch1, DC in next 3 sts, ch1\*. Rpt from \* to \* 3 times. PC in next st, ch1, skip next st, DC in last 4 sts. Ch3, turn. Row 12: Rpt Row 8. Row 13: Rpt Row 9. Row 14: Rpt Row 8. Row 15: Rpt Row 7. Fasten off. Row 16: With WS facing, attach C with a ch3, DC across. Ch3, turn. Row 17: Rpt Row 9. Row 18: Rpt Row 16. Row 19: Rpt Row 7. Row 20: DC in ea st across. Fasten off. Row 21: With RS facing, attach D with a ch3, DC across. Ch3, turn. Rows 22- 25: DC across. Ch3, turn. At end of Row 25 fasten off.
ASSEMBLY
Panel #1
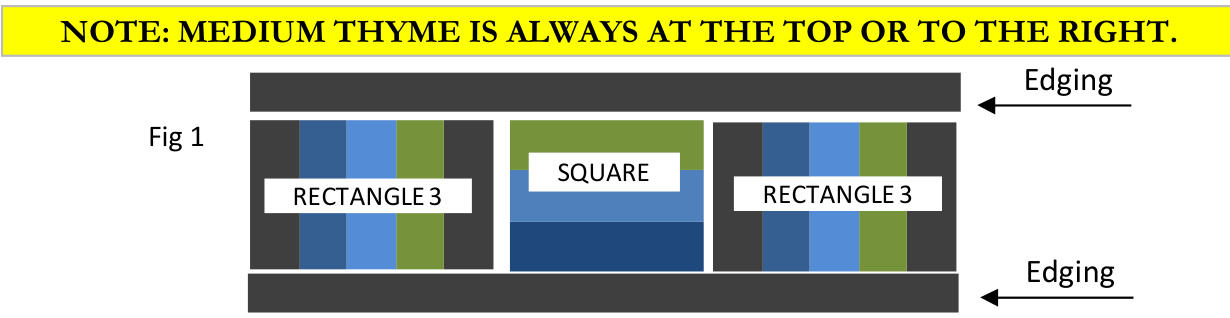
Edging for Panel #1:
Row 1: With side facing attach D with a ch 3. DC evenly to end. Ch 3, turn Rows 2 - 5: DC in ea st across. At end of Row 5, fasten off. Turn piece upside down. Row 1: With right side facing attach D with a ch 3. DC evenly to end. Ch 3, turn. Rows 2 - 5: DC in ea st across. At end of Row 5, fasten off. (See figure 1)
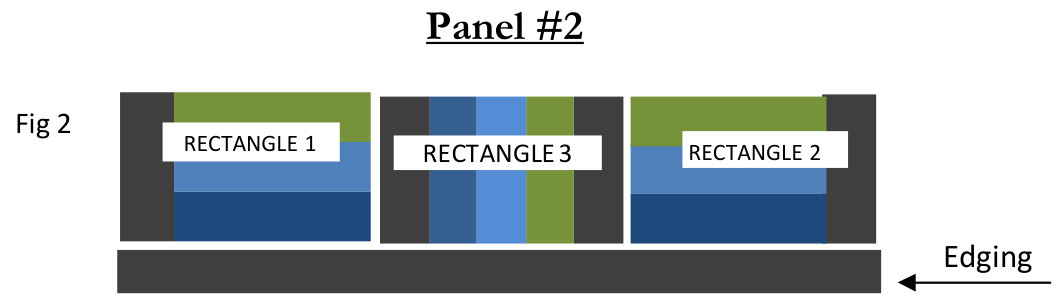
Edging for Panel #2:
at Edging instructions for Panel #1, along bottom edge only of Panel #2. (See figure 2)
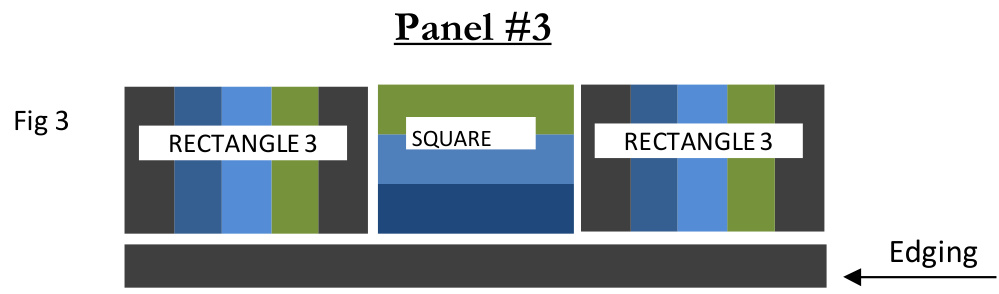
Edging for Panel #3:
Repeat Edging instructions for Panel #1, along bottom edge of Panel #3. (See figure 3)
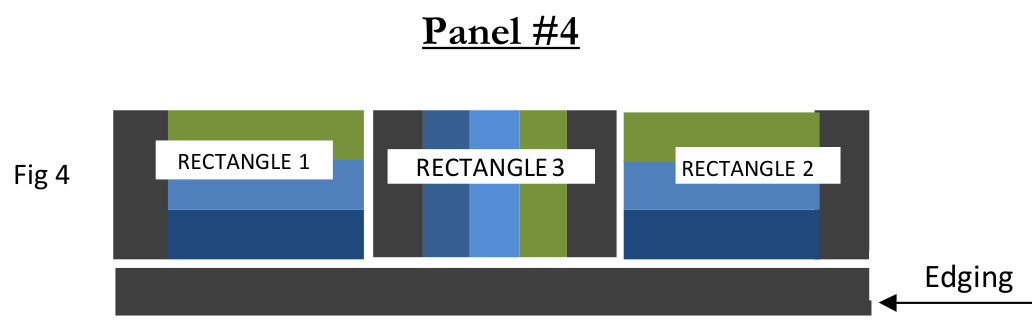
Edging for Panel #4:
Repeat Edging instructions for Panel #1, along bottom edge of Panel #4. (See figure 4)
WHEN Afghan ASSEMBLY IS COMPLETE AFGHAN SHOULDLOOKLIKETHE PICTURE BELOW
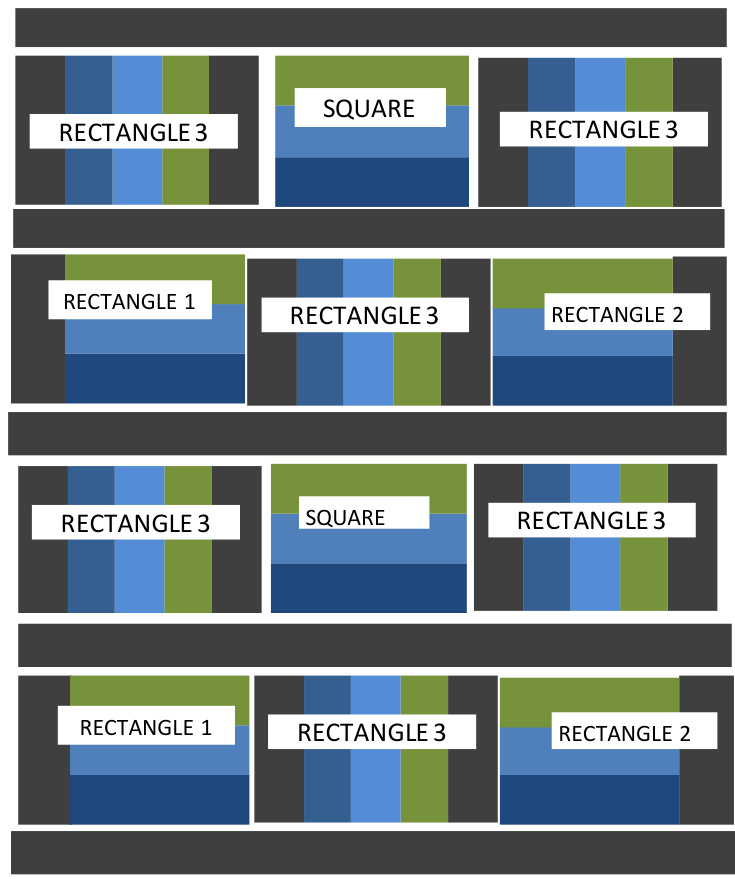
Attach Color D with a SC in any space on outer edge, evenly SC around entire afghan, placing 3 SC in ea corner. Repeat for another row if desired.


