By Stacy Santiago
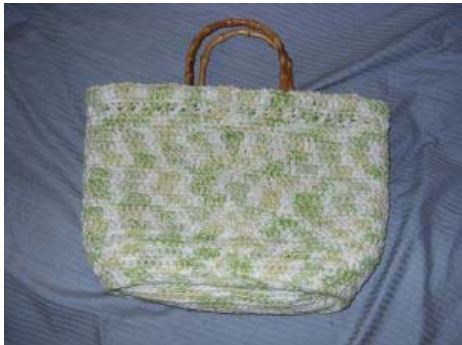
Pattern: Size F hook or size needed to get gauge. Gauge: 13 SC to 4" Bag without handles: 14" wide by 9 3/4" deep Materials Needed: 600 yards of Sugar N Cream Bag is worked double stranded for strength.In bag pictured one yarn was a variegated green (key lime pie) and the second as just beige. Chain 31 Round 1: Skipping 1st chain scin the next 29 chains. sc 3x in the next chain. (Do not turn work into the other side of the chain to form an oval.) Sc into the next 29 chains. Sc 3x in the next chain. Do not join the round. Cont to work without turning. Round 2: [Sc in the next 29 sc. (Sc 2x in the next sc) 3 times.] Repeat once more for other side. Do not join. Do not turn. Round 3: (Sc in the next 29 sc. Sc 2x in the next sc. Sc in the next 4 sc. Sc 2x in the next sc.) Repeat once more for other side. Sc in the next 2 sc. Slip to join. Do not turn Round 4: Chain 2. Dc in 33 sc. Dc 3x in the next sc. Dc in next 36 sc. Dc 3x in the next sc. Dc into the next 5 sc. Slip to join. Cut yarn and tie off. Fold Bottom of purse in half and mark so that you will have a sense of center. Round 5: Do not work into the tops of the stitches from previous. Work around the post of the Dc. Starting at the marked stitch Dc into each post around. Slip to join. Do not turn. (80 double crochets) Round 6: Chain 2 and Dc into next 18 posts. (counting chain there should at 19 Dc) (Dc 2x into next post)2x. Dc into next 38 posts. (Dc 2x into next post)2x. Dc into the next 19 posts. Slip to join. Do not turn. Round 7: Chain 2 and Dc into next 19 dc. (counting chain there should at 20 Dc) (Dc 2x into next dc)2x. Dc into next 40 dc. (Dc 2x into next dc)2x. Dc into the next 19 dc. Slip to join. Do not turn. Round 8: Chain 1 Sc even. Slip to join. Do not turn Round 9: Chain 2 and Dc into next 20 sc. (counting chain there should at 21 Dc) (Dc 2x into next sc)2x. Dc into next 42 sc. (Dc 2x into next sc)2x. Dc into the next 21 sc. Slip to join. Do not turn. Round 10: Chain 2 and Dc into next 21 dc. (counting chain there should at 22 Dc) (Dc 2x into next dc)2x. Dc into next 44 dc. (Dc 2x into next dc)2x. Dc into the next 22 dc. Slip to join. Do not turn. Round 11: Chain 2 and Dc into next 22 dc.(counting chain there should at 23 Dc) (Dc 2x into next dc)2x. Dc into next 46 dc. (Dc 2x into next dc)2x. Dc into the next 23 dc. Slip to join. Do not turn. Cut yarn and tie off Decide if you want crocheted pockets or knitted ones. Pick up stitches for either from the back of row 10. Make sure not to go all the way through the stitches so the pockets are invisible form the outside. Use only 1 stand of yarn for this part. Pockets will look like long flaps at this stage. Using the sitch marker to center pick up 12 stitches for one pocket and either knit, sc or dc until you feelit is big enough. Do the same on the other side with 20 stitches.(1 knit my pockets for 25 rows in stocking stitch) Feel free to add more stitches if you would like bigger pockets. Bind off and cut yarn.
The rest of the bag is crochet each round even at this point. As you go around the bag each time to come to the first or last stitch that a pocket was picked up from you willattach part of the pocket as follows. On Sc rounds. Pull loop up in next space. Stick hook through side stitch of pocket yo and pullthough all 3 loops. On Dc round. Yo and pull up a loop in next stitch. Making sure that you put the hook through the pocket at the height the row is yo and pull through 3 loops. Yo and pull though remaining 2 loops.\ Follow pattern bellow attaching pockets when necessary. When pockets are fully attached continue in pattern as normal. Round 12: Chain 1. Sc even. Slip to join. Do not turn. Round 13: Chain 2. Dc even. Slip to join. Do not turn. Round 14: Chain 2. Dc even. Slip to join. Do not turn. Round 15: Chain 2. Dc even. Slip to join. Do not turn. Round 16: Chain 1. Sc even. Slip to join. Do not turn. Round 17: Chain 2. Dc even. Slip to join. Do not turn. Round 18: Chain 2. Dc even. Slip to join. Do not turn. Round 19: Chain 2. Dc even. Slip to join. Do not turn. Round 20,21,22 Chain 1 Sc even. Slip to join. Do not turn. Round 23: (X stitch) Chain 2. Not counting chain as spaces Dc into 2nd space. Dc into skipped space. Con't all the way around the row. Slip to join. Round 24: Chain 2. DC even. Slip to join. Do not turn. Round 25: At this point you have to decide where you want your handles to sit. Mark stitches where the handle will come up from the bag. Chain 3 and TR even till you come to a marker. Pull entire skein of yarn through handle. Chain 2 and TR skipping space with marker. Con't in same pattern all the way around until you have completed the round pulling the skein through the handle to attach. Slip to join. Cut yarn leaving enough length to sew TR row over handle and down to the DC row below. Whip stitching the row down. Weave in all ends and enjoy your new purse. The Earth Day purse is double stranded for strength and should be quite sturdy on it's own. If you would like a bit more shape to your bag coat well with spray starch, stuff and let dry.


