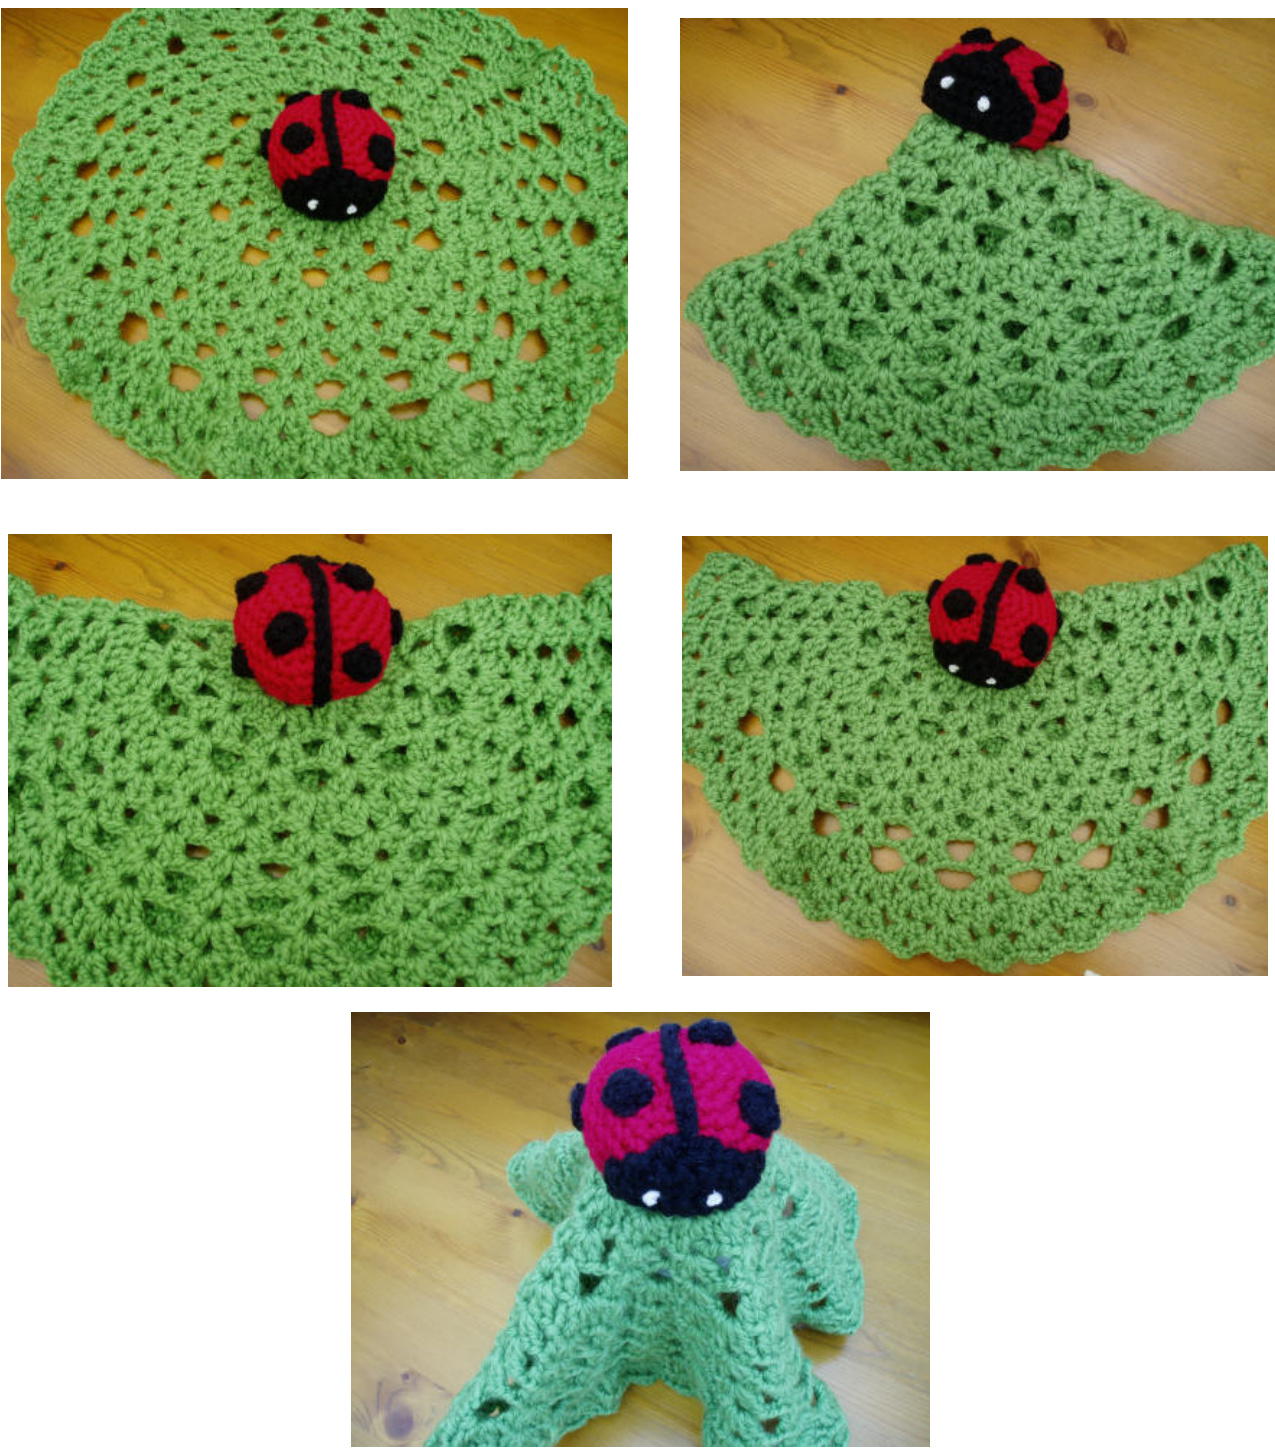
Lily theLladybird Blankie Crochet Pattern
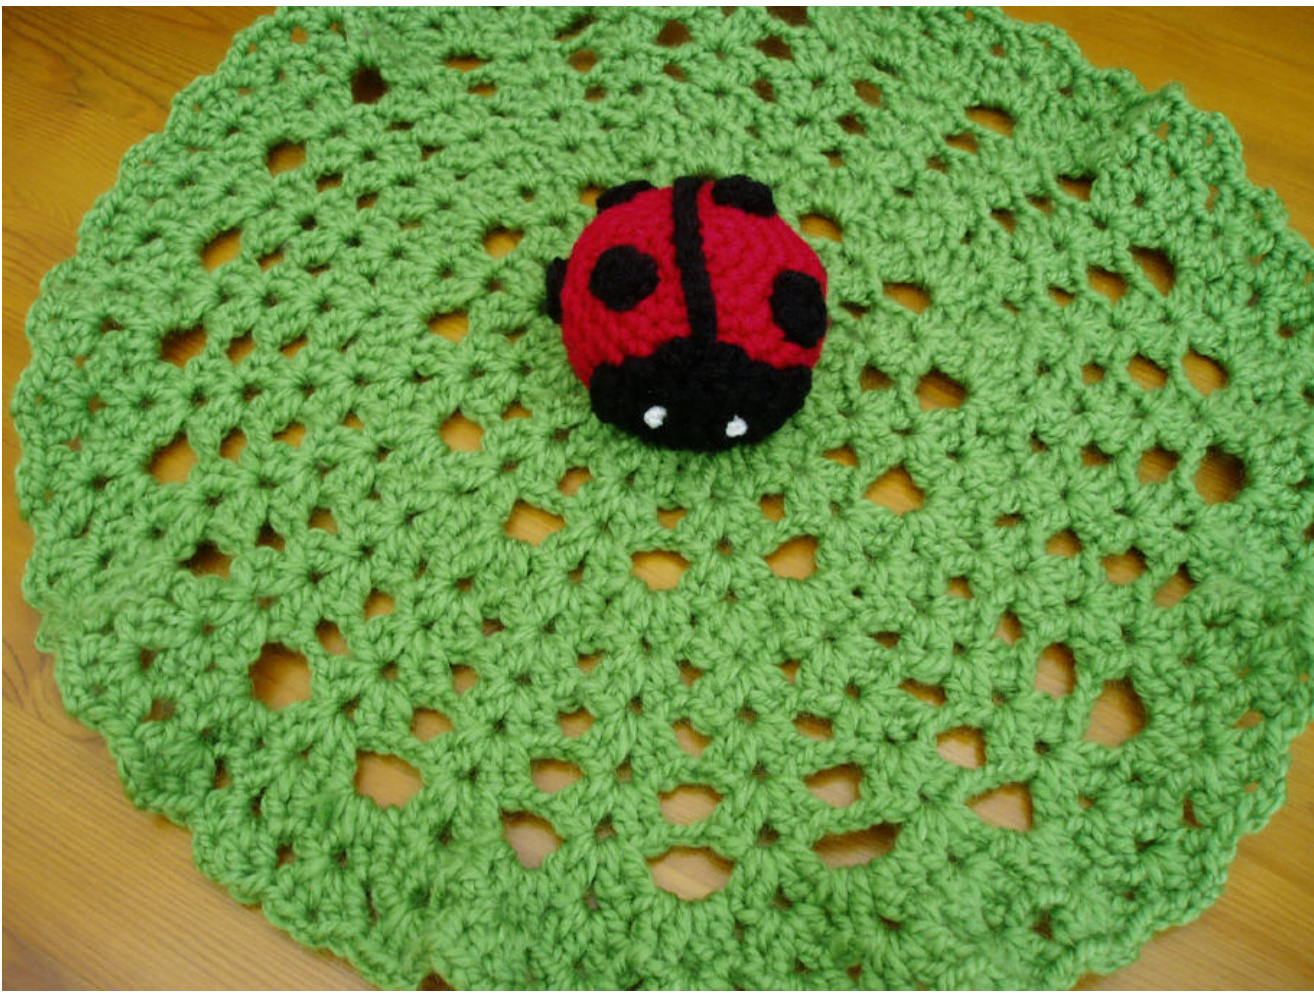
Lilly the Ladybird Blankie
Stitch Directory
Ch(s) Chain(s) Sc Single Crochet Dc Double Crochet St(s) Stitch(es) Inc Increase Dec2tog Decrease next 2 stitches together Nxt Next S1 St Slip Stitch BPO Back Post Only FLO Dec2tog - In Front Loops only, Decrease next 2 stitches together Ch2-sp Space created by previous row's Ch2
Materials
4.50mm Crochet Hook 100g - Green Chunky Baby Wool 25g - Red Chunky Baby Wool 25g - Black Chunky Baby Wool Tiny amount of White wool for eyes Tapestry / Yarn Needle Stitch Marker Toy Stuffing
Pattern Notes
· Lilly the Ladybird Blankie pattern is made using continuous rounds, unless otherwise stated. Ensure that you insert a stitch marker into the 1st stitch of each round, to keep an accurate note of your place in the pattern · Blankie is stitched in individual rounds, join at each row end. · No tension gauge required · Finished Blankie - 16" square · Pattern is suitable for a beginner or advanced beginner \*Warning\* Young Children, toddlers should always be supervised when playing with this toy. There may be small pieces that the child can dislodge and the potential for ingestion or respiration injuries. Please ensure that the wool used is safe for young children and that all pieces are securely attached to the toy firmly. (c) Peach.Unicorn Designs 2014 - All Rights Reserved . Page 2
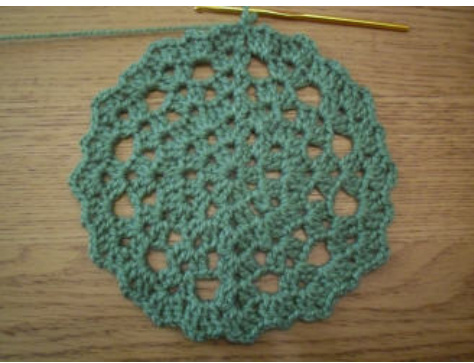
BLANKET Using Green
Ch4, Join with a sl st in 1st ch to make a ring Rnd 1 - Ch3, DC, Ch2, (2Dc, Ch2) 5 times, Sl st into 3rd ch of Ch3 - (Do all Dc through the ring)
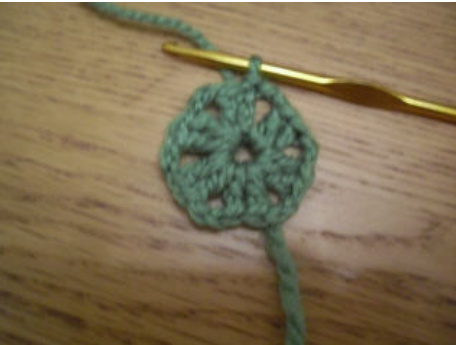
Rnd 2 - Sl st into next 2 sts, Ch3, Dc in ch2-sp, Ch2, 2Dc in same ch2-sp, Ch1, (2Dc, Ch2, 2Dc in nxt Ch2-sp, Ch1) 5 times Sl st into 3rd ch of Ch3
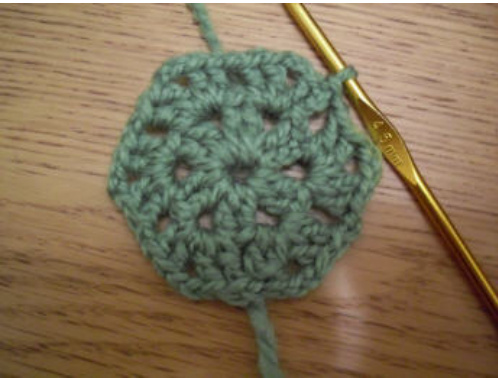
Rnd 3 - Sl st next 2 sts, Ch3, Dc in ch2-sp, Ch2, 2Dc in same ch2-sp, (2Dc, ch2, 2Dc) in nxt ch1-sp, [(2Dc, Ch2, 2Dc) in nxt ch2-sp, (2Dc, ch2, 2Dc) in nxt ch1-sp)]5 times Sl st into 3rd ch of Ch3
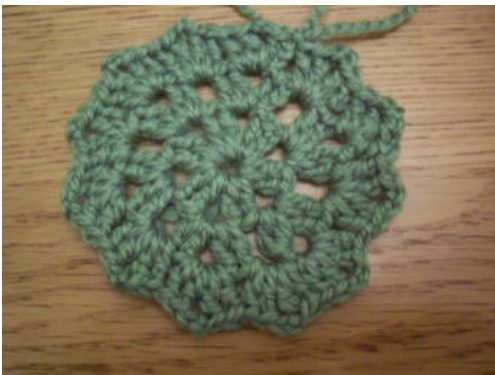
Rnd 4 - Sl st next 2 sts, Ch3, Dc, Ch2, 2Dc in same ch2-sp, Ch1, (2Dc, Ch2, 2Dc in nxt Ch2-sp, Ch1,) 11 times Sl st into 3rd ch of Ch3 Rnd 5 - Sl st next 2 sts, Ch3, Dc, Ch2, 2Dc in same ch2-sp, Ch2, (2Dc, Ch2, 2Dc in nxt Ch2-sp, Ch2,) 11 times Sl st into 3rd ch of Ch3 Rnd 6 - Sl st next 2 sts, Ch3, Dc, Ch2, 2Dc in same ch2-sp, (2Dc, Ch2, 2Dc in nxt Ch2-sp,) 23 times Sl st into 3rd ch of Ch3
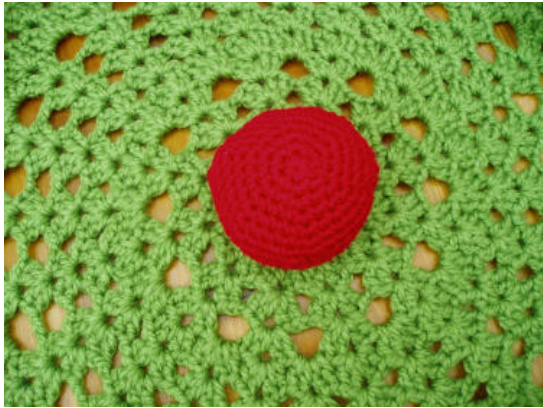
Rnd 7 - Sl st next 2 sts, Ch3, Dc, Ch2, 2Dc in same ch2-sp, (2Dc, Ch2, 2Dc in nxt Ch2-sp,) 23 times Sl st into 3rd ch of Ch3 Rnd 8 - Sl st next 2 sts, Ch3, Dc, Ch2, 2Dc in same ch2-sp, Ch1, (2Dc, Ch2, 2Dc in nxt Ch2-sp, Ch1) 23 times Sl st into 3rd ch of Ch3 Rnd 9 - Sl st next 2 sts, Ch3, Dc, Ch2, 2Dc in same ch2-sp, Ch2 (2Dc, Ch2, 2Dc in nxt Ch2-sp, Ch2) 23 times Sl st into 3rd ch of Ch3 Rnd 10 - Sl st next 2 sts, Ch3, Dc, Ch2, 2Dc in same ch2-sp, Ch3 (2Dc, Ch2, 2Dc in nxt Ch2-sp, Ch3) 23 times Sl st into 3rd ch of Ch3 Rnd 11 - Sl st next 2 sts, Ch3, Dc, Ch2, 2Dc in same ch2-sp, (2Dc, Ch2, 2Dc in nxt ch3-sp), [(2Dc, Ch2, 2Dc in nxt Ch2-sp), (2Dc, Ch2, 2Dc in nxt ch3-sp) 23 times Sl st into 3rd ch of Ch3 Rnd 12 - Sl st next 2 sts, Ch3, Dc, Ch2, 2Dc in same ch2-sp, (2Dc, Ch2, 2Dc in nxt Ch2-sp,) 47 times Sl st into 3rd ch of Ch3 Fasten off, secure all ends firmly. BODY - Make 1 With Red Rnd 1 - Using the Magic Circle method, Sc 6 (6) Pull to close Rnd 2 - (Inc in nxt st) 6 times (12) Rnd 3 - (Sc in nxt st, Inc in nxt st) 6 times (18) Rnd 4 - (Sc in nxt 2 sts, Inc in nxt st) 6 times (24) Rnd 5 - (Sc in nxt 3 sts, Inc in nxt st) 6 times (30) Rnd 6 - (Sc in nxt 4 sts, Inc in nxt st) 6 times (36) Rnd 7 - (Sc in nxt 5 sts, Inc in nxt st) 6 times (42) Rnd 8 - (Sc in nxt 5 sts, FLO Dec2tog) 2 times, Sc in nxt 12 sts, (FLO Dec2tog, Sc in nxt 5 sts) 2 times, Sc in nxt 2 sts (38) Rnd 9 - FLO Dec2tog, Sc in nxt 14 sts, (FLO Dec2tog) 2 times, Sc in nxt 16 sts, FLO Dec2tog (34) Rnd 10 - BPO Sc in all sts - See below (34) Rnd 11 - (Sc in nxt st, FLO Dec2tog) 11 times, Sc in nxt st (23) Rnd 12 - (Dec2tog) 11 times, Sc in nxt st (12) Rnd 13 - (Dec2tog) 6 times (6) Fasten off, Stuff and weave the wool tail through the front loops of the last round, pull to close and leave enough wool tail to firmly attach to the blanket
BPO = Back Post Only
Instead of inserting your hook under the 2 loops of the nxt st, go to the wrong side of the work and Insert your hook into the post of that stitch, then continue to do a single crochet stitch. Do this for the wholerow
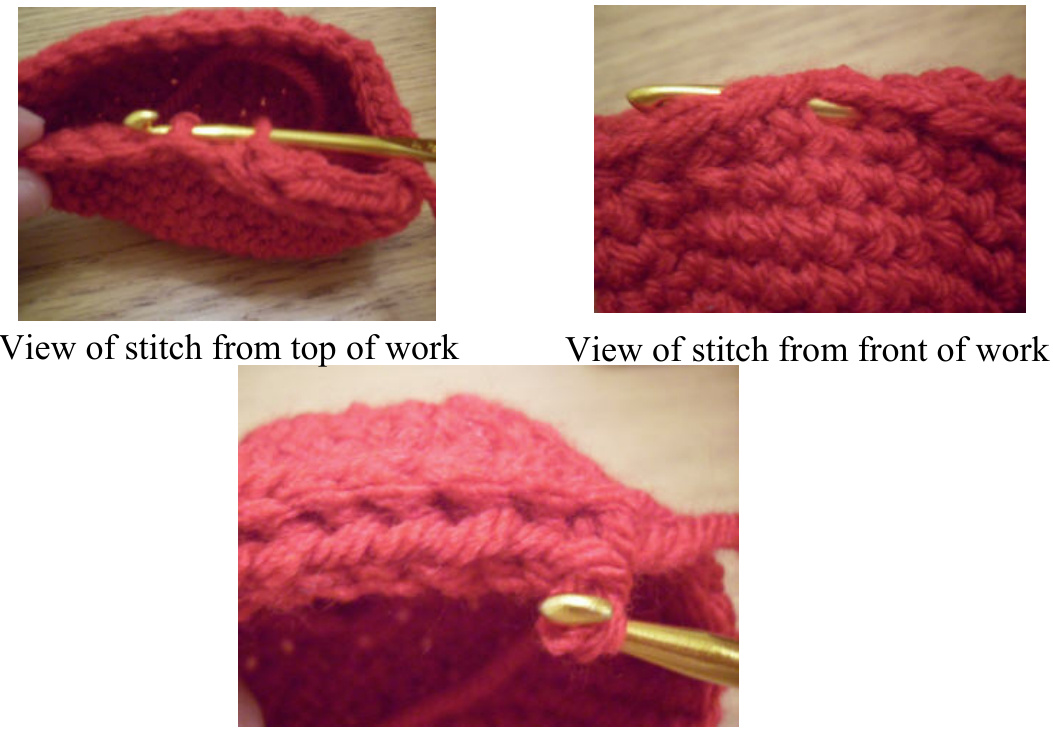
The BPO's will produce a row of right angle stitches to the previous row This will allow the ladybird to sit flat on the blanket SPOTS - Make 6 Using Black Wool Rnd 1 - Using Magic Circle method, Sc 4, join to 1st Sc, Pull to close. Fasten off, leaving enough wool tail to secure to the body BODY LINE - Make 1 (Not in the round) Using Black Wool Ch15, Fasten off and leave enough wool tail to secure to the body (c) Peach.Unicorn Designs 2014 - All Rights Reserved . Page 5
FACE PATCH - Make 1 Using Black Wool
Row 1 - Ch11, turn Row 2 - Starting in 2nd ch from hook, Sc in nxt 10 chs, Ch1, turn (10) Row 3 - Dec2tog, Sc in nxt 6 sts, Dec2tog, Ch1, turn (8) Row 4 - Dec2tog, Sc in nxt 4 sts, Dec2tog, Ch1, turn (6) Row 5 - Dec2tog, Sc in nxt 2 sts, Dec2tog, Ch1, turn (4) Row 6 - (Dec2tog) 2 times (2) Fasten off, leaving enough wool tail to attach to the Body. MAKING UP SECTION All Pieces
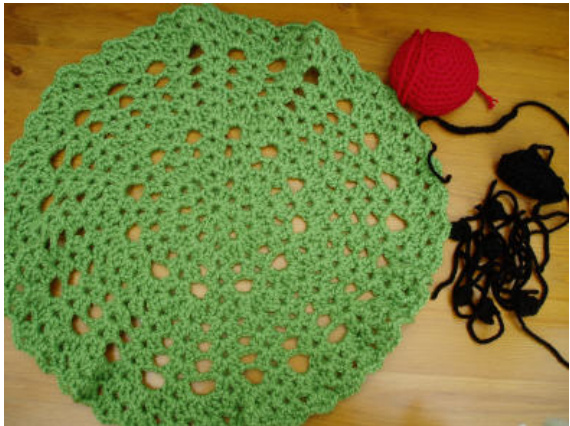
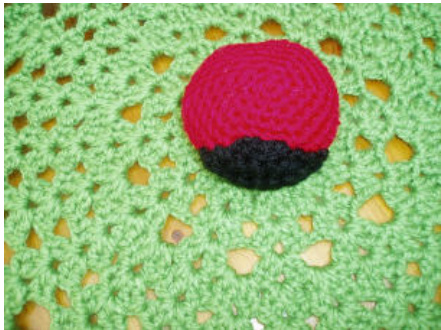
Attach Body to Blanket
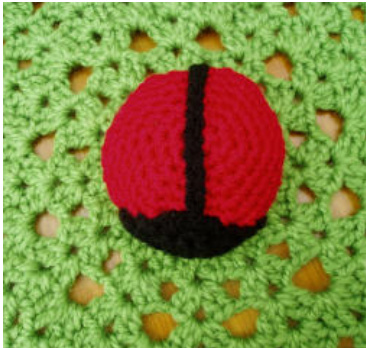
Attach Face Patch to Body Attach Black Line to Body
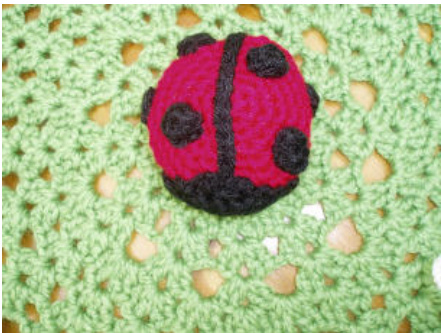
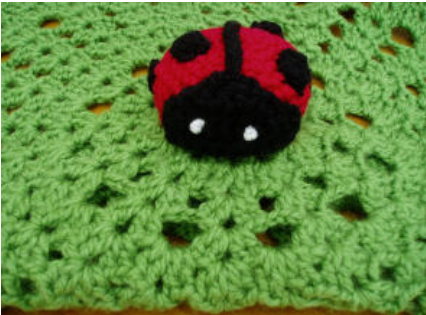
Attach Back Spots to body Give your Lilly some Eyes with White wool (c) Peach.Unicorn Designs 2014 - All Rights Reserved . Page 6
Well Done, you have completed your Lilly the Ladybird Blankie Hope you enjoyed making her.
Copyright
Thank you for your purchase. Please note that all crochet patterns purchased with Peach.unicorn are Protected by UK copyright law. Reproduction or distribution of this pattern is strictly prohibited unless specially Authorised. This includes any form of reproduction on the Internet, posting. scanning, photocopying or emailing. Derivative works created using this pattern are also strictly prohibited by copyright law Purchasers may not resell, redistribute or translate the pattern into another language for reselling. Permission is granted to print patterns for personal use only. Permission is also granted for finished goods to be sold, but with the condition that the pattern is credited back to Peach.Unicorn Designs. All patterns are sold in good faith. Every effort has been made to ensure that all instructions are accurate and complete. Peach.unicorn cannot, however, be responsible for human error, typing mistakes or variations in individual work. (c) Peach.Unicorn Designs 2014 - All Rights Reserved . Page 7


