MACHINE KNIT TUCK AND LACE BLANKET and Bag By Lisa Daniels (Idaniels8080)
Notes
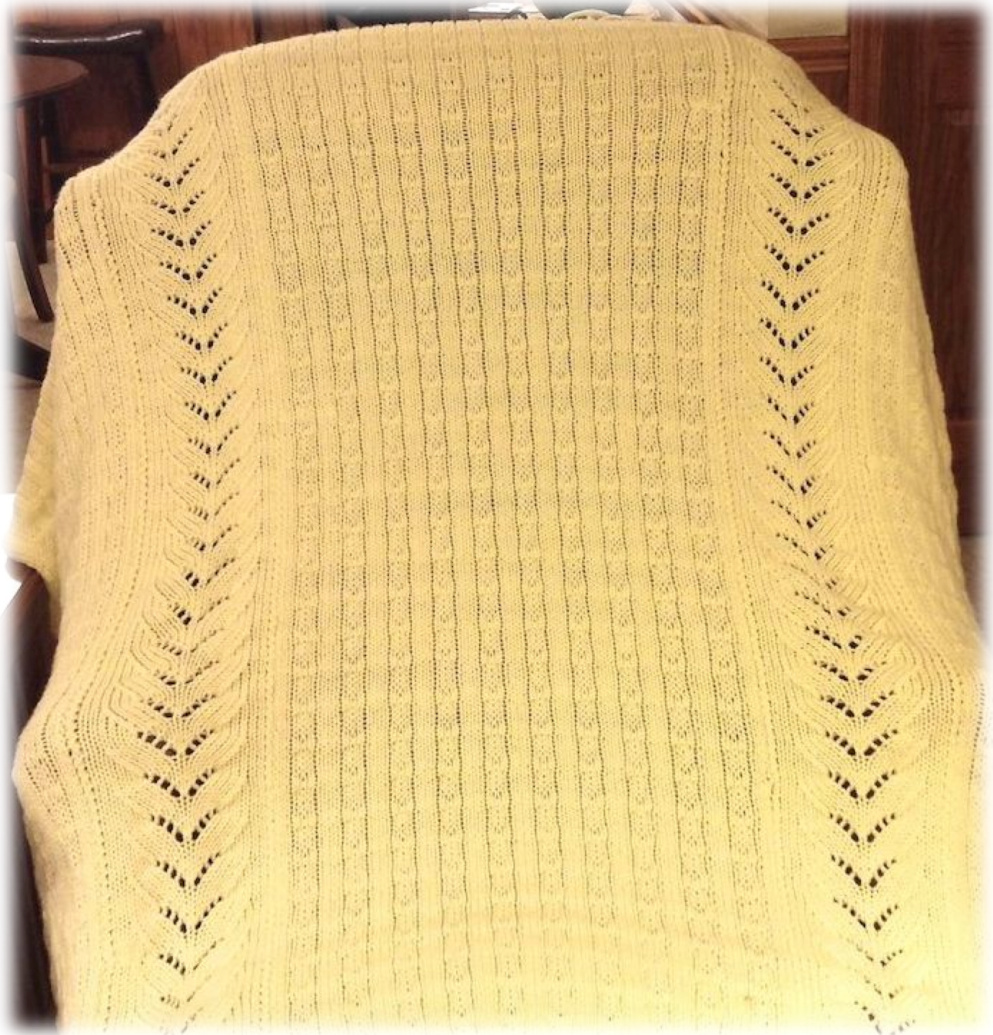
This is a simple Tuck stitch throw. It uses the LK-150 mid-gauge knitting machine, worsted weight yarn, the manual tuck stitch and handmanipulated lace techniques. (you could use a standard gauge machine with sport weight yarn, but will need to increase the number of stitches / rows to adjust to the right size blanket).
I used Hobby Lobby, I Love This Yarn Solids - Buttercup color. About 10 skeins. The whole process takes about a good solid 13-14 hours of knitting to complete. (about 2 hrs per panel. about 3 hours per join. About 1 to make the bag)
\*Pattern:\*
Panels: (make 3 panels) · For each panel, cast on 40L to about 43 R leaving every 4th needle We will start out doing one color just so you get the hang of the stitch itself, then move on to two color, then switch will look much more complicated than it is. back to one color so we don't fry our poor brains. This will make a cool 2-color transitional stripe across our work that
Tuck Pattern:
Cast on and knit 10 rows in stockinette (this will be a faux rib since you have some needles out of work) Begin tuck pattern: Pull out one needle in the middle of every other bank of 3 needles. (not every bank, but every other bank of 3 needles 0 (like this: xxx|xox|xxx|xox|xxx) Set carriage to tuck. Knit 3 rows (end with COL). Set carriage back to stockinette and knit 1 row (end with COR). Now knit 4 rows in stockinette. Then repeat this sequence until about 390 rows. Knit 10 rows stockinette (this will be in faux rib pattern since some needles are out of work). Cast off with whatever method you like. I like to end with COL and use the latch tool castoff.
Joining:
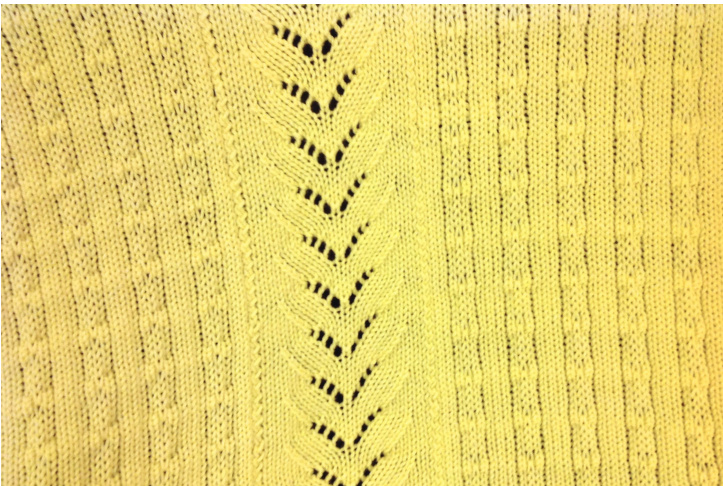
I recommend you watch Diana Sullivan's Easy Cable Join video before doing this section. While you won't be using her cabling join technique, she does show very clearly which stitches you need to hang from the panels in order to get a nice looking join. For the lace stitches in the middle of the join panels, I used the chart from the “"Strawberry Fields" pattern on Ravelry. Cast on 23 stitches. (end with COL) Hang one edge stitch from each of 2 panels (wrong side facing you) and Knit 1 row. (end with COR) Knit 10 more rows in stockinette, joining the panel edge stitch opposite the carriage on each pass. Begin working lace pattern as you alternate between hanging the edge stitches as you continue joining the panels. When you get down to the last 10 rows, end lace pattern and hang edge stitches, using stockinette stitch for the last 10 rows. Cast off in whatever technique you like ( I used latch tool bind off).
Bag Pattern:
When I make quilts, I always make a matching pillow case to hold the quilt I thought "why not make a bag to hold the throw?".
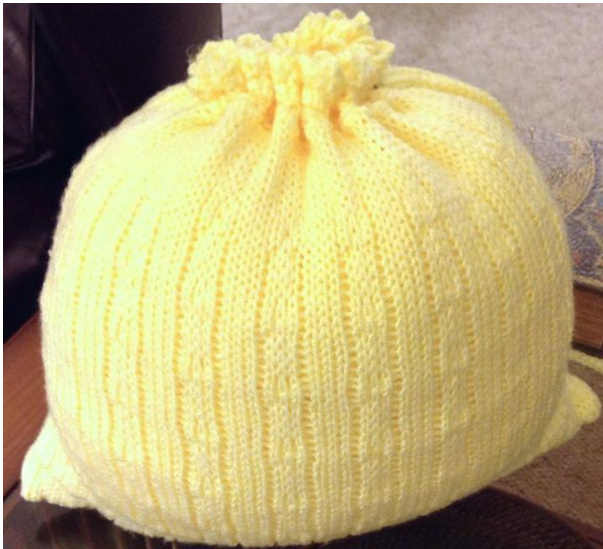
Cast on the same as for one of the panels you made. Knit 160 rows and cast off. Sew up both sides Double crochet around the top of the bag. On the 2nd row of crochet, double crochet every other stitch, with a Ch1 in between (DC, CH1, DC) around. Do one or two more rows of crochet (picot is nice on the last row - but just double crochet looks nice too). Knit an I-Cord (around 350-400 rows). Weave I-Cord into the Ch1 Spaces (every other hole) Optional: Include a cord tie to help secure the I-Cord when bag is closed. This works well for carrying and storing the throw when not in use (and makes a decent pillow too) :)


