Bob's Party Socks By Alyson Johnson
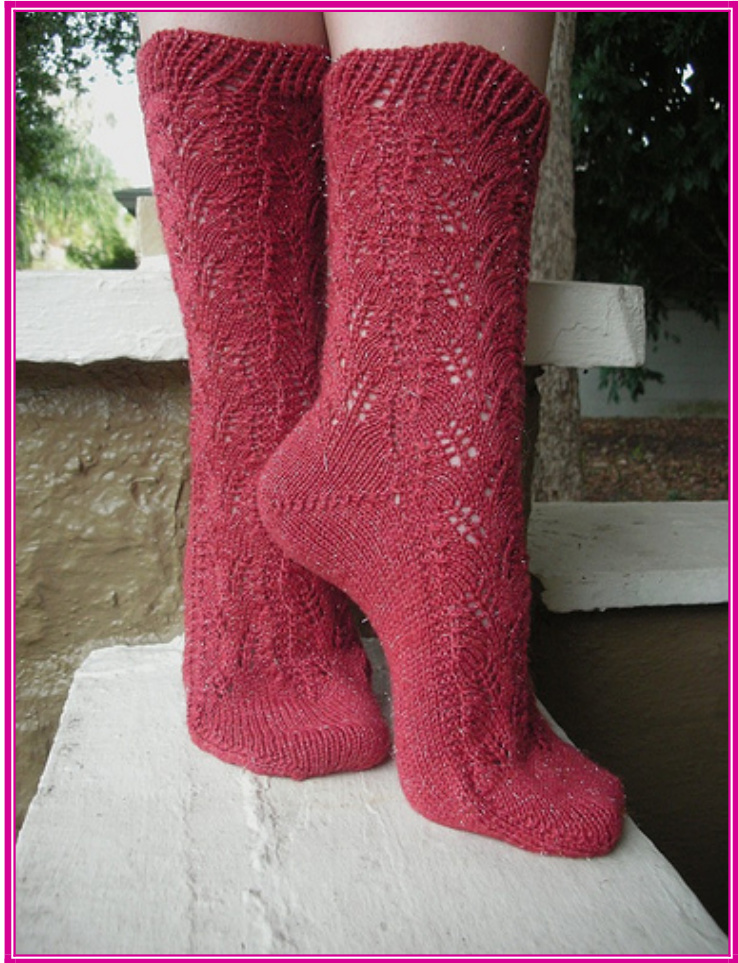
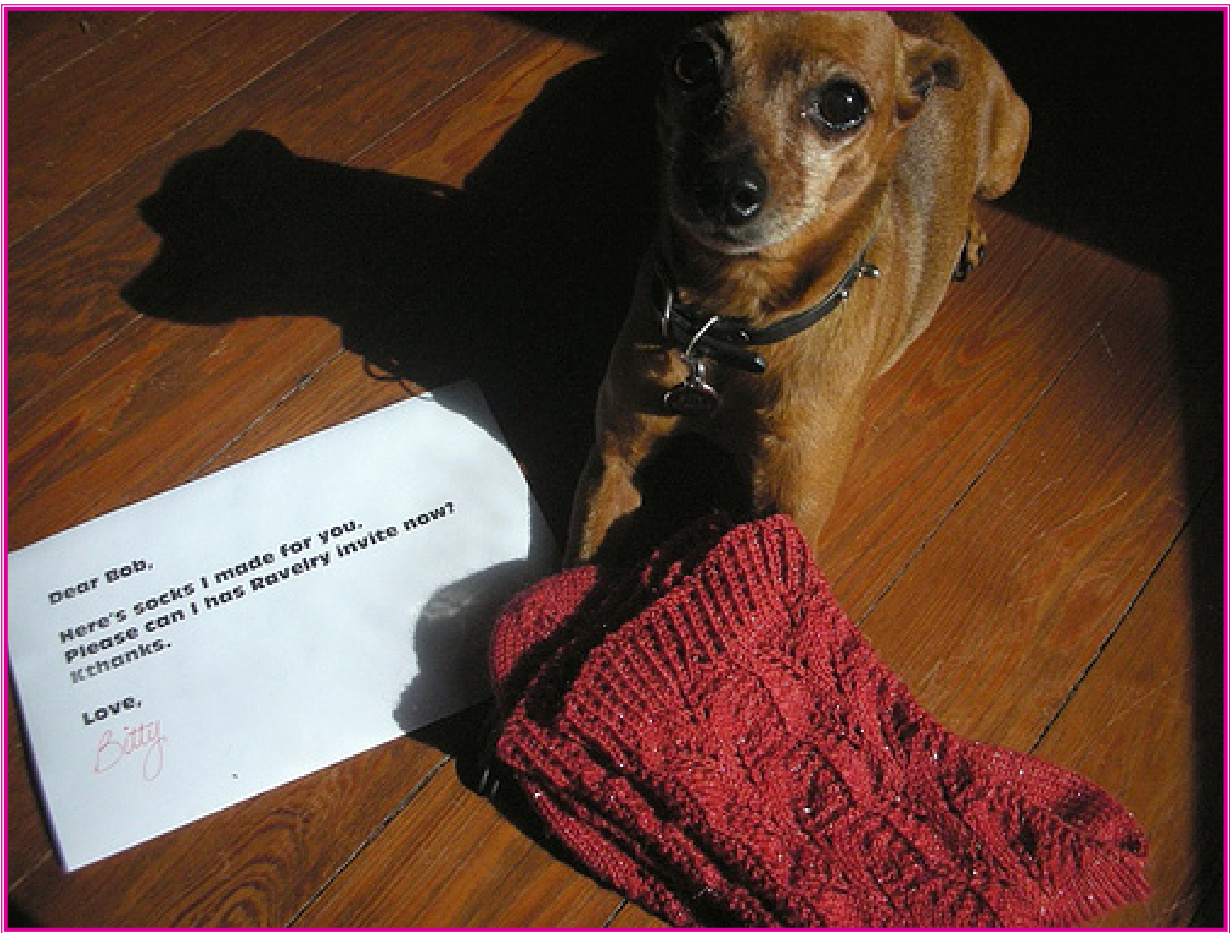
This is a sock pattern is designed to be worked toe-up on double-pointed needles. Upon spotting a stitch pattern called “Raveling Leaves", my mind immediately went to this blessed little slice of knitterly heaven that is Ravelry. Most everyone is familiar with Ravelry by now, and I'd venture to say that no single site has been so well-received and adored by the knitting community. I'd been a Ravelry Beta member for a while, but after seeing blogger after blogger exclaim, “I got my invite!!!", I thought perhaps a celebratory pattern would be in order. When I spotted a favorite dyer offering a festive new merino/nylon/silk yarn base with flecks of real silver, I thought it would be perfect for a celebration. So with the perfect colorway to pay tribute, I set off to make a sock that Ravelry mascot Bob himself could approve with pride. Put this one in your queue!! (This sock pattern is designed to be worked toe-up on double-pointed needles.) Size: One size fits most (adult-sized foot) Finished Measurements: Leg circumference $=8$ inches Top of sock to heel $=9$ inches Foot length (variable) $=9.5$ inches
Materials:
Painted Skeins Silver/Silk/Merino in “Ravelberry" (one skein - at least 375 yards) One set $2.25\;\mathrm{mm}$ (US Size 1) DPNs (or size to achieve gauge) Tapestry (darning) needle Gauge: 32 stitches $/40\,\mathrm{rows}=4^{\circ}\,/\,10\,\mathrm{cm}$
Pattern Notes / Special Abbreviations:
w&t Wrap and turn. RS: When you come to the stitch to be wrapped, bring your yarn forward, slip the stitch purlwise to your working needle, bring the yarn to the back, turn your work, and slip the stitch purlwise back to the first needle (which is now your working needle.) WS: When you come to the stitch to be wrapped, bring your yarn to the back, slip the stitch purlwise to your working needle, bring the yarn forward, turn your work, and slip the stitch purlwise back to the first needle (which is now your working needle.)
PATTERN:
Toe:
Note: The top of the foot is worked over four more stitches than the bottom of the foot, simply for symmetry in the lace pattern. Using Judy's magic cast-on (http://www.knitty.com/ISSUEspring06/FEATmagiccaston.html), cast on 24 stitches over two needles. Work one round as instructed for the cast-on, ending with 24 stitches divided evenly over four needles for working in the round. Before beginning the increases, designate two needles for the top of the foot (Needles 1 and 2 worked as the first half of your round) and two needles for the bottom of the foot (Needles 3 and 4, worked as the second half of your round.) Begin increase rounds: Round 1: All Needles: Knit plain Round 2: Needle I: kl, kfb, knit to end Needle 2: knit to last 2 stitches, kfb, k1 Needle 3: k1, kfb, knit to end Needle 4: knit to last 2 stitches, kfb, k1 Continue the two-round repeat, increasing to 68 stitches (17 per needle), then increase ONLY on Needles 1 and 2 for two more repeats. You'll have 72 stitches - 19 stitches each on Needles 1 and 2, and 17 stitches each on Needles 3 and 4.
Foot:
Begin working charted lace pattern for the foot across Needles 1 & 2 (top of foot.) Work every round plain across Needles 3 & 4 (bottom of foot).
Charted Lace Pattern for Foot:
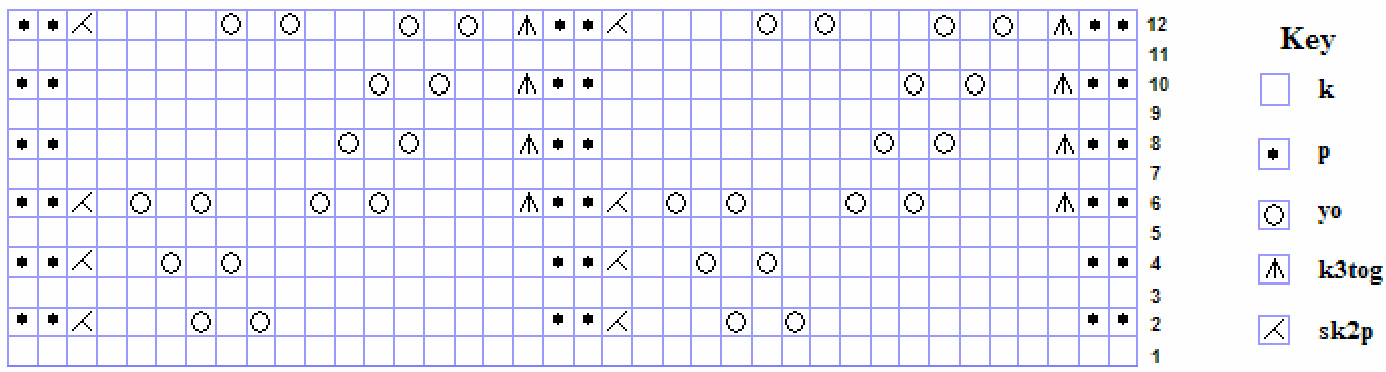
Repeat the lace chart four times, or until foot measures about $2~\%$ inches shorter than desired length, ending at Needle 2 with round 12 of the chart. Do not work stitches for the bottom of the fot (Needles 3 & 4) - you'll begin working those with the heel, as follows.
Short-Row Heel:
The heel is worked over 34 stitches of your round. The other 38 stitches are the instep stitches, which will be held in place on the needles while you knit the heel. When you reach the end of your last round for the foot, continue as follows: Row 1: Knit across 33 stitches, w&t last stitch. Row 2: Purl across to last stitch, w&t last stitch. Row 3: Knit across to last unworked stitch, w&t this stitch. Row 4: Purl across to last unworked stitch, w&t this stitch.
Continue repeating rows 3 and 4 - working to the last unworked stitch, wrapping, and turning - until there are 12 unworked stitches in the center of the heel and you've just completed a purl row. Note: if you have a narrower heel, leave fewer unworked stitches in the middle; if you have a wider heel, leave more unworked stitches. Continue as follows: Row 1: Knit across the unwrapped stitches to the first wrapped stitch. Pick up the wrap and the live stitch and knit them together, w&t the next stitch. Row 2: Purl across to the first wrapped stitch. Pick up the wrap and the live stitch and purl them together, w&t the next stitch. Row 3: Knit across to the first double-wrapped stitch. Pick up BOTH wraps and the live stitch and knit them together, w&t the next stitch. Row 4: Purl across to the first double-wrapped stith. Pick up BOTH wraps and the live stitch and purl them together, w&t the next stitch. Continue repeating rows 3 and 4 - working to the first double-wrapped stitch, picking up both wraps with the live stitch and working them together, wrapping and turning - until you've worked all the stitches and have a completed short-row heel. Leg: Knit across the heel stitches Needles 3 and 4). Begin working the charted lace pattern for leg on ALL needles.
Charted Lace Pattern for Leg:
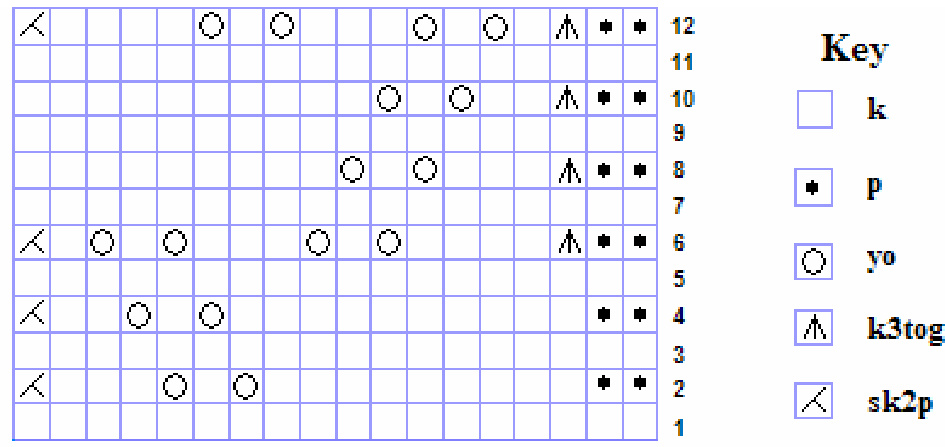
Continue working the lace chart across all four needles. You'll be repeating the chart four times on each round. Complete the 12-round chart five times total, or to desired length, and begin working the lace cuff. (Note: Before starting the leg, you may find it helpful to move two purl stitches from the end of Needle 2 to the beginning of Needle 3, to avoid confusion.) Cuff: Work the cuff as follows: Round 1: \*P1, K1\* Round 2: \*YO, k2tog\* Repeat these two rounds five times total, then work round 1 again. Bind off the stitches using a stretchy method, like a sewn bind-off. Weave in ends. Repeat for second sock.
Log on to Ravelry and edit project details to “Finished!' Yarn Note: This is a wonderful yarn available from a number of really talented and creative independent dye artists, so if small production runs make it hard to get from Helen of Painted Skeins (paintedskeins.etsy.com), she wants you to know you can look to felow artists Roxanne of Zen Yarn Garden (zenyarngarden.com) and Melanie of Lotus Yarns (lotusyarns.etsy.com).