FAWKES SAWKES byLauraJenkins
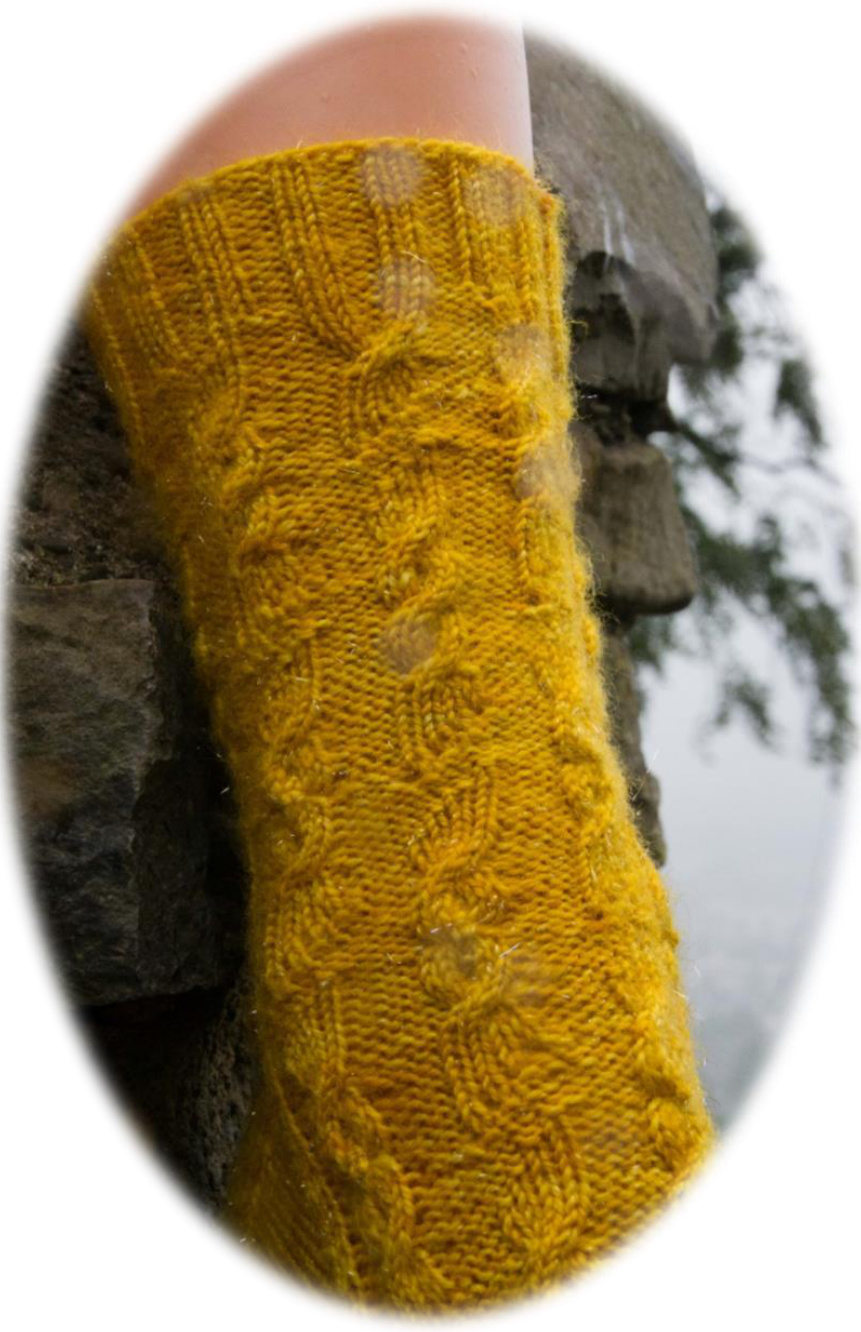
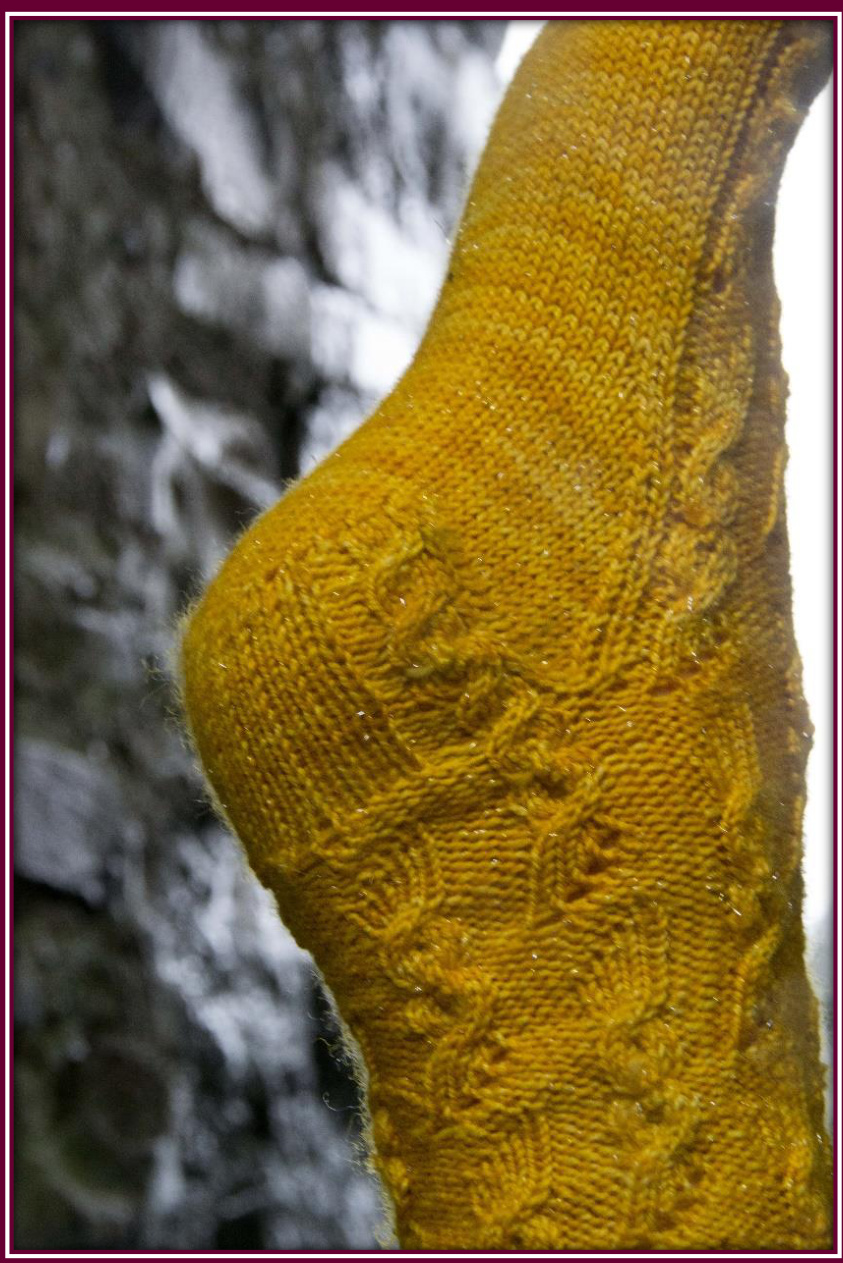
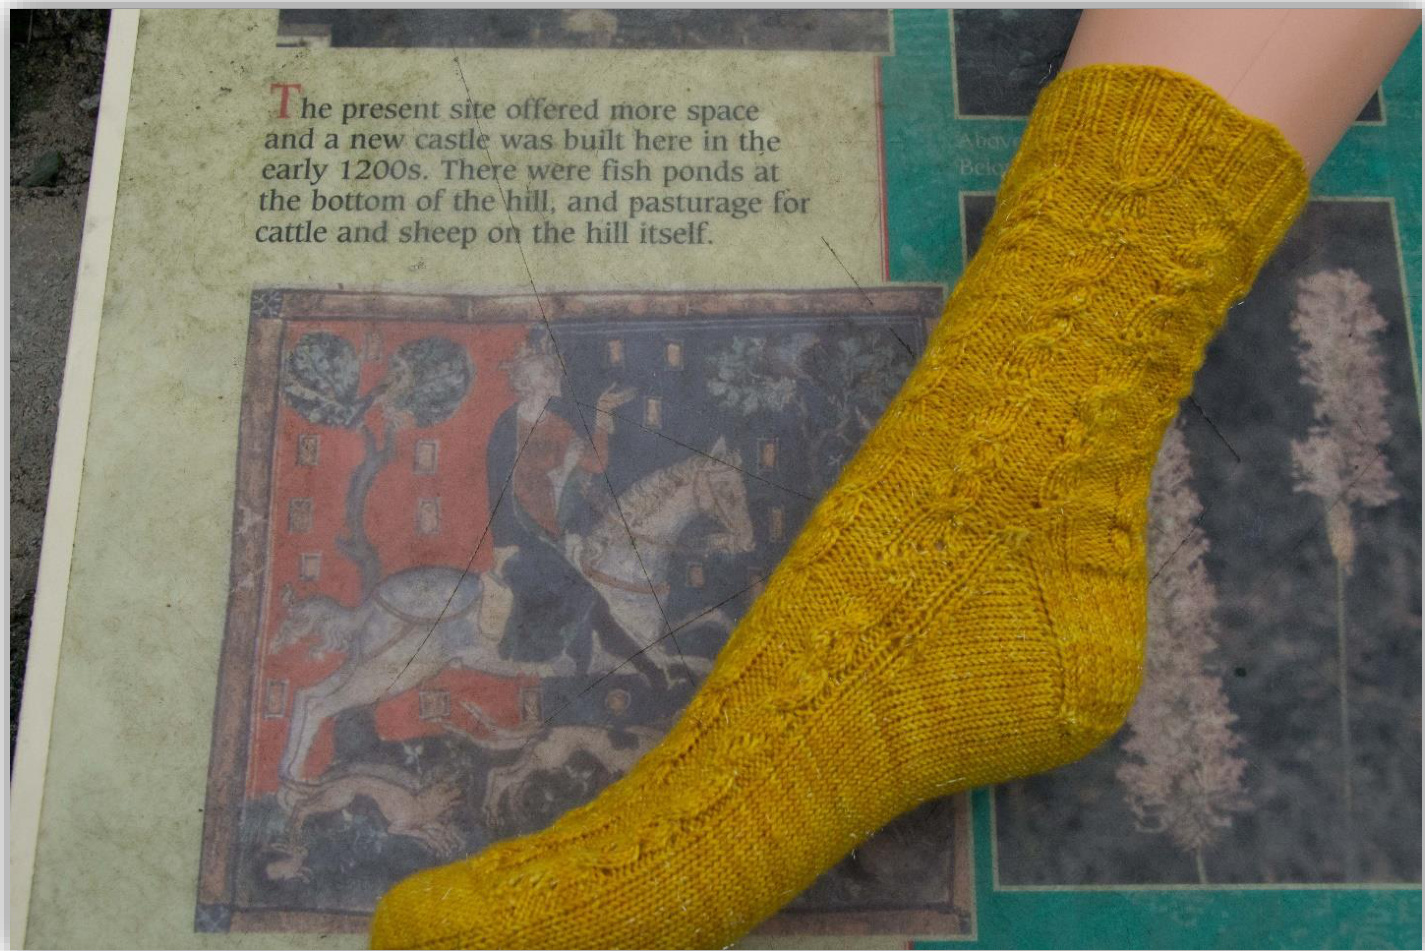
We recently moved to the Cumbrian town of Kendal, and live right below the ruins of Kendal Castle. The castle is believed to be the birthplace of Catherine Parr, the last wife of Henry Vlll and every year on Bonfire Night it serves as the background for an amazing fireworks display. I love fireworks so climbed the hill to watch them from the castle green for the first time this past fall. November in the Lake District can be quite damp and chilly and that night made me realise just how true it is that nothing is better for standing in a wet field in Wellington boots than a pair of handknit socks! While looking for a pattern that would suit some lovely sparkly yellow yarn that I purchased at Woolfest, I came across a Japanese stitch design that reminded me of fireworks, and thus this design was born.
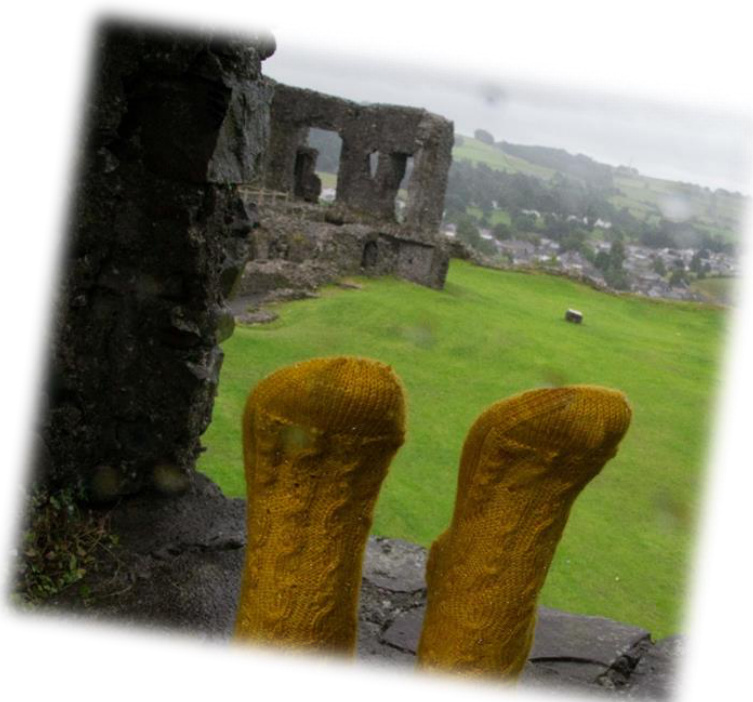
The sock is worked top-down, and the combination of cables and lace is what creates the fireworks. As with many of my designs the pattern extends all the way down the heel flap, and a classic short-row heel/gusset construction make this pattern suitable for knitters looking for an advanced beginner/intermediate sock pattern. As with any design that includes cables, the stitch count is higher than non-cabled patterns - this is because of the effect cables have on the stretchiness of the fabric - CookieA used the term “suckage" in a course I took with her a few years ago, and I haven't found a better word for it! I am mentioning this because it is important for knitters to use a yarn with yardage on the higher side, and also to (gasp!) swatch. Finally, I will suggest that this pattern is better suited to solid or semi-solid yarns, however a small amount of variegation may work.
SIZE
Small (Medium, Large) to fit a foot circumference of approximately 19cm/7 V2" (21.5 cm/8 %2", 23.5cm/ 9 %4"). Note: The words “small", “"medium" and “large” refer to the width of the sock around the foot.
MATERIALS
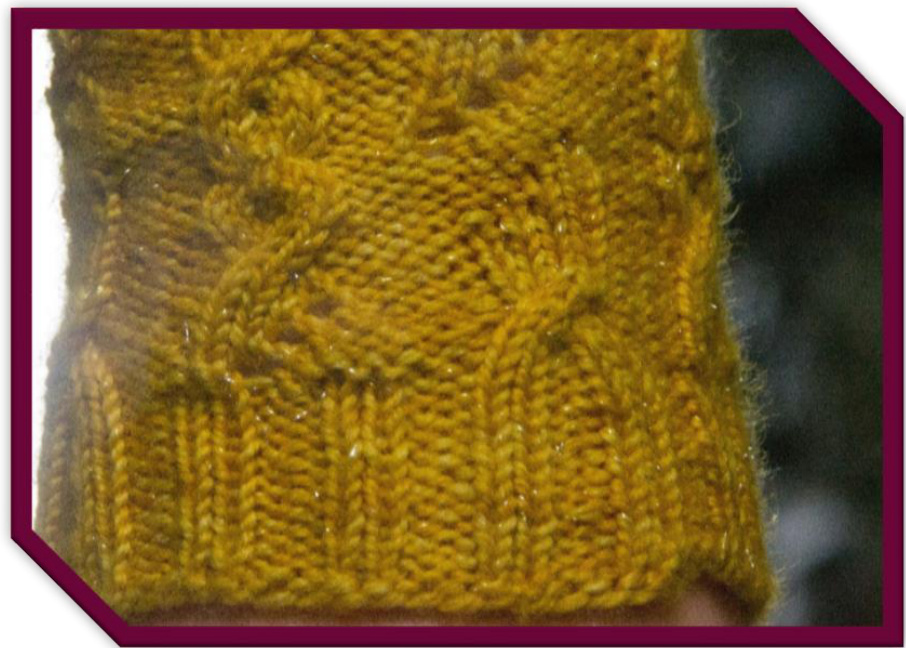
400 - 450yds (370-415m) fingering weight/sock yarn. The socks in the photos were knit with Willo Fibres Sparkle Sock (75% merino/20% nylon/5% Stellina) in the colourway Honeycomb. Two cable needles (for those who usually cable without a cable needle, please see note below) Tapestry needle for grafting toe Two stitch markers Note: I am an avid fan of cabling without a cable needle, and while I managed to get away without using cable needles for most of this design, the 6-stitch cable is very fiddly and I don't recommend attempting towork itwithout at leastonecableneedle.
RECOMMENDEDNEEDLES:
One or two circular 2.25mm/Us 1 needles, per your preference. Copyright 2014 Laura Jenkins. All rights reserved. For personal, non-commercial use only. Instructions and charts may be photocopied for personal use only. Note 1: No matter what your choice in needle, always use the size that gives you the gauge listed below -- every knitter's gauge is unique, and can be different with different techniques. Note 2: 1 have written this pattern for knitting with one or two circular needles, however it can easily be adjusted to using five double-pointed needles (DPN's) - just divide the stitches of Needle 1 evenly over DPNs 1 & 2, and the stitches of Needle 2 over DPNs 3 & 4. GAUGE: 8.5 sts = 2.5cm/1 inch in stockinette st
ABBREVIATIONS&CHARTSYMBOLS
st = stitch LHN = Left Hand Needle RHN = Right Hand Needle cnl, cn2 = Cable Needle 1, Cable Needle 2 N1, N2 = Needle 1, Needle 2 RS = Right Side = The side of the knitted fabric that is visible when you are wearing your socks e side of the knitted fabric that is not visible when you are wearing your sock: Turn = Turn the knitted fabric around so that the other side is facing you and start working st st in the other direction. You do this at the end of every row when working a flat piece, but when turning a heel using short rows, this turn occurs before you reach the end of a row St st = Stockinette Stitch = K all right-side rows, P all wrong-side rows. st st = Reverse Stockinette Stitch = P all right-side rows, K all wrong-side rov
YO = Yarn Over = Bring yarn to front of work and then knit the next stitch by bringing the yarn over the right hand needle before wrapping it around the stitch. K2Tog = Knit two together = insert the tip of the RHN as if to knit into the front legs of the next 2 sts on the LHN, wrap yarn and knit, slipping both sts off the needle at once - one st decreased. P2Tog = Purl two together = Insert the tip of the RHN as if to purl through the front legs of the next 2 sts on the LHN, wrap yarn and purl, slipping both sts off the needle at once - one st decreased. No Stitch= No stitch - a decrease somewhere on the row being knit is not compensated by an increase, resulting in a net decrease in the number of stitches. When knitting from a chart, you need to ignore this stitch. ssk = Slip, Slip Knit = Slip one stitch knitwise onto the right hand needle, slip a second stitch purlwise onto the right hand needle, then insert the left hand needle through the front of both stitches just slipped, wrap yarn and knit them together. ding the yarn to the back of the work, slip one stitch purlwise onto the RHN. SlIWYiF= Holding the yarn to the front of the work, slip one stitch purlwise onto the RHN.
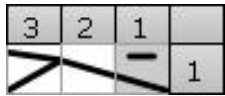
C3LP = Cable 3 Left (Purl) - Sl 2 sts from the LHN to cn and hold at the front of your work. P1, then K2 from cn.
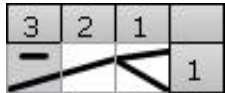
C3RP = Cable 3 Right (Purl) - SI 1 st from the LHN to cn and hold at the back of your work. K2, then P1 from cn. Copyright 2014 Laura Jenkins. All rights reserved. For personal, non-commercial use only. Instructions and charts may be photocopied for personal use only.
C4R = Cable 4 Right - Sl 2 sts from the LHN to cn and hold at the back of your work. K2, then K2 from cn.
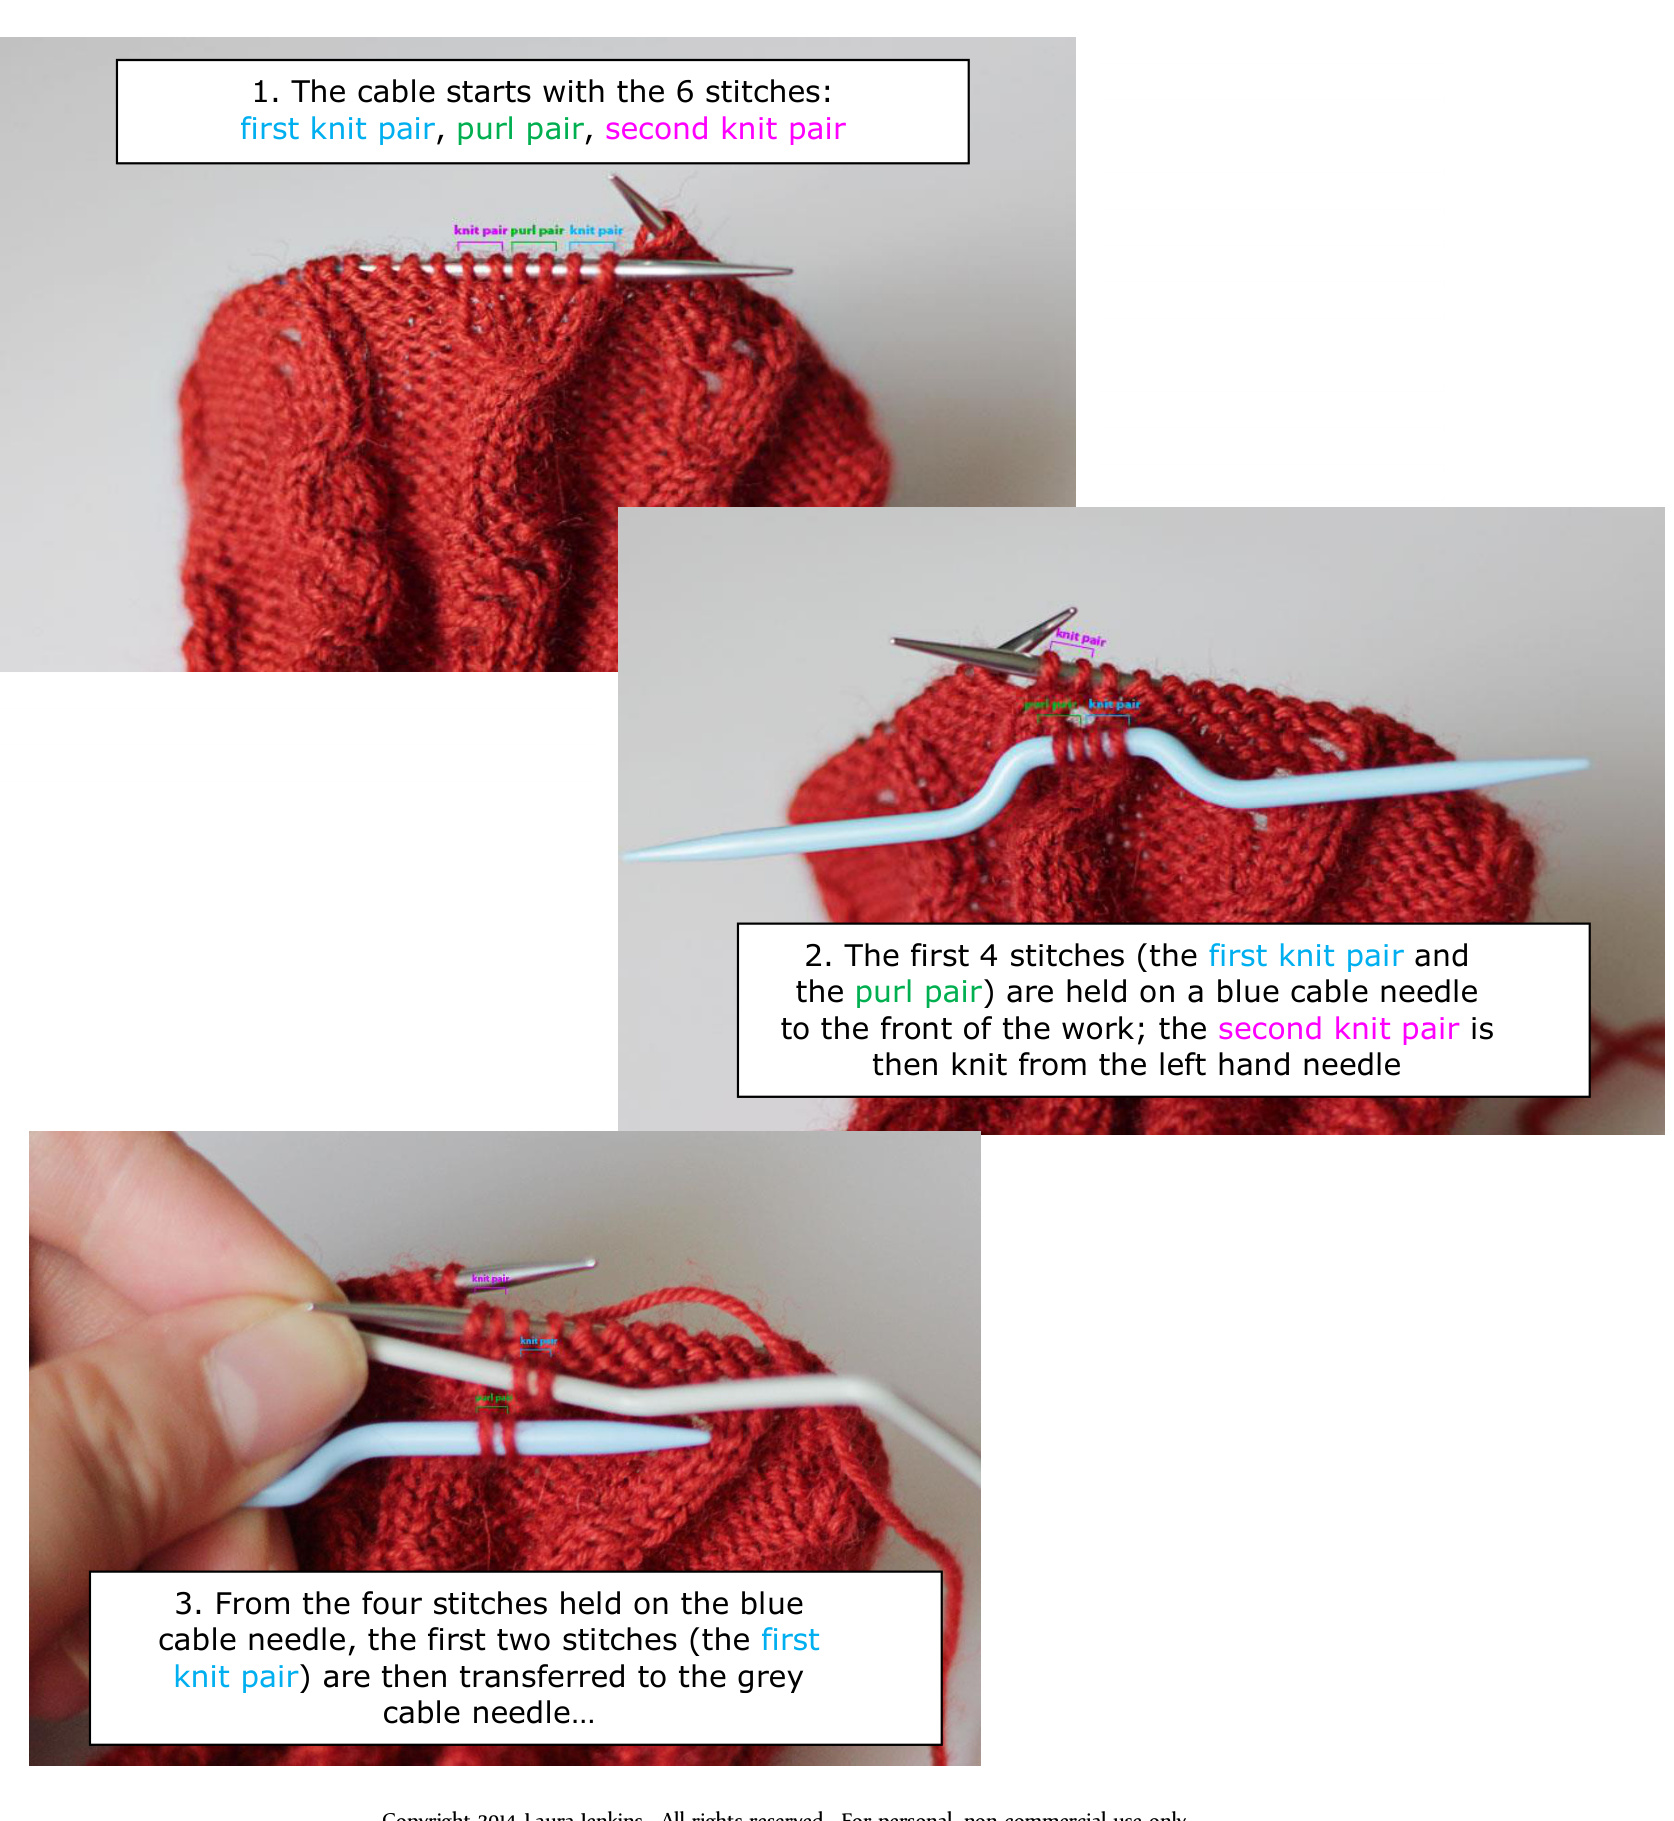
C6C = Cable 6 Centred = (See Pages 8& 9 for a detailed photo tutorial) Sl 4 sts from LHN to cn1 and hold at the front of your work. K2, then sl 2 sts from cnl to cn2 and hold cn 2 at the back of your work. K2 from cnl, then K2 from cn2.
NOTESBEFOREYOUSTART
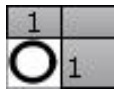
Charts are located at the end of this pattern - I do this to allow the knitter to print only the pages they need to. I have also tried to save paper by producing one chart for multiple sizes wherever I can. I use different colours to highlight sts specific to different sizes, so if you are printing in black and white, I would recommend that you use a highlighter or coloured marker to help identify sts you need to knit. The colour coding is as tollows: Stitches with no colour highlighting are meant to be worked for ALL sizes
| 1 | |

Stitches highlighted in Blue are to be worked for sizes Medium or Large only
| 1 | |
Stitches highlighted in Yellow are to be worked for size Large only
RIBBING
Cast on 64, (72, 80) sts using a loose cast-on such as the German Twisted cast-on (Here's a link to my favourite Youtube instructional video: http://youtu.be/AflxpkBBYxs) and divide the stitches evenly across N1 and N2 → 32 (36, 40) sts on each needle. Taking care not to twist them, join stitches in the round and \*work Row 1 of the size-appropriate RIBBING Chart across all sts. Repeat from \* at least another 11 times → minimum 12 Rows worked in total. Once the cuff length is satisfactory, 3 of the
Copyright 2014 Laura Jenkins. All rights reserved. For personal, non-commercial use only. Instructions and charts may be photocopied for personal use only. work Rows 2 and RIBBING Chart. Work Row 1 of the LEG Chart twice across the sts on of N1 and then repeat across the sts of N2 → your pattern is now set. Work Rows 2-32 of the LEG Chart as set above. Repeat the full LEG Chart (Rows 1 - 32) once more, then work Rows 1-6 a final (third) time → 70 rows of the Leg Chart worked. Note 1:There is only one LEG Chart for all sizes; make sure you follow the colour coding specific to your chosen size (Blue sts should be worked for sizes MEDIUM and LARGE only, Yellow Sts should be worked for size LARGE only) Note 2: lf you prefer a shorter leg, you can work only 1 repeat of the LEG Chart but don't forget thatit iscriticalthatyouworkRows1-6once more before moving on to the heel flap.
HEEL FLAP:
Note:TheHeelFlapisworkedFLAT;therefore rows are worked back and forth across the sts on N1 only; the sts on N2 remain unworked until it is time to pick up your gussets. In order to get a nice tight fit around the heel, the number of sts for theheel flap is reduced through apair of SET-UP rows. Work Row 1 of the size-appropriate HEEL FLAP SET-UP Chart across the sts of N1 ONLY. Turn your work so that the wrong side is facing you and work Row 2 of the HEEL FLAP SET-UP Chart back across the sts on N1. Turn the work, ready to work a Right Side Row → 30 (34, 36) sts on N1 and 32 (36, 40) sts on N2.
Continuing to work FLAT across the sts of N1 only, work as many rows of the HEEL FLAP CHART as necessary to obtain a Heel Flap that measures 2 %4"/6cm (2 V2"/6.5cm, 2 3/4"/7cm), ending with an evennumbered row, ready to work a Right Side Row. Note: The heel flap can be adjusted for a higher instep by working more rows of the chart; if you need to work more than 32 rows, simply start again on Row 1 of the chart. It doesn't matter which row you end on as long as it's an even-numbered row so that you are ready to work a Right Side row next. My "average" heel flap is 28 -30 rows, so I would typically end at row 26 or 28 of the chart (the Set-Up Rowscounttowardsheel flaplength).
HEEL TURN:
Row 1 (RS): Sl1 wyib, K 15(18, 18), SSK, K1, turn Row 2 (WS): Sllwyif, P3 (5, 3), P2Tog, P1, turn Row 3 (RS): Sl1 wyib, K 4 (6, 4), SSK, K1, turn Row 4 (WS): Sllwyif, P5 (7, 5), P2Tog, P1, turn Repeat Rows 3 and 4 above, working one more stitch before the decrease until all sts on N1 have been worked → 16 (20, 20) sts remain on N1. Note:Forthefinal tworows ofsizeSMALL,there is no single st to knit after the decrease -simply turn your work straight after the decrease and continue as described.
PICK UP GUSSETS
Note 1: You are about to start knitting in the round again,creating the foot of the sock. The top of the foot (lnstep) will continue to be patterned, but the sole will switch to plain st st. The pattern on the instep is a continuationof theone onthe leg,but a slight change in st count for size Medium means that separateFOOTChartshavebeencreated. Note 2: The whole point to slipping sts at the start ofeach row of theHEELFLAPwas tocreateChain Stitches along the edges of the flap (one Chain St for each pair of rows worked) - the gusset is picked up using these chain stitches. Sl1 then K across all heel stitches. Place a stitch marker, then continuing with N1, pick up and knit each chain st along the first edge of the heel flap, then pick up 1 additional stitch in the space between the heel flap edge and the stitches being held on N2.
Work row 1 of the size-appropriate FOOT Chart across the Instep sts on N2. Note: At this point, you will be holding the heel sts, the first set of gusset sts picked up and the instep sts all on N1. N2 should now be free to work the next section. Continuing with N2, pick up and knit 1 st in the space between the sts just worked and the second edge of the heel flap, then pick up and knit each chain st along this heel flap edge. Place a second marker and then knit across the heel sts and all the gusset sts you picked up on the previous round, slipping the first marker as you pass it by. Note: You should now have your instep sts on one needle (which we'll re-name as Nl) and all the sole (= heel + gusset sts) on the other (N2), with st markers on either side of the heel sts. Count the gusset sts on either side of the heel - the number should be the same. If it isn't and you are off by one or two sts, don't worry - you will just need to make an extra decrease or two on the gusset that has the extra sts. This happens to me often and I typically work the extra decreases in on the early “"non-decrease" rounds of the Gussets (see below - the even rounds are knit plain) so that I get to the same number of sts on either side quickly. The markers are used only to help with getting to the same number of sts on either side of the heel; they can be removed once you have achieved this.
WORKGUSSETS&INSTEP
Round 1: N1 (Instep): Work the next Row of the size-appropriate FOOT Chart N2 (Sole): K1, SSK, K across to the last 3 sts on N2, K2TOG, K1 Round 2: N1 (Instep): Work the next Row of the size-appropriate FOOT Chart N2 (Sole): Knit all sts Repeat Rounds 1 & 2, decreasing the number of gusset sts until you have 32 (35, 40) sts on N1 and 32 (36, 40) sts on N2. Continue working the instep and sole sts even (ie without any decreases) until your work measures 2"/5cm less than your total desired foot length, ending with an EVEN Row of the FOOT Chart for sizes SMALL and LARGE, and an ODD Row of the FOOT Chart for size MEDIUM. Note: Repeat the FOOT Chart as often as necessary to achieve your desired foot length. For size MEDlUM, note that Row 1 is NOT part of the chart repeat (as indicated by the red line); the chart repeatisthusRows2-33. TOESET-UP-WorkthissectionforSizeMEDIUMONLY: Round 1: N1 (Instep): K all sts N2 (Sole): K to last 3 sts, K2Tog, K1 TOE - ALL Sizes You should now have 32 (35, 40) sts on each needle. Round 1: N1 (Instep): K1, SSK, K to 3 sts remaining on the needle, K2Tog, K1 N2 (Sole): Repeat as for Instep. Round 2: K all sts. Repeat Rounds 1 and 2 until 20 (22, 24) sts remain [10 (11, 12) sts on each needle], ending with a Round 1.
FINISHING
ft toe using Kitchener st, weave in ends. Make a second sock to match the fir
DESIGNER BIO
My name is Laura Jenkins and I've been knitting since my grandmother Helen Matte took pity on me in my teenage attempts to make my boyfriend a sweater. While I lost my Neenie a long time ago, I firmly believe that her legacy lives on through my knitting. I work full-time in the pharma industry, and am lucky enough to work for one of the larger players, which has given me and my family the privilege of being moved around to different manufacturing sites in our network. After working for 15 years in my home country of Canada, I was given the opportunity to work for four years in Normandy, France and then relocated again to the Lake District in the UK. All of these wonderful countries have inspired me and my designs, and I am very grateful for the supportive and caring community that is Ravelry. 1 started designing socks as a means of challenging myself during the Sock Knitters Anonymous group's DYO month in June 2009, and have been slowly growing my repertoire - I have been a guest designer in for the Barking Dog Yarns sock club, and have designed Mystery Socks for the Solid Socks Ravelry group as well. If you have any comments on this pattern, please feel free to contact me through Ravelry, where I'm known as LauraJ. Happy knitting!
One of my fantastic testers, Cheryl Eaton (aka ElephantJuice on Ravelry), jumped in to help another one of the testing team who was struggling with how to work the 6-stitch cable. Below are a series of photos that she took as a means to describe how the cable should be worked. They are perfect - thank you so much Cheryl, this is really helpful!
Copyright 20l4 Laura Jenkins. All rights reserved. For personal, non-commercial use only. Instructions and charts may be photocopied for personal use only.

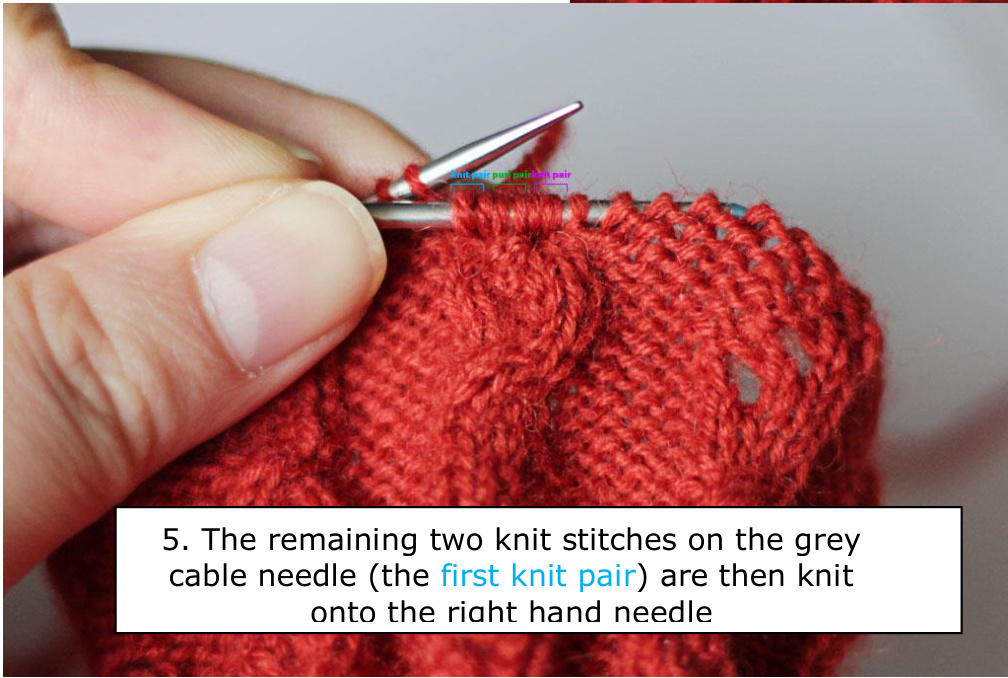
4. The purl pair remains on the blue cable needle, and those two stitches are then knit onto the right hand needle. Copyright 2014 Laura Jenkins. All rights reserved. For personal, non-commercial use only. Instructions and charts may be photocopied for personal use only.

RIBBING CHARTS
SIZE SMALL
| 16 | 15 | 14 | 13 | 12 | 11 | 10 | 6 | 8 | 7 | 6 | 5 | 4 | 3 | 2 | 1 | |
| 一 | 一 | 一 | ||||||||||||||
| 1 |
SIZE MEDIUM

SIZE LARGE

The Red line indicates that Row I is to be repeated a MINIMUM of 12 times; Rows 2 & 3 are the Leg Set-up rows and are only worked ONCE
Copyright 2014 Laura Jenkins. All rights reserved. For personal, non-commercial use only. Instructions and charts may be photocopied for personal use only.
LEG CHART -ALL SIZES
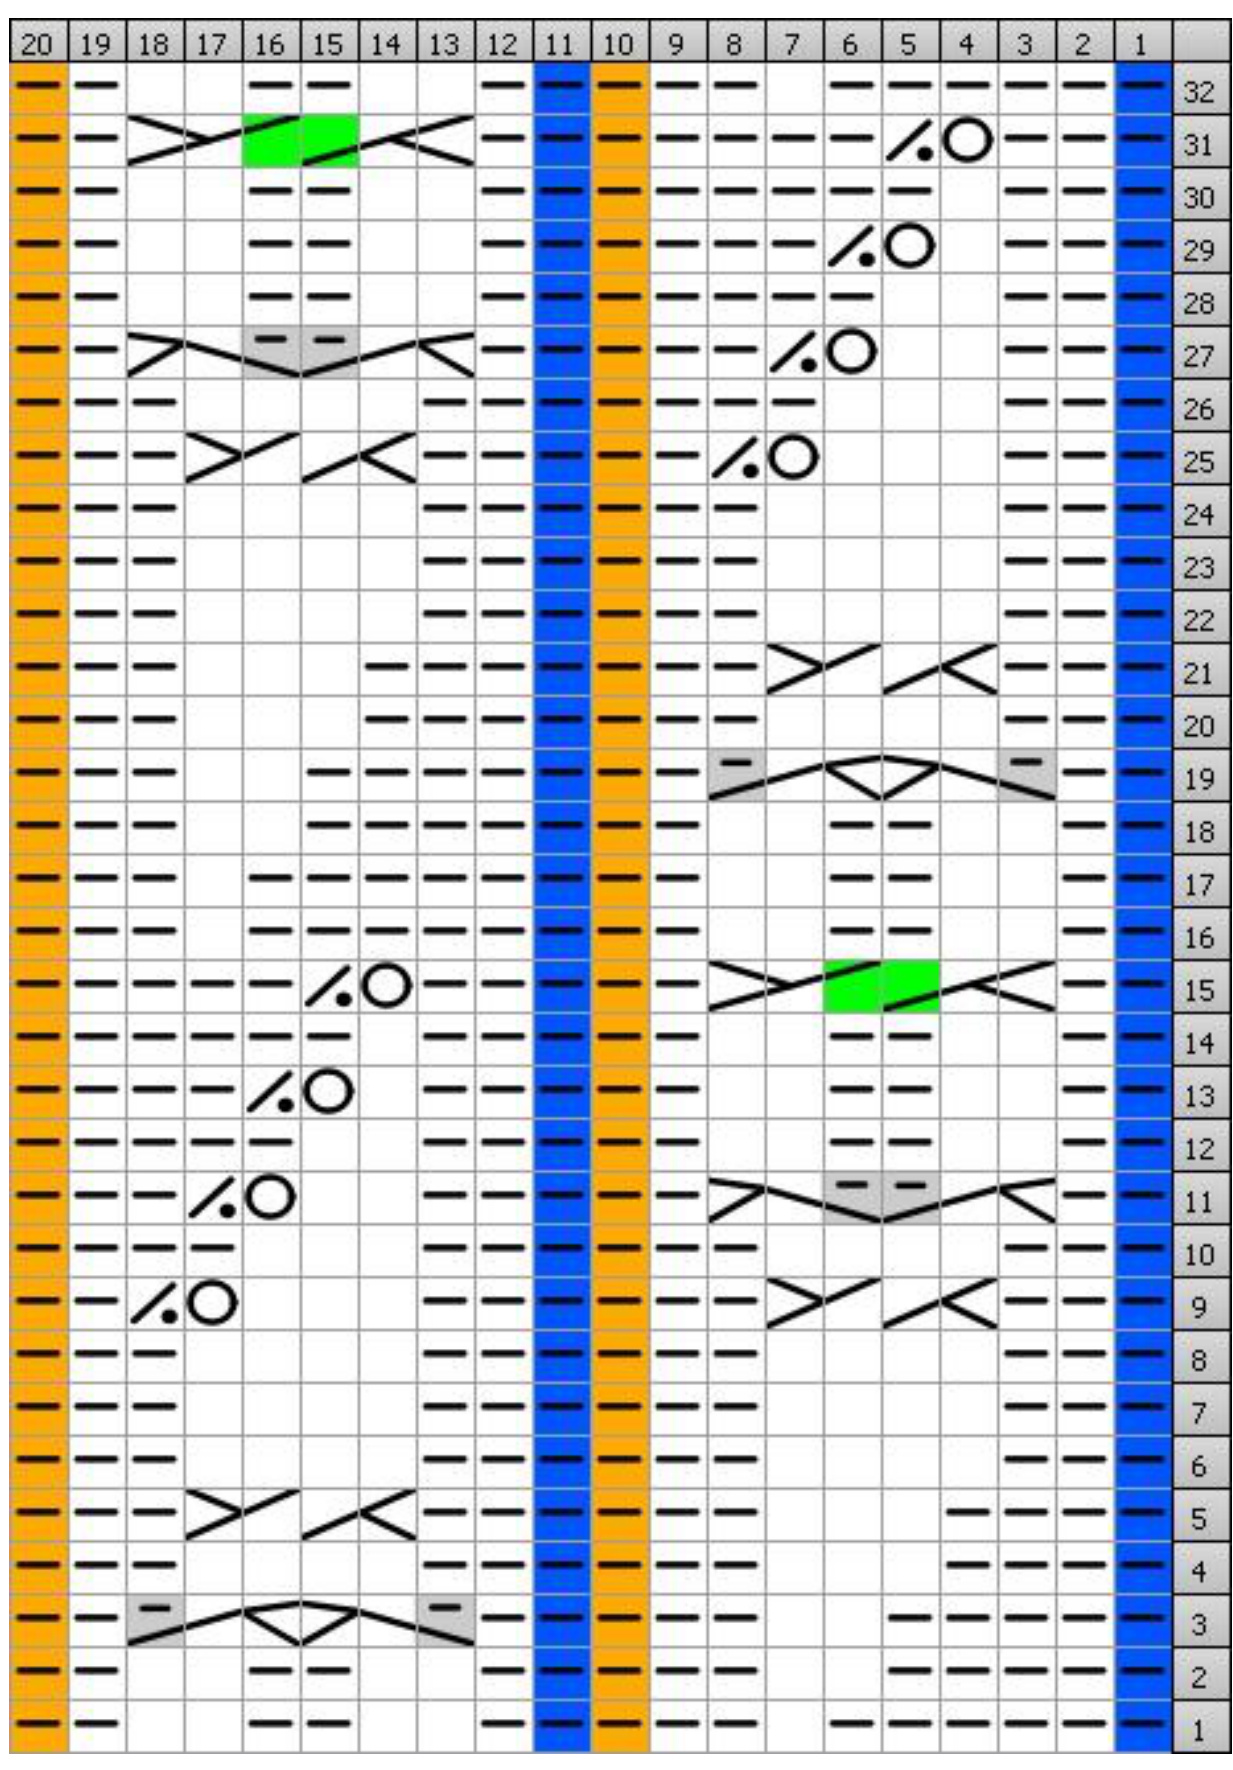
Workblue sts for sizes MEDIUM and LARGE only, and work yellow sts for size LARGE only.
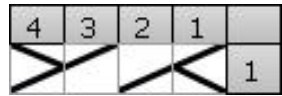
HEELFLAPSET-UPCHARTS
SIZE SMALL
| 3231302928272625242322212019181716151413121110987654321 | ||||||||||||||||||||||||||||||||
| A | 一 | 一 | 一一 | 一一 | ||||||||||||||||||||||||||||
| 一 | 一 | A | A | A | A | ★ | IK | 1 |
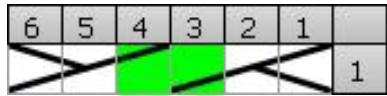
SIZEMEDIUM
| 36 | 32 31 | 30 | 29 | 282726 | 252423222120 | 19 18 | 17 | 1615141312 | 11 10 | 9 | 8 | 7 | 6 | 5432 | 1 | ||||||||||||||||||
| N | A | 一 | 一一 | 一一 | 一 | ||||||||||||||||||||||||||||
| 一 | 一 | 一 | 一 | A | A | A | A | A | A | A | -一A | 一 1 |
SIZE LARGE
| 4039 | 3837363534333231302928272625242322212019181716151413121110 | 98765432 | |||||||||||||||||||||||||||||||||||
| 2 | A | 一 | 一 | 一 | |||||||||||||||||||||||||||||||||
| 一 | AAA | AA | AA | 1一一 | 1 |
HEEL FLAP CHART -ALL SIZES
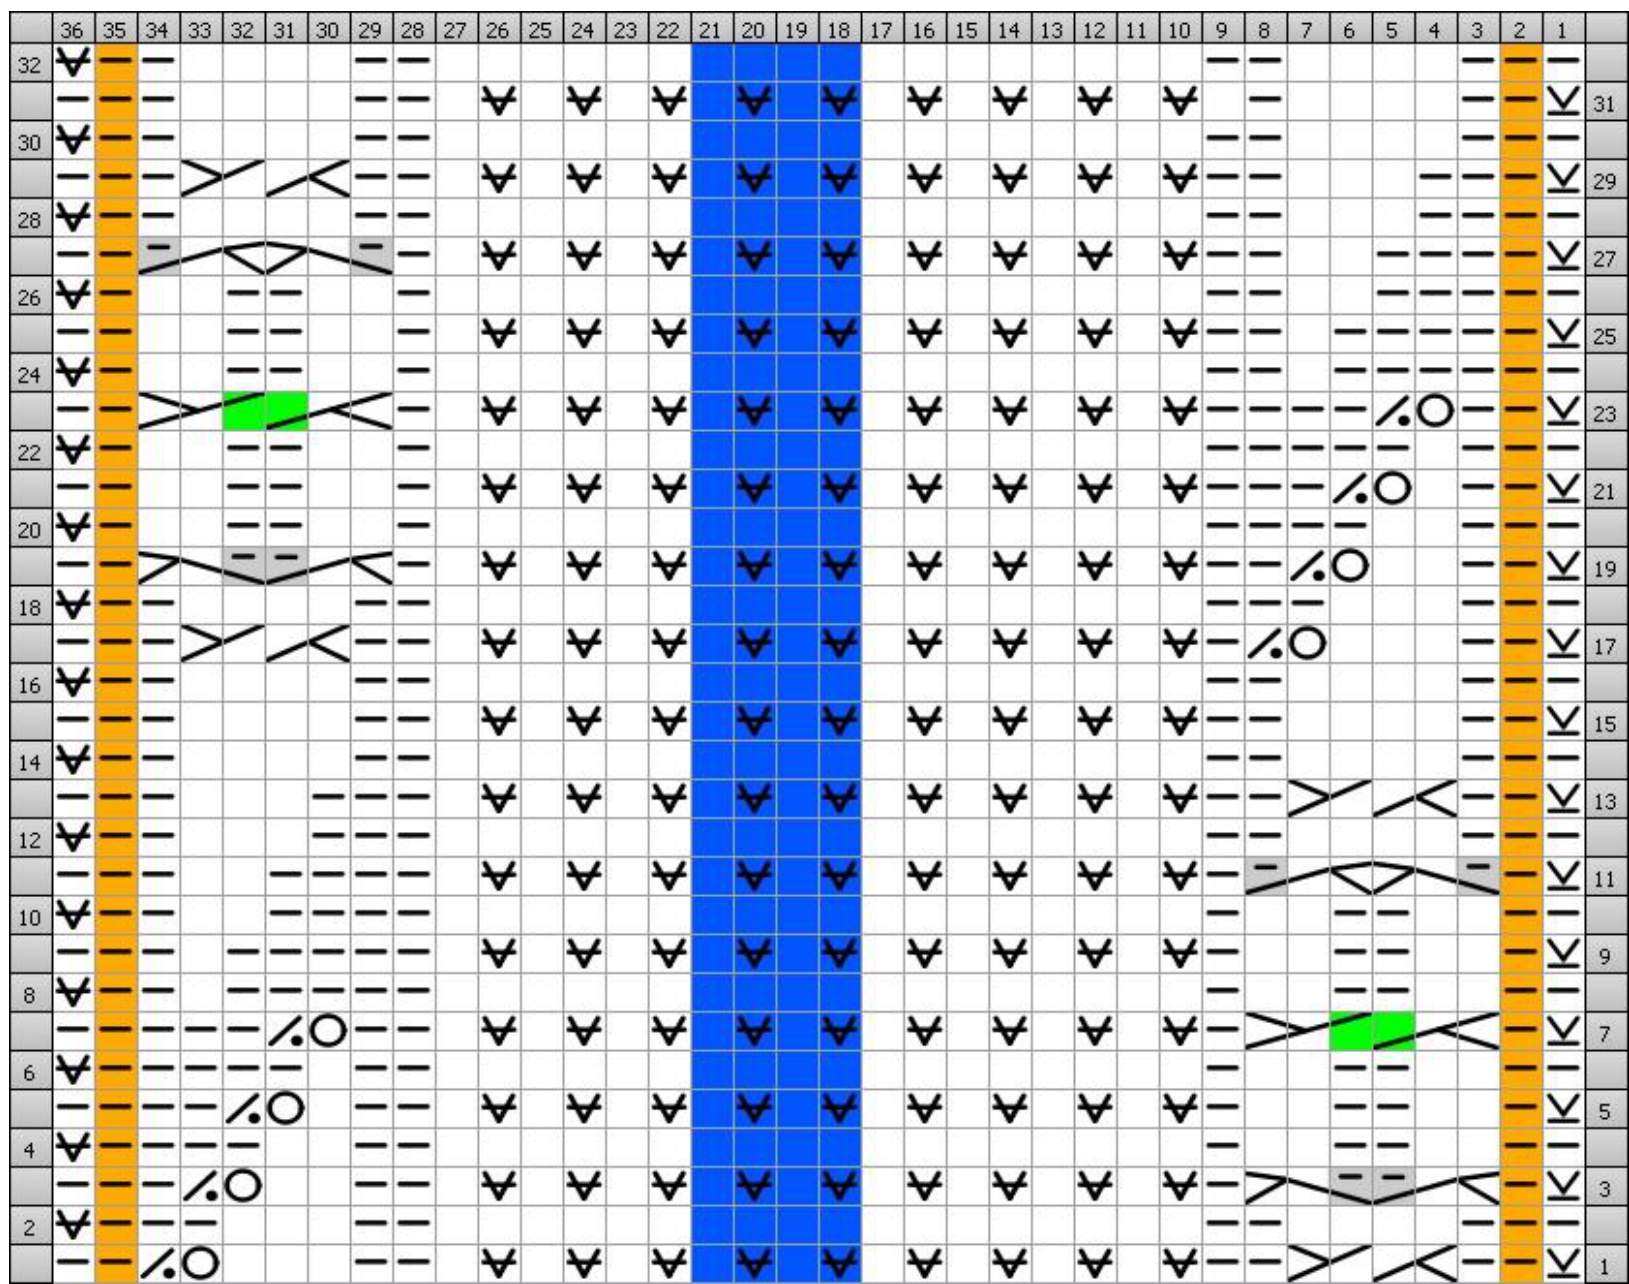
or sizes MEDIUM and LARGE only, and work yellow sts for size LARGE only.
Copyright 2014 Laura Jenkins. All rights reserved. For personal, non-commercial use only. Instructions and charts may be photocopied for personal use only.
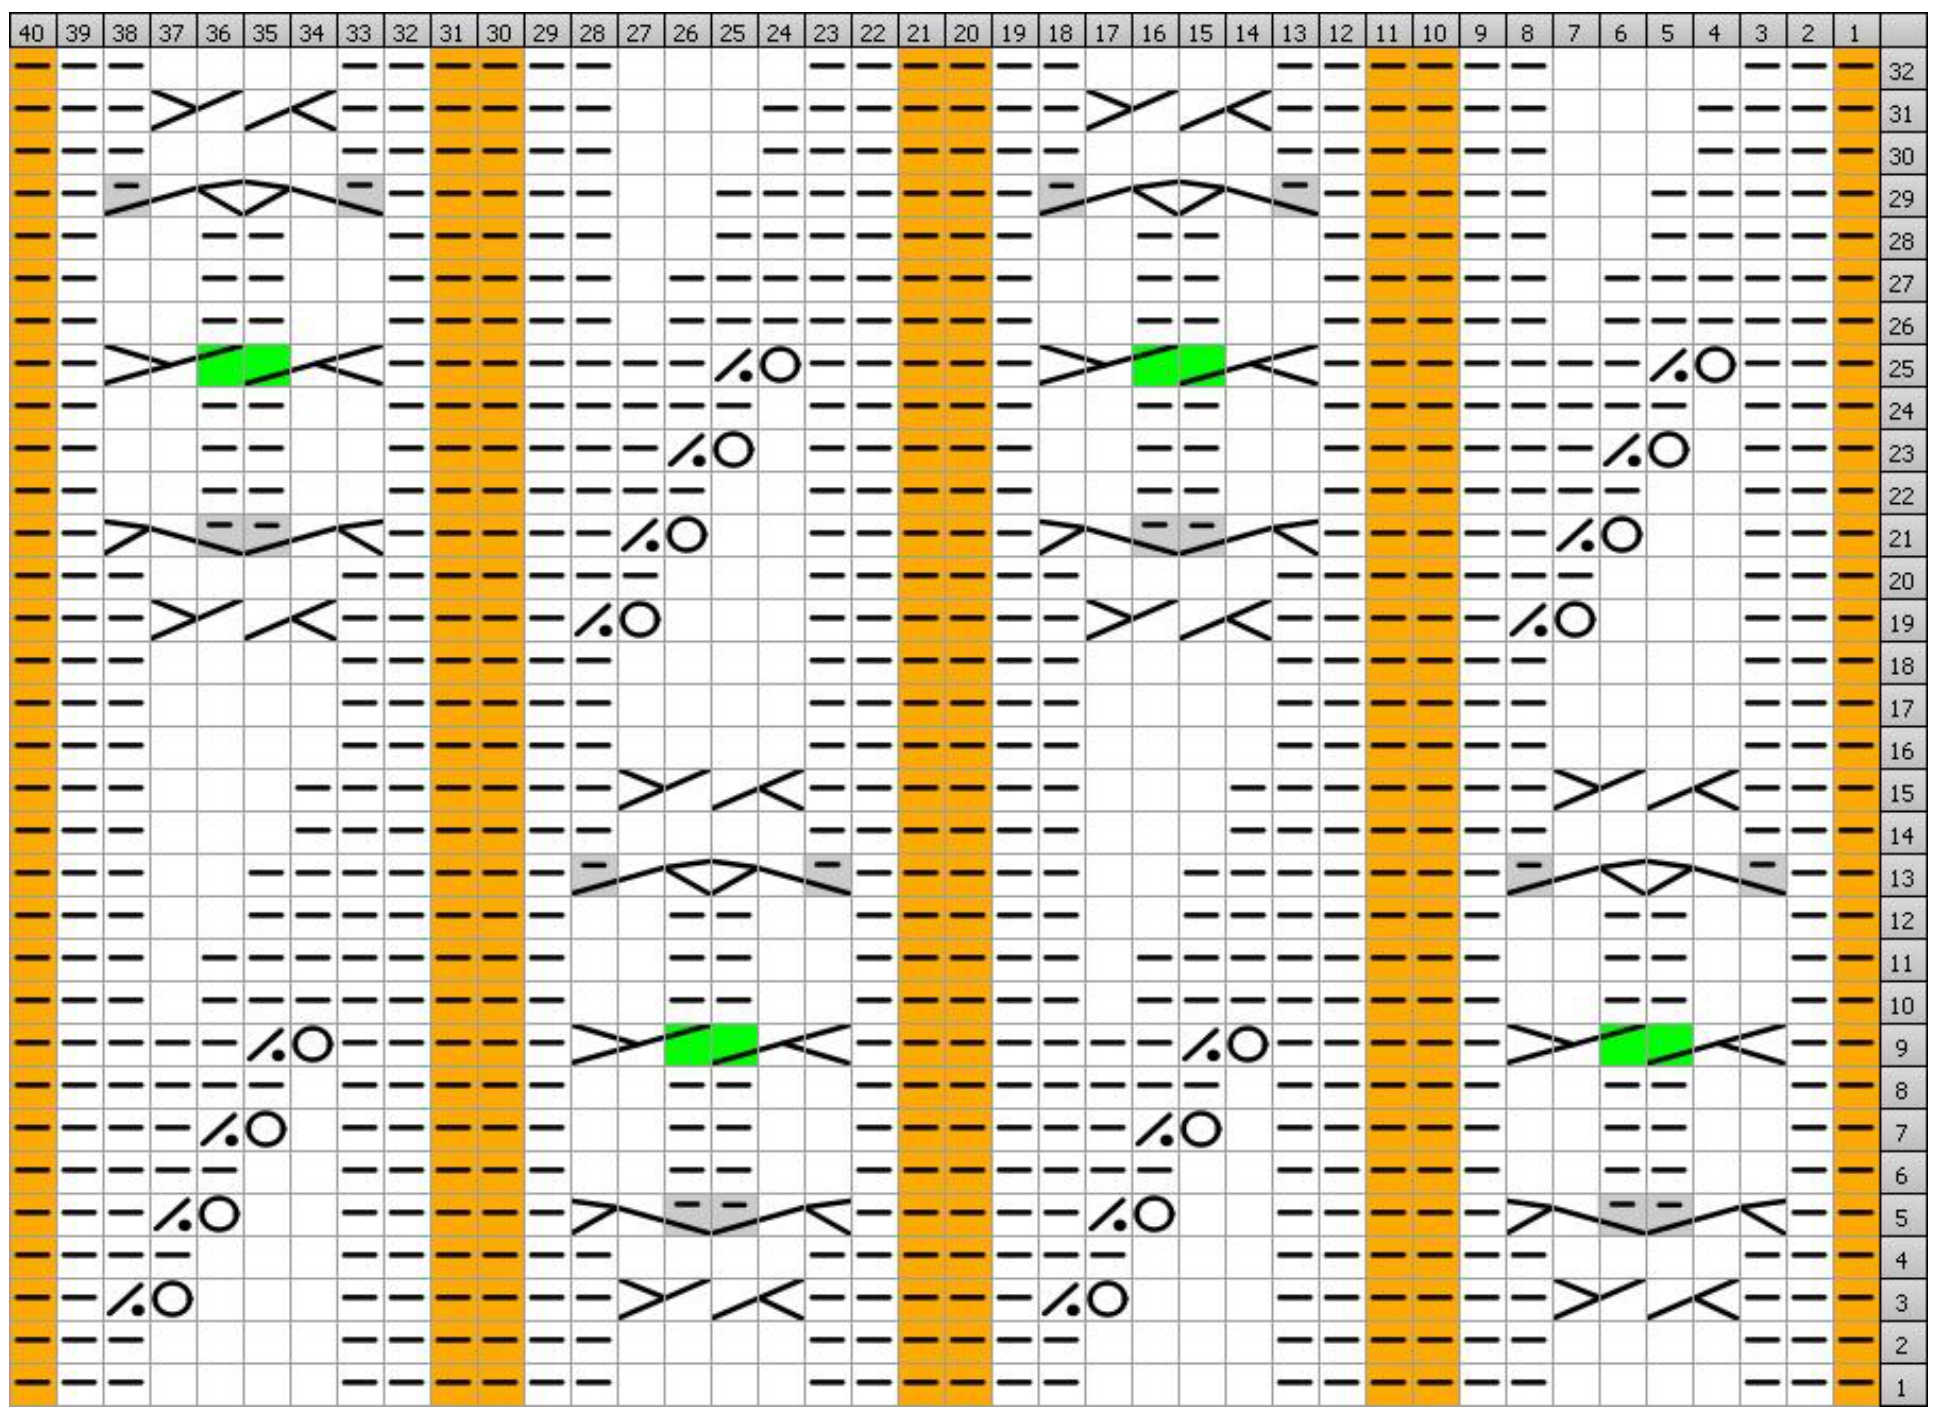
FOOTCHART-SIZESSMALLANDLARGE
Copyright 2014 Laura Jenkins. All rights reserved. For personal, non-commercial use only. Instructions and charts may be photocopied for personal use only.
FOOTCHART-SIZEMEDIUM

The Red line indicates that the chart repeat is from Rows 2 - 33 - Row 1 is only worked ON Copyright 2014 Laura Jenkins. All rights reserved. For personal, non-commercial use only. Instructions and charts may be photocopied for personal use only.


