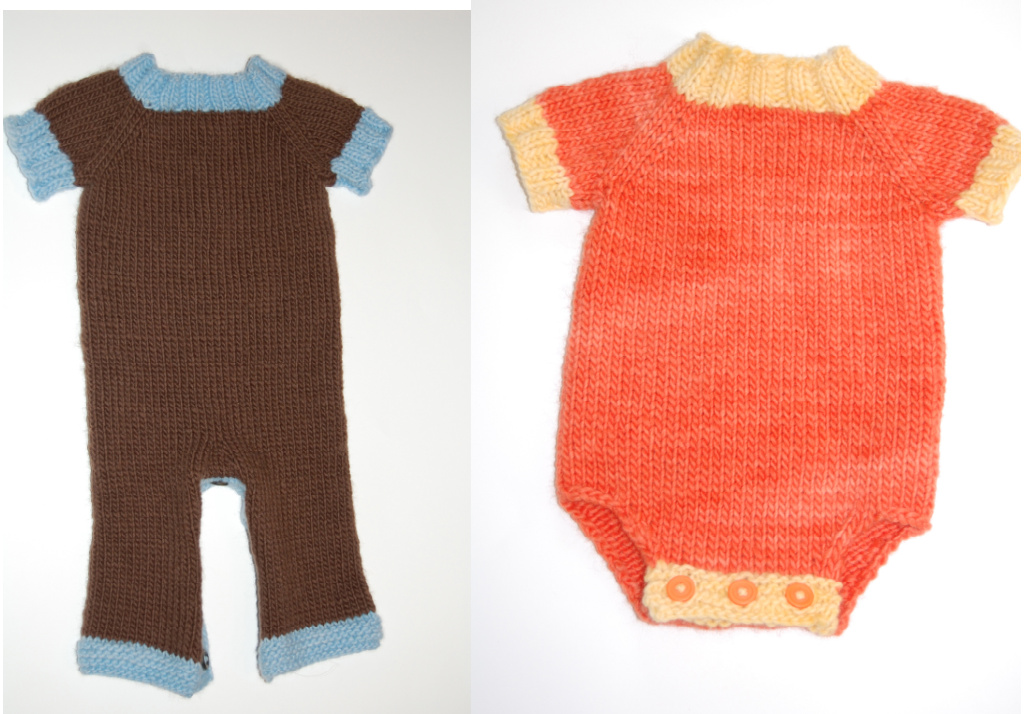
Raglan Romper or Onesie
id through the pattern before knitting; especially read the tips about gauge
Raglan Romper
| Newborn | 0-3 months | 3-6 months | 6-12 months | 12-18 months | 18-24 months | 2T-3T | |
| Chest 4.5 SPI | 14.5 | 16 | 17 | 18 | 18.5 | 20 | 21 |
| Chest 4 SPI | 16.5 | 18 | 19 | 20 | 21 | 22.5 | 23.5 |
| Body length | 11.5 | 13 | 14 | 15 | 16 | 17 | 18 |
| Inseam for shorts | 1.5 | 1.5 | 2 | 2 | 2.5 | 3 | 3 |
Raglan Onesie
| Newborn | 0-3 months | 3-6 months | 6-12 months | 12-18 months | 18-24 months | 2T-3T | |
| Chest 4.5 SPI | 14.5 | 16 | 17 | 18 | 18.5 | 20 | 21 |
| Total body length | 11.5 | 13 | 14 | 15 | 16 | 17 | 18 |
| Length to hip | 10.5 | 11 | 12 | 12.5 | 13.5 | 14.5 | 15.5 |
| Thighs | 8 | 6 | 10 | 11 | 11 | 11.5 | 12 |
Gauge
Gauge 4.5 SPl Chest Measurements You can do a looser fitting romper or onesie by using a gague of 4 SPl, but be sure to measure baby's chest to see how many inches wider than their chest you want it to be. I think the onesies look best with a gauge of 4.5, but the rompers look/fit better with a gauge of 4spi.
| Chest 4 SPI | 16.5 | 18 | 19 | 20 | 21 | 22.5 | 23.5 |
Materials, notions and needles Needed
-Worsted or Aran weight yarn (The amount in ounces should be enough for short sleeves, and for shorts, you will need to round up for long sleeves and pants) oz. Romper: 4 (4.5, 5, 5.5, 6.5, 7, 8) oz. Onesie: 3(3.5, 3.5 , 4, 4, 4.5, 4.5) oz. -3 (or more if doing pants) buttons around % " (l have used a little bit bigger and smaller buttons) Orsnaps -Darning needle to weave in ends -hand sewing needle to attach buttons -5 stitch markers -16" circular needles in US size 5 and 7 (or in the size you need to obtain gauge, be sure to use 1 or 2 sizes smaller for neckband, but I would NoT recommend going lower than a size 5 for the neckband) -US size 7 double pointed needles, or two sets of size 7 circular needles (or whatever size you used to get gauge) Raglan Onesie or Romper
Abbreviations
K: Knit P: Purl K2 P2: knit two, purl two, or ribbing CO: Cast On BO: Bind Off KFB: Knit in front and back M1F: Make one Front: Using your left needle, pick up the top strand between the needles from front to back and knit the loop you picked up through the back. M1B: Make One Back: Using your left needle, pick up the top strand between the needles from back to front and knit the loop you picked up through the front. K2tog: Knit two together SSK: slip, slip, knit SSP: slip, slip, purl PM: Place marker SM: Slip marker Sts: stitches CC: Contrast Color MC: Main Color
For the romper and the onesie
Knitting the neckband
Using size 5 needles (or bigger if you need) with your CC Using a stretchy cast on (http://www.knittinghelp.com/video/play/long-tail-cast-on) Lo0sely C0 52 (56, 60, 64, 68, 72, 76) join in the round, and place 1st stitch marker which will mark the center of the back of the romper, you may want to make this different than the other stitch markers being placed so you don't accidentally increase on this stitch marker (make sure it isn't twisted! Also, if you are making a smaller size and can't stretch the amount of stitches around your circular needles, you can use double pointed needles, or two pair of circular needles to start with; however if you do your cast on loosely enough, you \*should be able to fit it around your 12" or 16" circs- this is important so that it will be stretchy enough to fit over baby's head. Go up a size of needles if you have to) K2 P2 for 1" for the neckband
Placing markers
Change to size 7 needles (or the size to obtain your gauge) Switch to your MC Raglan Onesie or Romper K 9 (9, 10, 10, 11, 11, 12) PM, K 9 (10, 11,12, 13, 14, 15) PM, K 17 (18, 19, 20, 21, 22, 23) PM , K 9 (10, 11, 12, 13, 14, 15) PM. Knit until you are at the 1"t stitch marker (back center). FYI 9 (10, 11, 12, 13, 14, 15) sts will be the sts for the sleeves 17 (18, 19, 20, 21, 22, 23) sts will be for the front and back of the romper
Increase rounds
Round 1:\*K to two stitches before second stitch marker, KFB, K 1 stitch, SM, K 1 stitch, KFB\* and repeat at every stitch marker (\*except the back center stitch marker) Round 2: knit Knit these two rows until you have 31 (34, 35, 38, 41, 42, 45) sts in the front and back
Separating for Sleeves
(starting at second stitch marker) Place sts [between 2nd and 3'd markers] onto waste yarn After you place first sleeve stitches onto waste yarn CO 2 stitches Continue knitting (take out stitch markers as you pass them) until you reach the next set of sleeve stitches and put them onto waste yarn. After you place second sleeve stitches onto waste yarn CO 2 stitches You should now have 66 (72, 74, 80, 86, 88, 94) total stitches, and your 1st stitch marker, back center stitch marker.
For the romper
for the onesie go to page 8 Body Knit until you have 9 (10, 11, 12, 13, 13.5, 14) inches (from C0 edge)
Insert short rows
\*\*If you don't want to add short rows then proceed to the suggested length section after the short rows. Raglan Onesie or Romper (This will give you more shape for a cloth diaper bum) You do not have to do short rows to obtain the right size and length. To place stitch markers for the sides start at back center stitch marker and K 16 (18, 19, 20, 21, 23, 24), PM, K 33 (36, 37, 40, 43, 45, 47) PM, knit to end of round. You now have 3 stitch markers, the center back, and the two that will mark the sides. Do your short rows between these two markers in your preferred method in the back of the romper. I use the back center stitch marker to count from each side to make the short rows even. Knit in the round and close up any holes you have made from the short rows. If you need a link to help with short rows, refer to the helpful links sections. After knitting short rows if your front has not reached the suggested length (below), then knit until you reach this length, or your desired length.
Suggested length
Knit until you reach this length (or the length you need for the body minus 1(1, 1, 1, 1.5, 1.5, 1.5) (for the gusset) 10.5 (12, 13, 13.5, 14.5, 15.5, 16.5) inches
Gusset Increasing
Starting at your first stitch marker (back center) , (take out side stitch markers as you pass them to use them for gusset marking) k 32(35, 36, 39, 42, 44, 46)sts, PM, K1, PM. Now knit 32(35, 36, 39, 42, 44, 46)sts, PM, K1- you should now be at your beginning stitch marker. (Make sure you have the same amount of sts between the right side markers, and the left side markers, these will be the legs)
Increasing Rounds
1. Knit to front gusset stitch markers, SM, M1F, K1\*, M1B, SM and knit until the next set of stitch markers and do the same thing to increase. \*after each increase round you will have 2 more sts between markers, so round 3 you will increase then K3, on round 5 you will,K5andsoon 2. Knit round Repeat these rounds until you have 9 ( 9, 9, 11, 11, 11, 11) sts between front and back stitch marker sets. Raglan Onesie or Romper
Separating Romper legs Front and Back
Knit to the first set of stitch markers, and put 9 (9, 9, 11, 11, 11, 11) gusset sts on scrap yarn. Knit to the next set of stitch markers, and put the other 9 ( 9, 9, 11, 11, 11, 11) gusset sts on scrap yarn.
Right Leg
Now we will be working with the right leg- working back and forth, not in the round. You can leave the other stitches on your circular needles, or you can put them on scrap yarn, or a stitch holder. (i like to leave them on the same needles and work around it) You might be worried that the leg won't be wide enough, but remember it will be about 1" more with the button band added on. If you feel that you need even more width to the legs, you can cast on stitches at each end of the leg. Knit your first leg to 1" before your desired length (you might want to write the number of rows you knit so you can remember for the next leg). You can use the same color, or a CC to do a decorative cuff for the final 1", or desired length. Switch to CC
Cuff Options
Garter stitch cuff: \*lf using a CC, knit one row with the contrast color on the right side before knitting the garter stitch side Knit all rows, BO (loosely if making shorts) Moss/seed stitch cuff: (If knitting with a CC knit one row with the contrast color before starting pattern) K1 P1 on first row P1 K1 on second row Repeat rows for 1", then BO in pattern. Ruffles Cuff (use size 8 needles) Row 1: \*K2, M1\* Row(s) 2 (4, 6): P Row(s) 3 (5): K Row 7: BO Big Ruffles cuff (use size 8 needles) Row 1: K1 M1 Row(s) 2 (4,6): P @ Claire Gentry 2011 All rights reserved Raglan Onesie or Romper Row(s) 3(5): K Row 7: BO If you do ruffles, you will need to block well! Cut yarn, weave in ends.
Left Leg
Knit left leg the exact same that you did the right leg. Cut yarn, weave in ends.
Button Bands
With your CC Once your legs are both done, pick up sts along the front of the romper (remembering to take the gusset stitches off of the scrap yarn and onto your needles); picking up 3 out of 4 sts (not all sts). You don't want to pick up too many sts or the button band will be longer than you want it. A good way to pick up sts evenly is to pin every couple of inches and pick up a consistent number of sts between those pins. That way you will know exactly how many sts to pick up for the back button band.
Helpful hint
You can measure how many inches you have along the front, from the end of the leg, up around the crotch, and down to the bottom of the other leg (where you are going to be picking up stitches), and multiply that number by your gauge. If you did a gauge of 4.5 sts per inch, and you got 12.5 inches, multiply those two numbers together (56), and that could be the amount of stitches you pick up along the band. \*l have found that subtracting around 5 stitches from this number makes the band look a little better. If you chose to do buttons: After you have picked up your sts on the front knit stockinette (or garter if you choose) for 3 rows, on row 4 do your button holes. I like to do button holes close to each end of the leg so that it doesn't gap open. We want the pant legs to look closed. I usually K3, YO, K2 tog to start with, then end with K2tog, YO, K3. I like to space my button holes around 1" to 1 %" depending on button size. So for the full length measure it out, and spread the holes across evenly. It might take a little bit of thinking and math to get them to look even. Then knit stockinette for 2 more rows, and then BO. For the back button band, pick up the same number of sts as you did for the front band, then knit stockinette stitch for 6 rows, and BO. Raglan Onesie or Romper Sew on the buttons to the back band in corresponding places to the holes. I use a handsewing needle with my yarn that I cut after binding off (I make it a little longer). I weave in the ends until I come to the place where the button belongs, sew the button on, and weave until I reach the next button spot. If you chose to do snaps, do button bands in linen or moss /seed stitch after picking up stitches for 7 rows. \*\*To finish romper sleeves go to page 10
For the Onesie
Body
Knit in the round for 8(9, 10, 10.5, 11, 11.5, 12) inches (measuring from the shoulder /COedge)
Insert short rows
\*You do not have to do short rows to obtain the right size and length. If you don't want to add short rows then proceed to the suggested length section after the short rows. (This will give you more shape for a cloth diaper bum) To place stitch markers for the sides start at center back stitch marker and K 16 (18, 19, 20, 21, 23, 24), PM, K 33 (36, 38, 40, 42, 45, 47) PM, knit to end of round. You now have 3 stitch markers, the center back, and the two that will mark the sides. Do your short rows between these two markers in your preferred method in the back of the onesie. Knit in the round and close up any holes you have made from the short rows. Knit until you have the right length to your hip 10.5 (11, 12, 12.5, 13.5, 14.5, 15.5) inches (from CO edge), if you don't have the length you need, knit in the round until you get the desired length you need for your onesie. You are now ready to knit the front and back of onesie separately \*\*If you did not do short rows and need to know where to start binding off, K16 (18, 19, 20, 21, 23, 24) and then bind off your 5 sts. Start at second stitch marker \*righthand side of onesie) and bind off 5 sts. Raglan Onesie or Romper Knit 23( 26, 27, 30, 33, 34, 37 ) \*this is including the leftover stitch that you will already have on your needles from binding off\* stitches and bind off another 5 sts.
Back Flap
You have your working yarn in the back, and will be decreasing the back of the onesie. You should have 33(36, 37, 40, 43, 44, 47) stitches in the back. You will be knitting stockinette stitch. You can remove your back center stitch marker now. Row 1. Knit until you have 3 stitches on the left hand needle and K2tog then K1. Row 2. P until you have 3 stitches left, then SSP, P1. Repeat these two rows until you have 17(17, 21, 21, 25, 25, 25) stitches left. \*(If this onesie is meant to fit over a cloth diaper, I recommend the newborn and 0-3 month size do a wider crotch, and knit until you have 21 sts instead of the 17. If you are not using a cloth diaper, the bigger sizes might want to change the number down to 21 sts as well.) Make sure the back flap is measuring the total length that you need, 11.5 (13, 14, 15, 16, 17, 18) inches. Switch to CC on right side, and knit one row
Button band
Knit the button band, (with a contrast color if you want) garter stitch (or linen, moss/seed stitch if you are using snaps) for 7 rows, then BO all sts. Cut yarn and weave ends in.
Front Flap
Now you will be working with the front stitches; knit the two rows as mentioned above: Row 1. Knit 1 stitch, then SSK. Knit until you have 3 stitches on the left hand needle and K2 together then K1. Row 2. Purl all sts. Repeat these two rows until you have 17(17, 21, 21, 25, 25, 25) stitches left. \*(If you made the crotch wider or narrower, then decrease to that same number) Now knit in stockinette stitch until you have the length of the leg hole opening that you need, or you can use the suggested sizes as follows(in inches): 8(9, 10, 10.5, 11, 11.5, 12)
Button Band and Button Holes
Raglan Onesie or Romper Using CC on right side, knit one row, then K garter stitch for 3 rows, on the 4th row knit asfollows: K2(2, 3, 3, 3, 3, 3) stitches K2tog, YO, K4(4, 5, 5, 7, 7, 7) YO, K2tog, K 3(3, 4, 4, 6, 6, 6) YO, K2tog, K2(2, 3, 3, 3, 3, 3) After this row, knit 3 more rows, then BO all sts. If you chose to do snaps, do button band in linen or moss /seed stitch without holes.
Sleeves for Romper and Onesie
Put sleeve sts on double pointed needles, or two circular needles to work in the round, pick up sts along the CO edge, however many you want to make it look even, I would pick up at least 4 (4, 4, 5, 4, 5, 5) sts (I usually pick up as many as I can. Remember to write the number down for the other sleeve). Short sleeves: Knit with the main color for a couple rows, then knit a 1" cuff in a CC. Long sleeves: Knit for least 4.5 (5, 5, 5.5, 6, 7, 7) inches with the main color. Cuff options for short and long sleeves Switch to CC For 2X2 ribbing cuff you will need a stitch count that is a dividend of 4, if you do not have that number, decrease to the desired number the round before you start the cuff then knit your ribbing cuff for 1" or desired length. \*For ribbing always knit a round in the CC before starting the K2P2 Moss/seed stitch cuff: Knit 1 round with CC then begin your moss/seed stitch by: K1 P1 on first row P1 K1 on second row Repeat rows for 1", then BO in pattern.
Finishing
Now that you are finished with the knitting of the romper or onesie you can sew your buttons on the bottom flap (or place your snaps). Make sure you are putting them on the right side of the bottom flap. For the buttons I use a little sewing needle with a head that I can squeeze the yarn into, and I use one of the ends of the yarn that I have cut off Raglan Onesie or Romper from knitting that button band. I weave it in a little until I get to the place to place each button. For snaps you might want to reinforce each band area by sewing on some wool felt.
Helpful Links
Here are several different ways to do your short rows, it is a personal choice and takes some time to find which works best for you! shortrows short rows from adorabubble, also there are tutorials for M1B, M1F, and SSP on this site If you run into any problems or have questions, please feel free to contact me via e-mail ciaobellababy@gmail.com or on ravelry (ciaobellababy) or HC http://hyenacart.com/ciaobellababy/ Items may be made for charity events If you run into any problems or have questions, please feel free to contact me via e-mail michaelandclaire@gmail.com or on ravelry (ciaobellababy). ① Claire Gentry 2011 All rights reserved. This pattern is for the use of the original owner. This pattern may not be sold, reproduced or adapted in any way, without the permission of Claire Gentry. If you would like to sell items for profit from this pattern, please contact me for license agreement information at michaelandclaire@gmail.com.


