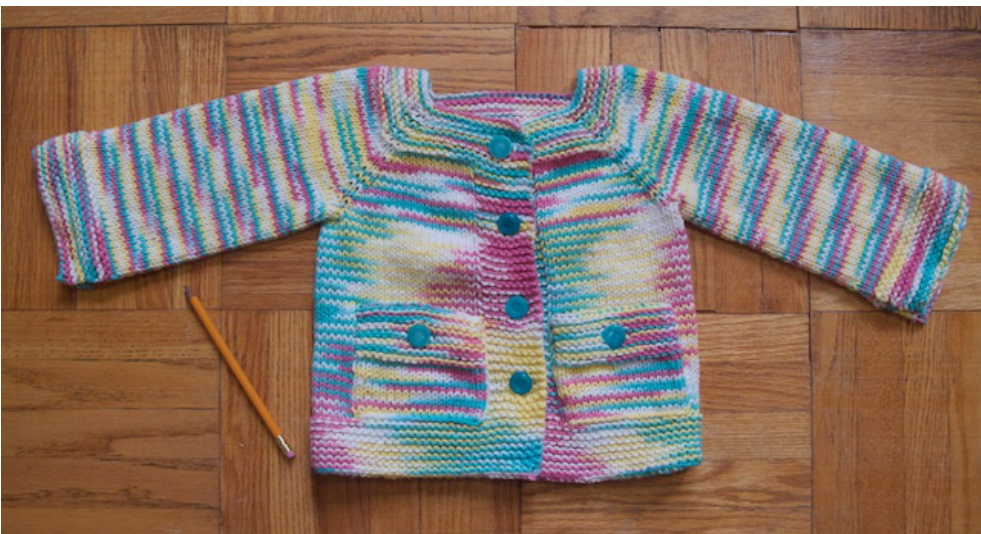
Subway Academy II IDC3O Basic Pattern Raglan Baby Cardigan (Top-Down)
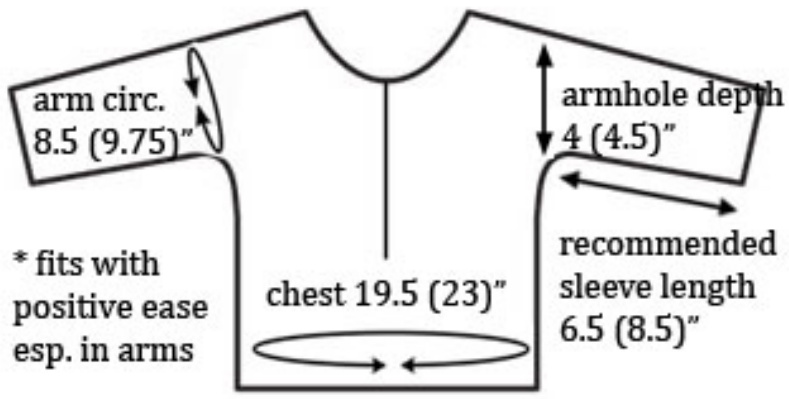
NOTE TO NON-STUDENTS: this simple pattern was designed for students in a high school knitting course. It is vague about gauge and sizing, but is a useful exercise for beginner knitters who are comfortable with basic techniques. DESCRIPTION: The construction of this knit follows a basic formula that can be used for many different baby and childsized cardigans, with opportunities for adjusting vertical sizing as well as for working in a dash of texture or colour. Call it a vanilla pattern for a topdown cardigan, with room for your choice of sprinkles or chocolate sauce. Once you have worked through it, you may also be able to see how to adjust the numbers used throughout the pattern in order to control width and proportion. Then you won't ever need a pattern to knit a baby cardie that you like! SIZE / FINISHED MEASUREMENTs: Will vary. If default yarn, needles and gauge are used, then the given S (M) size is likely to fit the average 6-month-old (2-year-old). CHEST CIRcUMFERENCE: 19.5 (23)". See notes in individual projects on ravelry for ideas about what other combinations resulted in what sizes. RECOMMENDED YARN: Your choice. As a default, use any worsted or aran weight cotton yarn. Switch to thinner (or thicker) yarns as desired to achieve smaller (or larger) sizes. RECOMMENDED NEEDLEs: 24" or longer circular needles, in whatever size is recommended on the ball band for your chosen yarn. As a default, use 5 mm (US 8) needles. Switch to thinner (or thicker) needles to achieve smaller (or larger) garment sizes. OTHERMATERIALSNEEDED: 4 dpns in same size (or long circular for magic loop method) 4 stitch markers stitch holders or waste yarn tapestry needle buttons (optional) GAUGE: Will vary. As a default, aim for 18 sts = 24 rows = 4" (10cm) in stockinette. (If aiming for a specific garment size, work a gauge swatch. Use its gauge and pattern CO instructions to extrapolate dimensions of garment worked at that gauge.)
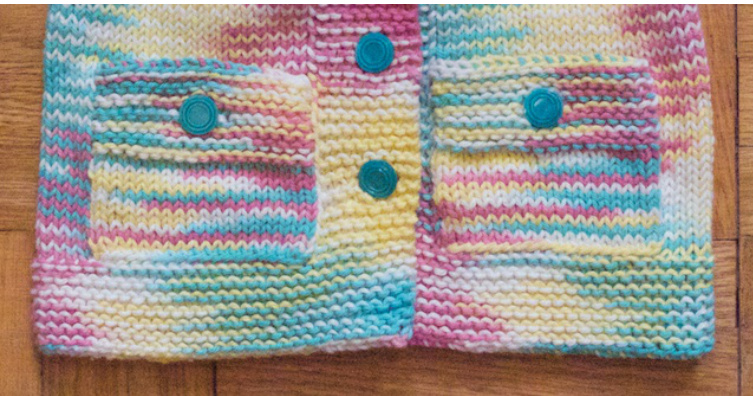
It is up to you whether you add buttonholes to one of the front edges of this cardigan, and if so, where. Since the cardigan is worked topdown, it is easy to place the highest button where you want it and then space out remaining buttons after that. However, there is no rule that says buttons must be perfectly placed! To add a large buttonhole in any given row, first choose whether you want it at the edge of the left front or the right front. Whichever edge you choose, the idea is to change how you work the 8 sts of garter stitch in that edge by doing the following: row1: replace targeted 8 sts of garter st with k2, B0 4, k2 (work rem sts in patt). row2: replace targeted 8 sts of garter st with k2, C0 4, k2 (work rem sts in patt). To add a small buttonhole instead of a large one in the left front, work as follows: row 1: replace 8 garter sts with k2, k2tog, yo, yo, ssk, k2 (work rem sts in patt). row 2: replace targeted 8 sts of garter with k3, p1, k4 (work rem sts in patt). You can also have fun with colour striping in this pattern, both in the body and in the sleeves. If you are switching colours frequently, keep the unused colours running up one edge of the body and the insides of the sleeves to avoid weaving in lots of ends. More experienced knitters may also like to try slip-stitch or mosaic knitting with different colours for more complex geometric effects. Such knitters will also notice the potential for displaying stranded or intarsia motifs within the large expanses of stockinette. Another way to change up the pattern is via texture. By default, this pattern is worked in stockinette stitch with garter stitch edges. However, you can experiment with the proportions of these areas. Experienced knitters will also realize opportunities for throwing in ribbing, moss stitch, cables, and more. One final embellishment that even beginning knitters can apply is an afterthought pocket. Using the same needles and yarn, simply knit a rectangular swatch to the desired pocket size. It's best to work the top rows of the pocket in garter stitch, which will not curl. Sew the other three edges securely to the cardigan where desired, and a pocket is born.
A note to students: The italicized portions of this pattern indicate helpful notes that are not usually included in knitting patterns, which tend to assume that you have enough experience.
INSTRUCTIONS:
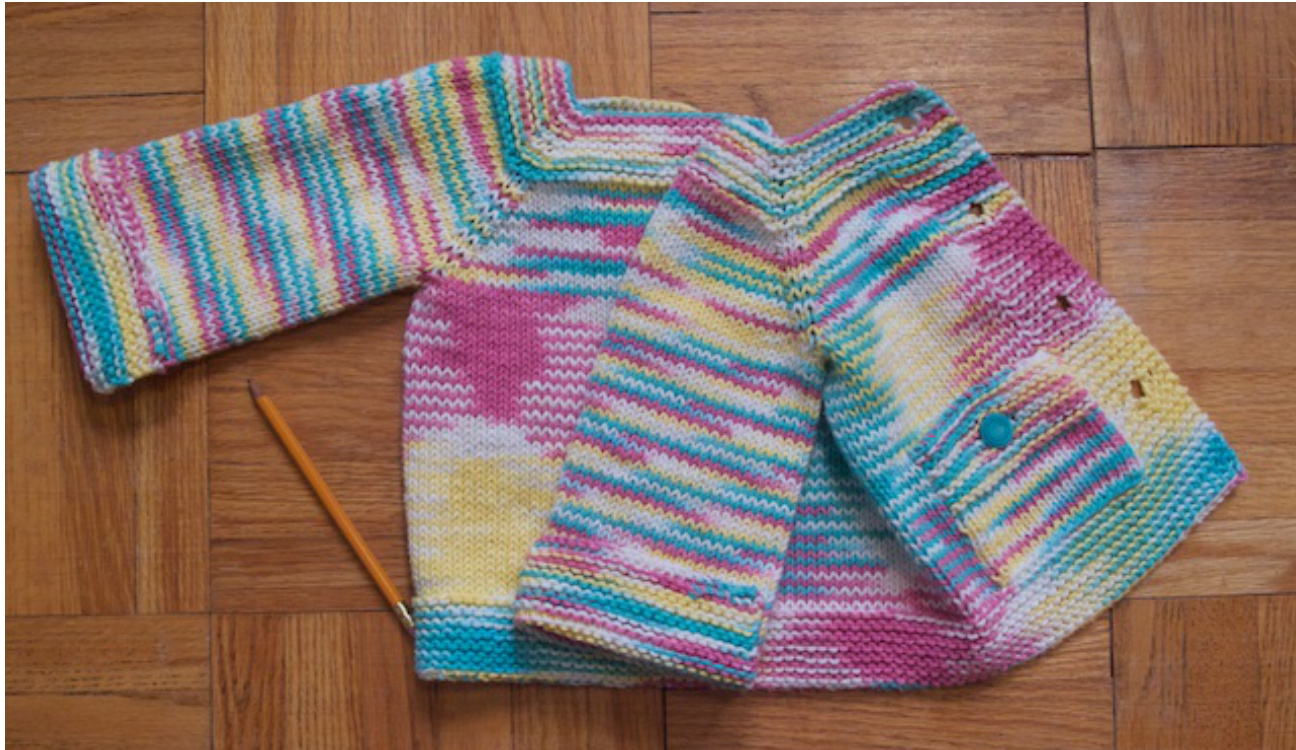
This cardigan is constructed by knitting the yoke in one piece from the neckline around the shoulders to the level of the armpits. The sts are then divided into sections that arranged in rounds to form the sleeves, with the remainder connected into one continuous row for the lower body, which is worked flat. Consequently, you may work the sleeves and lower body in any order, or even simultaneously. YOKE: CO 60 (72) sts using any method onto circular needle. Work flat in garter st for 3 rows. (This will start the garter st neckline.) AT THE SAME TIME,Workfirstbuttonhole where desired. (Next row would work.) Work next row (wS) as follows to set up for yoke increases: k12 (14), pm, k10 (12), pm, k16 (20), pm, k10 (12), pm, k12 (14). Increase yoke as follows: row 1 (RS): \* k to 3 sts before st marker, kfb, k1, sl m, kfb, repeat from \* 3 more times, work as set to end. (8 sts increased. You'll notice an increase before and after each st marker.) row 2 (WS): k all. Repeat above 2 rows 4 more times. (10 rows of garter st worked overall.) You should now have 100 (112) sts total, divided into sections of 17, 20, 26, 20, 17 (19, 22, 30, 22, 19) sts. Continue yoke increases in stockinette st as follows: row 1 (RS): work same increase row as above. (8 sts increased.) row 2 (WS): k8, p to last 8 sts, k8 Repeat above 2 rows 8 (10) more times. You should now have 172 (200) sts total, divided into sections of 26, 38, 44, 38, 26 (30, 44, 52, 44, 30) sts. AT THE SAME TIME, work buttonholes where desired. To divide sts into sections for sleeves and lower body, work as follows on next RS row (removing all current st markers): 1) k26 (30) (for left front of body); 2) transfer next 38 (44) sts to st holder or waste yarn (will form left sleeve); 3) using same needles and working yarn, k next 44 (52) sts (for back of body); 4) repeat step 2 (will form right sleeve); 5) repeat step 1 (for right front).
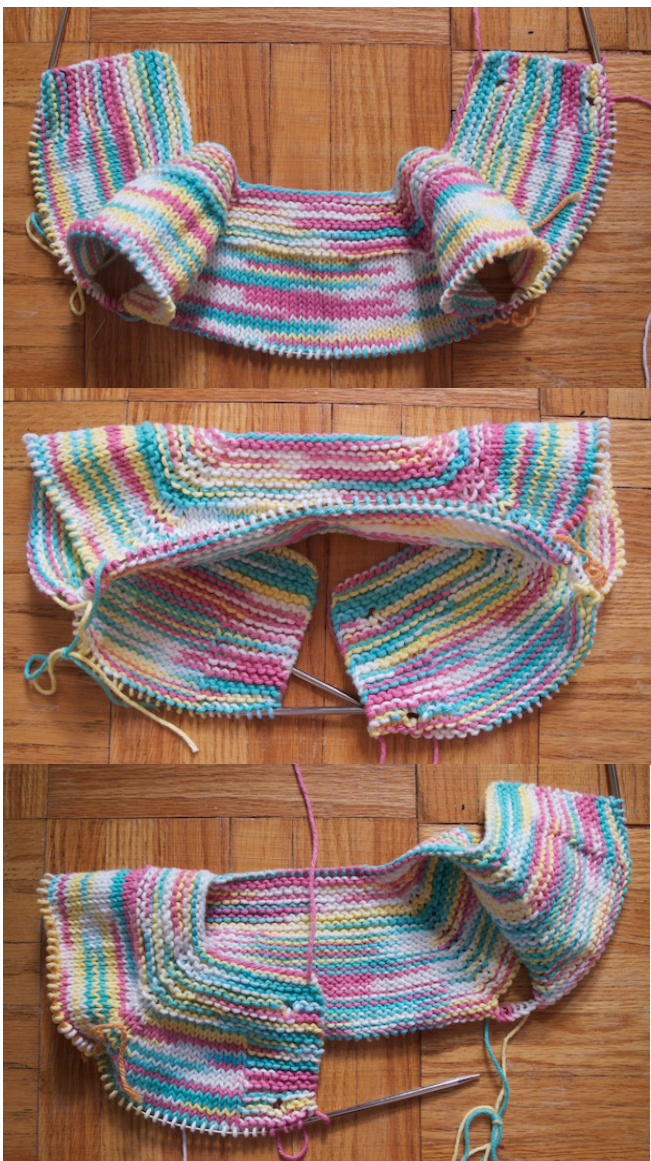
LOWER BODY:
Continue working flat across 96 (112) sts on circular needles as follows: row 1 (RS): k all. row 2 (WS): k8, p to last 8 sts, k8. Repeat above two rows until work is \~1.5" short of desired length from underarm hem to bottom edge, ending after completing a WS row. AT THE SAME TIME, add buttonholes where desired (see pattern notes). Work flat in garter st for 14 rows. B0 all. (This creates the bottom hem.) SLEEVES: (REPEAT FOR BOTH) Transfer 38 (44) sts from waste yarn, arranging evenly on 3 dpns in order to work in the round (or on circular needles if using magic loop method). Using fresh yarn (and leaving longish tail) work in stockinette st in the round until sleeve is \~1.5" short of desired length. (Total recommended sleeve length is at least 6.5 (8.5)".) Once desired length is reached, work to beg of round (identifiable by the tail of the newly joined yarn). Work flat in garter st for 14 rows. B0 all (This will create the sleeve cuff.)
FINISHING:
Once lower body and both sleeves are done, use yarn tails to sew across and cinch together any gaps in underarms. Sew on buttons where desired. (Be sure to sew on buttons securely, so that the recipient cannot pull them off and swallowthem!) Weave in all ends. Your cardigan is done!
last updated - Nov 2010 ABOUT THE DESIGNER: Subway2 represents a gaggle of knitting students and teachers from a small alternative school in Toronto, Canada. In this case, a knitting teacher specially created these designs for use in the school's knitting course.


