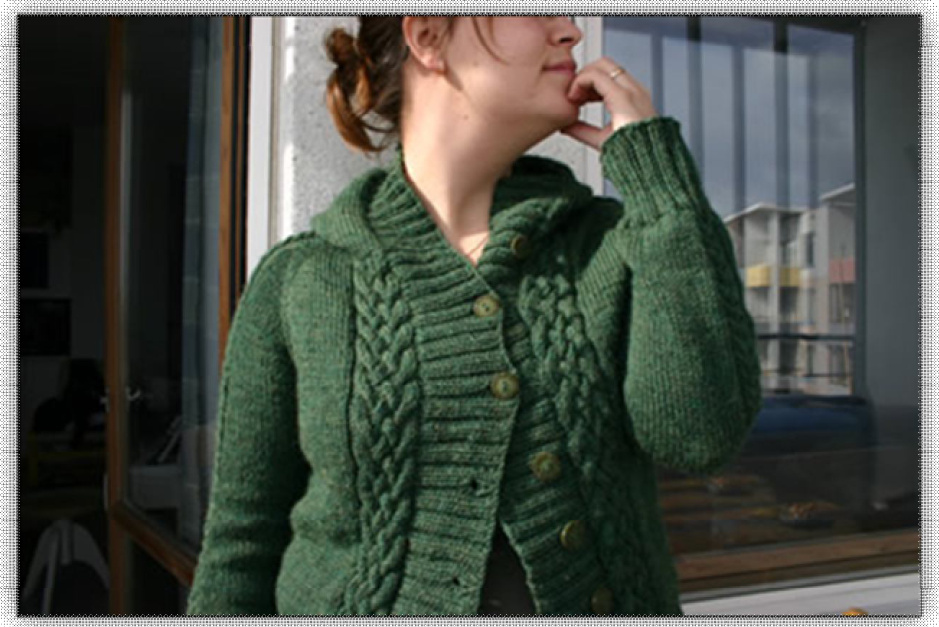
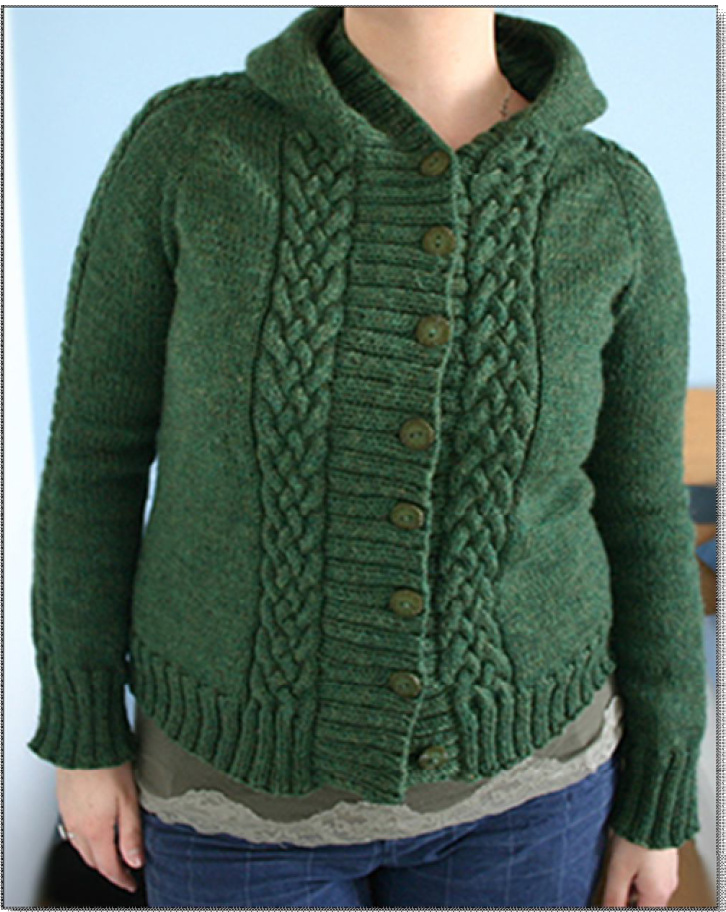
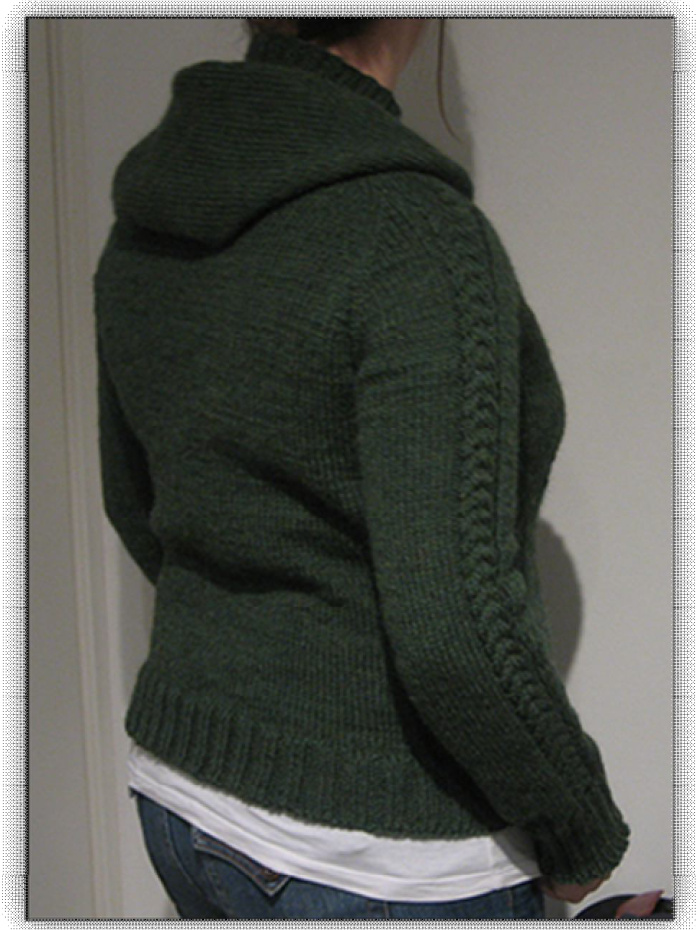
Jade by Mira Ranki
I have always loved different kind of sweaters and pullovers with cables. I stil hadn't find a perfect one with raglanseams, so this is what I came up with - Jade.
YARN:
11-12 skeins of Knitpicks Wool of Andes (50 $9=101~\mathsf{m}$ / 110 yards; $100\;\%$ Peruvian highland wool) Or any other yarn that you wil get gauge with.
GAUGE
20 stiches and 25 rows $=$ 10 cm / 4 inches NEEDLES US 4 / 4,00 mm circulars 8 buttons also needed
SIZE
The finished sweater is about size M (39") You can alter the size by making more/less of raglan increases before taking the sleeves on left-over yarn.
DIRECTIONS
Cast on 112 stiches. 1.row: k2,p15, k2, p5, pm, p1, k2, p8, k2, p1, pm, p36, pm, p1, k2, p8, k2,p1, pm, p5, k2, p15, $\mathsf{k}2=$ total 112 stiches. 2. row: Begin with the cable chart A. Knit until there is 1 stich before the marker. M1, k1, slm, k1, M1. Knit cable chart B. Repeat the increases when you come to the next marker. Knit until the next marker (third marker on the row, this is also the back piece of the cardigan) and repeat the increases. Knit chart B and repeat the increases again. Knit until there is 19 stiches left on the left needle and knit chart C. Continue knitting the charts in sleeves and both fronts. Make the increases every other row the way you did them on the row 2. Purl on the wrong side expect during cables (these parts you knit like the charts tell you to knit). Continue the increases and cables until there are 90 stitches in the back piece (between the two middle markers). On the next RS wor knit the front, pick up the sleeve stitches on a left-over yarn, CO 4 stitches, knit the back, pick up the sleeve stitches on an another left-over yarn, CO 4, knit the front. PM in the middle of these 4 stiches which you casted on. These indicates the side seams.
Continue the fronts with cable charts A ja C and the rest of the body in stockinette stitch for 10 cm / 4 inches. Decrease on the next RS row on the both side of the markes one stitch. Repeat the decrease every sixth row two times. Continue without decreases for 10 cm / 4 inches. Increase after this on the both side of the markers one stitch every sixth row two times. When the work measures 5 cm / 2 inches less than you wish for (mine was about 35 cm / 13,7 inches), begin k2,p2-ribbing. Continue ribbing for 5 cm / 2 inches. Cast off loosely.
SLEEVES
Pick up the sleeve stitches from the left over yarn. CO 4 stitches to the armhole. PM between these 4 stitches. This is your sleeve seam. Continue knitting chart B where it was established. Decrease 1 stitch on the both side of the marker 4 times. When the sleeve is long enough (somewhere between your wrist and elbow), begin the k2,p2-ribbing. Continue the ribbing for 13 cm / 5 inches. Cast off loosely. Repeat this to the other sleeve.
HOOD
Pick up 92 stitches from the neckline for the hood. The first row is knitted on the wrong side: k1, p90, k1. Turn the work. p1, k90, p1. Continue like this until the hood is 27 cm / 10,5 inches long. Devide the stitches in two and use three-needle bindoff.
BUTTON BAND
Pick up 360 stitches from the fronts and from the hood. Knit k2,p2-ribbing for 4 cm / 1,6 inches. Make eight (8) button holes on the left side equally. Knit the ribbing for 2 cm / 0,8 inches and cast off.
FINISHING
Weave in the ends. Sew the armhole seams together by kitchener stitch. Attach the buttons. Block the piece.
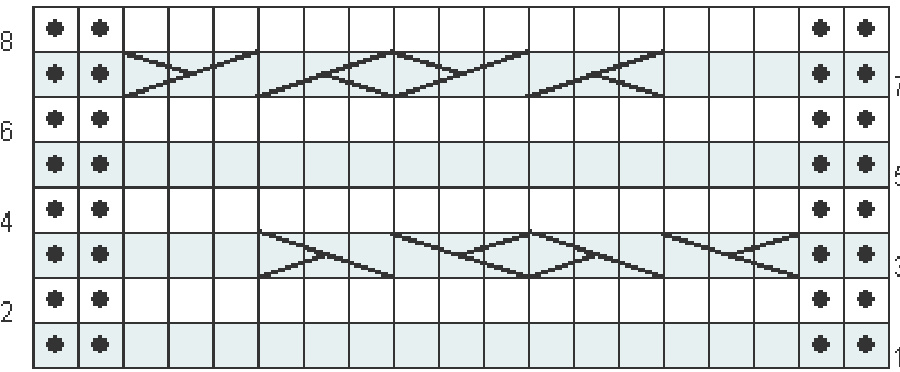
CHARTS
Cable A
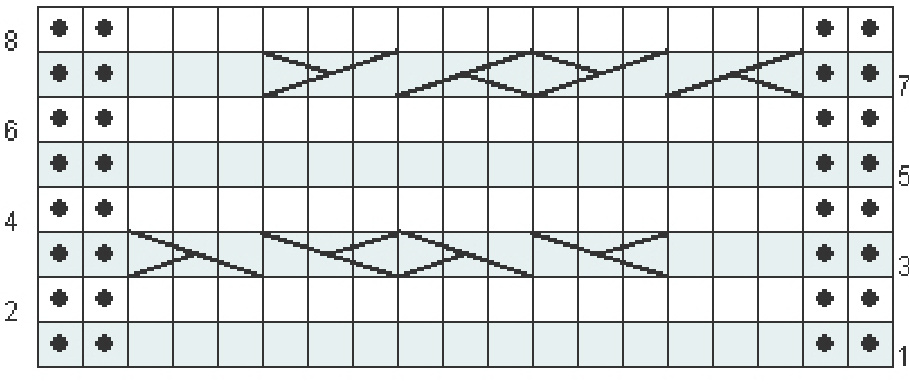


nurja sllmu ka

oikea silmukka
C3B: slip 3 stitches onto cable needle and hold in back of the work, knit the next 3 stiches, then knit the 3 stitches from your cableneedle C4F: slip 3 stitches onto cable needle and hold in front of the work, knit the next 3 stiches, then knit the 3 stitches from your cableneedle
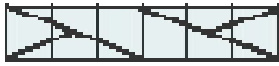
Chart B

C2B: slip 2 stitches onto cable needle and hold in back of the work, knit the next 2 stitches, then knit the 2 stitches from your cableneedle

C2F: slip 2 stitches onto cable needle and hold in the front of the work, knit the nect 2 stitches, then knit the 2 stitches from your cable needle
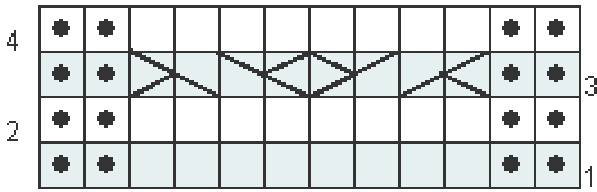
Chart C
$\circledcirc$ Mira Ranki, http://mipen.blogspot.com V 1.0 Originally published in Finnish in Ulla 2/08http://www.ullaneule.net/0208/ohjeetjade.html. The pattern is available for personal use only.