
STRAIGHT UP SOCKSBY KELIE OREB
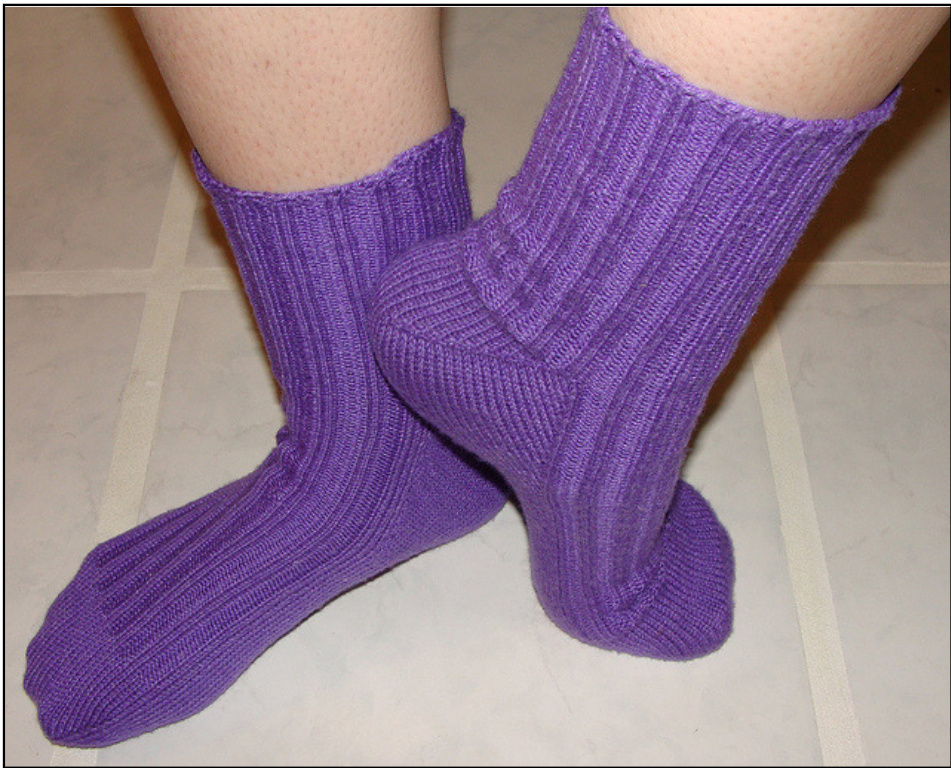
Get your diploma in sock knitting with this pattern specifically designed for a beginning Sock-aholic. This simple toe-up sock allows the knitter to tailor the width and length to the wearer's foot size for a perfect no-fuss fit. Stepby-step tutorials are included to help you with the techniques used, and video support is available for this project, tool Thie nattern ie written for the Two Circuular Nleadle mathad co arah a nair and aet knittinal YARN: Knitters Brewing Co: SOCk-aholicTM or Sock-aholicTM weet Fingering Weight Yarn, One skein SIZING: Sock width and length is established by the knitter. NEEDLES: Two 24" Circular Needles in US Size 0, 1, or 2 as needed to achieve the correct gauge. HORIZONTAL GAUGE: 32 sts = 4" in Stockinette Stitch (8 sts per inch) ADDITIONAL SUPPLIES NEEDED: Stitch marker, blunt-tipped tapestry needle Straight Up Socks shown in sock-aholicTM &weet color Sweet Violet
k knit k2tog knit two together (a right-leaning decrease). Insert RH needle into the front of the next 2 sts from left to right, and knit the two sts together as one stitch. LH left-hand LLI left lifted increase. Knit 1. With LH needle pick up the left side loop of the st below the st just worked from the back, and then knit that loop through the back. p purl and purl the two sts together as one stitch. RH right-hand RLI right lited increase. Knit into the right leg of the st below the next st on the LH needle, and then knit the next st. sl slip stitch from LH to RH needle (purlwise unless noted differently) ssk slip slip knit (a left-leaning decrease). Slip one stitch as if to knit it (but don't). Slip the next st in the same way. Insert LH needle into the front of these two sts from left to right, and knit the two sts together as one. ssp slip slip purl. Slip one stitch as if to knit it (but don't). Slip the next st in the same way. Return the two sts to the LH needle in their new orientation. Insert RH needle into the back of these two sts from left to right, and purl the two sts together as one. st(s) stitch(es) WYIF with yarn in front STITCH PATTERN: 2x2Rib \*K2, p2, repeat from \* for specified amount of stitches.
INSTRUCTIONS:
NOTE: Knitting directions are highlighted in blue. Techinique descriptions are in black text. Cast on 12 sts to each needle (24 total sts) using Judy's Magic Cast On and knit Round 1 of the toe.
Technique Tutorial for Judy's Magic Cast On
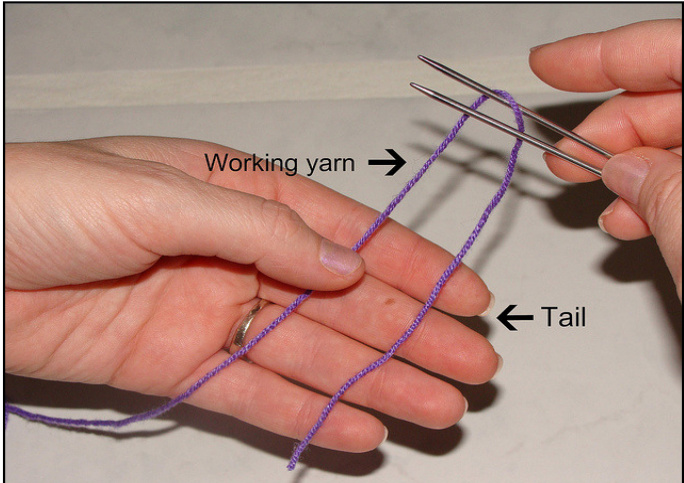
Step One: Hold the two needles together with the tips pointing to the left. Bring a long tail of yarn up and over the top needle and allow it to hang behind the bottom needle.
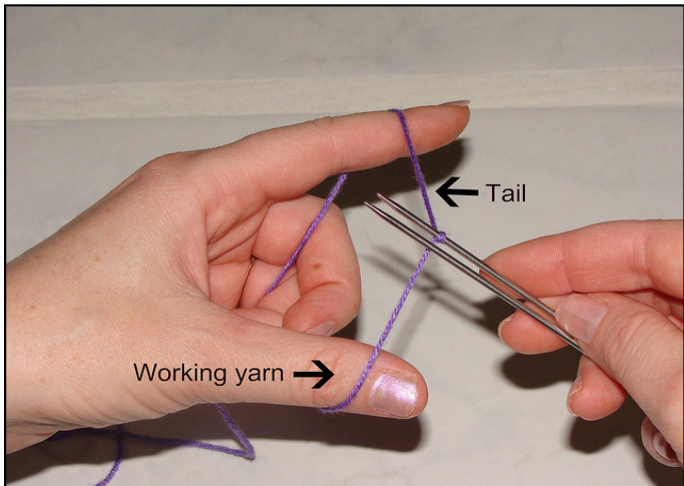
Step Two: Beginning Position. Move the tail to the back, keeping it to the right side of the working yarn. Wrap the tail over your index finger and the working yarn over your thumb. Hold the ends against your palm with your other fingers to maintain tension.
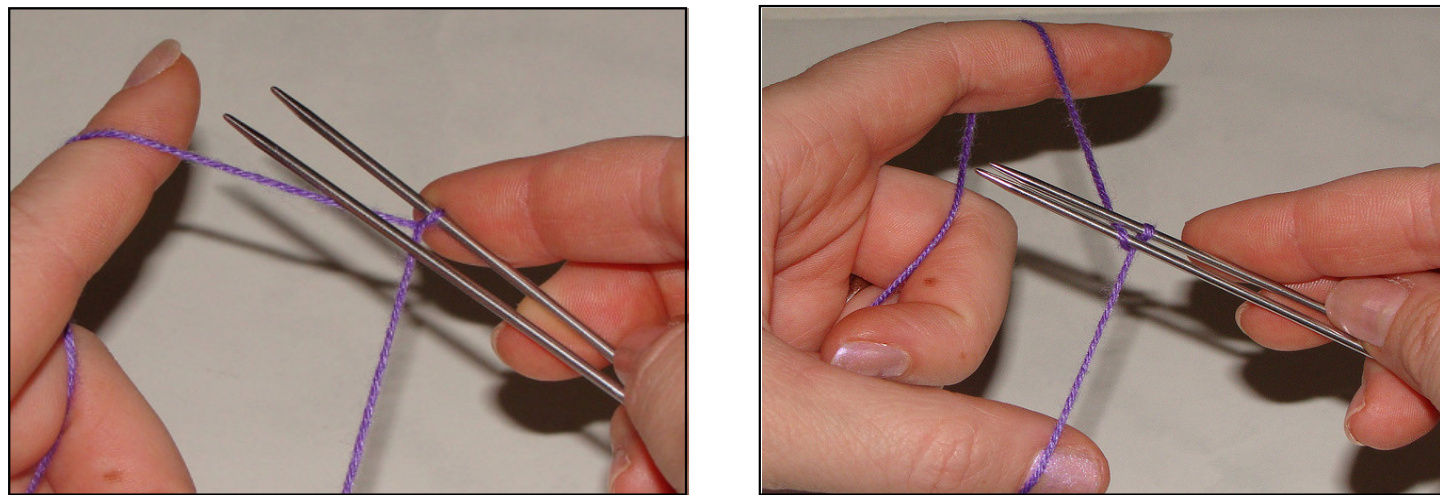
Step Three: Wrap the tail around the bottom needle by going under then over the bottom needle. Return tail and working yarn to beginning position.
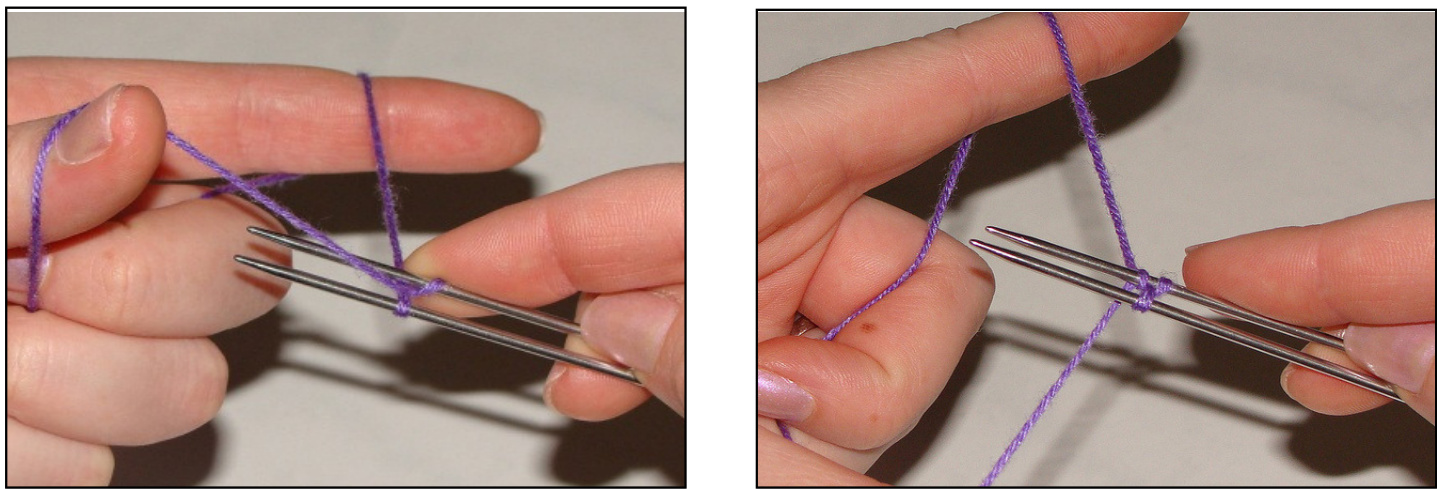
Step Four: Wrap the working yarn around the top needle by bringing it up between the needles and then over the top needle. Return tail and working yarn to beginning position.

Repeat Steps Three and Four until 12 sts are on eachneedle.
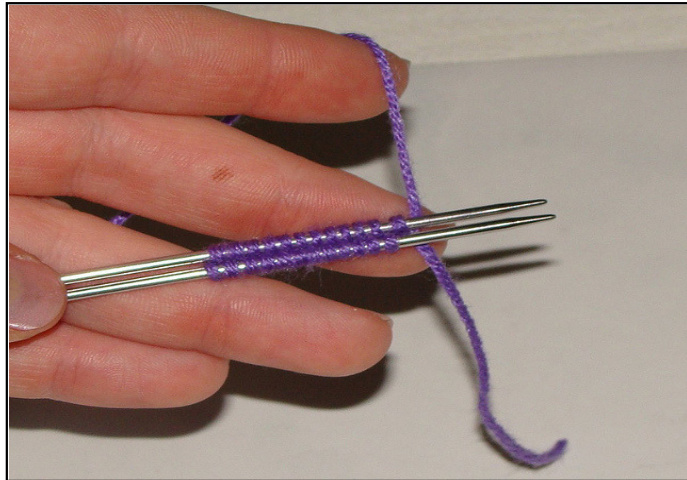
Step Five: Rotate the needles clockwise so that the tips are pointing to the right. Pick up the working yarn, making sure that it comes up in front of the tail. This ensuresthat thelaststitchwon'tfallofftheneedle.
Step Six: Now prepare to knit the first row by sliding the bottom needle to the right so that the stitches are on the cable.
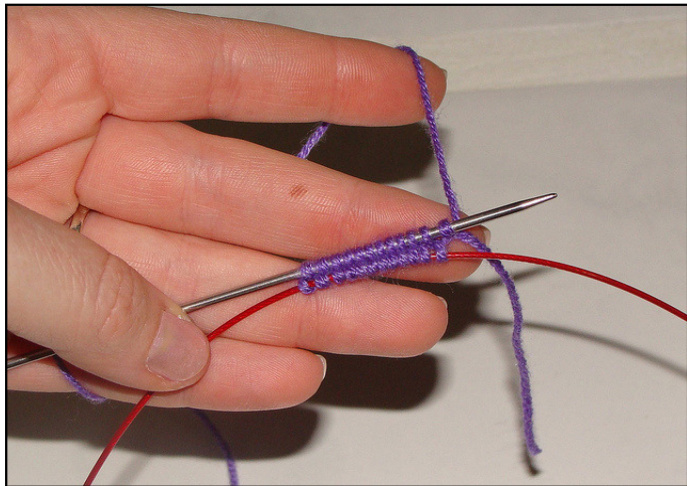
Step Seven: Using the free end of the top circular needle, knit the 12 sts on the top needle. When you reach the end, rotate the needles clockwise,with the right side still facing. Pull the bottom needle (holding the sts you just knit) to the right so that the sts are on the cable. Pull the top needle to the left so that the sts are near the tip. Use the free end of the top needle to knit the 12 sts on the top needle. Now you've knit the first round. Notice how the yarn tail shows you where the end of the round is.
Toe Increases:
You wil now work increase rows to gradually widen your sock to the width needed to fit around your foot. It is important not to increase the toe too much, as this will cause the foot to be too loose. A properly fitting sock has a snug fit, and must be stretched slightly when slipped onto the foot. This is called "negative ease", meaning that the garment is slightly smaller than the actual body measurements. Increases sts are worked this way:
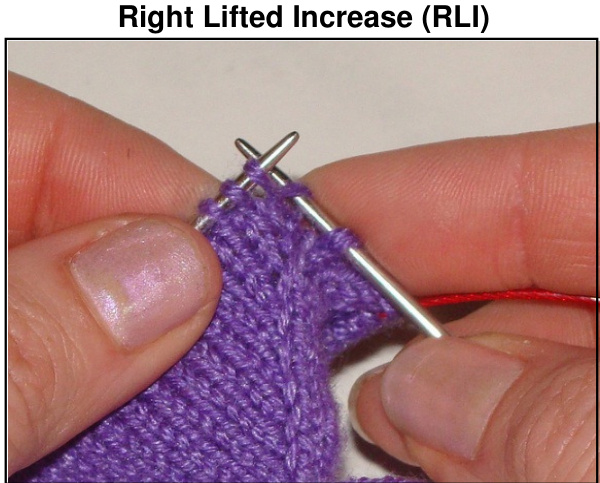
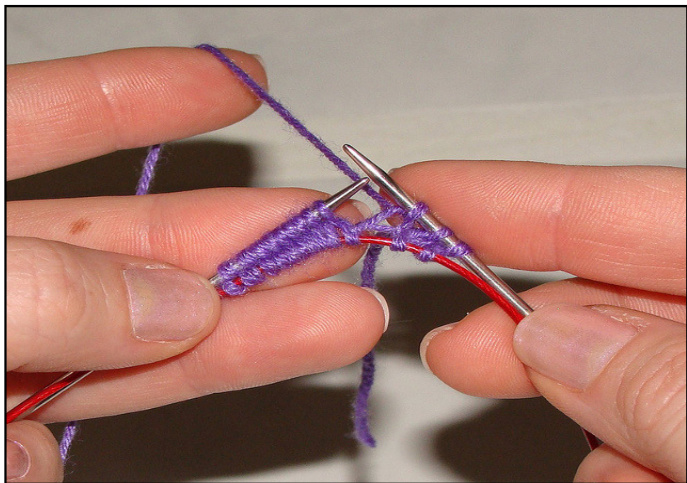
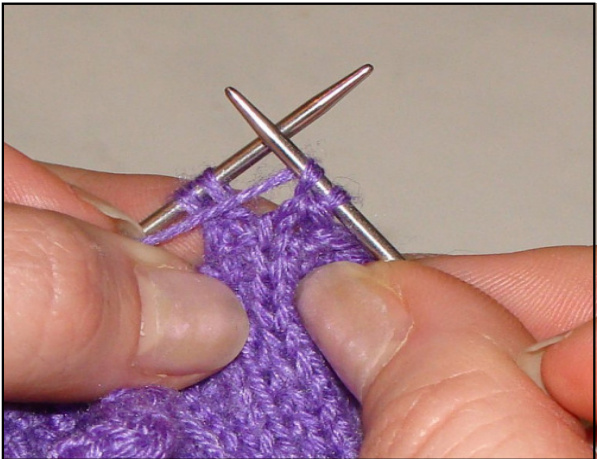
Insert needle into the right leg of the stitch below the next stitch. In the photo you can see how to grab the stitch with your needle. Place that loop on the LH needle, and knit into it. Knit the next stitch.
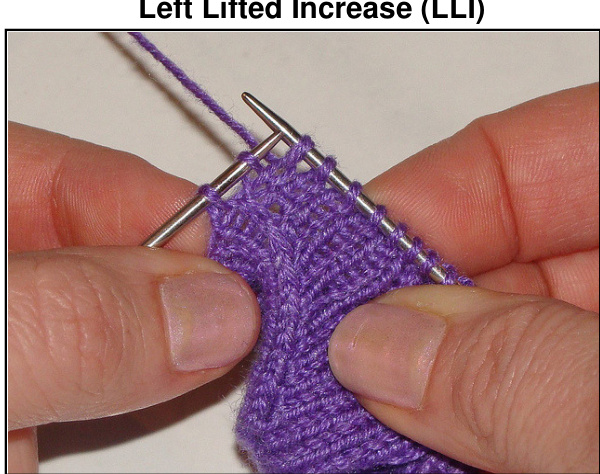
Knit 1. With LH needle pick up the left side loop of the st below the st just worked from the back, and then knit that loop through the back. Round 1: \*K1, RLl, k to within two sts of the end of the row, LLl, k1. Repeat from \* for second needle. Round 2: K all stitches on both needles (no increases). Repeat these two rounds, (which increases 4 stitches every other round), until sock fits snugly over toes (as pictured on the right). Count the sts on ONE of your needles. If that number is divisible by 4, then you are finished with your toes increases. If you need to add 2 more sts to in order for the number to be divisible by 4, then work Round 1 one more time
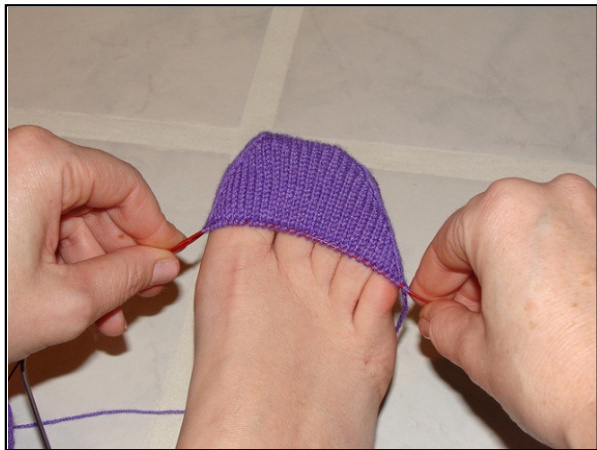
Repeat Round 2 until toe reaches the base of toes (as pictured on the right)
You have now completed the toe of the sock. This is a good time to check the fit. If the toe fits snugly you can move on to the foot. If you find it is too tight or too loose, undo the sock to the increases and either work more increase rounds to widen, or take out some of the existing increase rounds to make the sock more narrow.
Foot:
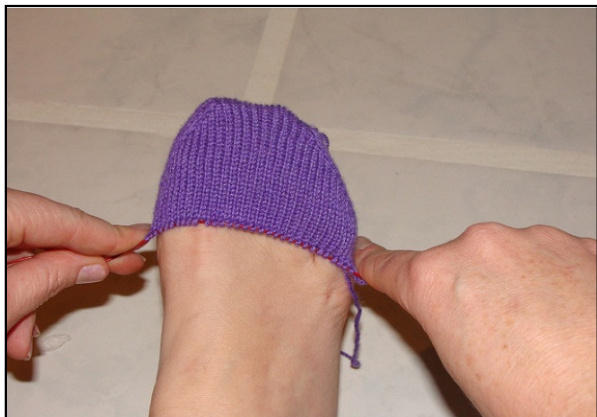
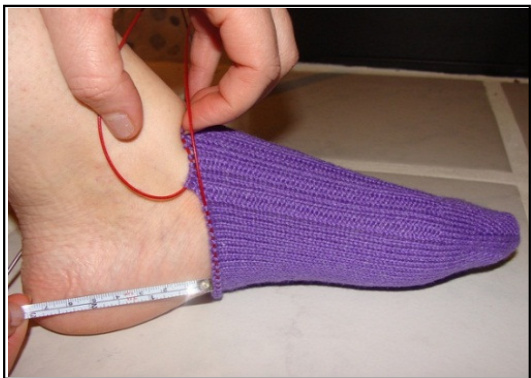
We will be using the 2x2 Rib Pattern for the top of the foot and the leg. Ribbing on a sock is very stretchy, and improves sock fit by ensuring it is not too loose. The sole of the sock is worked in Stockinette Stitch Pattern so that it is smooth. Needle 1 (the first half of your round) will now hold the sts for the top of your sock (known as the instep), and Needle 2 will hold the sole sts. Work each foot row as follows: Needle 1: Work in 2x2 Rib Pattern. Needle 2: K all sts. Continue until your sock is 3" shorter than your foot as shown in the photo on the right.
Heel Gusset Increases:
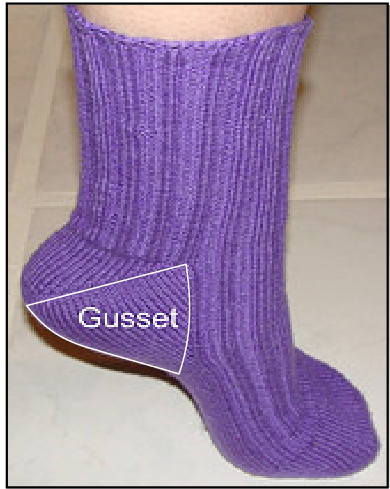
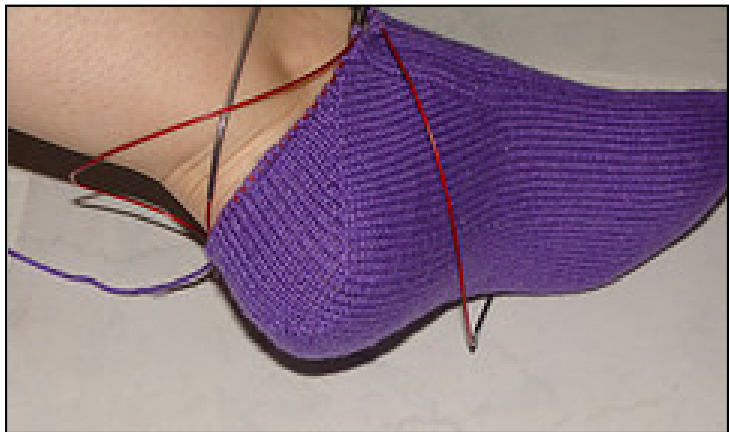
You will now work increases on Needle 2 (the sole sts) to accommodate how the foot widens as you knit toward the heel. These are called the Gusset Increases. The photo on the right shows the section of the sock which is shaped by gusset increases.
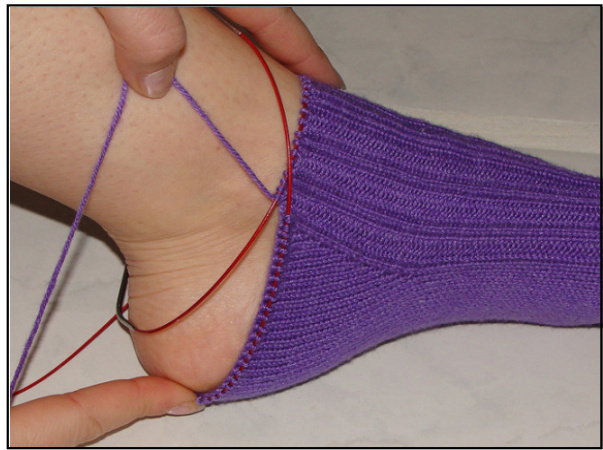
Round 1: Needle 1: Work in 2x2 Rib Pattern. Needle 2: K1, RLl, k to within two sts of the end of the row, LLl, k1. Rounds 2 and 3: Needle 1: Work in 2x2 Rib Pattern. Needle 2: K to end. Repeat these three rounds until the sock reaches the tip of your heel as shown in the photo. It is important not to knit past the curve of your heel because socks fit best when there is a little negative ease. Count the number of sts on Needle 2. If the number is not divisible by 4, work Round 1 an additional time before continuing. Work the Needle 1 sts in 2x2 Rib Pattern one more time, then stop without working the Needle 2 sts.
Heel Turn:
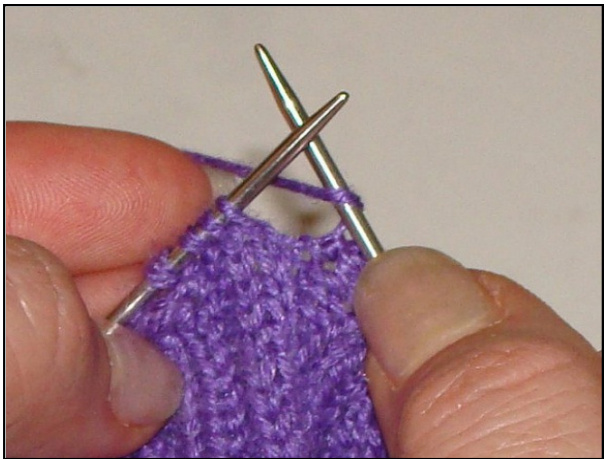
The heel turn section is worked back and forth on the Needle 2 (sole) sts only. Place a stitch marker to indicate the center of the sole sts onNeedle2. Row 1: K across the Needle 2 sts until you have gone 2 sts past the marker, k2tog, k1. Turn your work. Row 2: Sl1, p until you have gone 2 sts past the marker, ssp, p1. Turn. You may remove your marker now. Row 3: Sl1, knit to one st before the gap, k2tog (which knits the stitches before and after the gap together), k1. Turn. Seephotobelow. Row 4: Slip 1, purl to one st before the gap, ssp (which purls the stitches before and after the gap together), p1. Turn. See photo below. Repeat Rows 3 and 4 until there is one unworked st next to the gap at each end of Needle 2. Your last row will be a purl row.
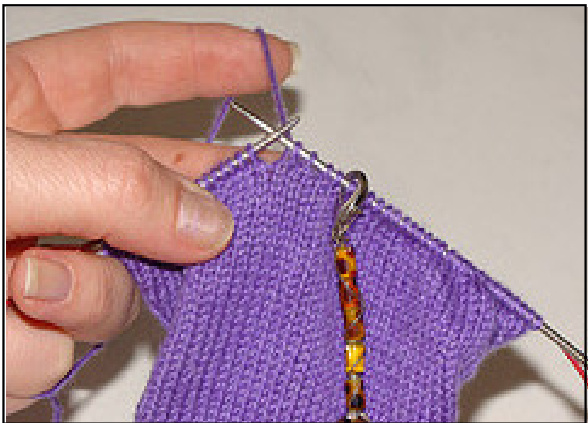

Row 3 Gap
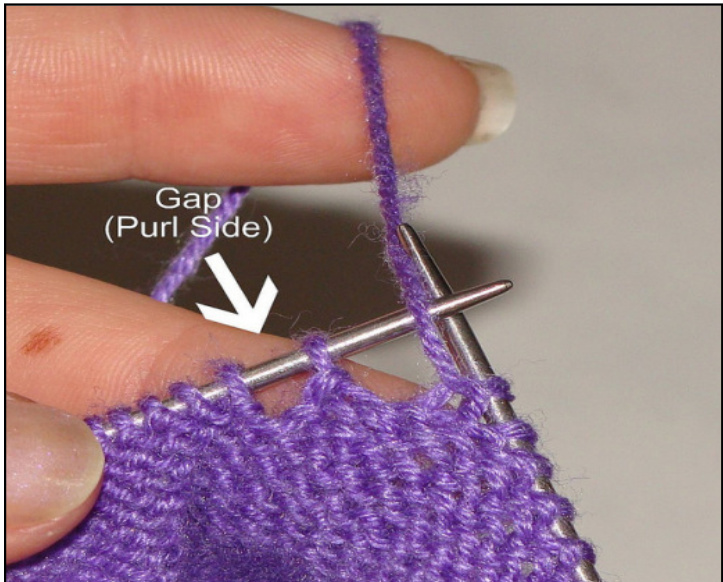
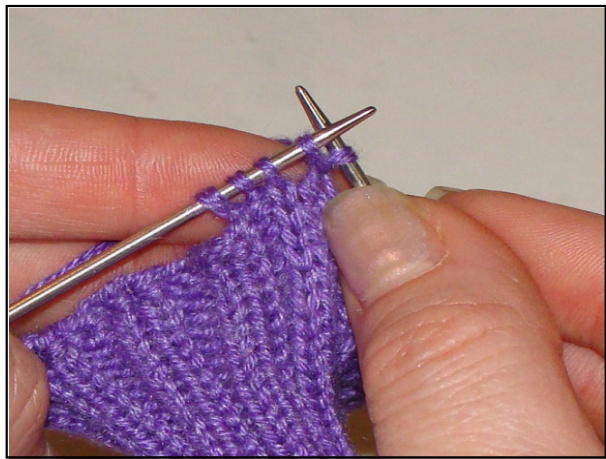
Row 4 Gap When you have reached the point where there is one unworked st at each end of Needle 2, count the number of stitches on your heel needle. If your stitch count is divisible by 4: You have the correct number of sts to initiate 2X2 Rib. Finish yourheel turn as follows: Needle 2: Sl1, k to end of needle. Do not turn. Proceed to the Leg Section. If you need to decrease two more sts so that your stitch count will be divisible by 4: Finish your heel turn as follows:
A Completed Heel Needle 2: Sl1, k to one stitch before the gap, k2tog. Do not turn - continue to work in the round. Needle 1: Work in 2 x 2 Rib Pattern. Needle 2: K2tog, k to the end of Needle 2. Proceed to the Leg Section.
Leg:
You will now work in the round again. Work the 2x2 Rib Pattern on the sts of both needles until you reach your desired sock height.
Bind Off:
The traditional bind off method is not stretchy enough to use at the top of a sock. Jeny's Suprisingly Stretchy Bind Off adds a "processing step" before each stitch is worked which gives the technique extra elasticity.
Processing a Knit Stitch
Step One: Yarn-over in reverse by bringing the yarn behind the right needle and over the top and back into position.
Step Two: Knit the next stitch as usual. Insert the left needle into the yarn-over and pullit over the stitch you just knit.
Processing a Purl Stitch
Step One: Yarn-over in the usual direction by bringing the yarn in front of the right needle and over the top back into position.

Step Two: Purl the next stitch as usual. Insert the left needle into the yarn-over and pull it over the stitch you just purled. Process each of the first two knit sts as shown above, then pass the first st over the second st and off the RH needle. Process the next purl st on the LH needle, then pass the previously processed st over it and off the RH needle. Note: Once you have processed the first stitch, for allremaining stitches you can pass over the yarn-over and the previously processed stitch together in one step. Continue processing and binding off sts in this manner until only one st remains on the RH needle. Cut working yarn and pull the end of the yarn tail through the loop.
Weaving In The End:
To make an invisible join at the bind off edge of your sock, thread the tail through a blunt-tipped darning needle and follow these two steps:
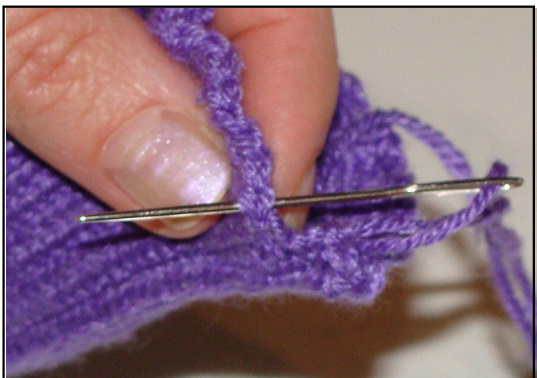
Step 1: Insert the needle through the top two loops of the first bound off stitch and pull the tail through.

Step 2: Insert the needle back into the stitch where the tail started. This mimics the appearance of a stitch, and joins the first and the last stitches together. Weave the tail through the inside of the sock for about an inch, and then cut the tail close to the work. Turn your sock inside out and weave the cast on tail into the inside of the sock for about an inch, then cut the tail close to the work.
Congratulations on your achievement!
You are officially a sock-aholic. Now is the time where you put your socks on and dance around wildly!


