Stash Buster Rose Pin

Stash Buster Rose Pin
Note: This pattern is a true stash buster, as any yarn can be used and any size knitting needles. Instead of making a pin, use roses to embellish totes, mittens, scarves... anything you can think of! Needles:needles needed for stiff fabric with your particularyan Yarn: Any yarn! Roses Pictured, needle size used: Top Left: Manos Del Uruguay, size 8 (light, multicolored) Top Right: Mango Moon Recycled Silk, size 7 (dark, multicolored) Center Left: Cascade 200, size 7 (solid red) Center: Mountain Colors Bearfoot Sock Yarn, size 2 (solid pink) Bottom Middle: Pylmouth Outback, size 7 (blues, maroon) Middle Right: Sublime, size 4 (solid blue) Notions: Jewelry pin back, blunt yarn needle for sewing rose together. gauge craft/hobby wire to attach jewelry pin back to rose.
Kim Haesemeyer, Proprietor Billings, Montana dkhaese2000@yahoo.com (406) 672-5042 www.bigskyyarnsandcrafts.com eBay store: big sky yarns and crafts
Abbreviations
$\mathsf{B O}=$ bind off $\complement0=$ cast on $k=\mathsf{k n i t}$ kfb $=$ knit in front and back of the next stitch, making 2 stitches from 1 $\mathsf{p}=\mathsf{p u r l}$ $\mathbf{st}(\mathbf{s})=$ stitch(es) ${\sf R S}=$ right side ${\sf W S}=$ wrongside
Knit
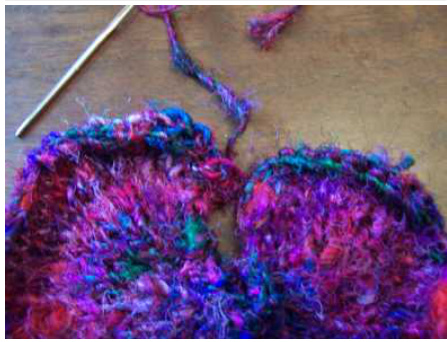
CO 5 stitches. Row 1: k Row 2: p Row 3: kfb of each st (10 sts) Row 4: p Row 5: kfb of each st (20 sts) Row 6: p Row 7:k Row 8: p Row 9: kfb of each st (40 sts) Row 10: p Row 11: k Row 12: p Row 13: kfb of each st (80 sts) Row 14: p Row 15: k Row 16: p BO loosely, leaving at least a $12^{"}$ tail. Pull tail through last stitch. Below is a picture of your finished fabric:
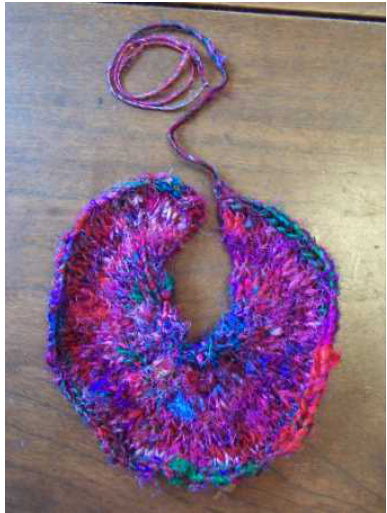
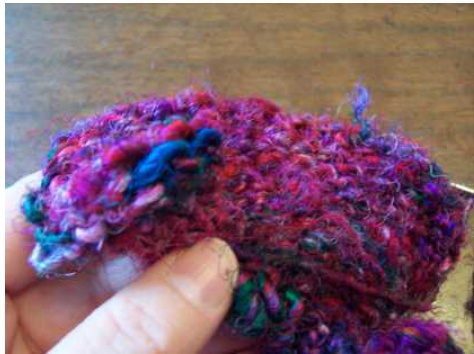
Thread a blunt needle and run thread around inside seam until an inch before the other end. Let yarn drop through middle.

Cinch until tight.
With the yarn tail dropped through the middle of the fabric, start rolling from inside, making sure the purl side is on the inside so the fabric edges rolls outward.
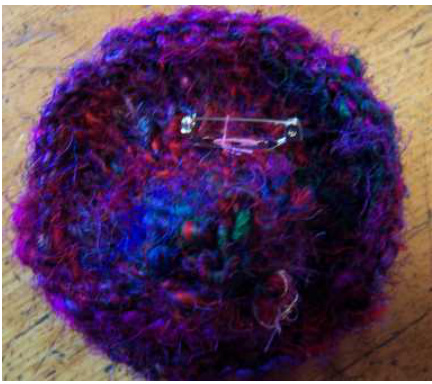
After rolling the flower, secure the design by passing the blunt needle through the base of the flower a couple of times.
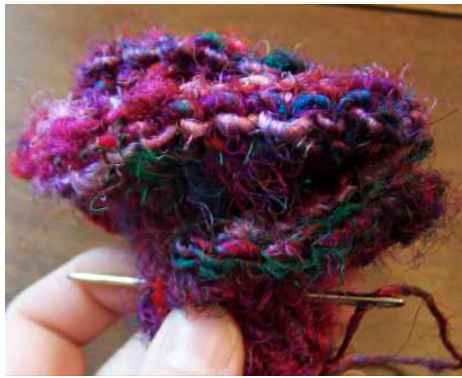
Use fine gauge craft/hobby wire to attach jewelry pin back to rose, a bit above the center.