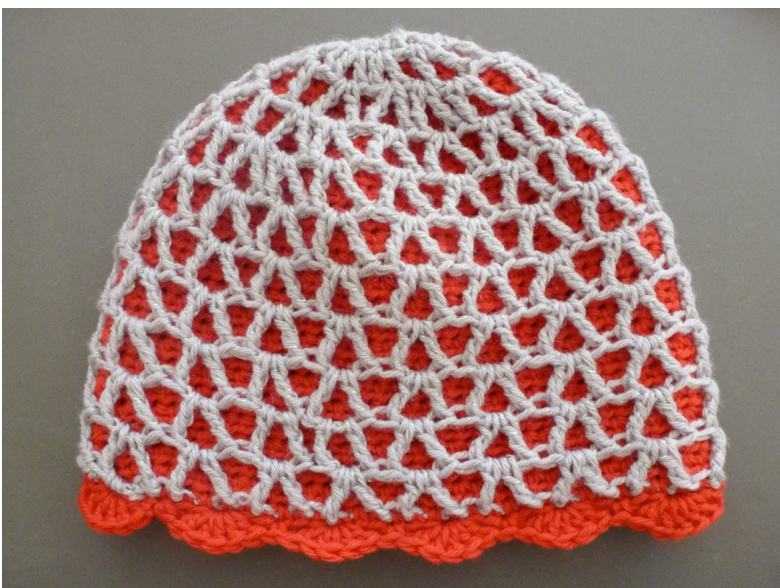
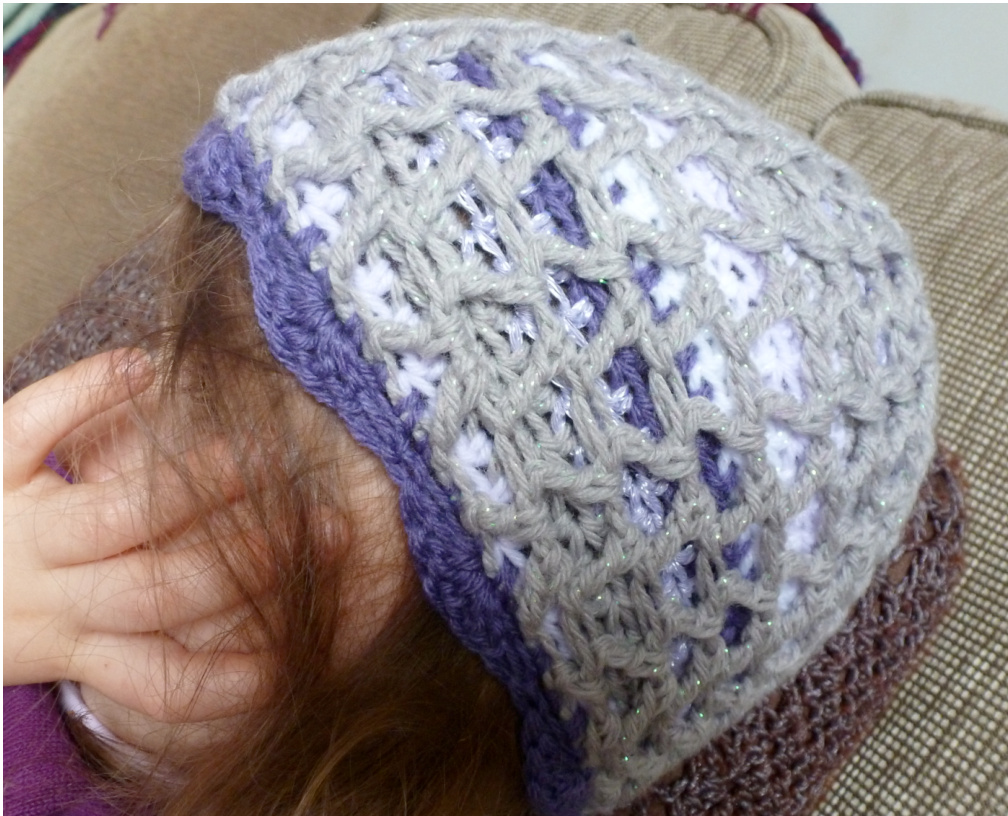
This hat was borne of the combination of cold weather and lots of DK weight yarn. It's quite difficult to find a good pattern for a plain beanie in DK yarn so I had to make one up! Also a single layer of DK crochet fabric might not be enough for keeping your brain warm. And why can't you have a little lace in the winter? A double layer of plain was just too dull so the second layer is in a simple v-stitch. As this was for a girl there is a simple shell-stitch border but this is entirely optional. I've also done this in stripes which works really well. For a boy/man you could do both inside and outside in a plain stitch.
FINISHED SIZE
This is an adult sized hat. There is not a great deal of stretch and so I have made it on the big side (it fits me and my head is on the top growth centile!)
HOOK & YARN
A 4.5mm hook was used with a red 100% merino wool (Wendy Merino DK) and a sparkly grey soft acrylic. Any DK yarn should work up to the right size.
GAUGE
I haven't specifically estimated the gauge as it is difficult to do so when everyone has such different sized heads!
Abbreviations (American)
Ch chain Ch-sp chain space SC single crochet hdc half-double crochet dc double crochet tr treble crochet slst slip stitch British equivalent chain chain space double crochet half-treble crochet treble crochet double treble crochet slip stitch
PATTERN
All hats are based on my basic beanie pattern with your topping of choice. Of course if you wish to have just a plain beanie then go topping-free. I have used a magic ring for all of the hats but if you just can't get the hang of that (l think the trick is a single chain to start to fix the ring) then work the appropriate number of hdc into the third ch of a foundation chain. Work in the round for all and I would suggest using a stitch marker to indicate the first st of each round.
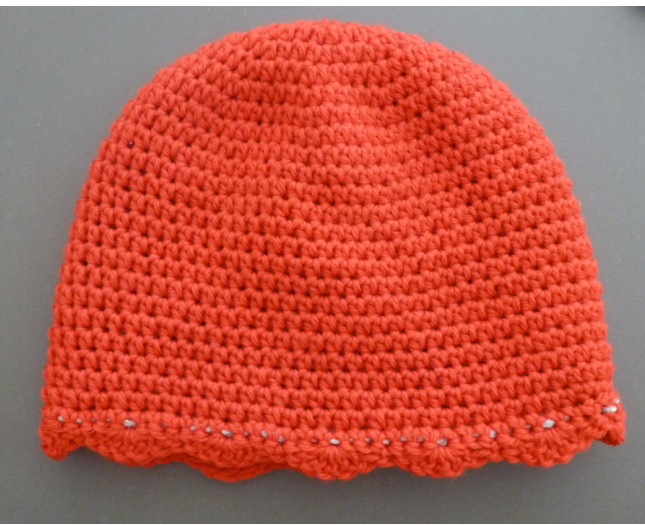
BEANIE
1. Using main colour work 10hdc into a magic ring, 2. Work 2hdc into each st around, 3. Work \*1hdc into next st, 2hdc into next st, repeat from \* around, 4. Work \*1hdc into next 2st, 2hdc into next st, repeat from \* around, 5. Work \*1hdc into next 3st, 2hdc into next st, repeat from \* around, 6. Work \*1hdc into next 4st, 2hdc into next st, repeat from \* around, 7. Work \*1hdc into next 5st, 2hdc into next st, repeat from \* around (70st), 8. Work 1hdc into each st around for approximately 15 rows or until length required. 9. Fasten off and weave in ends.
V-STITCH HAT
The groups and stitches change in the first few rows but after that it is straighforward! I suggest using a stitch marker to indicate the first v-stitch group in each row and moving it up as you progress. 1. Using contrasting colour work 1ohdc into a magic ring, 2. Work 1 dc group (dc, 1ch, dc) into each st around, 10 grps = 30st 3. Work 1 tr group (tr, 2ch, tr) into each ch-sp between dc in row below around, 10 grps = 40st 4. Work \*1 tr group (tr, 2ch, tr) into next 2ch-sp, 1 tr group between next two groups in row below, 1 tr group into next 2ch-sp, repeat from \* around, 15 grps = 60st 5. Work \*1 tr group (tr, 2ch, tr) into next 2ch-sp twice, 1 tr group between next two groups in row below, 1 tr group into next 2ch-sp twice, repeat from \* around, 18 grps = 72st 6. Work 1 tr group (tr, 2ch, tr) into each 2ch-sp around for 6-7 rows or until the same length as the beanie. 7. Finish with progressively shorter groups, such as dc group in next 2 ch-sp, hdc grp in next 2 ch-sp and sc x2. 8. Slst to finish, fasten off and weave in ends.
FINISHING
It is important to weave in ends before finishing as it is much harder after the hats have been joined together. With wrong sides facing fit beanie inside v-stitch hat until lower edges of each are lined up. You will notice that there are 2 more stitches in the v-stitch hat but these can be worked into the joining row. Using the colour of your choice join to the beanie and work a row of sc around working though both the beanie and the v-stitch hat, slst to join to first st. Ch1, sc in first st and work a row of 5dc shells around the base of the hat as follows: \*skip 2st, 5dc next st, skip 2st, sc next st, repeat from \* around. There should be enough stitches to fit them in evenly. Fasten off and weave in ends.
Make, give, wear and enjoy!


