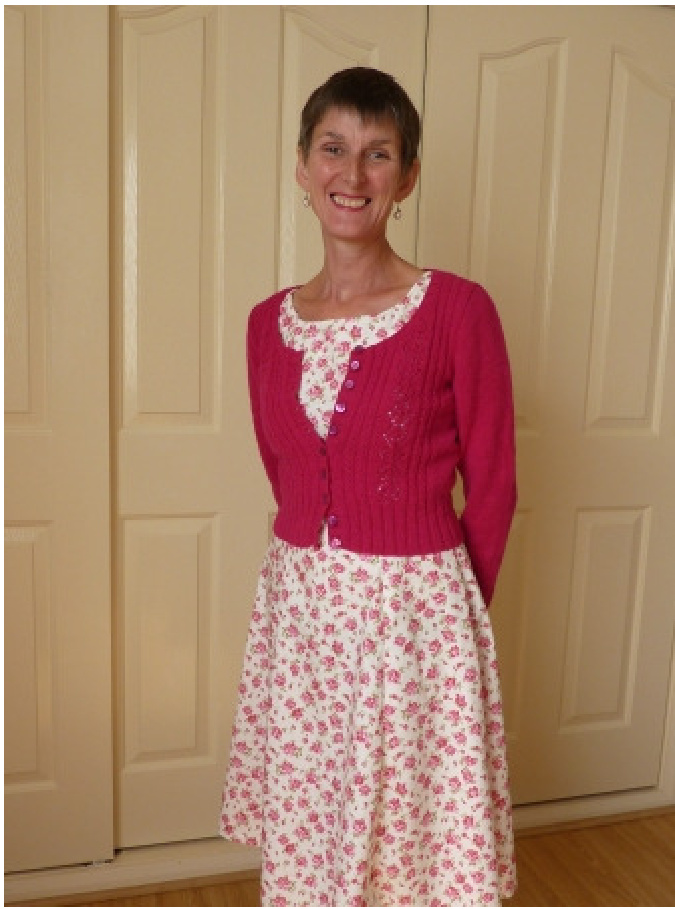
Diana
by Janet McMahon
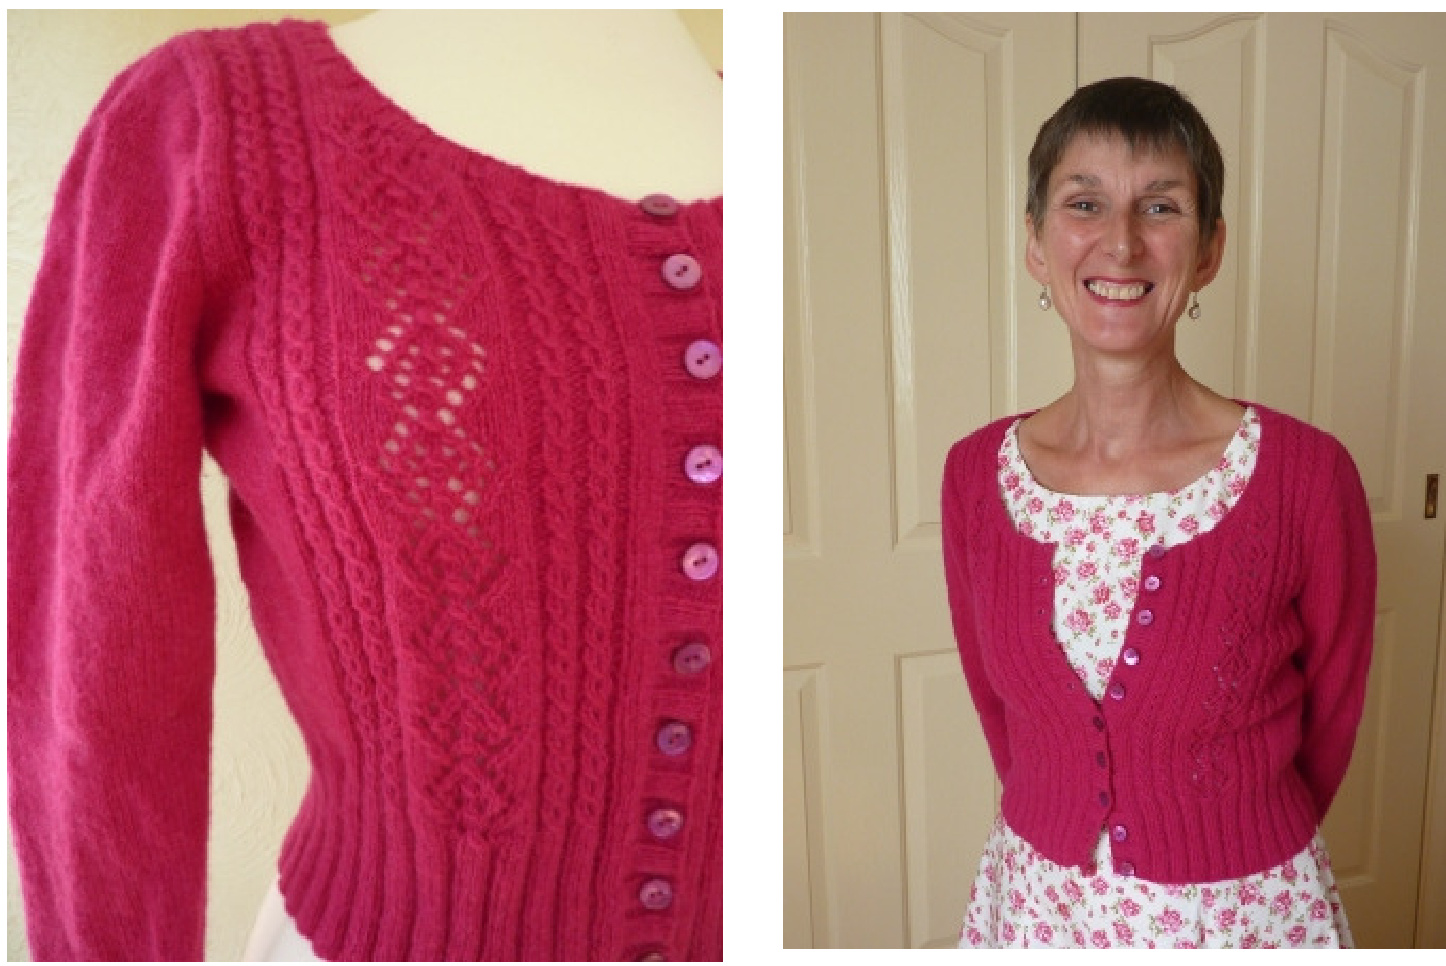
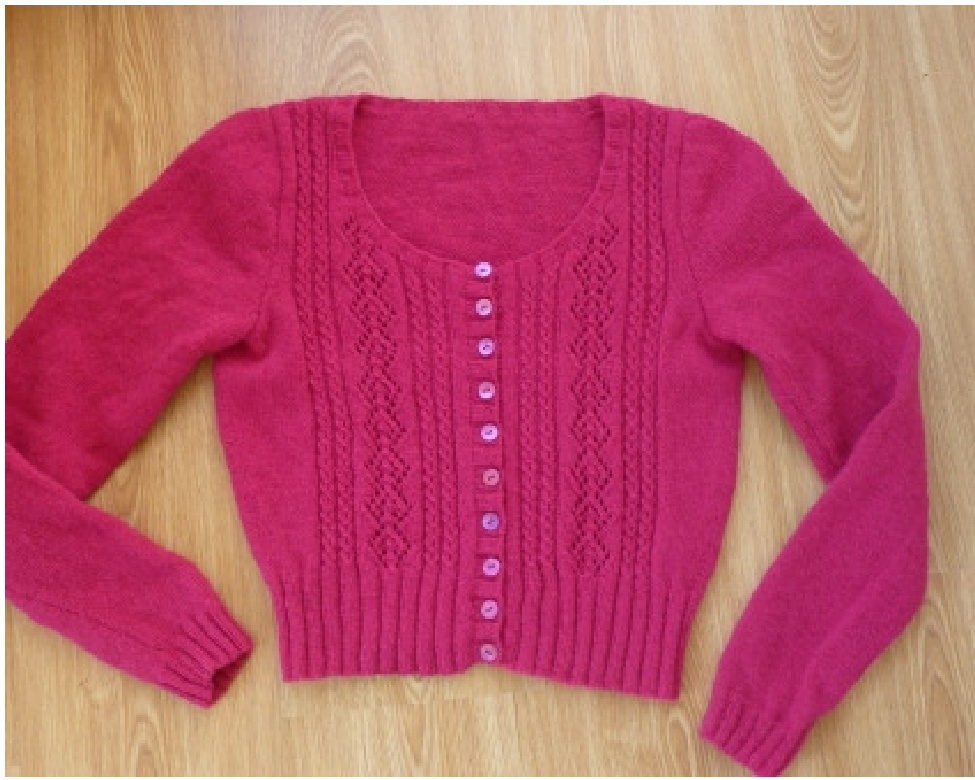
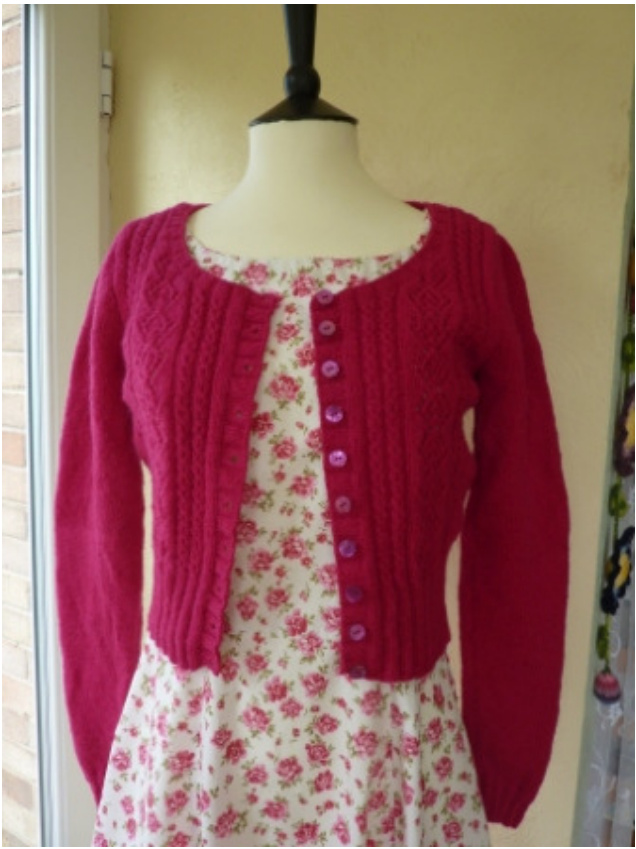
A pretty fitted cardigan with an open diamond panel on the front. It is knitted in 4 ply weightwool.
The body of the cardigan is worked as one piece, bottom-up to the armholes. It then splits to form the upper body. Short row shaping creates the shoulders which are joined with a three needle bind off. The sleeves are knitted flat , bottom-up and then seamed to the body. Button bands and neck edging are picked up and knitted afterwards.
SIZING AND MEASUREMENTS
The cardigan is offered in one size only - to fit 32/ 34 inch bust (80/ 85 cm) Actual bust measurement - $82.5\;\mathsf{c m}$ (33 inches) Length (from back neck) - 44 cm (17 1/4 inches) Sleeve length - 46 cm (18 inches)
LEVEL OF DIFFICULTY
This pattern incorporates, short row shaping, three needle bind off, lace knitting and decreasing within a lace pattern. The lace pattern is not complicated but because of the decreasing needed in the lace pattern I would say that some experience of lace knitting is required. This pattern is therefore for intermediate knitters.
YOU WILL NEED
$10\times25\mathfrak{g}$ balls of Jamieson and Smith 2 ply jumper weight Shetland wool (knits as 4 ply, 114 metres per 25g). $2.75\;\mathrm{mm}$ and $3\;\mathsf{m m}$ knitting needles (US sizes 2 and 2 1/2)- although the body is knitted flat, circular needles are best used in order to hold the large number of stitches, but they are not essential. Stitch markers. Stitch holders. 10 buttons
GAUGE
26 sts and 38 rows to 10 cm measured over stocking stitch using 3 mm needles.
ABBREVIATIONS USED
$\mathsf{k}=$ knit $p=p u r l$ $\mathsf{s t}(\mathsf{s})=$ stitch(es) yrn $=$ yarn round needle k $:\mathtt{t o g}=\mathsf{k n}$ it 2 stitches together $)2\mathrm{tog}=\mathsf{p u r l}$ 2 stitches together $\mathsf{s l}1=\mathsf{s l i p}\ 1$ stitch $\mathsf{p s s o}=\mathsf{p a s s}$ the slipped stitch over yon $=$ yarn over needle ${\sf R S}=$ right side WS $=$ wrong side slm $=$ slip marker w&tt $=$ wrap next stitch and turn - work the required number of stitches in the row, wrap the next st by slipping the st onto the RH needle, take the yarn to the opposite side of the work, between the needles, and then slip the same st back onto the LH needle. On subsequent row, work the loop and the wrapped st together and continue in pattern
SPECIAL STITCHES
Panel Pattern Row 1: p2, (k3, p2) x 2, k5, yrn, sl1, k2tog, psso, yrn, k5, p2, (k3, p2) x 2. Row 2: k2, (p3, k2) x2, p13, k2, (p3, k2) ×2. Row 3: p2, (sl1, k2, psso, p2)x2, k3, k2tog, yrn, k3, yrn, sl1,k1, psso, k3, p2, (sl1, k2, psso, p2) x 2. Row 4: k2, (p1, yon, p1, k2) x 2, p13, k2, (p1, yon, p1, k2) x 2. Row 5: p2, (k3, p2)x2, k2, k2tog, yrn, k1, yrn, sl1, k2tog, psso, yrn, k1, yrn, sl1, k1, psso, k2, p2, (k3, p2) x2. Row 6: as 2nd row. Row 7: p2, (sl1, k2, psso, p2) x2, k1, k2tog, yrn, k2tog, yrn, k3, yrn, sl1, k1, psso, yrn, sl1, k1, psso, k1, p2, (sl1, k2, psso, p2)x2. Row 8: as 4th row. [continued on next page] Row 9: p2, (k3, p2) ×2, k3, yrn, sl1, k1, psso, yrn, sl1, k2tog, psso, yrn, k2tog, yrn, k3, p2, (k3, p2) × 2. Row 10: as 2nd row. Row 11: p2, (sl1, k2, psso, p2) ×2, k4, yrn, sl1, k1, psso, k1, k2tog, yrn, k4, p2, (sl1, k2, psso, p2) $\times\,2$ Row 12: as 4th row. Important note - the stitch count changes during the course of the panel pattern. Rows 3, 7 and 11 have a reduction in the number of stitches. Please be aware of this when counting your stitches.
THE PATTERN
LOWER BODY With $2.75\;\mathrm{mm}$ needles cast on 210 stitches. Row 1 (RS): k1, (k3, p2) to last four stitches, K4. Row 2 (WS): p1, (p3, k2) to last four stitches, p4. Repeat these two rows another 15 times (32 rows worked in total). Row 1 (RS): k4, place marker, [work 37 stitches from row 1 of panel pattern instructions], place marker, k12, place marker, k104, place marker, k12, place marker, [work 37 sts from row 1 of panel pattern instructions], place marker, k4. (210 sts) Row 2 (Ws): p4, slip marker, [work 37 sts from row 2 of panel pattern instructions], slip marker, p12, slip marker, p104, slip marker, p12, slip marker, [work 37 sts from row 2 of panel pattern instructions], slip marker, p4. Continue with the body, working the panel pattern as per instructions for four more rows. Row 7 (side increase row): Work in pattern to one stitch before third marker, m1, k1, slm, k1, m1, pattern to one st before next marker, m1, k1, slm, k1, m1, pattern to end. (214 sts) Continue with body, working four more increases at an interval of every eight rows. (230 sts) Continue without shaping until the total length of body is 27 cm (approximately 10 1/2 inches) ending with a Ws row. Make sure you end with either row 2 or row 6 or row 10. make a note of the last row worked on the panel pattern for later reference. DIVIDING FOR ARMHOLESRIGHT FRONT Pattern to within four stitches of third marker, turn, leaving unworked stitches on a separate needle. (54 working sts) Keeping panel pattern correct, decrease 1 st at armhole edge on next 5 rows. (49 sts) Work one row without decreasing, then decrease 1 st at armhole edge on next row. Repeat the last two rows one more time - four rows worked in total. (47 sts) Work three rows without decreasing, then decrease 1 st at armhole edge on next row - four rows worked in total. (46 sts) Work 2 more rows without any decreases, ending with a Ws row.
Shape neckline
Pattern 10 sts then place these on a stitch holder, pattern across the remaining 36 sts. It is important to keep the panel pattern going but you need to be careful that the stitch count is maintained. Decrease 1 st at neck edge on the next 8 rows. (28 sts) Work one row without decreasing, then decrease 1 st at neck edge on next row. Repeat the last two rows five more times - 12 rows worked in total. (22 sts) Work three rows without decreasing, then decrease 1 st at neck edge on next row. Repeat the last four rows two more times - 12 rows worked in total. (19 sts) Continue in pattern without shaping until your armhole measures 17 cm from the beginning of the division, ending with a WS row.
Shape shoulders
With RS facing, pattern 13 sts, w&t. WS row - pattern to end. RS row - pattern 7 sts , wat. WS row - pattern to end. RS row - pattern across allstitches, picking up the loop of the wrapped sts. Place these sts on a stitch holder and put to one side. BACK Return to the remaining 176 sts on spare needle. With RS facing, rejoin your wool to the sts and cast off 8 sts for the right underarm, knit to within 4 sts of next marker, turn, leaving remaining unworked sts on a spare needle. (106 working sts) Decrease 1 st at each of row on next five rows. (96 sts) Work one row without decreasing, then decrease 1 st at each end of next row. Repeat the last two rows more one time - four rows worked in total. (92 sts) Work three rows without decreasing, then decrease 1 st at each end of next row - four rows worked in total. (90 sts) Continue without decreasing until work measure 17 cm from the division for the armholes, ending with a Ws row.
Shape shoulders
K23, turn, leaving remaining 67 sts on one side. Working on the 23 sts only, cast off 4 sts and purl 13 sts, w&t. Knit to end. P7, w&t. Knit to end. Purl across all stitches, picking up the loop of the wrapped sts. Place these stitches on a stitch holder and put to one side. Return to the 67 sts of the remaining back. With RS facing, do not rejoin wool yet, but place the next 44 sts on a holder for the back of the neck. Now with RS stillfacing, rejoin your wool to the remaining 23 sts. Cast off 4 sts, k13, w&t. Purl to end. K7, w&t. Purl to end. Knit across allstitches, picking up the loop of the wrapped sts. Place these sts on a stitch holder and put to one side.
LEFT FRONT
With RS facing, rejoin wool to the remaining 62 sts of the lower body. Cast off 8 sts for the left underarm and pattern to end (Resume the panel pattern at the point you noted before the start of the division for the armholes). (54 sts) Keeping panel pattern correct, decrease 1 st at armhole edge on next 5 rows. (49 sts) Work one row without decreasing, then decrease 1 st at armhole edge on next row. Repeat the last two rows one more time - four rows worked in total. (47 sts) Work three rows without decreasing, then decrease 1 st at armhole edge on next row - four rows worked in total. (46 sts) Work 2 rows without decreasing, you should end with a Ws row.
Shape neckline
Pattern to last 10 sts, turn. Place the ten unworked sts on a stitch holder. (36 working sts) Decrease 1 st at the neck edge on the next 8 rows. (28 sts) Work one row without decreasing, then decrease 1 st at neck edge on next row. Repeat the last two rows five more times - 12 rows worked in total. (22 sts) Work three rows without decreasing, then decrease 1 st at neck edge on next row. Repeat the last four rows two more times - 12 rows worked in total. (19 sts) Continue in pattern without shaping until your armhole measures 17 cm from the beginning of the division, ending with a RS row.
Shape Shoulders
With ws facing, pattern 13 sts, w&t. RS row - pattern to end. Ws row - pattern 7 sts , w&t. RS row - pattern to end. WS row - pattern across all stitches, picking up the loop of the wrapped sts. Place these sts on a stitch holder. Match the shoulders of the fronts and backs. Transfer the stitches from the stitch holders to 3mm needles and with right sides facing each other, work a three needle bind off to complete the shoulder seams. SLEEVES With $2.75\;\mathrm{mm}$ needles, cast on 54 Sts.
Row 1: k2, (p2, k2) to end. Row 2: p2, (k2, p2) to end Repeat the last two rows 7 more times - 16 rows worked in total. Change to 3mm needles and work 4 rows in stocking stitch. Increase row (RS): k2, m1, k to last 2 sts, m1, k2. (56 sts) Work 9 rows. UJULIUILUIIIILAL Repeat the last ten rows 13 more times. (84 sts) Continue without shaping until sleeve measures 46 cm (18 inches). Armhole shaping Cast off 6 sts at the beginning of the next 2 rows. (72 sts) Decrease 1 st at each end of next 3 rows. (66 sts) Work 1 row without decreasing, then decrease 1 st at each end of next row. Repeat the last 2 rows 1 more time - 4 rows worked in total. (62 sts) Work 3 rows without decreasing, then decrease 1 st at each end of next row. Repeat the last 4 rows 4 more time - 20 rows worked in total. (52 sts) Work 1 row without decreasing, then decrease 1 st at each end of next row. Repeat the last 2 rows 4 more time - 10 rows worked in total. (42 sts) Decrease 1 st at each end of next 5 rows. (32 sts) Cast off 4 sts at the beginning of the next 4 rows. (16 sts) Cast off remaining sts. Sew up the long sleeve seams using either backstitch or mattress stitch. Sew the sleeves into the armholes on the body, placing the long seam on the sleeve at the centre of the cast off underarm sts of the body. NECKBAND With the RS of the body facing and 2.75 mm needles, we are now going to work the 10 sts from the holder on the right front first, as follows - K4, p2, k3, p1, next pick up and knit 43 sts up the neck edge to the shoulder seam, then pick up and knit a further 8 sts from the shoulder seam along the back neck edge, knit across the 44 sts on the holder for the back neck, pick up and knit 8 sts from the back neck edge to the shoulder seam, then pick up and knit a further 43 sts down the left front neck edge, finally work the 10 sts on the holder at the left front as follows - p1, k3, p2, k4. (165 sts) Row 1 (Ws) : p4, (k2, p3) to last 6 sts, k2, p4. Row 2 (Rs) : k4, (p2, k3) to last 6 sts, p2, k4. Repeat these 2 rows one more time, then the first row once more - a total of 5 rows worked in total. Cast off in rib. BUTTON BAND With RS facing and $2.75\;\mathrm{mm}$ needles, pick up and knit 94 sts along the left front edge. Row 1 (Ws) : p4, (k2, p3) to end. Row 2 (RS) $:$ (k3, p2) to last 4 sts, k4. Repeat these 2 rows 3 more times - 8 rows worked in total. Cast off in rib.
BUTTON HOLE BAND
With RS facing and $2.75\;\mathrm{m}$ needles, pick up and knit 94 sts along the right front edge. Row $1~(\mathsf{W S}):(\mathsf{p}3,\,\mathsf{k}2)$ to last 4 sts, p4. Row 2 (RS) : k4, (p2, k3) to end. Repeat these 2 rows one more time - 4 rows worked. Row 5 (button hole row) (Ws): (p2tog, yrn, p1, k2, p3, k2 )x9, p2tog, yrn, p2. (10 but- Repeat row 2 again, then rows 1 & 2 one more time - 8 rows worked in total. Cast off in rib. Neaten all loose ends. Sew on buttons to match the button holes. And it's done! Diana $\circledcirc$ Janet McMahon, 2015.