Pieni luotolainen
The Little lslander'
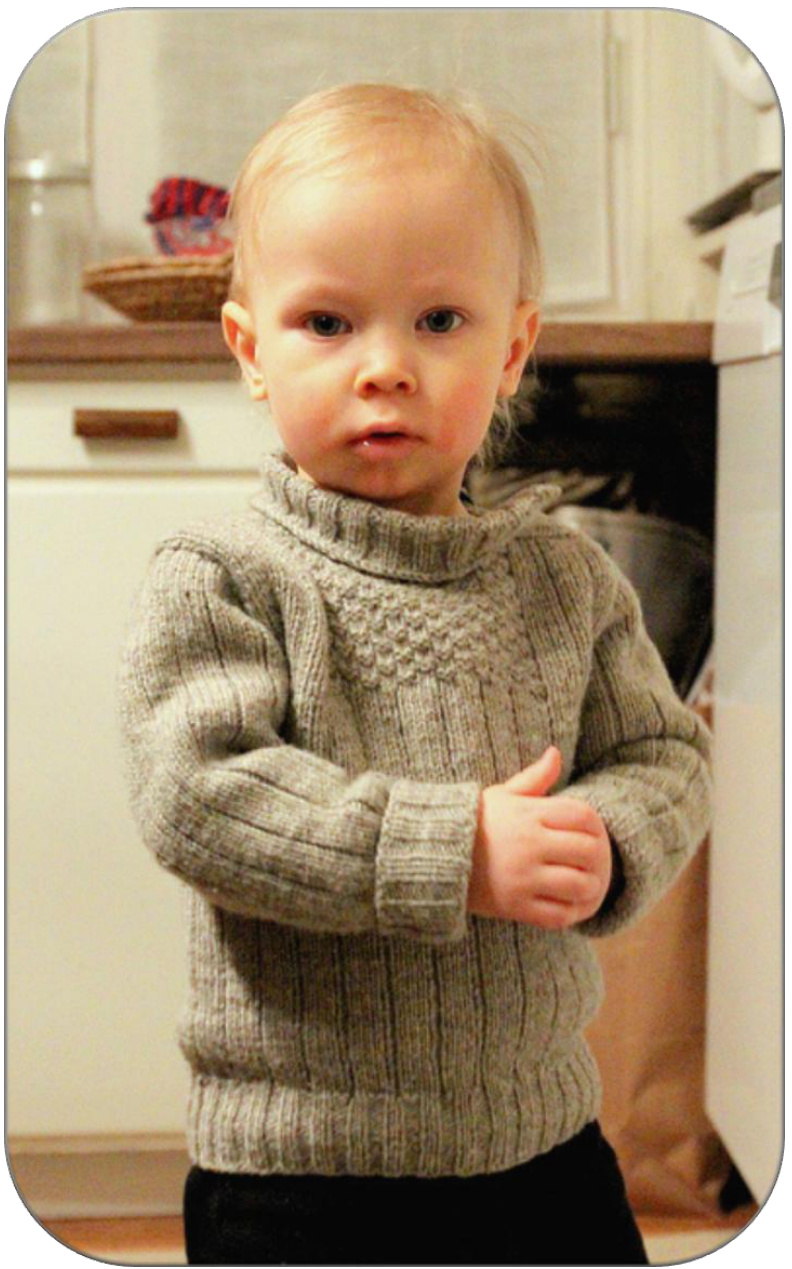
This is a traditional sweater from the Finnish island of Hailuoto, the largest island of the Northern part of the Gulf of Bothnia. For the past couple of hundred years fishermen of Hailuoto have worn these warm sweaters made of 1oo % lamb wool yarn. The greasy wool from the lambs pasturing in the island kept the sweater from getting soaked at the sea and it also gave shelter from of the harsh blowing wind. As women of Hailuoto knit this sweater for their husbands to keep them safe and warm, this toddler-sized version can be knit to protect the precious little ones in the rough seas of life. This toddler-sized version of the traditional pattern is made by Vilma Vuori whose family roots are deep in the sands of Hailuoto.
Size
The pattern is designed to fit a 2-year-old, but since children grow at their individual paste, it is best to check the size from the following measurements of the finished sweater: Body circumference 24.5", height (shoulder-hem) 15", sleeve (armpit-wrist) 9.5"
Gauge
24 sts/28 rows = 4" in stockinette stitch on larger needles
Materials
Yarn - Dalegarn Falk or any other preferred yarn giving the correct gauge, approx. 200-250 grams/450-58o yards. Needles - US 11/2 (2.5 mm) & US 21/2 (3.0 mm) 16" circular needles and a set of double-pointed needles. Adjust the needle size if necessary to get the correct gauge. Notions - crochet hook US 21/2 (3.0 mm), stitch markers, 2 stitch holders or scrap yarn, needle, 3 buttons.
Abbreviations
st- stitch sts - stitches k- knit p-purl RS - right side WS - wrong side k2tog - knit two stitches together 2p2tog - purl two stitches together ssk - slip, slip, knit ssp - slip, slip, purl pm - place stitch marker
Decreasing stitches:
RS - ssk on the right edge, k2tog in the left edge WS - p2tog in the left edge, ssp in the right edge Pick up and knit the yarn between the stitches and work it through the backloop
Stitch patterns
K2, p2 stitch Worked flat: Row 1 (RS): k2, p2 Row 2 (WS): p2, k2 Worked in the round: All rounds: k2, p2 2 × 2 moss stitch Row 1 (RS): k2, p2 Row 2 (WS): p2, k2 Row 3 (RS): p2, k2 Row 4 (WS): k2, p2 K4, p1 stitch Worked flat: Row 1 (RS): k4, p 1 Row 2 (WS): k1,p 4 Worked in the round: All rounds: k4, p 1
Body
Cast on 140 sts on the smaller circular needles. Work in the round in k2, p2 stitch for 2". Change to larger needles and work k4, p1 stitch until the piece measures 9". Divide the hem into back and front (front = 70 sts, back = 70 sts). Increase 1 st in the left edge of the front and 1 st on the right edge of the back (front = 71 s, back = 71 s). From now on knit front and back separately, which are worked flat. On every row purl the first and last st of the piece to get a neat and firm edging.
BacR
Continue working in k4, p1 stitch as established and decrease in both edges inside the edge st 1 st 5 times on every row = 61 sts. When armhole measures 5", place the center 19 sts (the center st is a purled st) on stitch holder or scrap yarn and knit the shoulders separately. Left shoulder:When the center sts have been placed on holder there are 21 sts on the left shoulder and the next row is RS. Work 2 rows. On the next RS row bind off the first 2 sts. Work with the remaining 19 sts until the armhole measures 5.5". Bind offsts. Right shoulder: When the center sts have been placed on holder there are 21 sts on the right shoulder and the next row is WS. Work 2 rows. On the next WS row bind off the first 2 sts. Work with the remaining 19 sts until the armhole measures 6". Place the sts on holder. These will later on be grafted together with the front right shoulder sts.
Front
Continue working in k4, p1 stitch as established and decrease in both edges inside the edge st 1 st 5 times on every row = 61 sts. After the decreases (or when the armhole measures o.75") start knitting the 2 X 2 moss stitch section below the neckline on the next RS row: work k4, p1 stitch as established for 16 sts (last st is a purled st), pm, \*p2, k2\* three times, p2, k2tog, k1, \*p2, k2\* three times (=28 sts of 2 x 2 moss stitch), pm, work k4, p1 st as established for 16 sts = 6o sts. Continue as established (the center 28 sts in 2 X 2 moss stitch) until the armhole measures 3.5". Place the center 14 sts on holder and knit the shoulders separately. Left shoulder: Continue k4, p1 stitch as established and decrease in the neckline edge 1 st every other row four times. Bind off remaining 19 sts when the armhole measures 5.5". Work the right shoulder reversed but place the remaining 19 sts on holder when the armhole measures 6". These will later on be grafted together with the back right shoulder sts.
Sleeves
Cast on 4o sts on smaller double-pointed needles, pm to indicate the beginning of the round. Work k2, p2 stitch for 1.5". Change to larger needles and increase 1 st in the beginning of the round: this is the middle st. Establish the k4, p1 stitch: k2, p1, \*k4, p1\* eight times, k2. Repeat this round once more. Begin the increases: Increase 1 st on both sides of the middle st on every 5th round nine times = 59 sts. Continue knitting even until the sleeve measures 9". Bind off the middle st and 1 st on its both sides and continue working flat. Decrease in both edges 1 st four times (the first decrease row is WS) on every row and then 1 st nine times on every other row. Bind off remaining 30 sts.
Shoulders and neckline
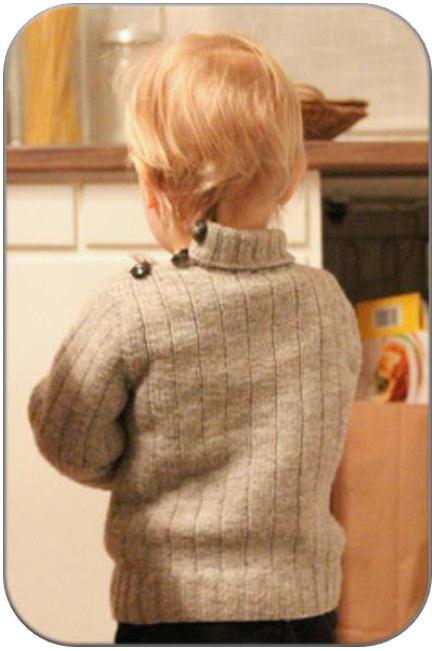
Graft together the shoulder sts of right front and right back. Pick up and knit 90 sts from the neckline and work k2, p2 st for 2.5". Bind off sts and crochet 1 row of slip sts to the bind off edge. Fold the collar, the bind off edge on the outside. Crochet button bands on the front and back left shoulders and collar: crochet slip sts in the 0.5" in the back shoulder. The collar will simultaneously be permanently fixed as double-folded. On the last slip st row

crochet three evenly placed chain st chains for buttonholes: 1 in the collar and 2 in the shoulder. Attach buttons accordingly to the back shoulder button band.
Finishing
Sew the sleeves to the body. At the same time, sew the left shoulder button bands so that the front shoulder button band overlaps the back shoulder button band for approximately o.5". Weave in yarn ends. Soak the sweater in water for a few minutes. Wrap the sweater into a towel and gently press it to remove excess water. Lay the sweater flat and gently block it into preferred shape and size.
More information..
.. about the island of Hailuoto: http:/www.hailuototourism.fi/sivu/en/matkailu/hailuoto/ .. and photographs of the original traditional Hailuoto sweater (in Finnish): http://www.kaspaikka.fi/savonlinna/perinneneule/ohje.htm Pattern version: 1.0 Published: 23.3.2011 All rights reserved @ Vilma Vuori


