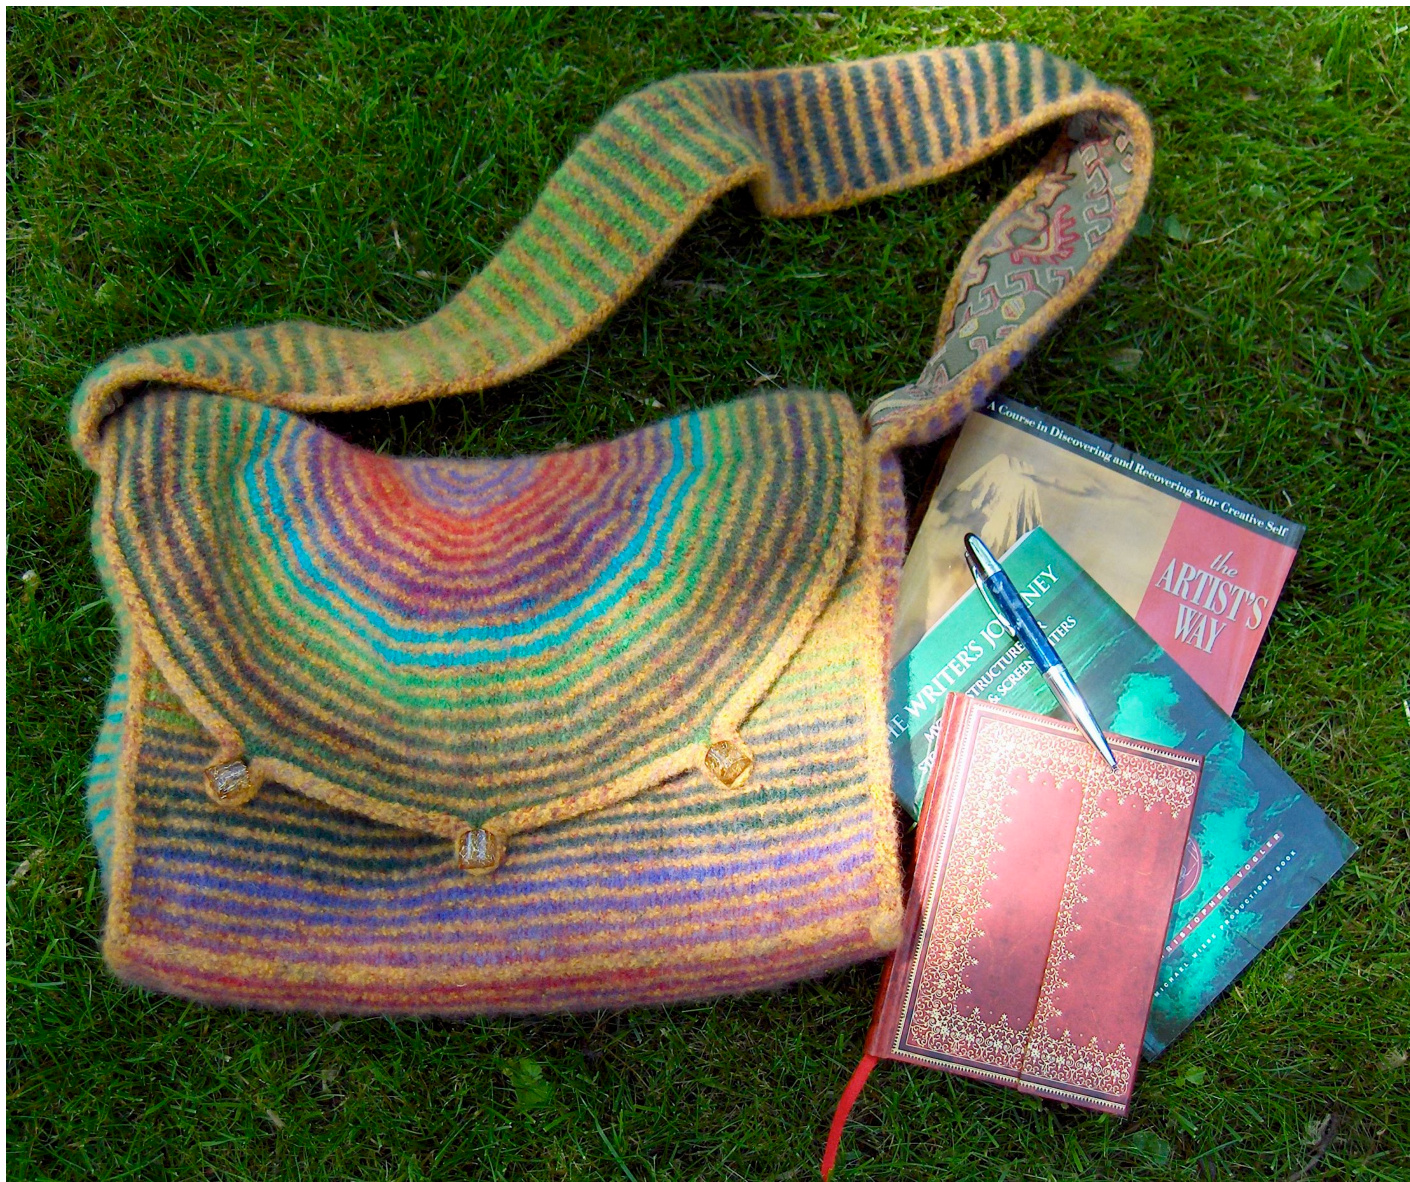
Stripey Noro Messenger Bag
@ 2010 Deborah A. Cooke A striped and felted messenger bag, with zipper, buttons and half-circle fap.
Materials: 2.5 balls $\mathrm{~\times~}100\mathrm{g}$ Patons Classic Wool (main colour MC) 4 balls x 50g Noro Kureyon (contrast A) $4.0\;\mathrm{mm}$ circular needle $4.0\;\mathrm{mm}$ double pointed needles stitch markers darning needle 3 interesting buttons 3 flat buttons with two holes. (These will be used as anchors for the buttons and will only be visible on the inside.) $40\mathrm{cm}\;(16^{\circ})$ zipper - I like the heavy ones with the plastic teeth even if they are separating zippers. Having the zipper a little longer than the width of the bag means that the separating end can hang down inside the bag. For optional lining: $1\textrm{m}$ (1 yd) of sturdy fabric which has been prewashed (don't ignore drapery fabrics) matching sewing thread needle and pins Gauge Before felting, in stockinette stitch:19 sts and $28\ \mathrm{rows}=4^{\ast}$ Size Before felting, the bag was $18^{\circ}\mathrm{~x~}13^{\circ}$ , and $4^{\circ}$ deep. The handle was $42^{\bullet}$ long. After felting, the bag is $14^{\circ}\mathrm{~x~}10^{\circ}$ , and about $3.5^{\circ}$ deep. The handle, which felted less than the main bag,is $39^{\circ}$ long. Notes This bag is knitted together as you go. The only seaming required is to sew the ends of the zipper flaps to the inside of the handles, and sewing in your ends (although you can weave a lot them in as you go, too.) The bag is designed to have a zipper sewn into the top, under the flap. Lining instructions are also included, although the lining is optional. A garter stitch ridge is used on each of the foldlines of the bag - this not only gives a bit of 3D detail, but will make the fabric fold. The I-cord applied around the perimeter continues that accent detail. I only used about a quarter of the third ball of Patons Classic Wool and that was for the I-cord - you could do the I-cord in a contrasting colour instead. Abbreviations: MC - main colour A - contrast A K - knit P- purl PM - place marker M - make K2tog - knit two stitches together P2tog - purl two stitches together SSK - slip next two stitches, one at a time, move them back to the left needle and knit them together through the back loops
4 Row Stripe Repeat
Row 1: With MC, knit. Row 2: With MC, purl. Row 3: With A, knit. Row 4: With A, purl.
6 Row Garter Ridge
Row 1: With MC, knit. Row 2: With MC, knit. Row 3: With MC, purl. Row 4: With MC, purl. Row 5: With A, knit. Row 6: With A, purl. Body of the Bag: With MC and circular needles, cast on 80 stitches. Work 4 Row Stripe Repeat three times. (This is the front zipper fap.) Work 6 Row Garter Ridge. Work 4 Row Stripe Repeat twenty-four times. (This is the front of the bag.) Work 6 Row Garter Ridge. Work 4 Row Stripe Repeat six times. (This is the bottom of the bag.) Work 6 Row Garter Ridge. Work 4 Row Stripe Repeat twenty-four times. (This is the back of the bag.) Break A. Work first four rows only of 6 Row Garter Ridge. Break MC - do not bind off! There will be 80 live stitches on your circular needle.
Half-Circle Flap
This is the only tricky big of making this bag, and it's not that hard. You begin at the centre of the flap, gradually adding stitches to increase the radius. At the same time, you'll join the half circle flap to the live stitches left at the top of the bag. You'll use your circular needle as a stitch holder and work out from the centre. If you find this too challenging, you can always just continue as established and make a rectangular flap of whatever length you wish. Here we go. There are 80 live stitches on your circular needle. Hold the work as if you're going to knit. Without knitting them, move 39 stitches from the left point of the needle to the right one. It will look like you're in the middle of a row - except that you're not knitting yet. Join MC. Row 1: With MC, K1, M1, K1. Turn. Row 2: With MC, Slip 1, P2. Turn. With the third row, you'll start joining the flap - the part you're knitting now - with the stitches from the top of the bag. At the end of each row, you'll work two stitches together - a slipped stitch from the flap and a stitch from the top of the bag. Row 3: With A, Slip 1, M1, K1, M1, SSK joining last stitch in flap and next stitch from top of bag. Turn. Row 4: With A, Slip 1, P3, P2tog joining last stitch on flap and next stitch from top of bag. Turn. Row 5: With MC, Slip 1, M1, K1, M1, K1, M1, K1, M1, SSK joining last stitch in flap and next stitch from top of bag. Turn. Row 6: With MC, Slip 1, P7, P2tog joining last stitch on flap and next stitch from top of bag. Turn. Row 7: With A, Slip 1, (M1, K1) seven times, M1, SSK joining last stitch in flap and next stitch from top of bag. Turn. Row 8: With MC, Slip 1, P15, P2tog joining last stitch on flap and next stitch from top of bag. Turn. Row 9: With MC, Slip 1, (PM, M1, K2,) seven times, PM, M1, K1, SSK joining last stitch in flap and next stitch from top of bag. Turn. Row 10: With MC, Slip 1, P23, P2tog joining last stitch on flap and next stitch from top of bag. Turn. From this point on, you will only increase on right side rows in the MC. Row 11: With A, Slip 1, K to last stitch on flap, SSK joining last stitch in flap and next stitch from top of bag. Turn. Row 12: With A, Slip 1, P to last stitch, P2tog joining last stitch on flap and next stitch from top of bag. Turn. Row 13: With MC, Slip 1, (M1, K to next marker) seven times, M1, K to last stitch, SSK joining last stitch in flap and next stitch from top of bag. Turn. Row 14: With MC, Slip 1, P to last stitch, P2tog joining last stitch on flap and next stitch from top of bag. Turn. Repeat Rows 11 - 14 until only two stitches from the top of the bag are still unattached to the flap. Row 79: With MC, Slip 1, K to last stitch, SSK joining last stitch in flap and next stitch from top of bag. Turn. Row 80: With MC, Pto last stitch, P2tog joining last stitch on flap and next stitch from top of bag. Turn. Cast off loosely.
Bag Sides
The bag sides begin at the base of the bag on each side, then become the handle. This is a big Ushaped piece, one that is knitted into the sides of the bag as you go. The handle is grafted, but it doesn't really matter where you graft it once the sides are done. I grafted mine where the Noro colours made a nice match, a couple of inches up from the top of one side of the bag. The technique is similar to what you did with joining the flap to the bag. Put the bag in your lap with one side on top. the cast on edge to your left and the flap to your right, the base closest to you. We'll call this the left side of the bag. Using your circular needle, starting at the top of the left edge at the first Garter Stitch Ridge, pick up two stitches in the Garter Stitch Ridge. Then pick up one stitch for every colour stripe (that's one stitch for every two rows), working toward the second Garter Stitch Ridge. You should have 50 stitches on your needle. Use the other point of the circular needle to do the same thing on the other side of the bag. Be sure you start at the Garter Stitch Ridge at the bag edge of the flap, then work down the back of the bag to the next Garter Stitch Ridge. You will have 50 stitches on each end of the circular needle, or 100 stitches total. The ends of the needle will be toward the base of the bag. Row 1: Keep the bag in the same orientation. With MC, pick up and knit 14 stitches across the base of the bag, working from one Garter Stitch Ridge to the next one. Pick up one more stitch, but K2tog it with the first stitch from the bag. Turn. Row 2: With MC, Slip 1, P to last stitch, P2tog with the stitch from the bag. Turn. Row 3: With A, Slip 1, K4, M1, K3, M1, K3, M1, K4, SSK joining last stitch and next stitch from bag. (18 stitches) Turn. Row 4: With A, Slip 1, P to last stitch, P2tog with the stitch from the bag. Turn. Row 5: With MC, Slip 1, K to last stitch, SSK joining last stitch and next stitch from bag. Turn. Row 6: With MC, Slip 1, P to last stitch, P2tog joining last stitch and next stitch from bag. Turn. Row 7: With A, Slip 1, K to last stitch, SSK joining last stitch and next stitch from bag. Turn. Row 8: With A, Slip 1, P to last stitch, P2tog joining last stitch and next stitch from bag. Turn Repeat rows 5 - 8 until you have joined all of the stitches from the side of the bag. Continue knitting the handle on the same 18 stitches, in the 4 Row Stripe Repeat. Knit the other side of the bag the same way. Graft the handle in pattern when you think it's long enough. Mine was $42^{\circ}$ long and has 72 stripes in A. To graft in pattern, knit until there is one row “missing" - for example, you only knit one row of A on the needles for one end of the handle and have the second row of MC on the needles for the other. When you graft the two ends of the work using A, that missing second row of A will be filled in by the graft.
Second Zipper Flap
On the wrong side of the work, with the half-circle flap closest to you, find the inside of the Garter Stitch Ridge that you knit before starting that half-circle flap. Row 1: Using MC, pick up and knit 80 stitches on the inside of that flap. The right side of the new work will be against the wrong side of the half-circle flap. Row 2: Using MC, P to end. Row 3: Using A, K to end. Row 4: Using A, P to end. Work Four Row Stripe Repeat twice more - you will have 3 stripes in A. Work the first two rows of the Four Row Stripe Repeat (in MC) and bind off in MC. The bottom of the bag has seven stripes in A. This zipper flap and the one you knit when you cast on each have three A stripes, for a total of six. The idea is that the zipper in the middle makes the seventh stripe - pick a zipper in the appropriate colour of A.
I-Cord Forever
Applied I-cord finishes the edges of the bag in a nice crisp way. It feels as if there are several miles of it to knit here, but it's worth it. Put the bag fat in front of you, flap closed, with the top of the bag closest to you. If you would like to make loops for your buttons - as I did - mark where those button loops should be. I put one in the very middle, then marked the stitch 25 stitches away from there on either side. Cast on 3 stitches in MC on a double-pointed needle. Move the needle to your left hand, to knit again, instead of turning the work. (This is what pulls the fat knitting into an I-cord tube.) K2, then Slip 1. Pick up the first stitch from the cast-off edge of the flap at the right edge. Knit that stitch, PSSO. \* Move the needle with the stitches to your left hand, ready to knit, bring the yarn around to knit. K2, Slip 1, pick up and knit a stitch from the edge, PSSO. Repeat from \*, following the edge of the bag. When you get to a place where you want to make a button loop, work into that stitch. Then work I-cord without applying it to make the loop. (K3, \*move the needle to your left hand, K3, repeat from \*.) I worked 18 rows for each button loop. When the I-cord is the desired length - remember it will shrink in felting - begin to work applied I-cord again, making the first join into that same stitch where you started the button loop. When you get to the other side of the flap, continue apply I-cord down the seam between the side and back of the bag. You will probably only need to apply three rows of I-cord for every four rows of knitting - any less and it tugs; any more and it ruffles. In the corners, do an extra row on the I-cord so there's some fullness in the corner. Apply I-cord to the seam between the side and the bottom of the bag, then up the seam between the front and the side of the bag. Continue around one edge of the handle, down the other side of the bag, across the bottom, up the other side, then around the other side of the handle. Bind off.
Felting
Make sure that all of your ends are sewn in. The only handstitching is to sew the ends of the zipper flaps to the inside of each handle. You can do that before felting, so the pieces start to felt together, or you can do it after felting, which will make it easier to insert the zipper. Your choice. If you haven't done any felting in your washing machine before, you might want to felt a swatch before you felt the entire bag. That will give you an idea of how rapidly this wool will felt in your machine. Heat and agitation promote felting. Some machines and some yarns have to ride through the cycle two or even three times for good results. Be sure to put whatever you're felting into an old pillowcase and close the end with an elastic. Wool that is felting often sheds fibre, and this can clog your drain. Better to have the loose fibre trapped in the pillowcase! Balance the load with towels and/or jeans. When you're satisfied with the amount that the knitting has felted, shape your bag while it is still damp. Tug the I-cord seams until they are straight. Flatten the handle and ensure that it's a consistent width. Stretch out the I-cord loops so they lie as you'd like them to be. Pinch those Garter Stitch Ridges so that they make nice straight folds. Fill the bag with rolled or folded towels to shape it as it dries. When the bag is dry, sew in the zipper. (I use a zigzag stitch to make the seam sturdy, and choose a matching thread colour. In this case, I sewed on the stripe in A closest to the zipper opening, and matched my thread to it.) Sew the buttons in place, using the flat buttons on the inside of the bag as anchors. (\*Sew through the bag, through the button, back through the bag, through the anchor. Repeat from \* as many times as you like. You may find this easier to do if you leave a gap between your outside button and the bag - I stick one of those dpns beneath the button while I'm sewing it on.) Using an anchor distributes the strain and makes it less likely that the button will pull through the felting or tear the bag.
Optional Lining
A lining is extra work, but a lined bag keeps its shape and wears better. A lining is easy to make - you replicate the shape and size of the bag in fabric, then sew it in. The lining goes into the bag so that the wrong sides of the knitting and of the sewn lining are together. When you pick a lining fabric, be sure to check out drapery fabrics too. If you choose a fabric that really wants to unravel, then you may want to finish the edges before you sew the bag. For most fabrics, sewing a second seam, $1/8^{\circ}$ inside the seam allowance from the main seam, will do the trick. Before cutting your lining fabric, decide how much of a seam allowance you would like to use. Most commercial patterns use a $5/8^{\circ}$ seam allowance,but $1/2^{\circ}$ is easier to calculate - you just have to remember to sew with $1/2^{\circ}$ seam allowance if that's all you cut. The lining of this bag will be constructed the same way as the bag, with the exception of the zipper flaps. The idea here is to have no raw edges showing. You don't have to be enormously fussy about the fit - if the lining is a bit bigger, the excess fabric will just scrunch down in the bottom. Measure the width of the bag between the I-cord edges. If there's some variation because of the way it felted, use the bigger number. (This is the scrunch factor.) Add twice your seam allowance to get the width of the bag lining. Measure the length of the bag. Start at the first Garter Stitch Ridge you knit, and measure to the next one. Keep measuring across the bottom of the bag, to the third Garter Stitch Ridge, then up the back to the fourth Garter Stitch Ridge. Add twice your seam allowance, to get the length of the entire bag lining. Cut one piece of lining in these measurements. As an example, I used 1/2" seam allowances. My bag is 14" wide. My bag is 24" in length, all the way around the bottom, at least on the longer edge.Adding twice 1/2" to each measurement, I cutamainliningpiece $I5^{\,,\ast}\,x\,25^{\,,\ast}$ Next, measure for the two side gussets. Measure the length of just the front of the bag, from the first Garter Stitch Ridge to the second one. Check that the back is the same measurement, and the other side. Again, take the longest one. This, plus twice your seam allowance, is the length of each side gusset piece. Now measure the width of the bag on the bottom, comparing each side. This plus twice your seam allowance is the width of each side gusset piece. Cut two side gusset pieces. Here's the example again. My bag is 10" tall and about 3.5" wide (it varies, so I took the larger number). I cut two side gusset pieces of $I I^{\,,\ast}\,x\,4.5^{\,,\ast}$ Sew the side gussets into the main piece of lining. One thing that will simplify setting in the corners is to clip the main fabric - to do that, first stitch a line of staystitching just barely inside the seamline. You don't have to stitch down the whole side; just make the line of stitching long enough to include the two corners on each side. Pin in the gusset, then cut the fabric right at the corner from the raw edge into the line of stitching. Don't cut the stitching! This will allow you to bend the main piece of fabric around the corner. Stitch just inside the staystitching so it doesn't show. Press the bag lining and turn down your seam allowance all around the top/open edge. Measure the length of each zipper fap and add twice your seam allowance for the length to cut. Then measure the depth of the zipper flap, from the Garter Stitch Ridge to the stitching line from installing the zipper. Add ONE TIME your seam allowance, then double the total. Cut two of these pieces. My zipper faps are 14" long, and 1.5" deep. With my 1/2" seam allowance, I cut them both 15" longand4" $^{\prime}I.5+.5$ times2) wide. Fold the zipper flap lining pieces in half, wrong sides together, and press. Starting at one corner on a short edge of the lining, pin in the end of one zipper flap piece. Pin the long side of that same zipper flap piece, then the other end. Do the same with the other zipper flap piece. There will be a gap between the two folded edges of the zipper flap pieces - this ensures that the zipper won't snag on the lining. Sew the seam you've pinned. Press and turn the bag so that the right side is outside. Turn the felted bag so that the right side is inside. Push the bag into the lining, pin the lining and sew in place. I prefer to sew bags into felted bags by hand, so there are no machine stitches showing on the outside, but the choice is yours. Sew all around the top of the lining, then sew the folded sides of the zipper flap linings to the zipper. If you've used a zigzag stitch to put in the zipper, you can sew the lining to the underside of those stitches. Turn the bag right side out. To line the flap, if you want to do so, simply trace the shape of the flap on to your fabric. This should give you enough seam allowance on the round edge - add your seam allowance to the straight edge. Cut it out, press down the seam allowance all around, and sew into the bag. Again, I'd do this by hand, but the choice is yours. Finally, if you want to line the handle, measure its width and its length. Add those seam allowances, cut, press down the seam allowances and - you know this part - sew it in, by hand or by machine. And you're done! This pattern is copyrighted and is intended for personal use only. Please do not reproduce this pattern, sell it or sell items made from it, without the express written permission of Deborah Cooke.


