Stained Glass Windowpane Afghan
The no seams approach to a multi-piece afghan!
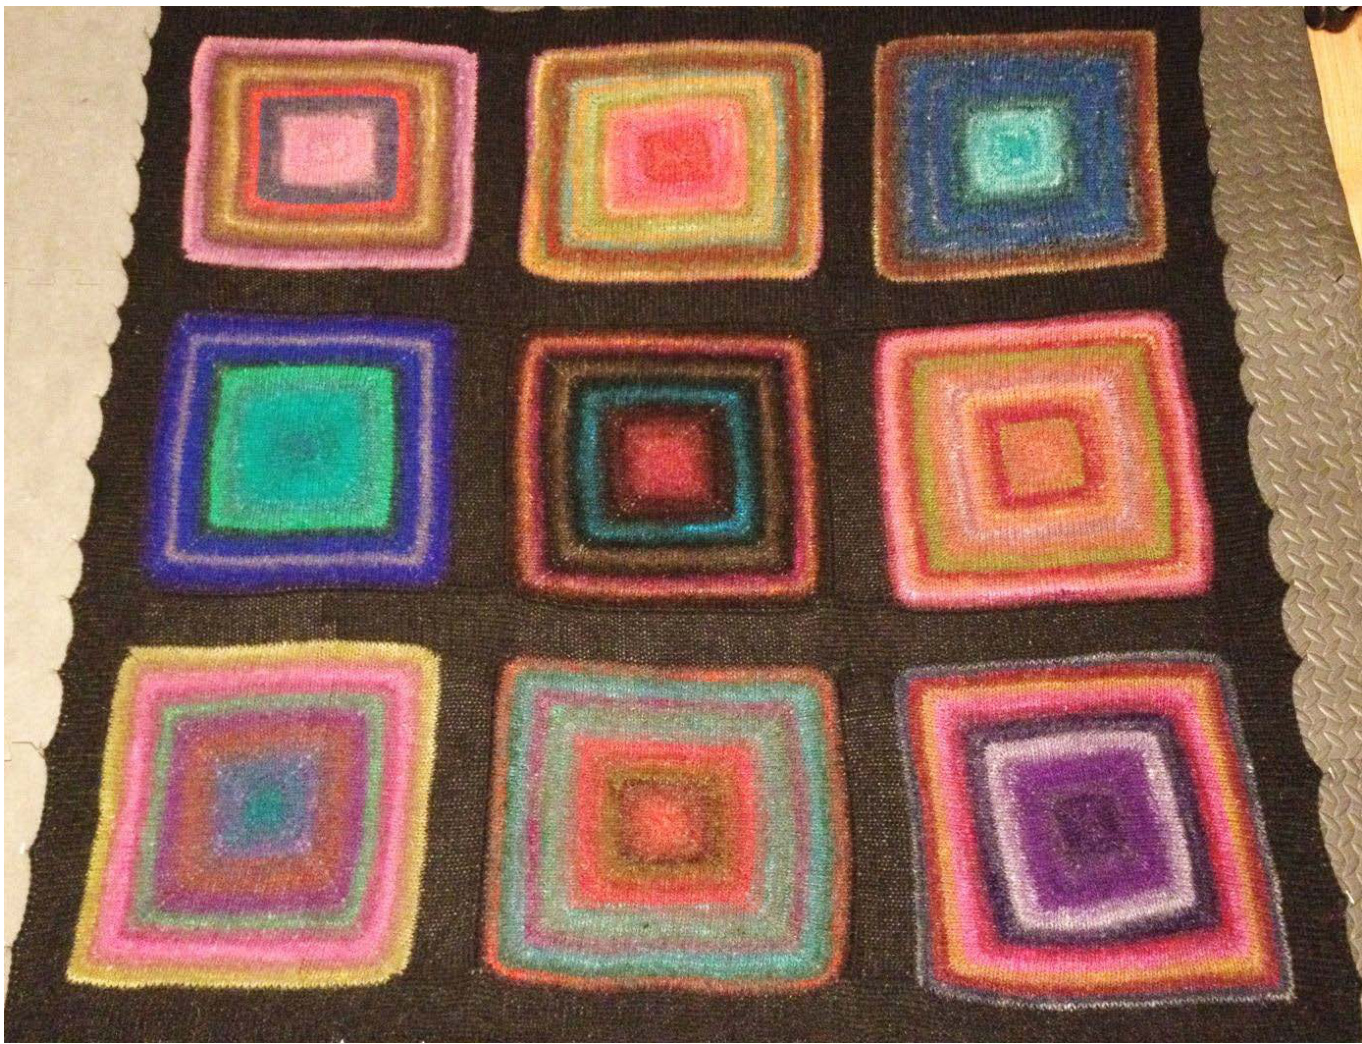
Blocks: 9 Skeins of Noro Silk Garden, Aran Weight 110 yards - Colors I Used (8, 258, 275, 282, 292, 302, 308, 320, 211) Border: 3 Skeins of Ella Rae Classic Heathers, Worsted Weight 219 yards - 121 Charcoal Heather Gauge 4.5 sts / inch This pattern is assumed to be worked using the Magic Loop method, but can be worked on double point needles as well. It is highly advised that you have 9 long cables for interchangeable needles (47-60").
KNITTING THE SQUARES
Form a small circle with the thread. With a crochet hook pull a loop of your main thread up through the center of this circle, then reach over the circle and pull a loop of your thread through this loop. Leave this loop on your crochet hook and do 11 more just like it. Slide these 12 stitches on to your needle, divide them 6 on the front needle and 6 on the back needle, join to knit in the round. Now, pull on the tail of your cast-on thread to tighten up the circle (but not too tight, you can always tighten it more later), you can also do this after you've knitted a few rows. Row 1 Knit 2nd Needle K1 M1R K2 M1L K1 M1R K2 M1L Row2 K1 M1R K2 M1L K1 M1R K2 M1L Repeat these two rows, each repeat the bold stitches will increase by 2. The corner stitch (K1) in between the make 1s will never increase.So Row 4 would be: RoW 4K1 M1R K4 M1L K1 M1R K4 M1L K1 M1R K4 M1L K1 M1R K4 M1L ... and so on continuing in this manner for 41 rows, end with row 1, a plain knit row. Do not bind off, put the square onto a spare cord or needle or waste yarn. Repeat for a total of 9 squares. Mod: You can knit however many rounds needed to get the most out of your skein of yarn, just remember to do all 9 squares the same number of rounds. You will also need to make adjustments to the number of rows you knit for your border to make it look proportional. I generally divide the number of rows on the square by 3 and make sure that's an odd number. Note: You can replace the M1L and M1R in the pattern above with a yarn over (YO), but you must knit the yarn over through the back loop on the plain knit rows or you will have a hole. This is the easier method.
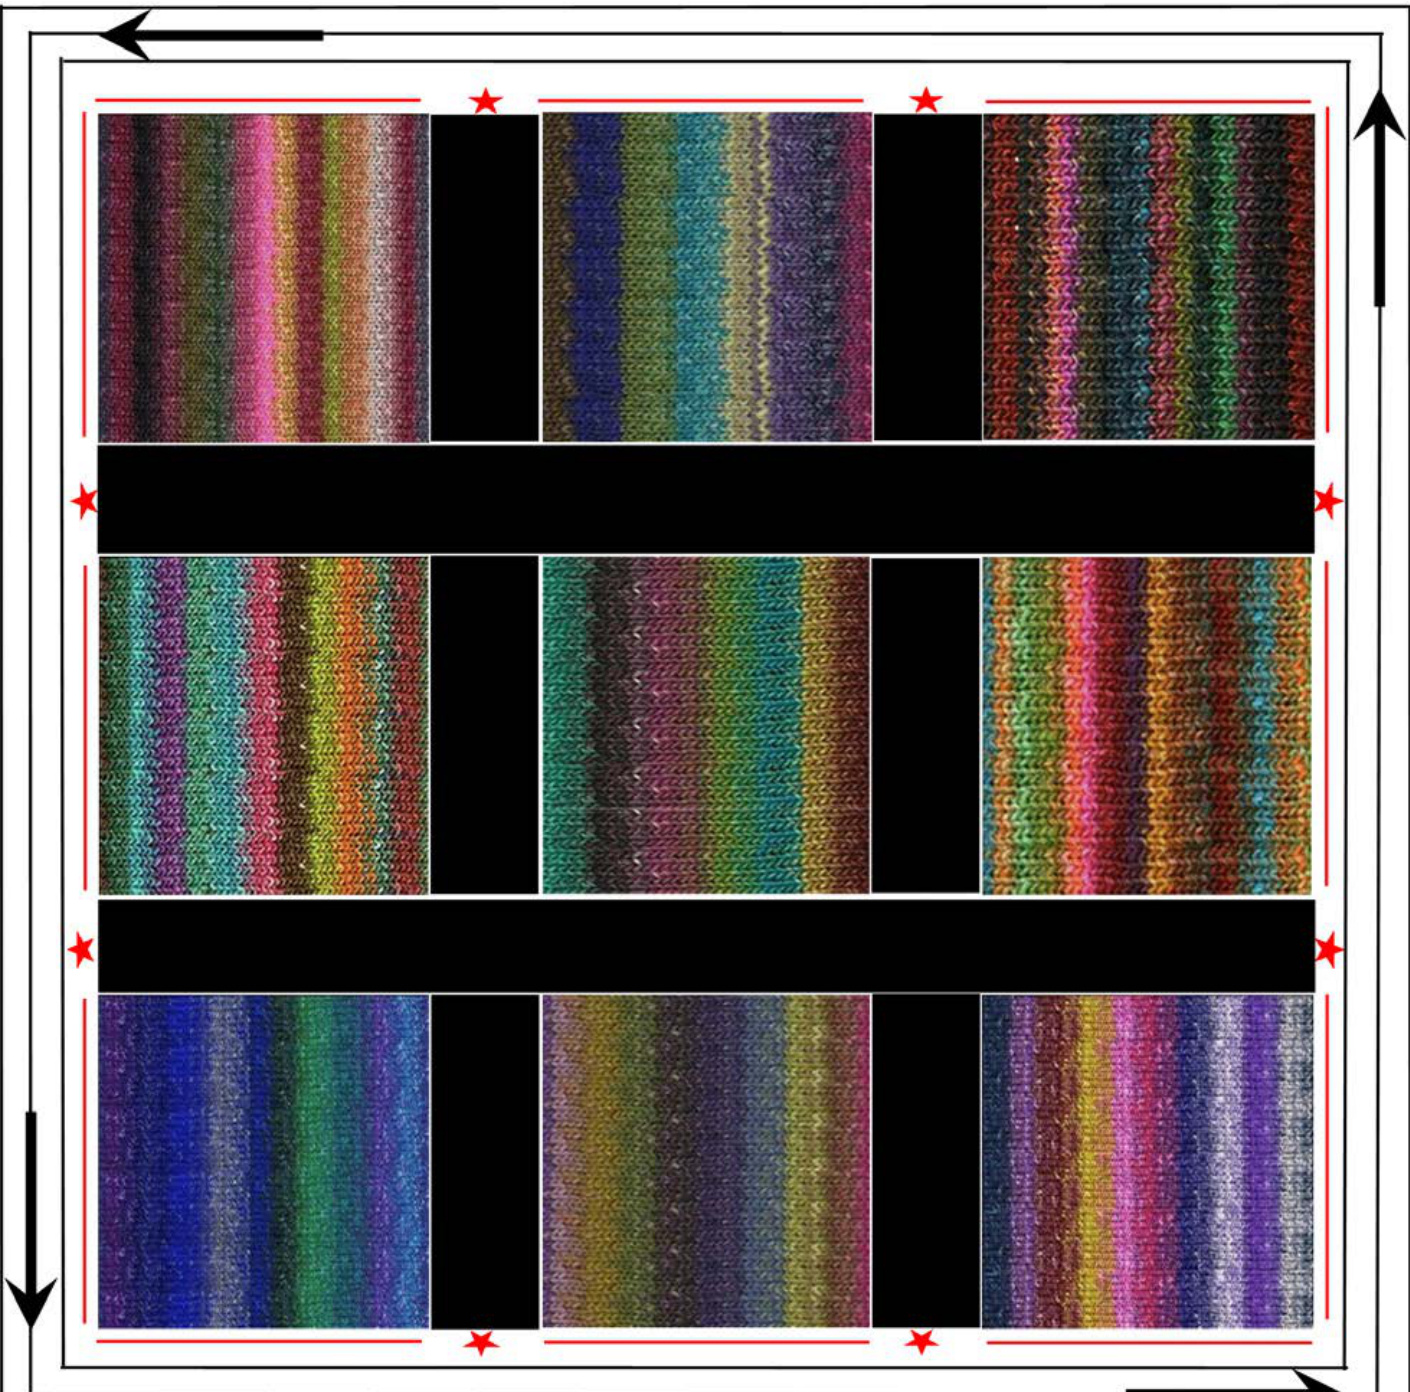
ASSEMBLY
All four sides of the squares are live stitches.
Phasel
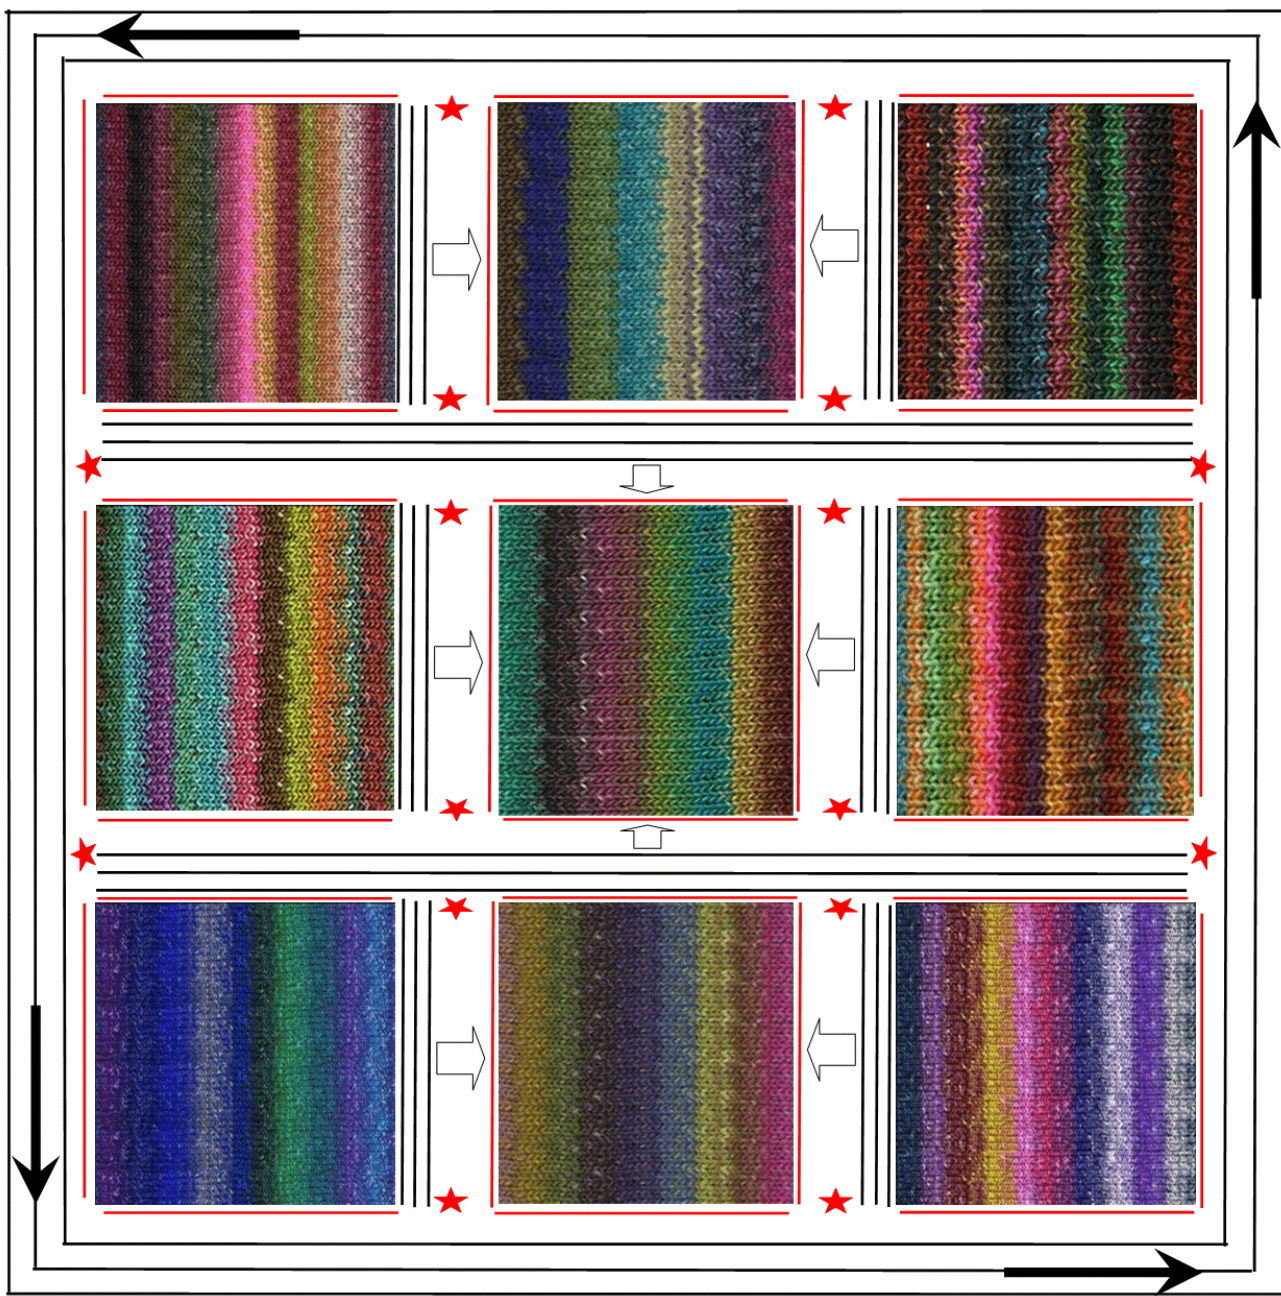
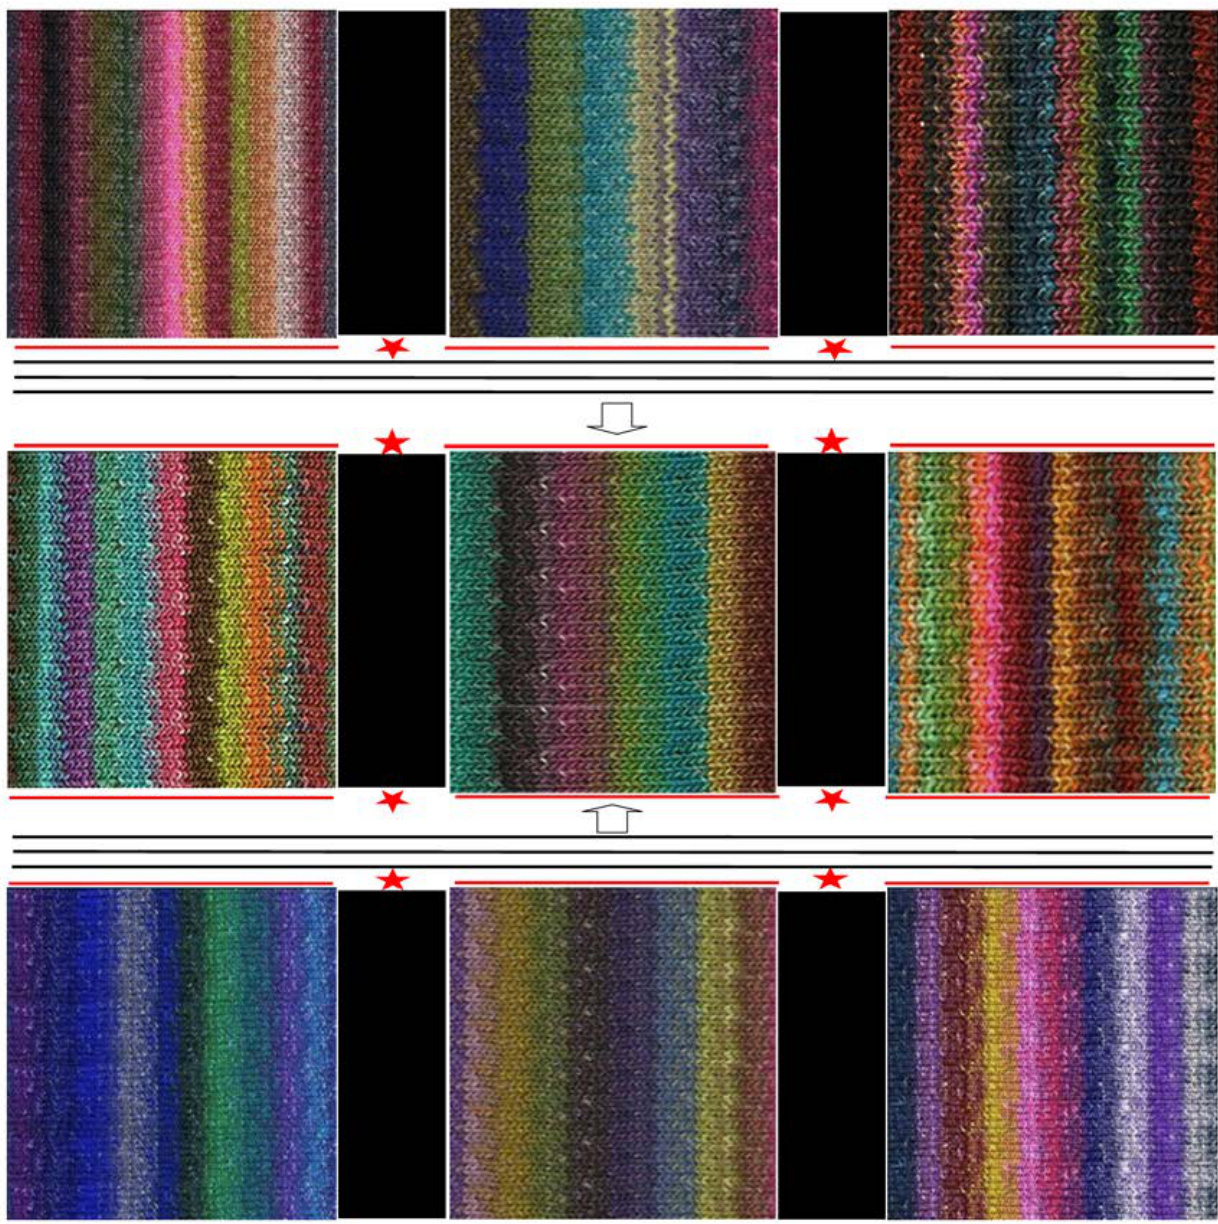
The first phase of the assembly is to get groups of 3 blocks bound together with the contrasting color. Choose one side of the square, make sure to exclude the corner stitch on either side, you should have 42 stitches being worked. Work 12 rows of stockinette stitch back and forth across that side. Choose a side of the square that will go next to the one you just worked on, work 1 row of stockinette in contrasting color. Hold the two needles on the two squares parallel and either 3 needle bind off or kitchner stich together. You now have a band of contrasting color in between two squares. Choose one side of the square that will go next in line, work 12 rows of stockinette stitch back and forth across that side. Choose another side opposite of the band you just created on one of the two squares you joined together and work 1 row of stockinette stitch, join with the 3'd square in kitchner or 3 needle bind off. You now have 3 blocks joined together in a line with bands of contrasting color between them. Repeat this for the other two rows of 3 blocks.

Phase 2
The second phase of the assembly is to get the three lines of blocks joined together to make 1 large square. Put all of the live stitches from one long side of the 3 block-line onto the needle. As you are knitting 1 row with the contrasting color you need to pick-up 15 stitches along the edge of the band of contrasting color that is between each block (1 for each row in the contrasting band (13) + 1 next to the corner stitch of the blocks on either side of the band). Make sure not to include the corner stitches on either end of the end blocks (these will be knit in phase 3), you should have 160 (43-15-44-15-43) stitches on your needle. For the line of blocks that is in the center of the blanket, knit 1 row in stockinette as you do this pickup on either side (top and bottom). The top of the center line of blocks will be joined to the bottom of the top line of blocks using either kitchner or 3 needle bind off. The bottom of the center line of blocks will be joined to the top of the bottom line of blocks.
Phase 3
The last phase of the assembly is to make the final contrasting bands all the way around the now joined square. Put all of the live stitches from each side of each of the 8 blocks onto a large circular needle. As you are knitting 1 row with the contrasting color you need to pick-up 15 stitches along the edge of the band of contrasting color that is between each block (1 for each row in the contrasting band (13) + 1 next to the corner stitch of the blocks on either side of the band). You should have 644 (43-15-44-15-44-43-15-44-15-44-43-15-44-15-44-43-15-44-15-44) stitches 0n your needle. Note: This is 44 stitches along the side of each square except where the corner squares share a corner stitch and 15 along the bands of contrasting color. Join to work in the round in stockinette stitch for 13 rows and then bind off. Remember row 1 and all odd rows are plain stockinette, row 2 and all even rows you will need to work corner increases to keep the square growing. Knit to the corner stitch, M1R, K1, M1L, knit to the next corner stitch and so on around. You can use the YO alternative as well, just remember to knit into the back of the yarn overs on your odd rows. I used a purl bind off to help combat the edge curling that working in stockinette causes, Ialso used a size 10 needle for the bind-off to give extra room for blocking. Weave in all your ends. You may wish to crochet around the edge after blocking to further keep it from curling or use a garter edge as described below.
Garter Edge
Work row 13 as a purl row, row 14 as a knit row with the corner increases, row 15 as a purl row, row 16 as a knit row with corner increases, row 17 as a purl row, and then use a purl bind off with a size 10 needle to give room for blocking.