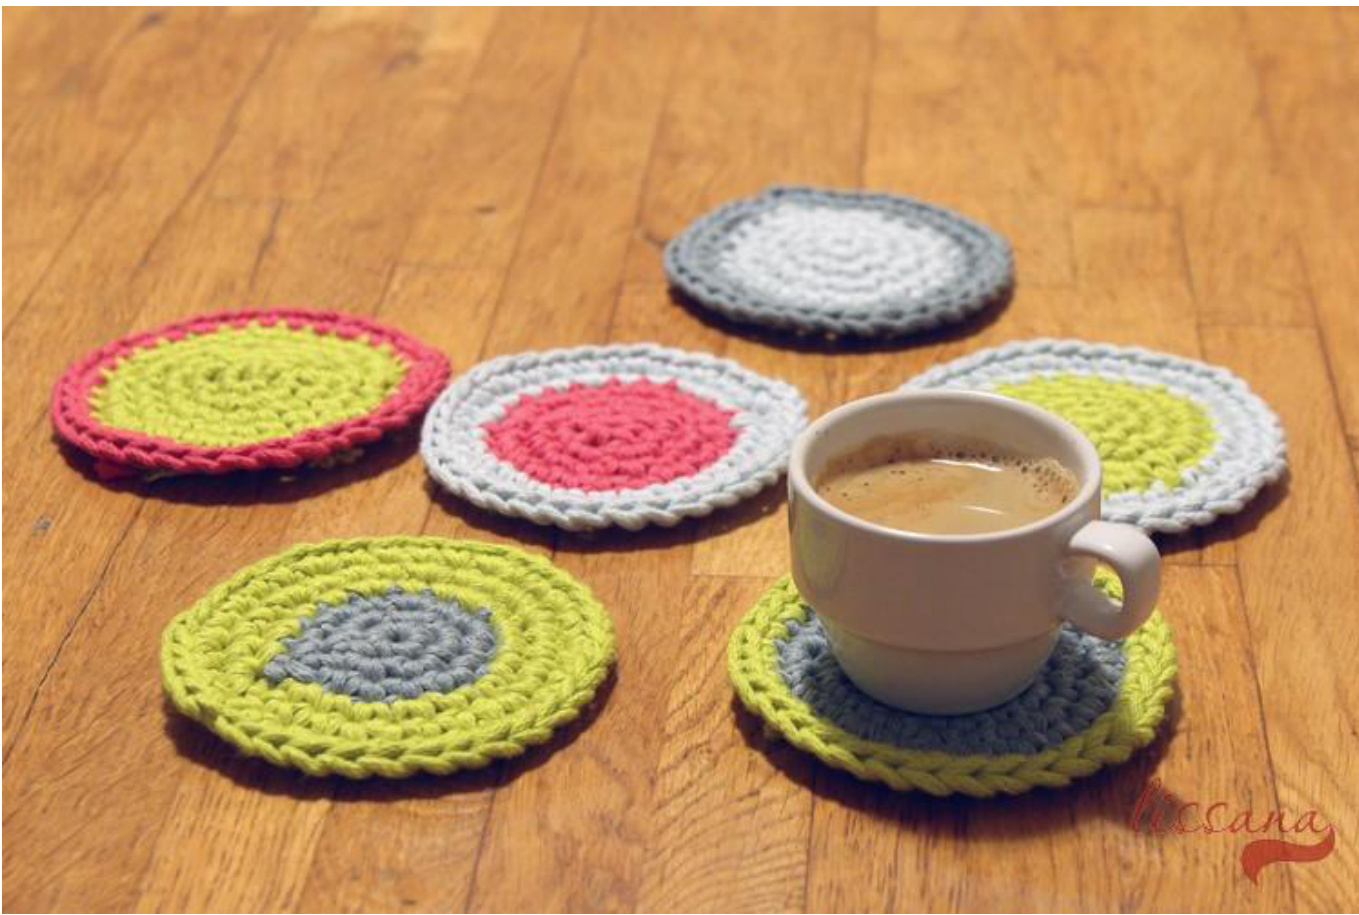
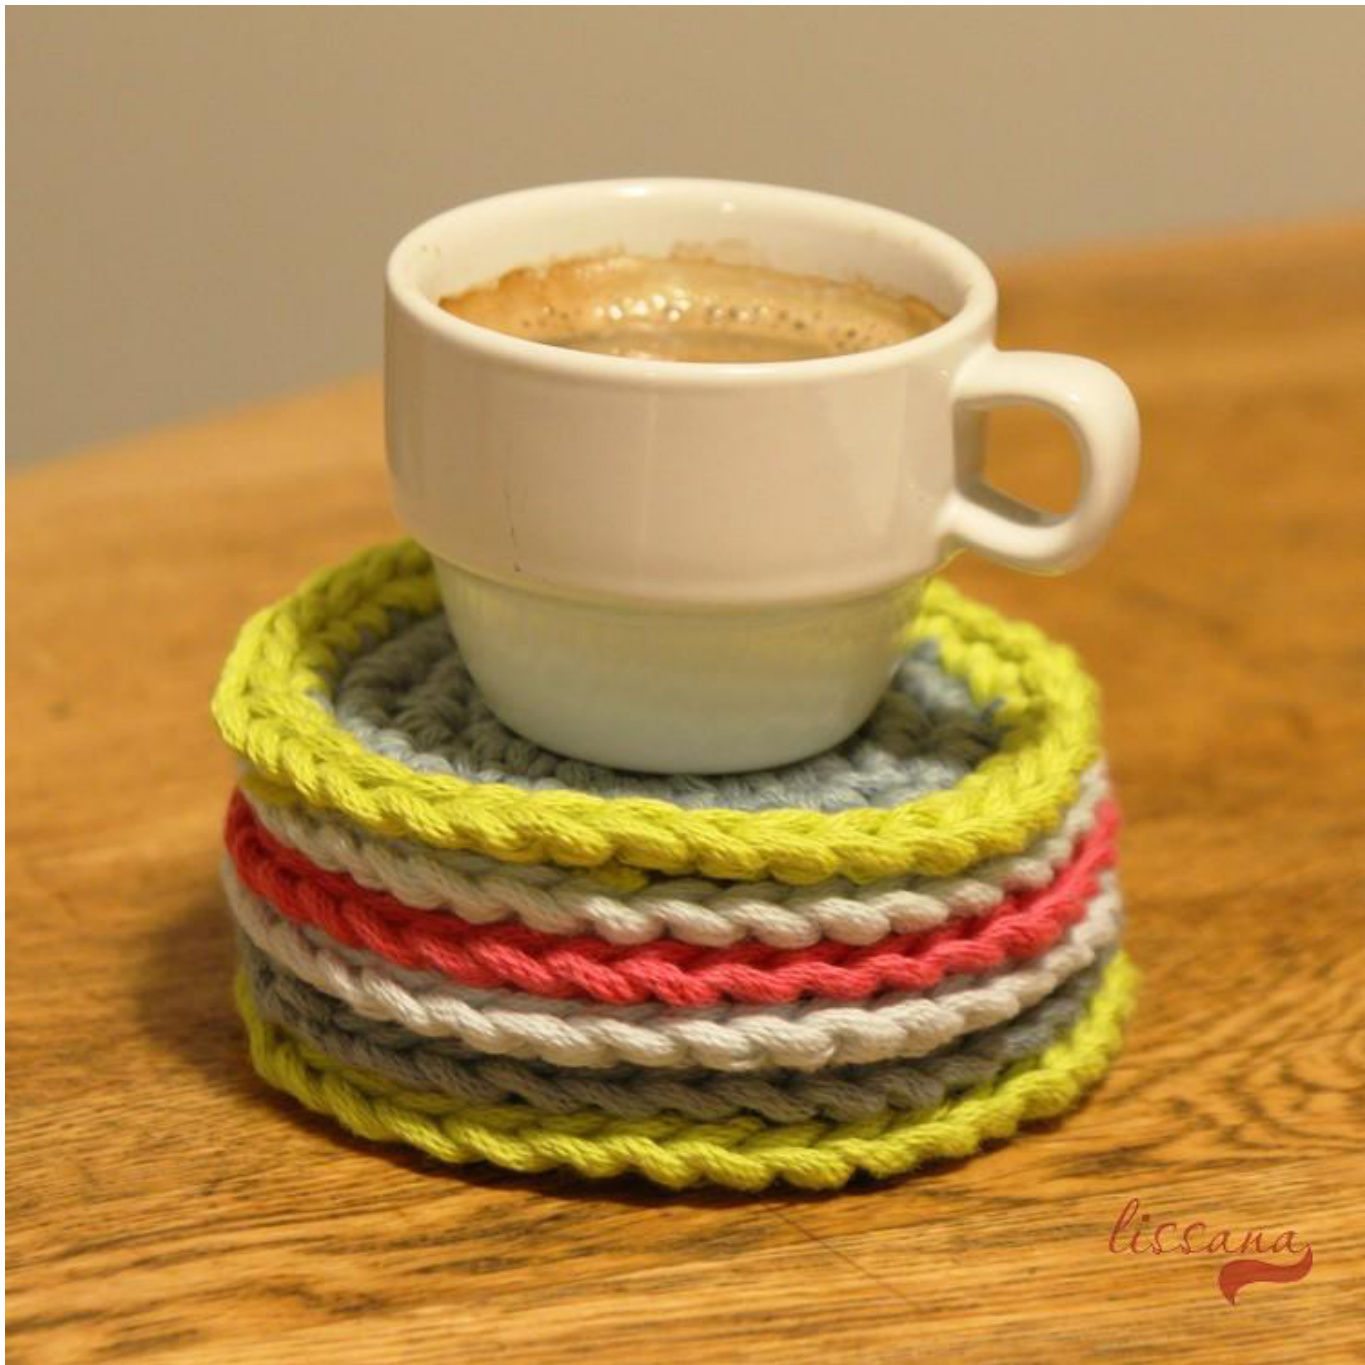
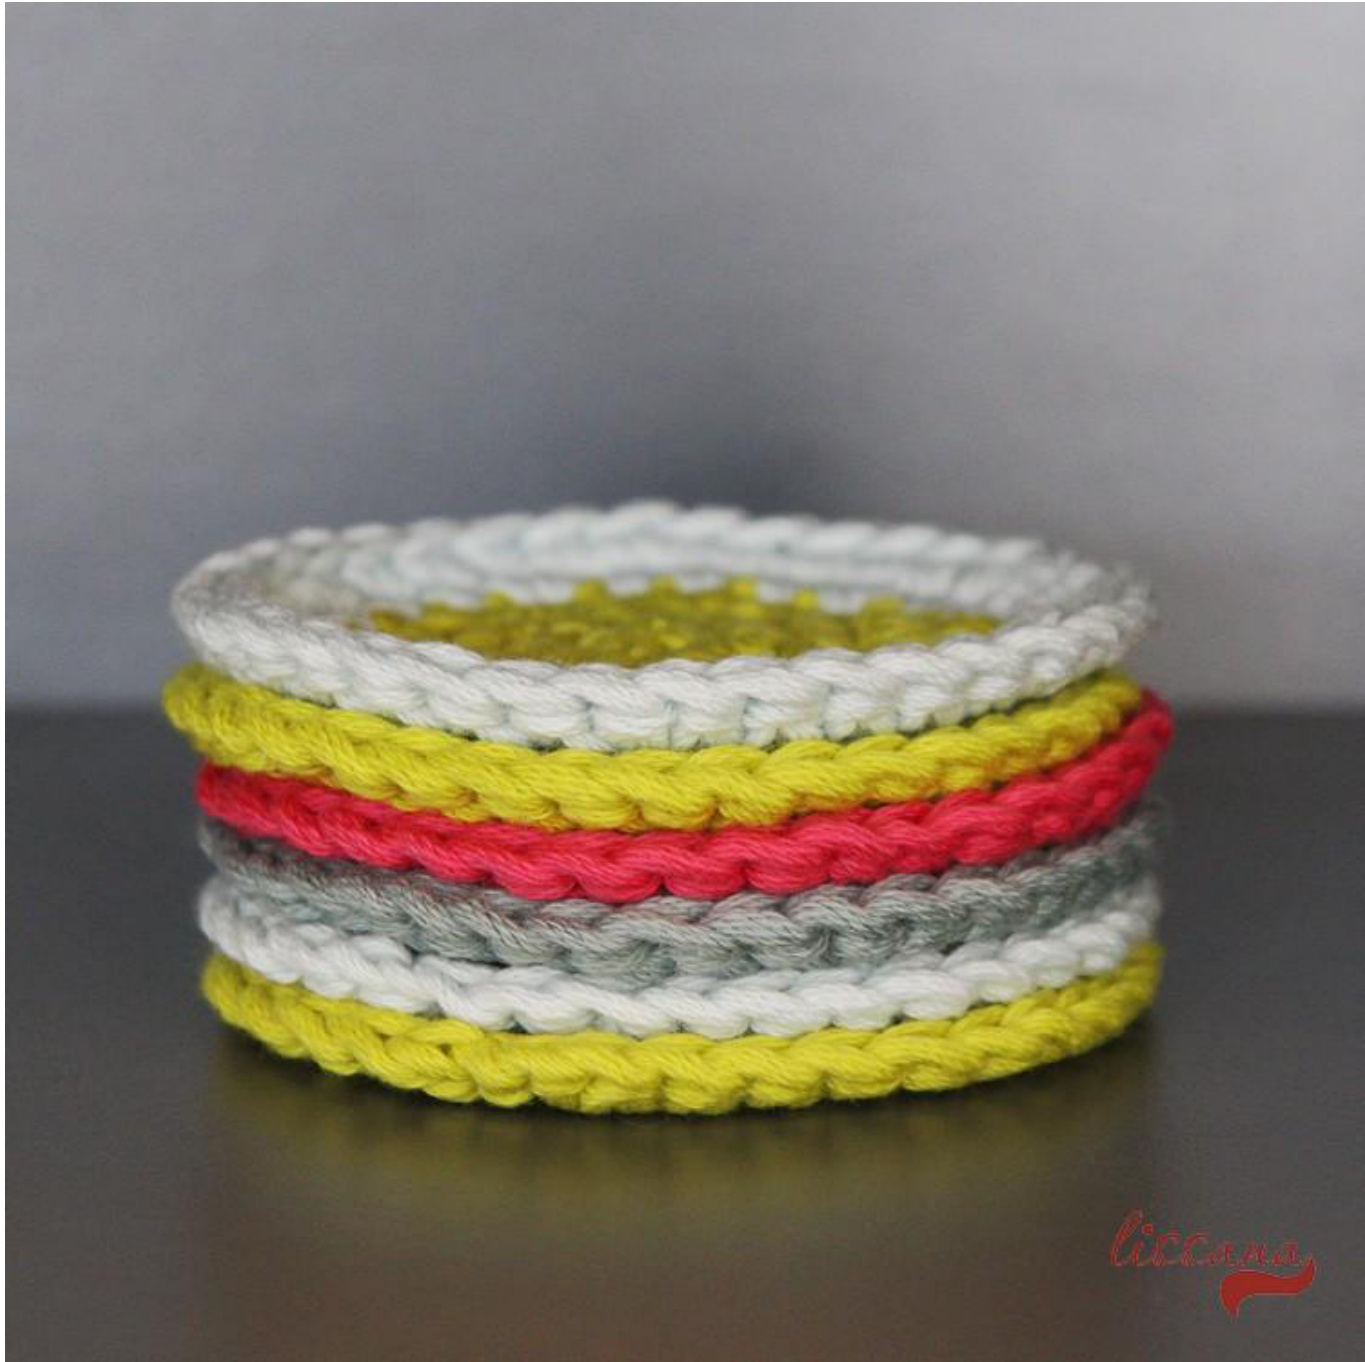
Festive crochet coasters
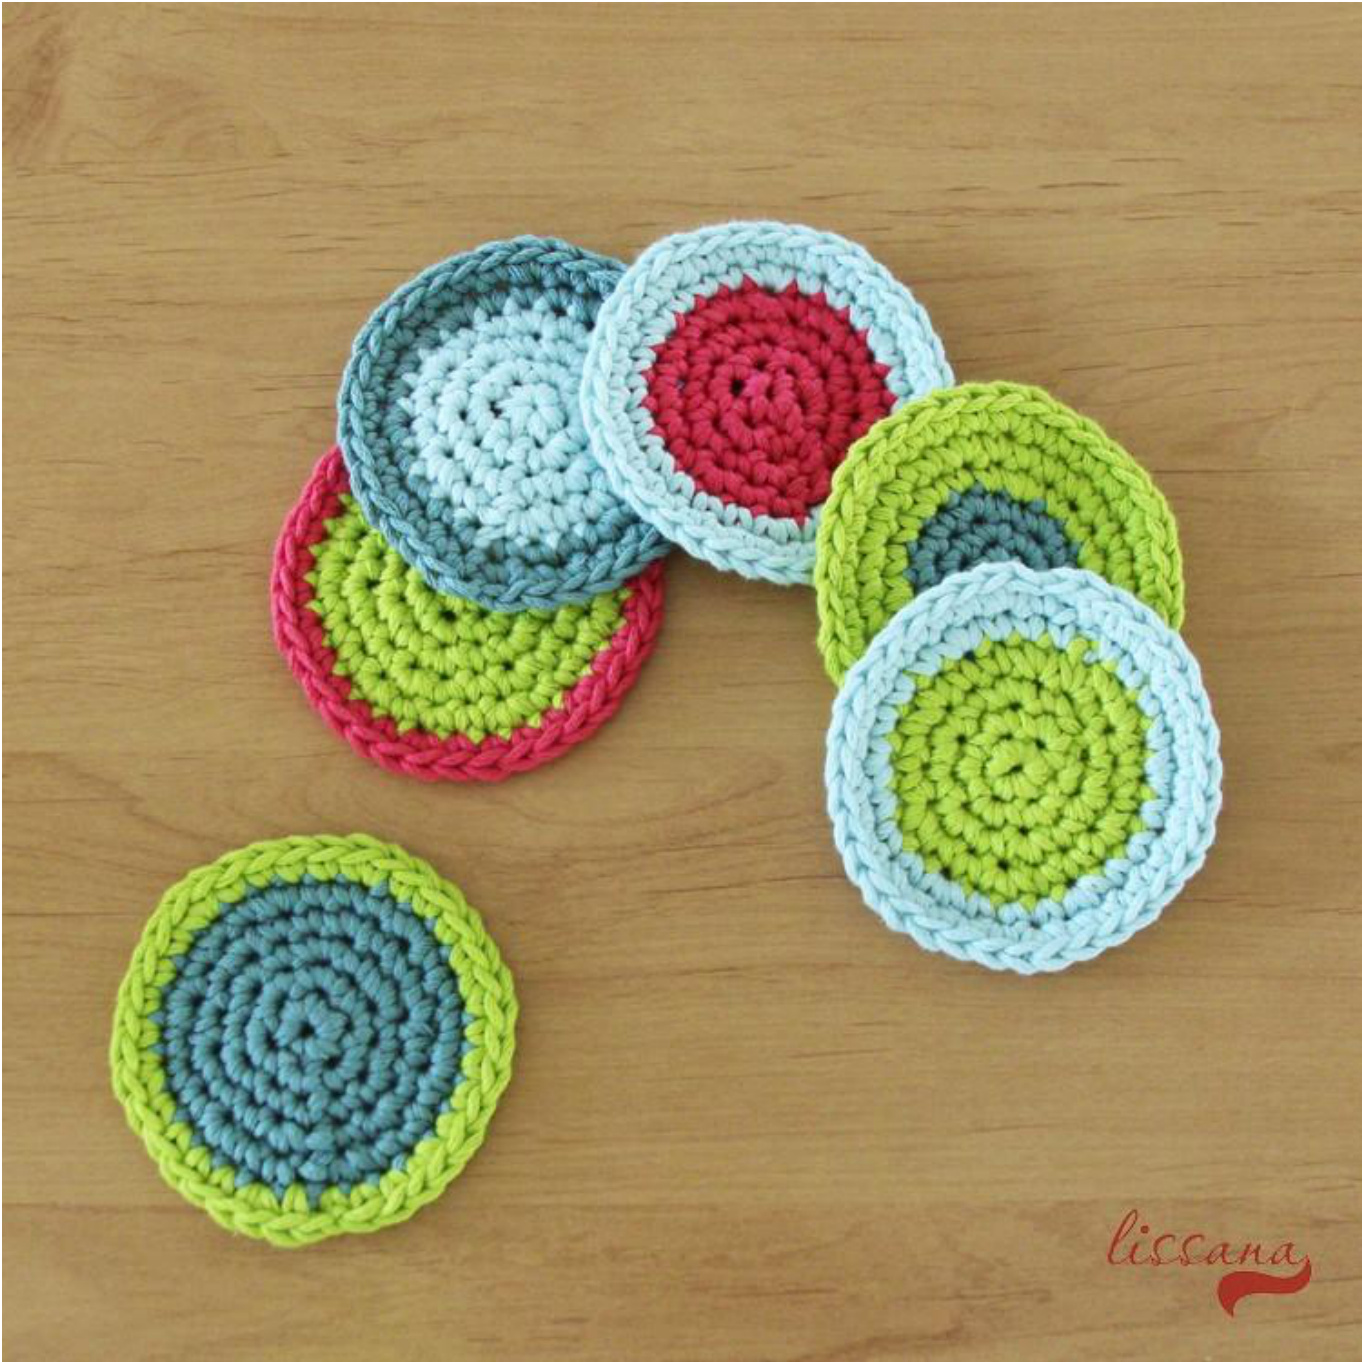
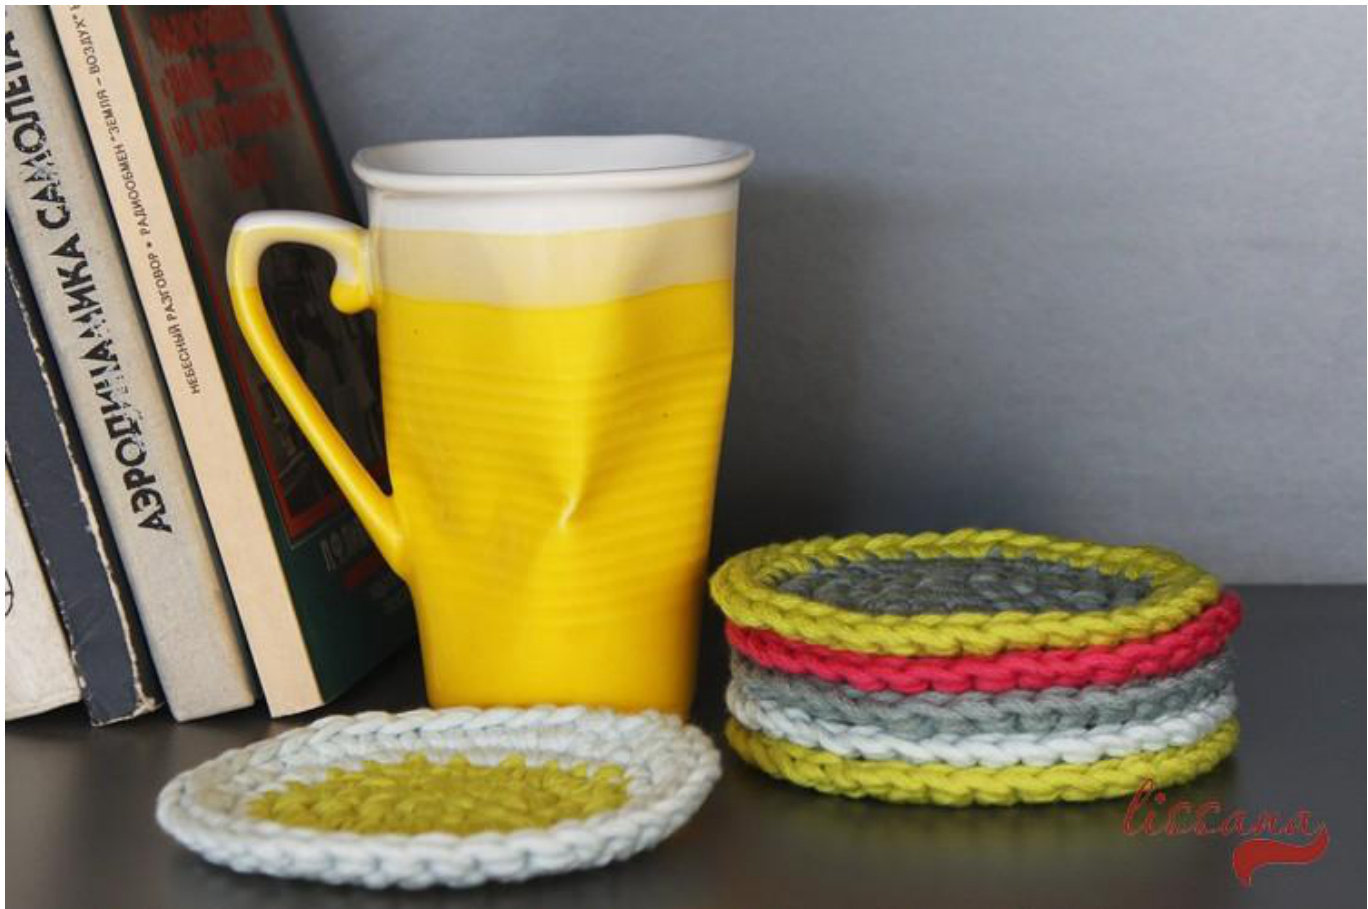
Pic 1 The New 2016 is in full swing already with the next holiday approaching fast. Thus, I'd like to share my tutorial for festive crochet coasters for occasion. I am a devoted coffee drinker. I can survive without food but I can't do without coffee. It's enough only to hear the word "coffee" in order to start needing some. Of course, as a person who loves all things Italian, you can imagine that I love the coffee short and strong. Smaller the cup, better the taste. Lately, I realized that my coffee was missing something. I changed the brand, it didn't help. A few days had passed until one morning I suddenly realized what was bothering me! I didn't have a coaster for my cup and it was leaving stains on the table. Thus is how the idea of these festive and very bright coasters was born. To make these you need some small amounts of coordinating yarns from your stash. The yarns I used were left from the crochet baskets l shared with you some time ago (http://upcraftclub.com/blogs/news/44413953-tutorial-crochet-baskets-for-fall)
Pic 2
Materials
For the projects you can use any type of yarn but natural yarn will give you best results. I used DMC Natura Just Cotton XL. Each ball is 100 g/82 y. You will need scraps in different colors. Unfortunately I don't have the color numbers because those were only scraps left at home. C1 - light blueC2 - lime greenC3 - grey C4 - pink You may use other colors to suit your interior better. Crochet hook size 10 % US. A marker. You don't really need a marker but I found out that this is the only one way in which I don't lose the track of my stitches number. The marker simply makes your life much easier.
Size 4 inches in diameter. Let's get started! Pic 2-1 Worked in the round. Read the whole section first!
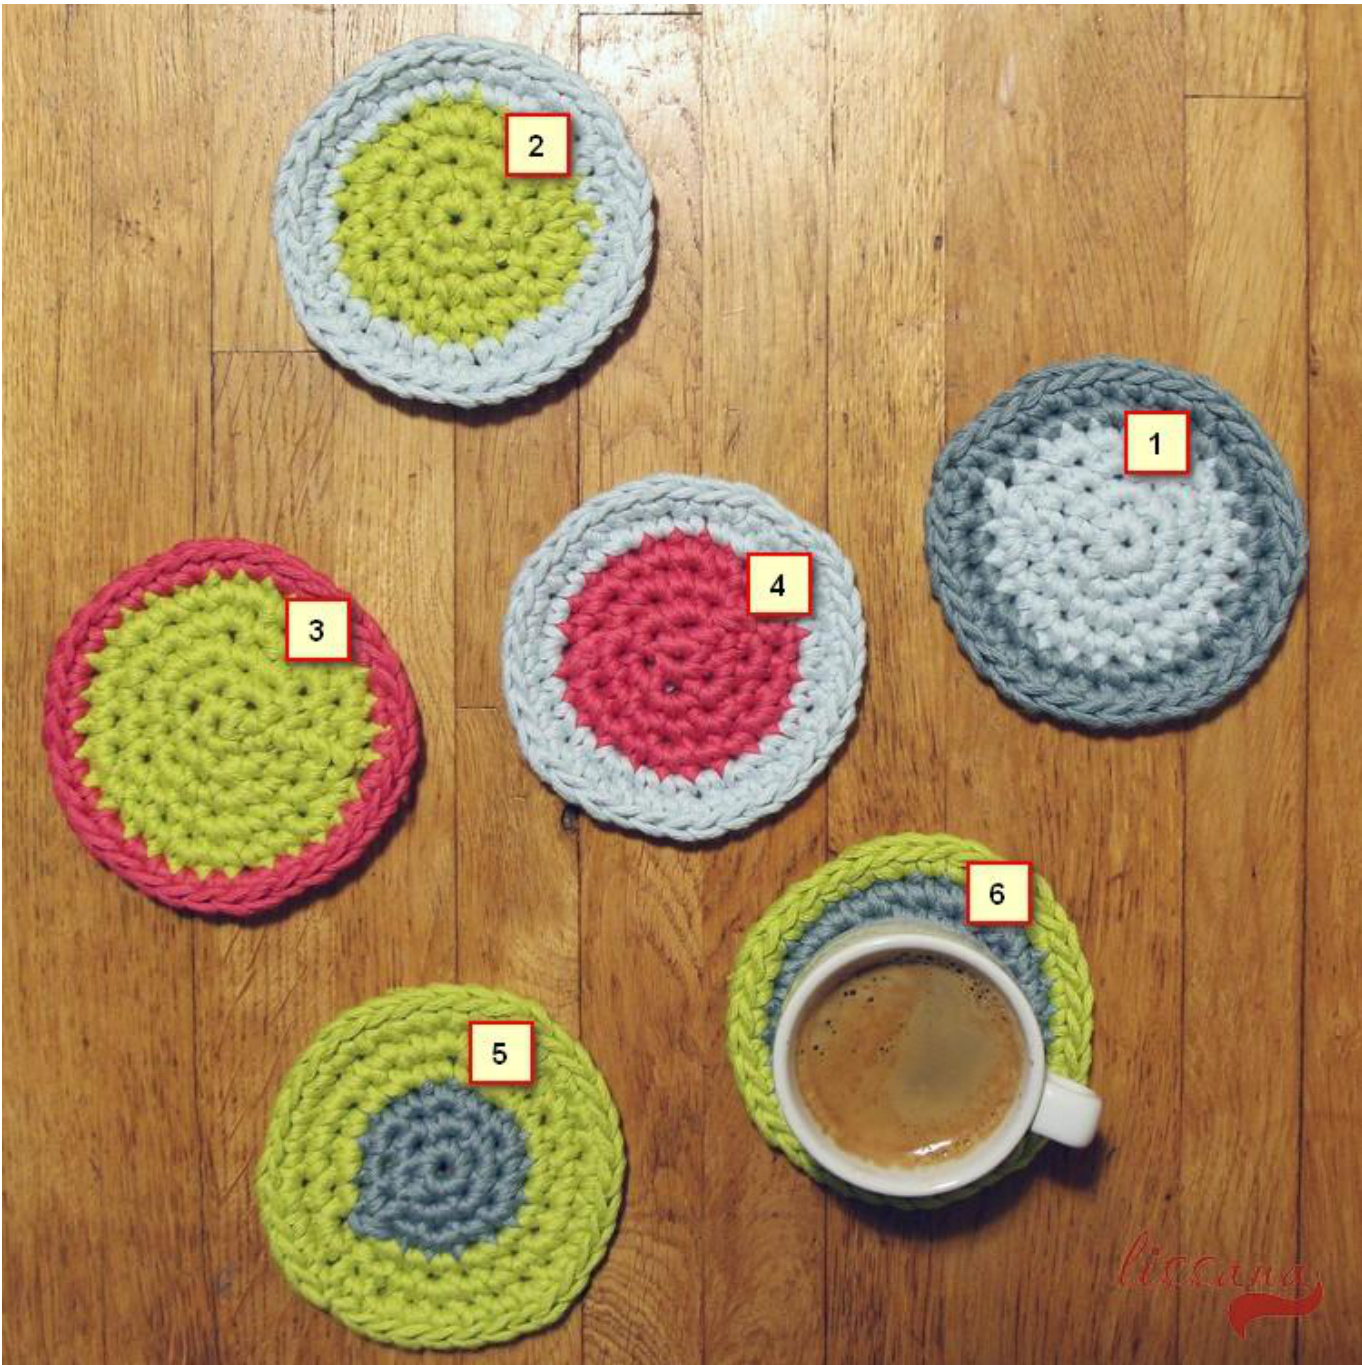
Coaster 1
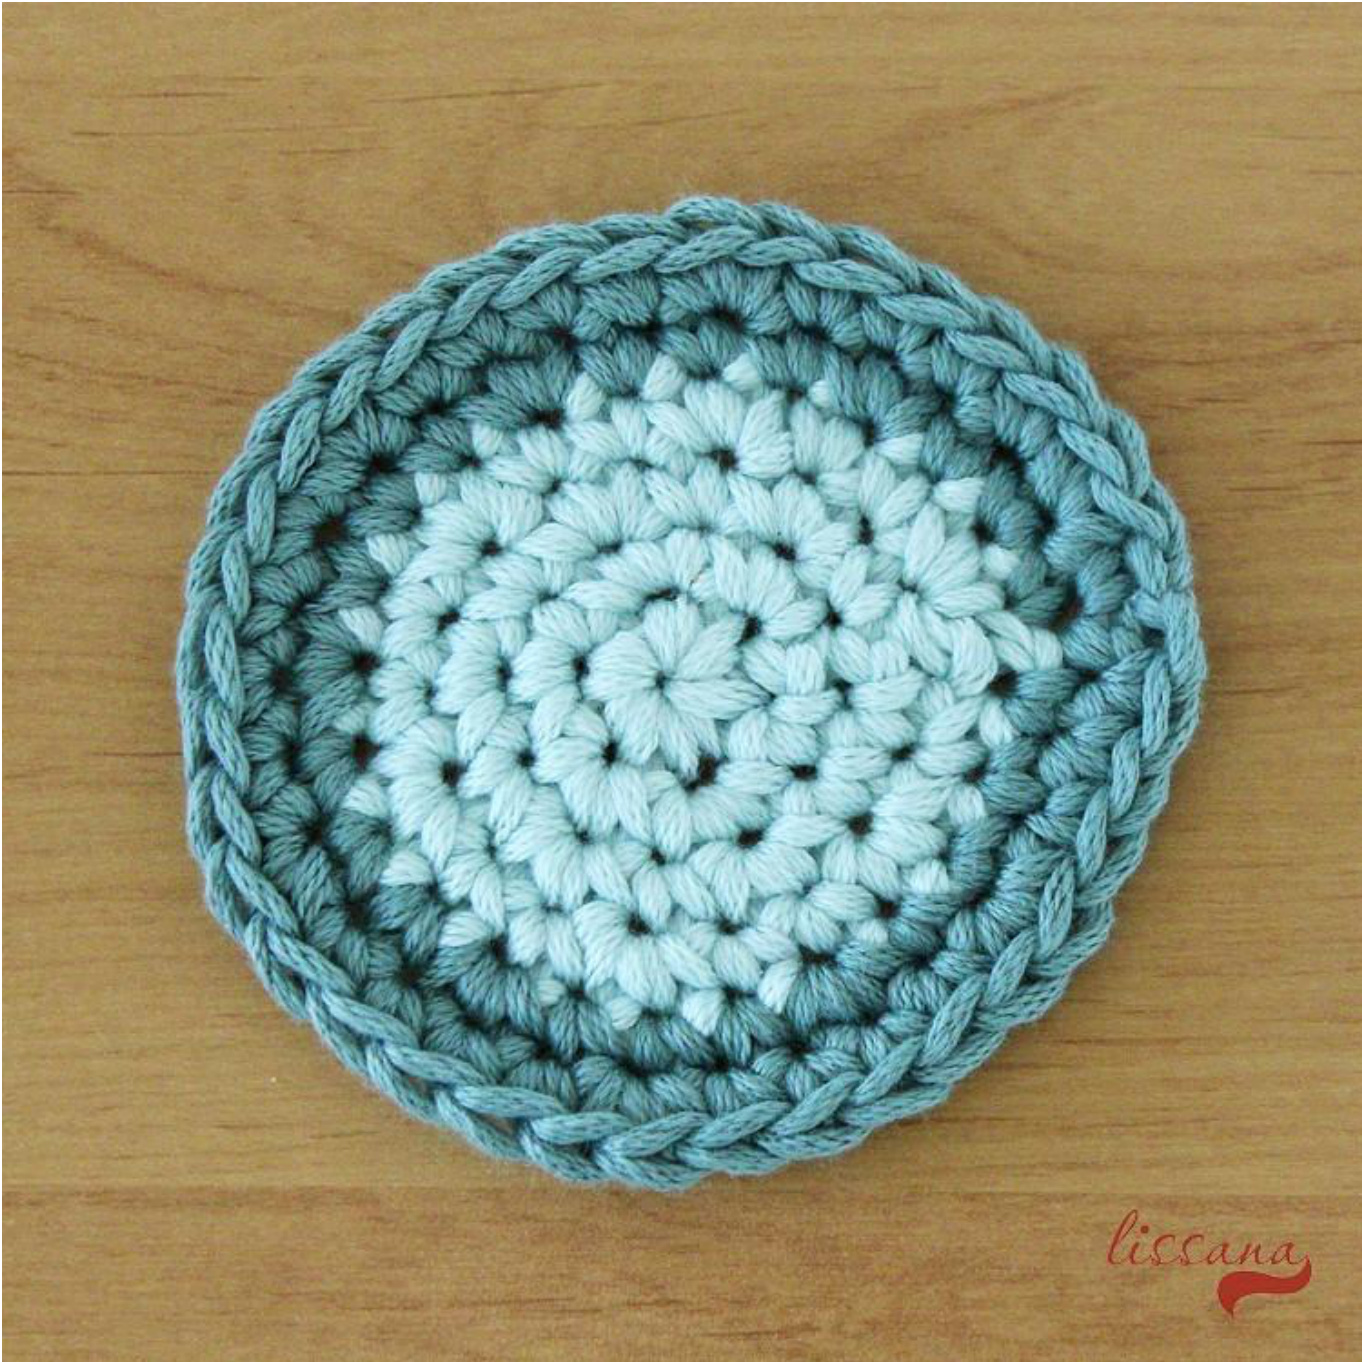
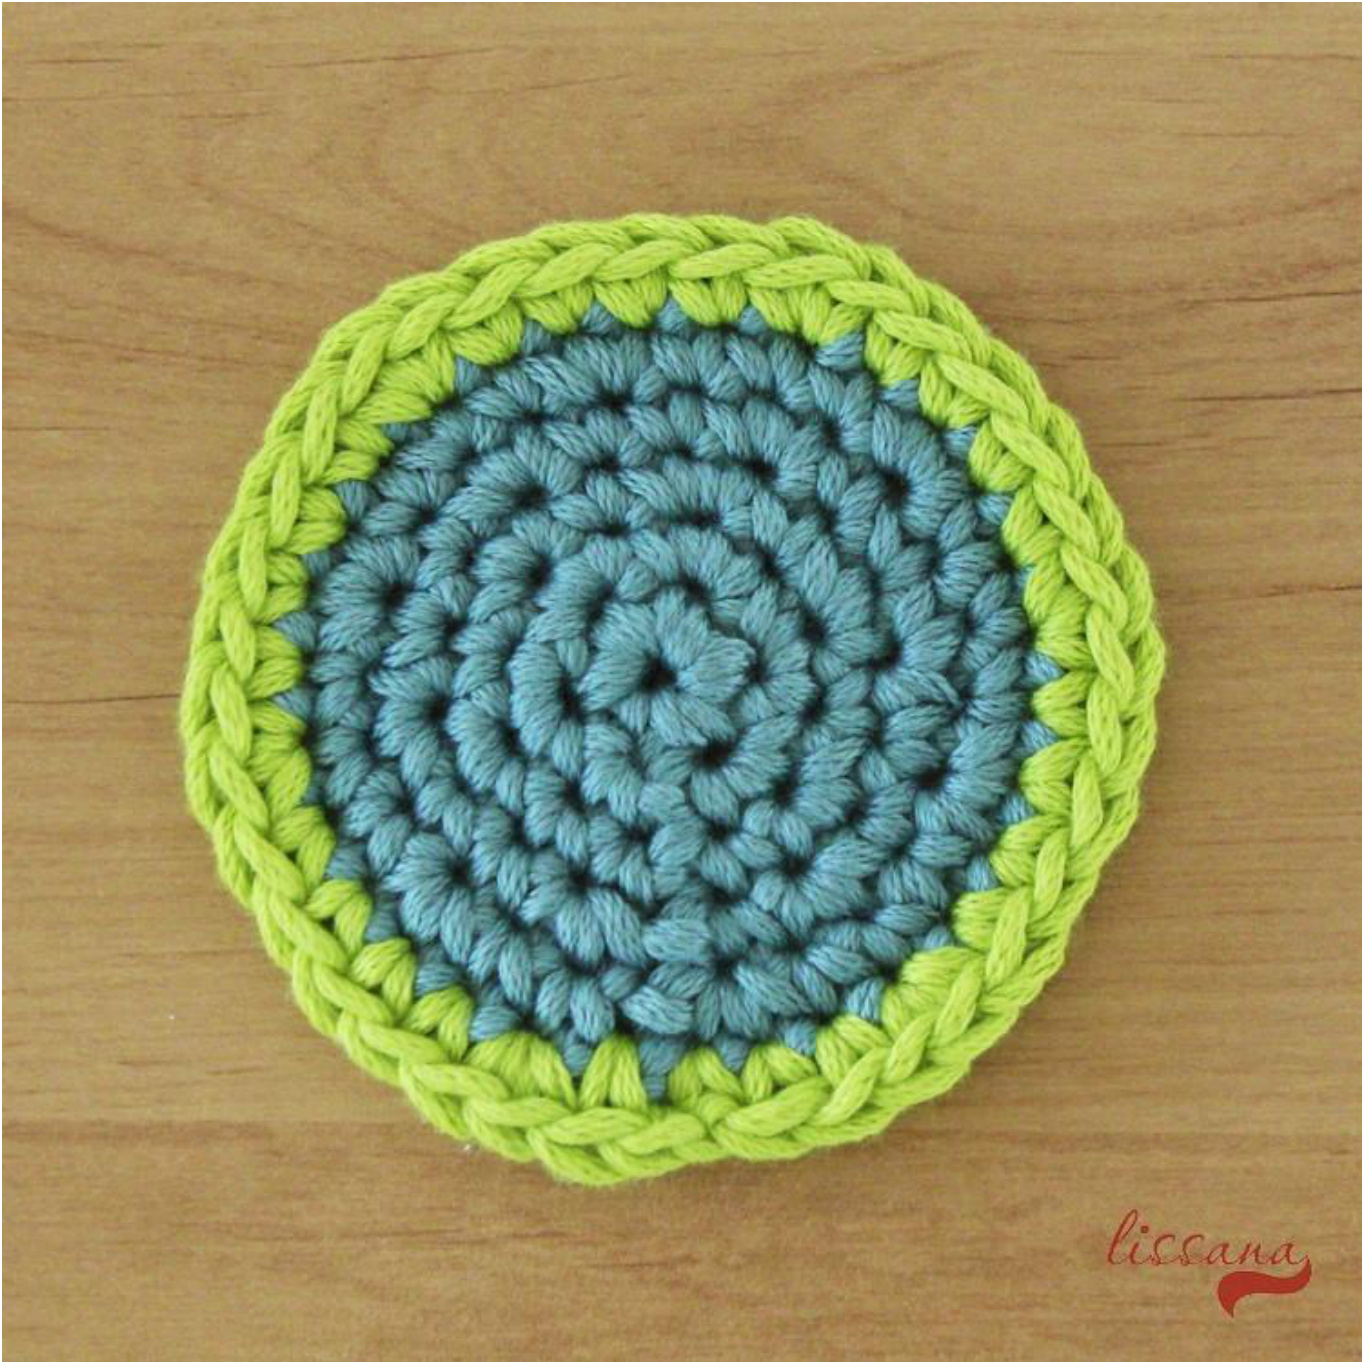
Pic coaster1 Rnd 1: Make a magic loop and work 6 sc st in the loop. Sl st in the first st. Ch 1. This is your transition to the next round. Put the marker in the first sl st. Tighten the loop. Rnd 2 - Make 2 sc in each st, make one 1 st in the last sc from the previous row and join with a sl st in the st with marker (12 sc). Move the marker to this st. Move the marker on every round. Rnd 3 - Ch 2, in the next st \*make 1 sc in the first sc, make 2 sc in the second sc\*. Repeat from \* to \* tillthe last stitch. Join with a sl st (18 sc). Rnd 4 - Ch 2, \*make 1 sc in the first two sc, make 2 sc in the third sc\*. Repeat from \* to \* till the last stitch. Join with a sl st (24 sc). Change to C3. Work next 2 rounds with C3. Rnd 5 - Ch 2, \*make 1 sc in the first three sc, make 2 sc in the fourth sc\*. Repeat from \* to \* till the last stitch. Join with a sl st (30 sc). Rnd 6 - Ch 2, \*make 1 sc in the first four sc, make 2 sc in the fifth sc\*. Repeat from \* to \* till the last stitch. Join with a sl st (36 sc). Fasten off. Cut the yarn. Weave the ends in.
Coaster 2
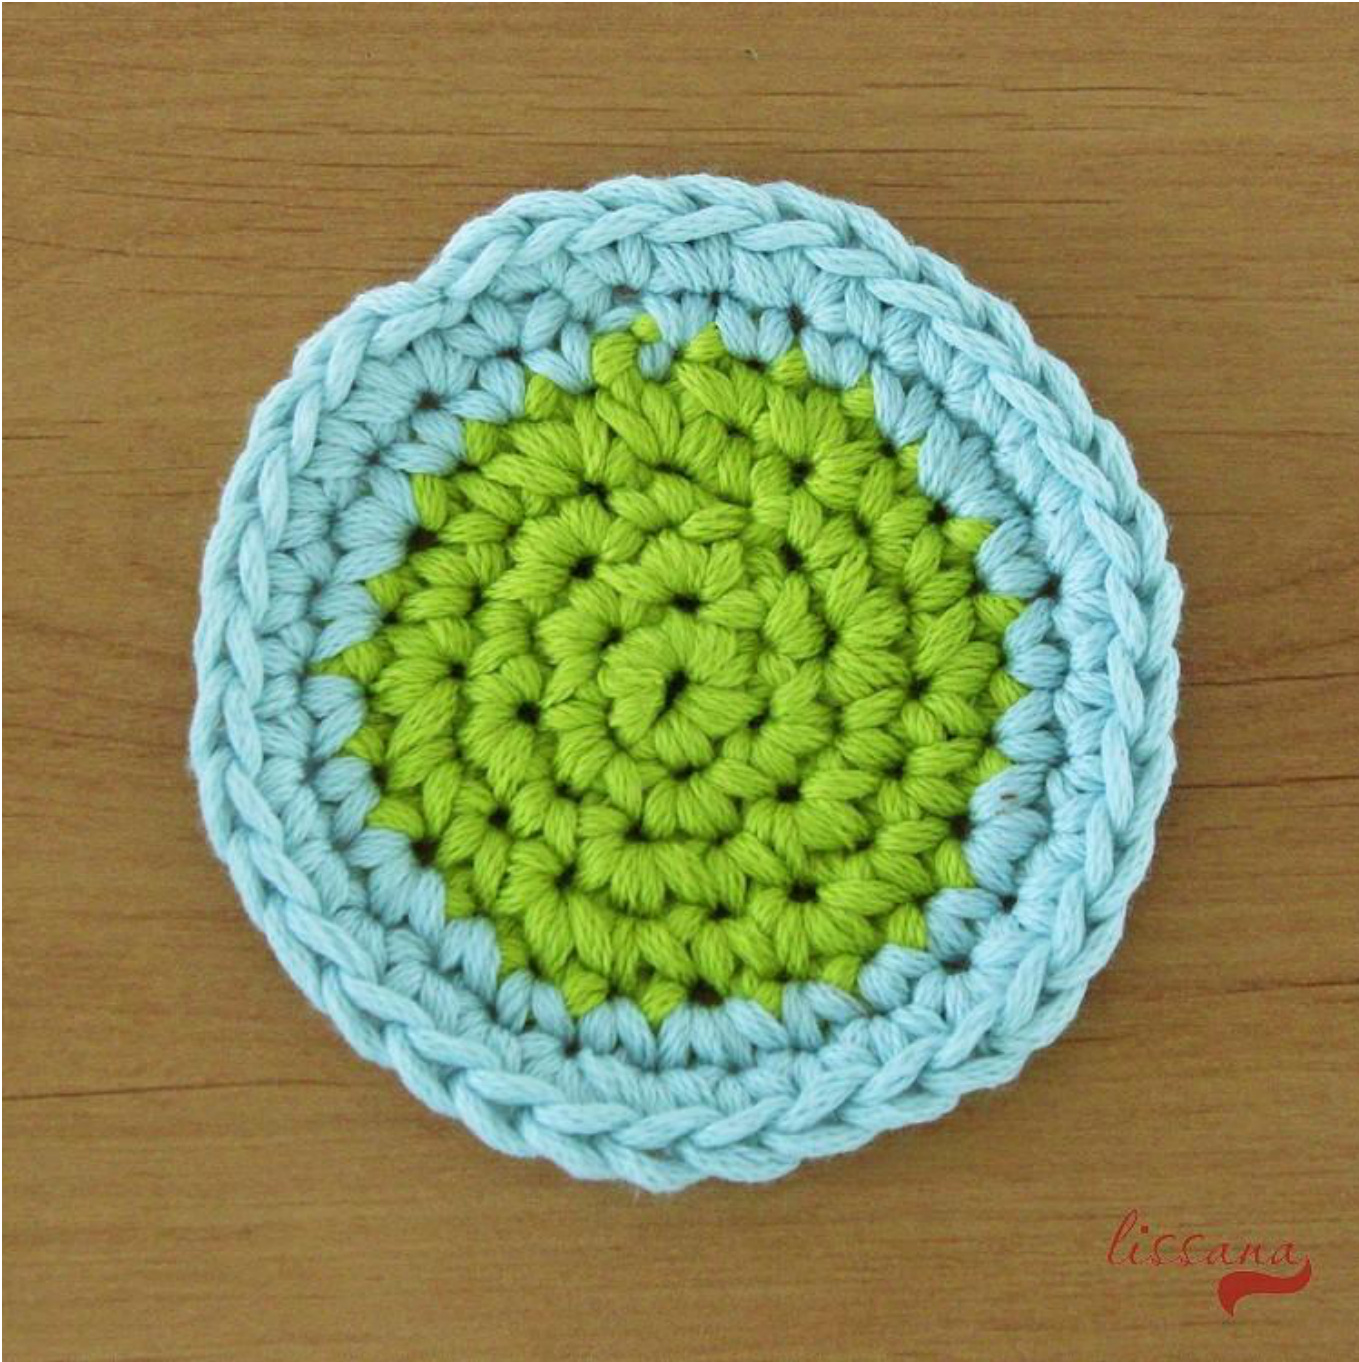
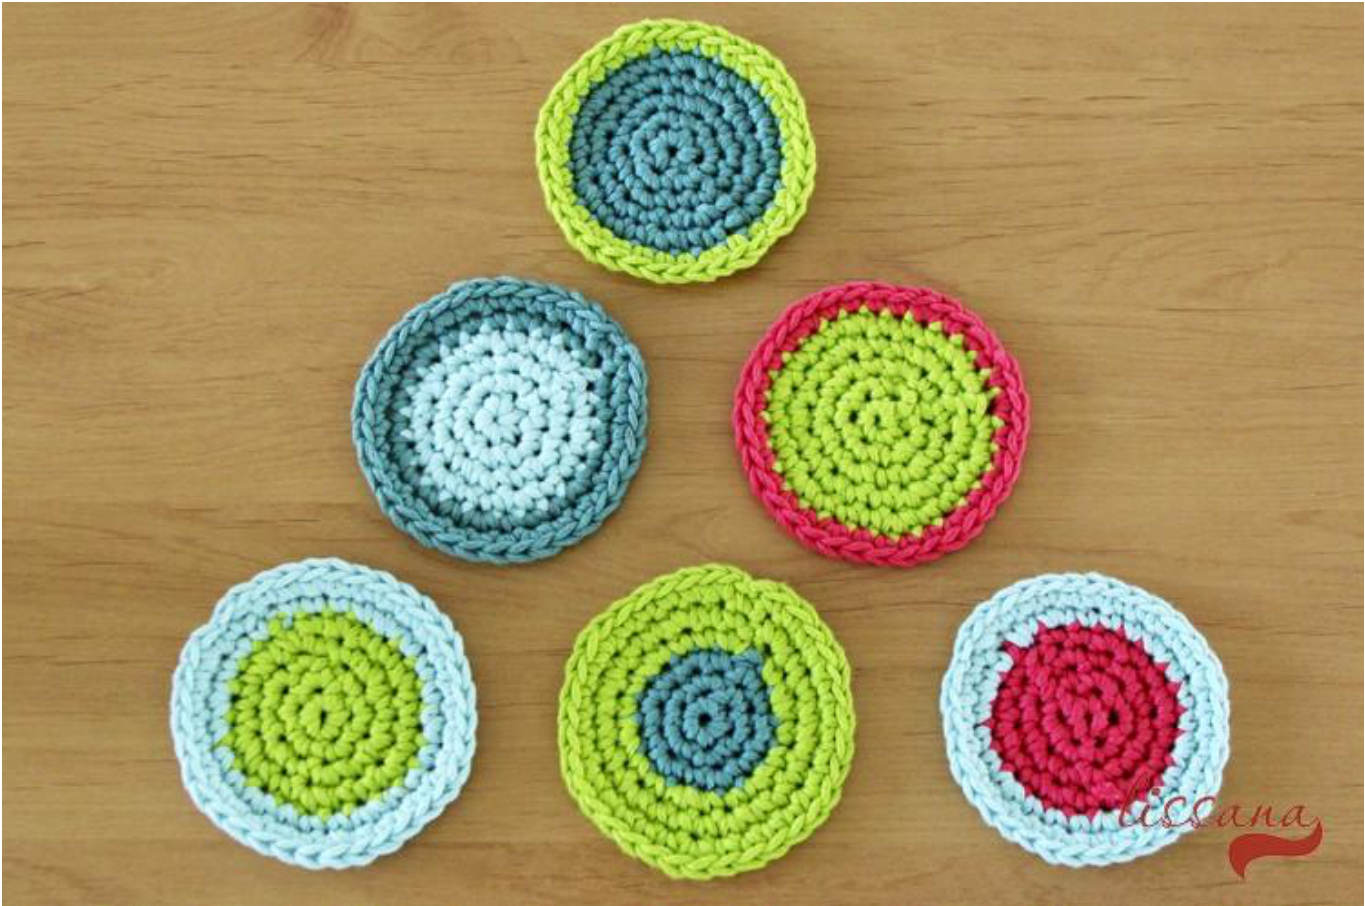
Pic coaster2 Repeat the steps but start with C2 and on the round 5 change to C1.
Coaster 3
Pic coaster3 Repeat the steps but start with C2 for five rounds and on the round 6 change to C4.
Coaster 4
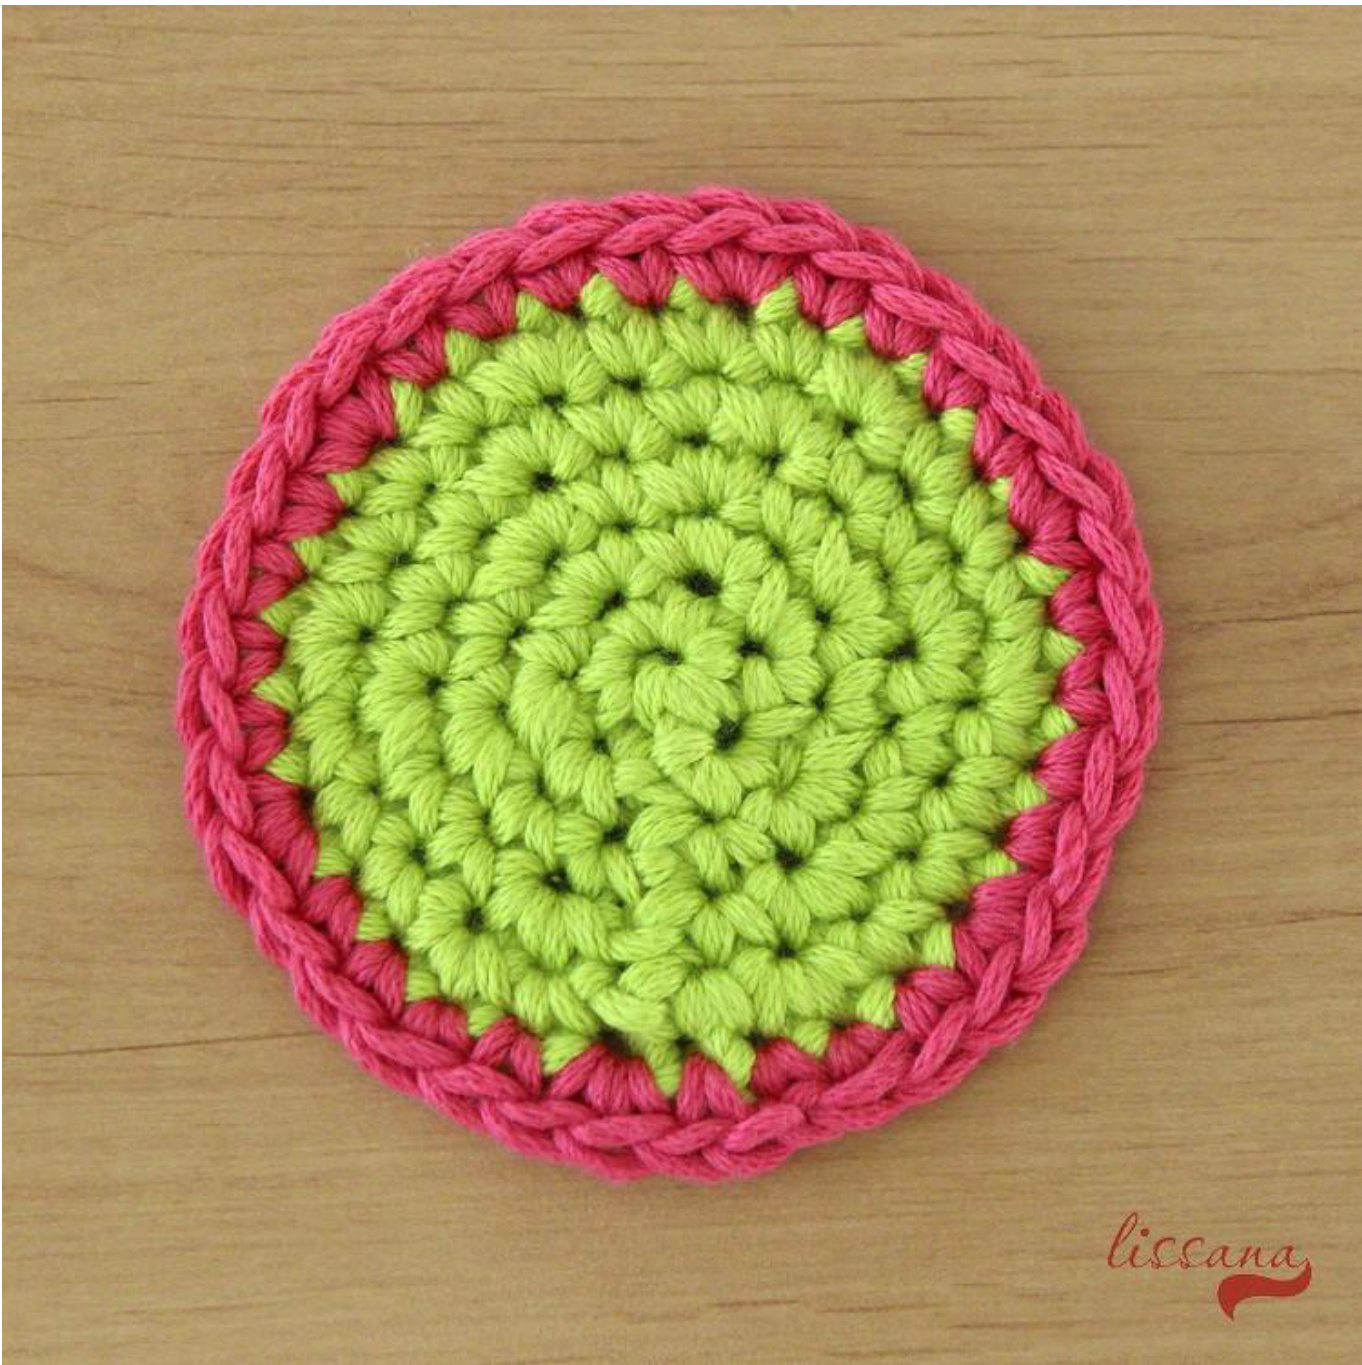
Pic coaster 4 Repeat the steps but start with C4 and on the round 5 change to C1.
Coaster 5
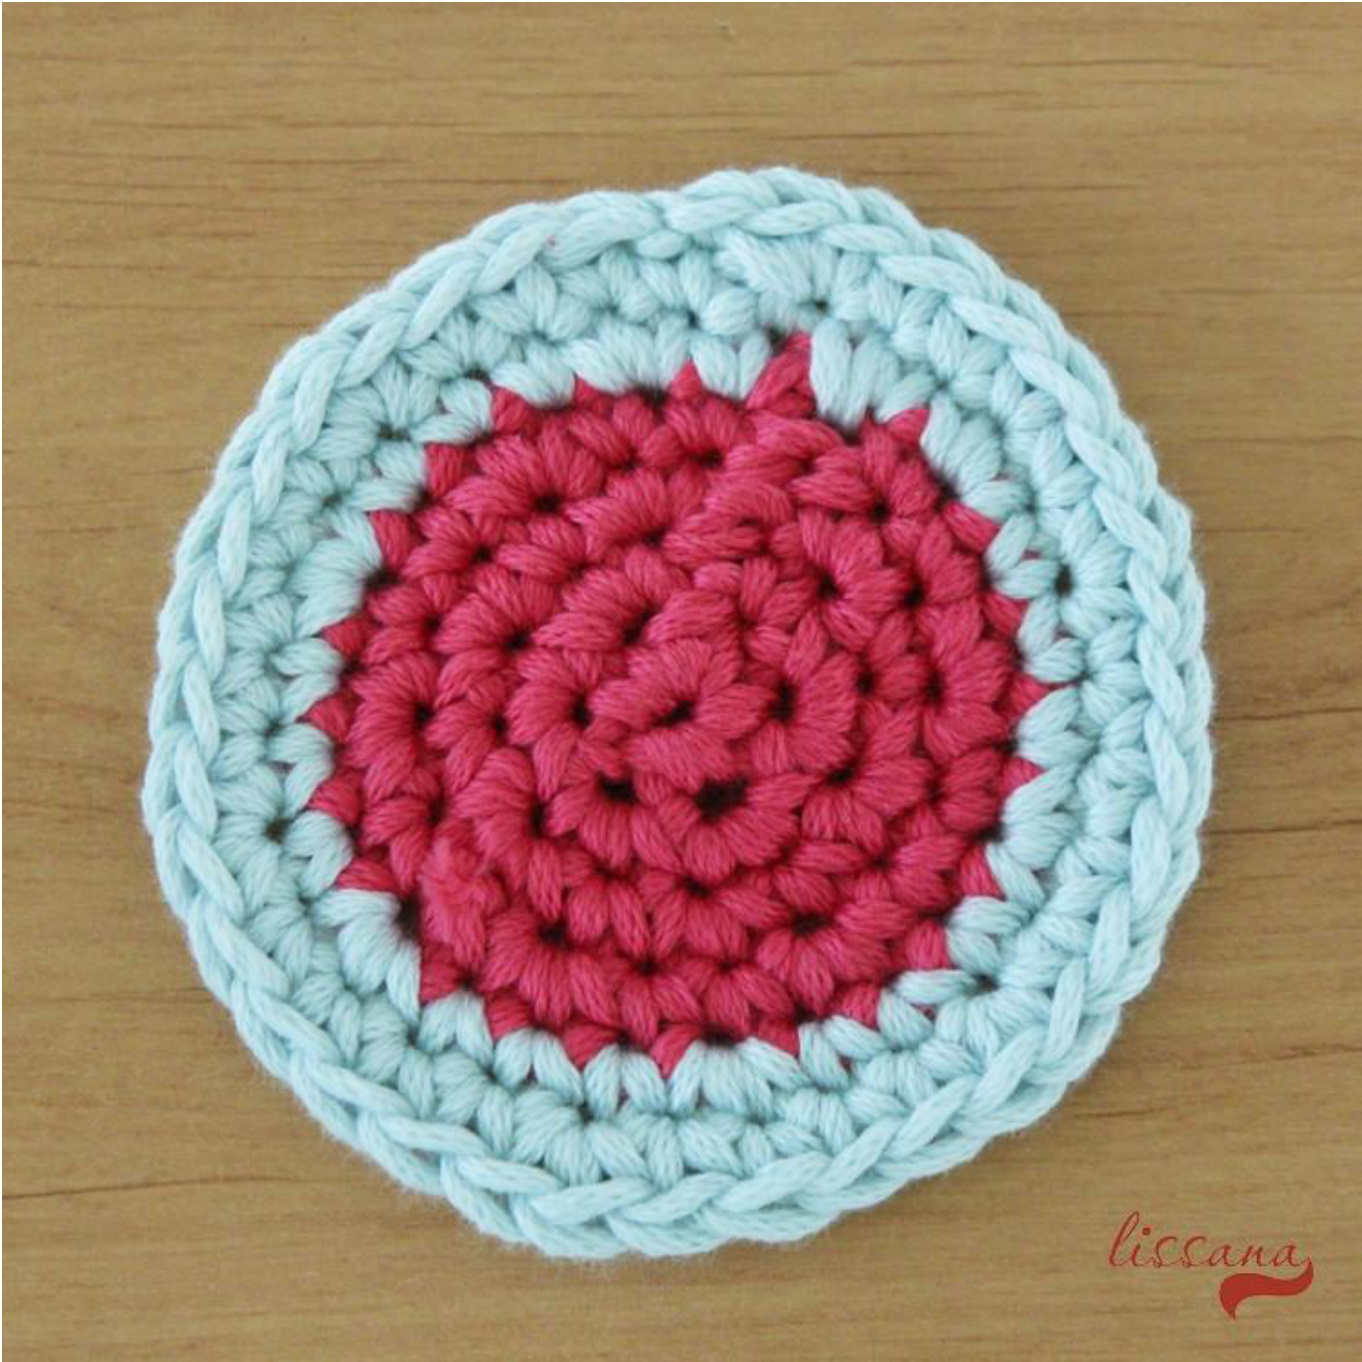
Pic coaster 5 Repeat the steps but work three rounds with C3 and on the round 4 change to C2.
Coaster 6
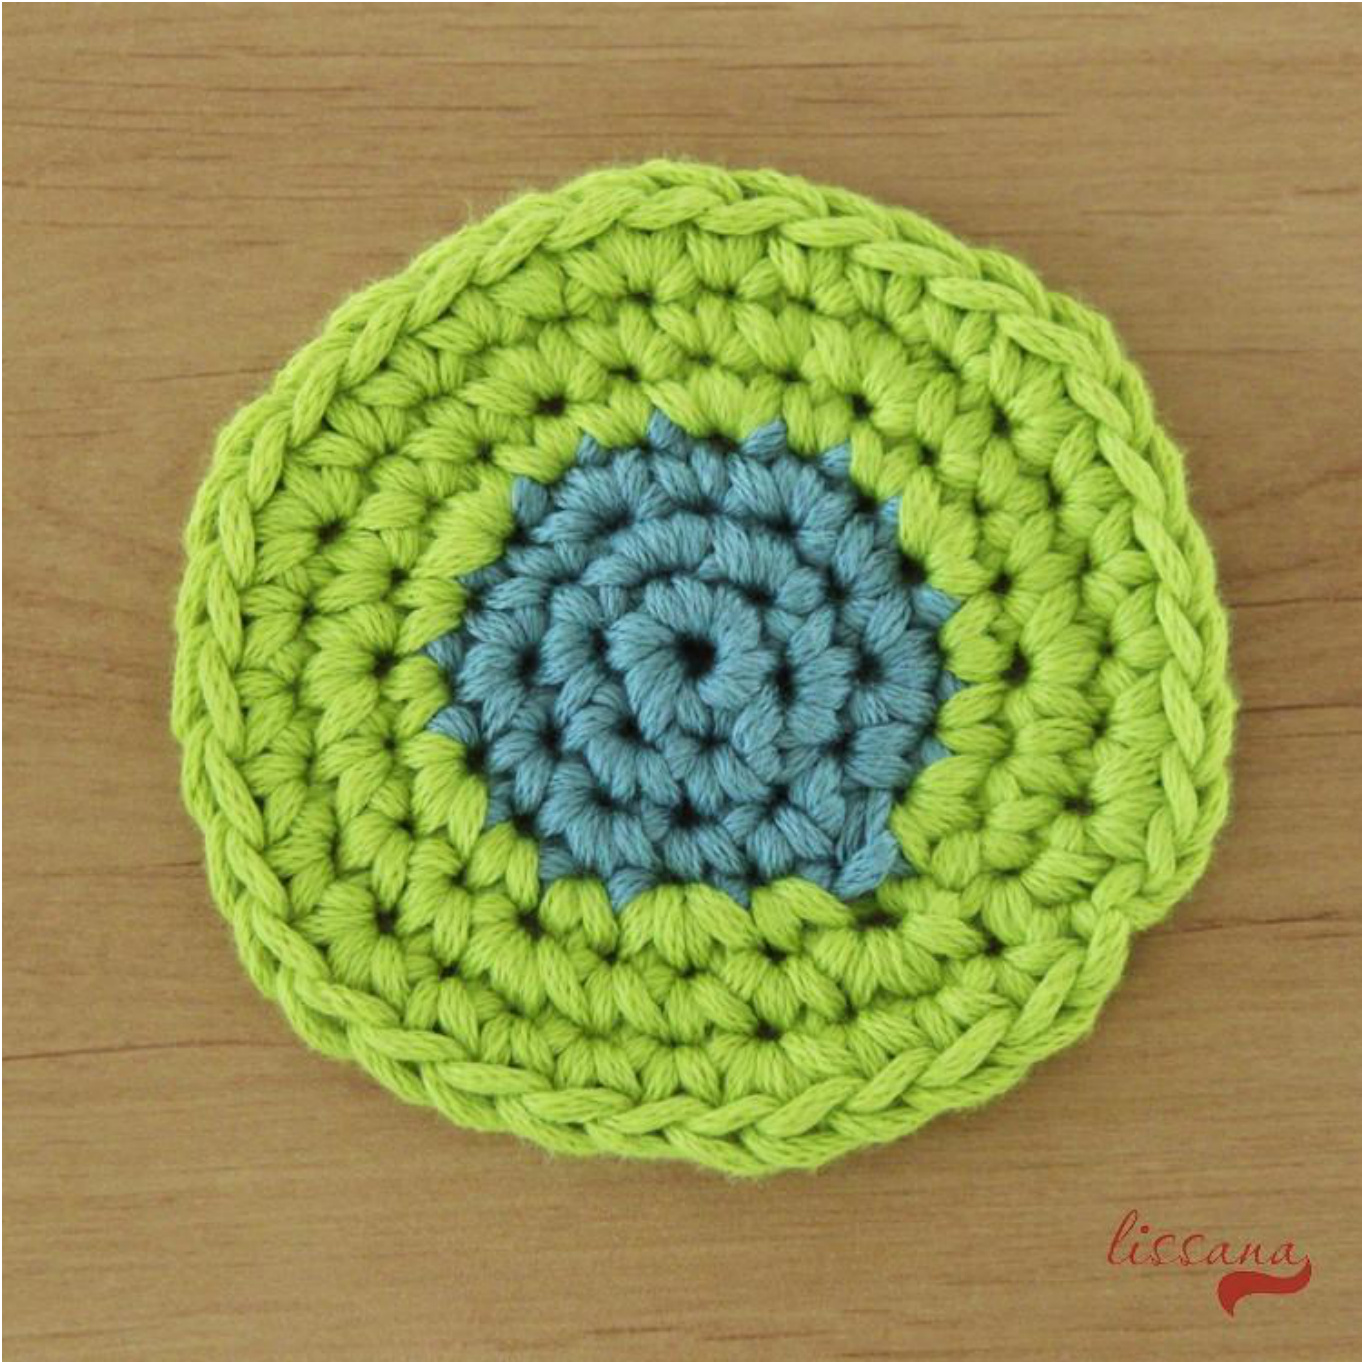
Pic coaster6 Repeat the steps but start with C3 for five rounds and on the round 6 change to C2.
Pic 3
Pic 4
Pic 6
Abbreviations:
ch - chain Rnd - round st - stitch sl st - slip stitch sC - single crochet
Pic 7


