Knitted Desiqns
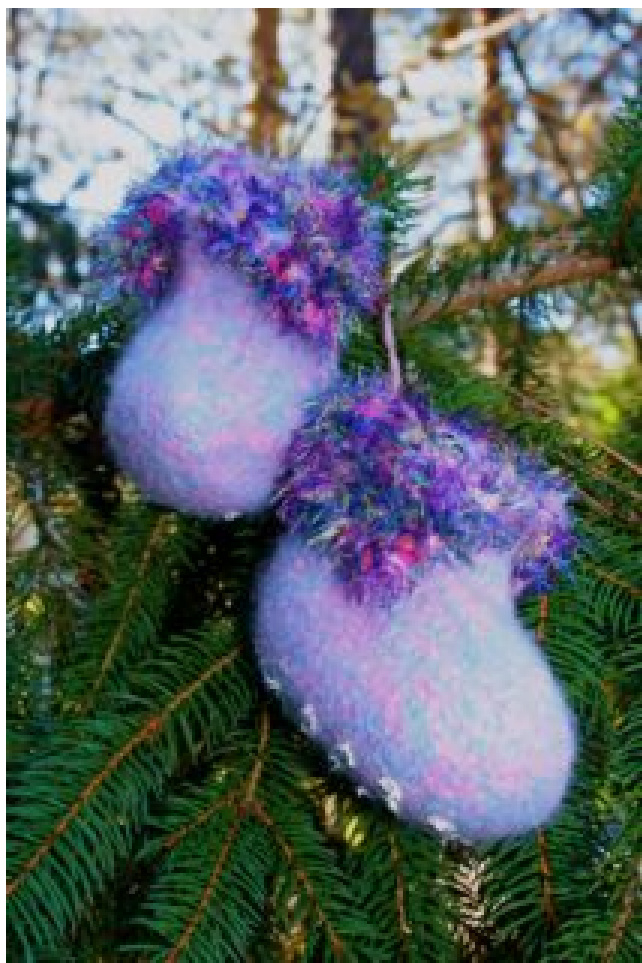
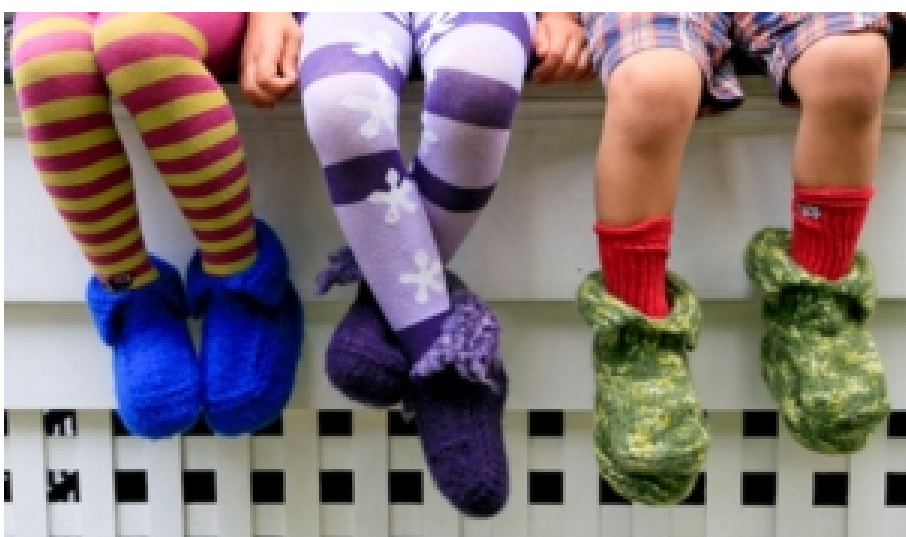
First-time Felted Slippers
The Scoop: Keep those little feet cozy with these easy felted slippers. With a fold down cuff that gives them "staying on" power and added soles or non-skid material, these slippers will keep any busy toddler on their feet and warm too! You'll smile as you watch your project's fast progress, and its small size is an ideal felting project for those new to it. Materials we used: Cascade 220 yarn, Aussie Wool color combo or combo of your choice. The yarn will be held double throughout. Some slippers have added trim color. This is basically a one skein project unless combining colors. Materials needed but not included: Two sizes of needles: Size 10 and Size 11 or Size 9 and Size 10 needles. Use whatever you are comfortable with when holding this yarn double. The size smaller is for the cuff. The needles can be straight or $16"$ circular. You will also need a tapestry needle (blunt end), a marker or safety pin to mark the RS of your work. Size: Toddler sizes 4 (6, 8, 10) when felted also can be measured in inches: Size $4=$ approx. 4 $\frac{1}{2}$ inches, size 6 $\underline{{\underline{{\mathbf{\delta\pi}}}}}$ approx. 5 inches, size $8=$ approx. 5 inches, size $10=\mathsf{a p p r o x.}\,6\textsuperscript{\frac{1}{2}}$ inches. Directions: You will be working this pattern from the bottom up. The sole of the slipper will be knitted first. Hold two strands of yarn together throughout and working with the larger needles cast on 19 (23, 29, 35) sts. Be sure to mark your right side. Row 1: Knit. Row 2: (RS) Kf&b of first stitch, K8 (10, 13, 16), M1, K1, M1, K8(10, 13, 16), Kf&b of last stitch. Row 3: Knit. Row 4: (RS) Kf&b of first stitch, K10 (12, 15, 18), Kf&b of next 2 stitches, K9 (11, 14, 17 ), Kf&b of last stitch. Row 5: Knit. Row 6: RS, Kf&b of first stitch, K12 (14, 17, 20), Kf&b of next 2 stitches, K11 (13, 16, 19), Kf&b of last stitch. Row 7: Knit. Row 8: RS, Kf&b of first stitch, K14 (16, 19, 22), Kf&b of next 2 stitches, K13 (15, 18, 21), Kf&b of last stitch. Row 9: Knit (35 stitches)(39, 45, 51) sts Row 10: Knit. Row 11: Purl. Row 12: Knit. Row 13: Purl. D... 14. Vnit Row 15: Purl. Row 16-19: Knit. Row 20: RS K20 (22, 26, 30) skp, turn. Row 21: Sl pwise, P5 (5, 7, 9) P2tog, turn. Row 22: Sl pwise, K5 (5, 7, 9) Skpo, turn. Row 23, 25, 27, 29, and 31: Repeat Row 21. Row 24, 26, 28, and 30: Repeat Row 22. Size 4: proceed to final decrease row Size 6: repeat rows 21 and 22 (once) then go to final decrease row Size 8: repeat rows 21 and 22 (two times), go to final decrease row Size 10: repeat rows 21 and 22 (three times), go to final decrease row Final Decrease Row: Sl pwise, K5 (5. 7, 9), K across, 23 (25, 29, 33) sts Next Row: Purl. Next Row: Knit. Next Row: Purl. Cuff of Slipper: Add detail yarn here. Cut one strand of main color and leave a $6"$ tail for weaving in later. Using smaller needles knit both strands (main color and detail yarn) for 1 inch in single rib pattern of K1, P1. (Depending on your gauge that will be about 4-6 rows. Be sure to end with c Ws row). Next row: Change back to larger needles. K11 (12,14, 16) Cast off next stitch. K to the end. 22 (24, 28, 32) stitches. Next rows: You will knit all rows on the first 11 (12, 14, 16) stitches until you have 6 garter stitch ridges on the Ws. Cast off on in K on the WS. Work the other side: Attach your yarn on the WS, on the inside edge of your slipper and knit across. Knit all the rows, so that you have 6 garter stitch ridges on the WS. Cast off in K on the Ws. Ending at the outside edge, cut your yarn, but leave a long tail of your main color with which to seam your slipper. Finishing: Using your long tail, thread a tapestry needle. With the right sides facing each other seam together the garter stitch rows. Then turn your slipper RS out and seam together along the back and bottom of your slipper. Weave in all ends. Make a second slipper to match. Felting Instructions: Please follow felting instructions provided. It is best you place your slippers in separate laundry bags for the felting process. Be sure to check often for correct sizing. When letting it air dry. you can stuff your slippers with a plastic bag and do some shaping while the slipper is still wet.
Level of Difficulty: BEGINNER
Care Instructions: First, treat stains by lightly vacuuming or spot clean with a damp cloth and mild soap. Then, if needed, hand wash in cold water with mild soap. (Note: Do not over agitate as this may result in additional felting.) Towel dry by rolling or bloting, then reshape and allow to air dry. Use warm iron if necessary. Note: We highly recommend adding a product to improve the traction on the slipper bottoms! There are a few items available. One is a suede bottom from Fiber Trends that can be purchased at a yarn or craft store. Another is a fabric with grip dots that you can sew on. A third option is a rug backing compound called SAF-T-BAK that sells at craft stores which is washable and comes in a tub. (We used a dowel end or a paintbrush end to get the dot effect.)
Definition:
M1: Pick up the horizontal bar between 2 stitches with left needle from back to front, knit into bar. (an increase of one)
Felting Instructions
First of all, don't be nervous if this is your first try. Felting is amazingly easy and the process can be repeated if you don't think your project came out "felt-y" enough. Remember, this will only work with wools that are nonwashable. Felted projects sold by Spyra Designs have been tested many times to be sure they will work for you with minimal frustration and no guesswork. Felting causes the item to become smaller in size overall. The shrinkage is greater is the length than in the width. Spyra Designs patterns are written with these "rules of felt" in mind. There are many different ways to successfully felt a project, so if you have used a technique that you know to work well, and are comfortable with, feel free to use that method instead.
You will need:
· a lingerie bag or pillowcase cover with a zipper · a ToP loading washing machine · a tiny amount of laundry detergent (some folks swear by Ivory liquid dish soap, though) · somewhere to dry your project (a flat surface works fine, or a drying rack) Ready? Place your completed item in the bag. Combine with a small load of like-colored towels. Set washer to the hottest water temperature, on the lowest water setting, and the longest wash cycle. (This ensures that the felted item gets plenty of agitation time.) Add the detergent, and start the machine. Once the washer starts agitating, look inside every few minutes. If your project seems slow to start felting, you can speed things along by adding a kettle of boiling water to the washer. If the item has felted to your liking before the wash cycle is finished, move the dial ahead to the rinse and spin phase. If your project has felted very tightly and you are concerned about creases developing, remove it from the washer partway through the spin cycle. Press out remaining water using a bath towel. Smooth shape, if necessary (this is more important with bags and similar items) and lay out to air dry. If you have felted a bag and are having trouble standing it up, stuff it with towels to help it hold its shape as it dries. If your project does not seem to have felted enough, a second wash can be done. It will not damage the item. You do not have to allow it to dry in between washings. We do not advise felting more than twice.


