STAINED GLASS WINDOW SCARF AND SHAWL
DESIGN INSPIRATION
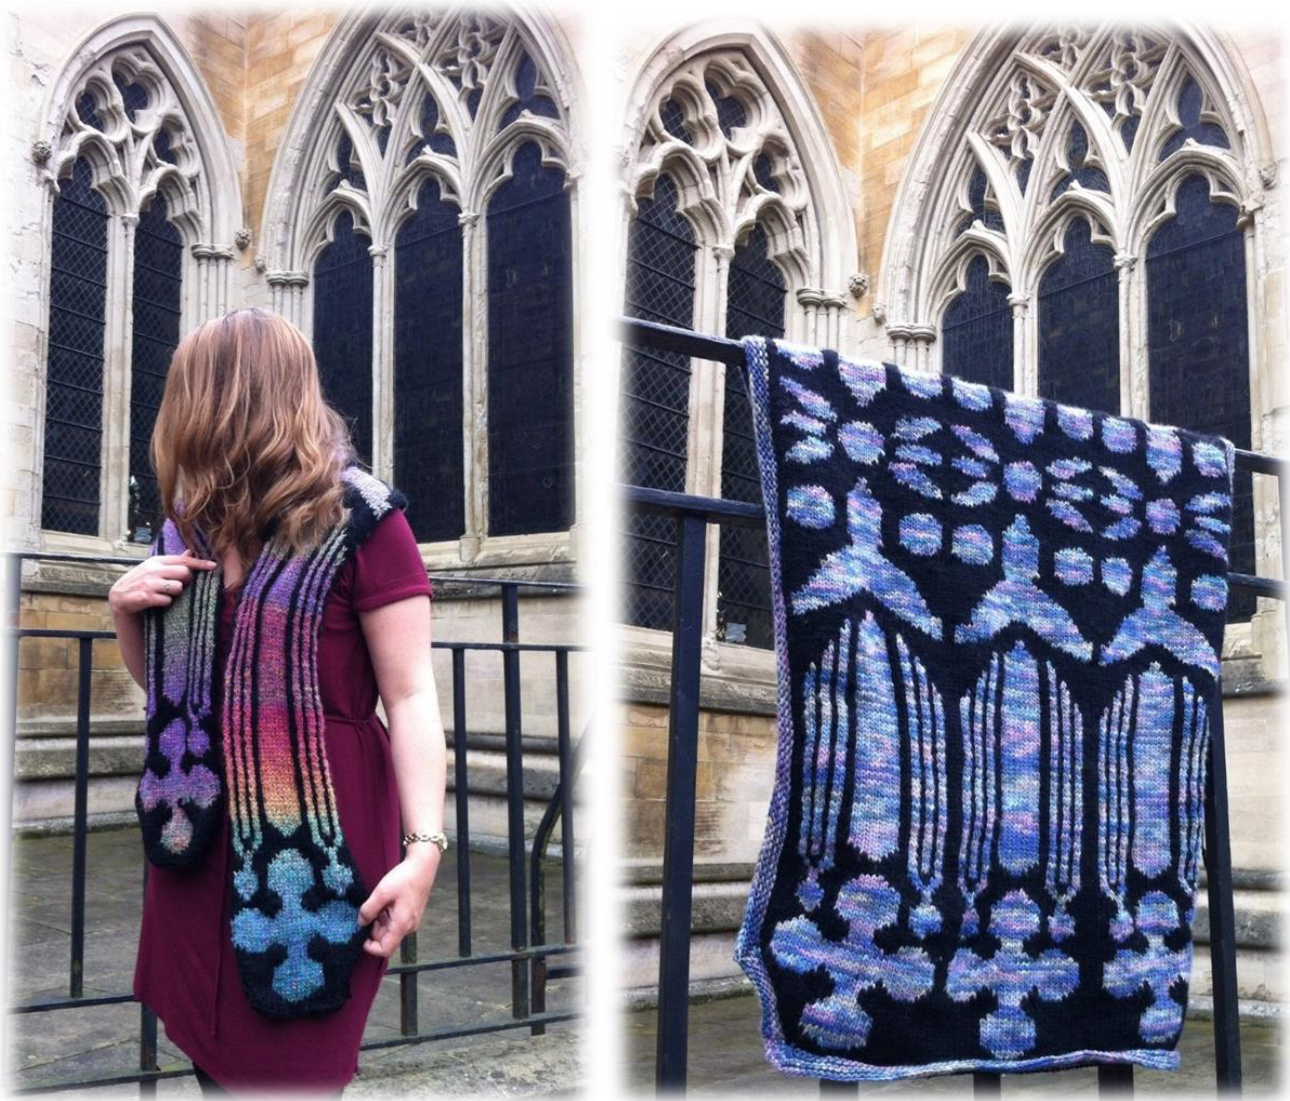
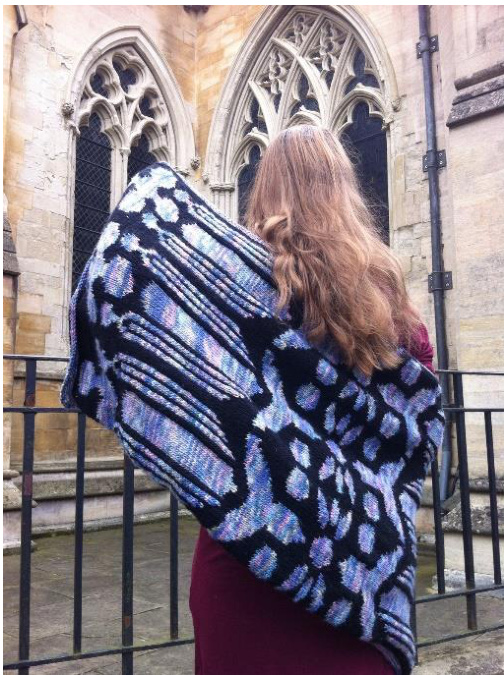
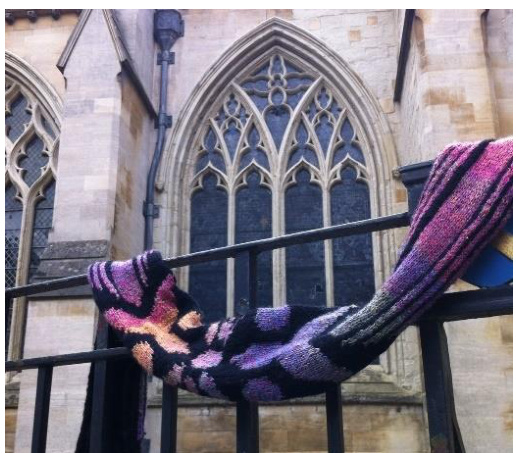
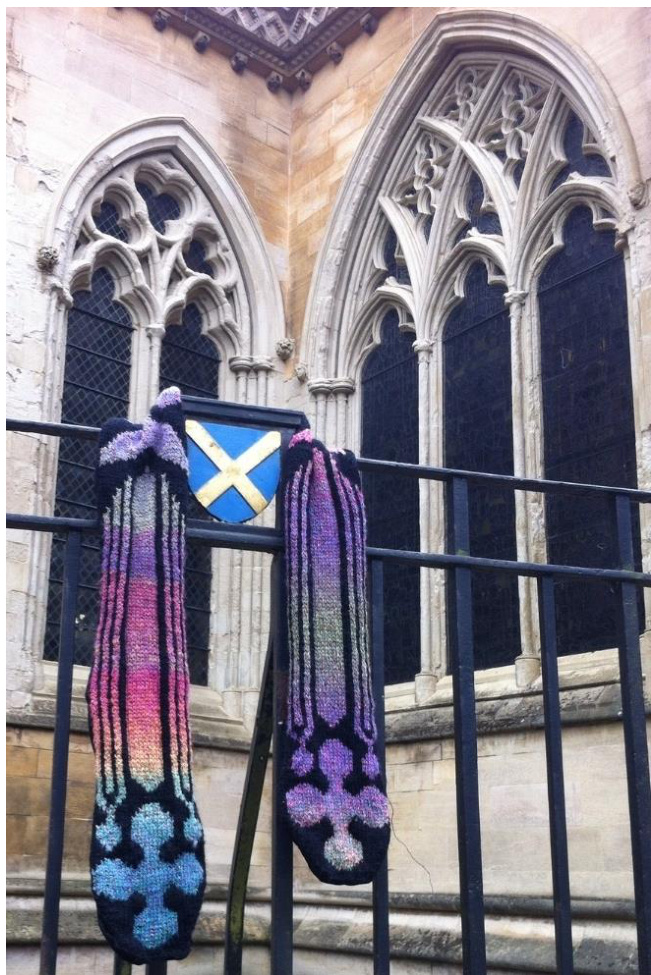
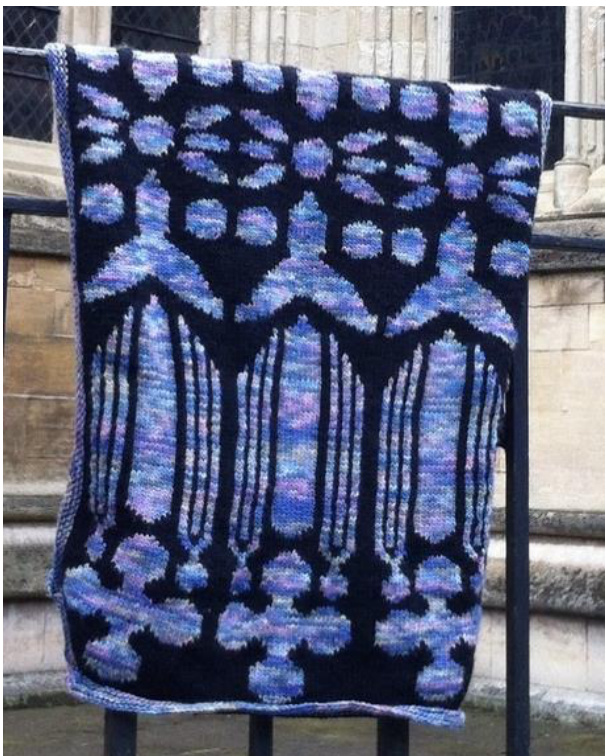
This pattern was inspired by the stunning stained glass windows in the medieval Cathedral Abbey of St Albans. I was amazed at how such swirling, intricate designs could be formed out of something as linear and compact as a stone wall. As I began to sketch the patterns in the windows, I realised that it wasn't just the pictures portrayed in the glass that were different - all the shapes of all the window structures were each slightly different from each other, whilst still being symmetrical and structurally perfect. It was these shapes that I have attempted to illustrate in this design. The pattern reflects the feeling of gazing up at the windows from inside the cathedral. The way the bright variegated yarn is silhouetted against a solid dark background evokes the glittering sunlight shimmering through the brightly coloured glass, casting the stone walls surrounding them into shadowed relief. This shawl or scarf would make a gorgeous gift for anybody with an interest in architecture or a passion for history. It would also be a very thoughtful token for someone of faith, and would make a beautiful and comforting prayer shawl.
YARN
You will need two colours - Yarn A (Solid) and Yarn B (variegated). I would recommend a picking a dark tone for Yarn A, providing the greatest possible contrast to a bright Yarn B. The yarn used in the pictured projects was:
Scarf:
Yarn A (solid): James C. Brett Aztec in Colourway 12 - Black Yarn B (variegated): Sirdar Giselle Aran in Colourway 139 - Cosm0 1 skein Yarn A (approx 190m, 100g) and 2 skeins Yarn B (approx 192m, 100g)
Shawl:
Yarn A (solid): Malabrigo Yarn Merino Worsted in Colourway 195 - Black Yarn B (variegated): Malabrigo Yarn Merino Worsted in Colourway 625 - Kaleidos 2 skeins Yarn A (approx 384m, 200g) and 3 skeins Yarn B (approx 576m, 300g). With the wool used for the scarf, the yarn was dyed in one long colour change. This meant that in order to keep the lovely rainbow effect as smooth as possible I needed to do all the colourwork without cutting and rejoining my yarn in a way that would break the colour transition. This left some floats on the back, so I decided to back the scarf in black velvet so it wouldn't catch on anything. In contrast, the scarf was knitted in 1o0% merino wool, with a much more varigated effect. This meant there were were no colour definitions to preserve, so all ends could be cut and woven in. The pure wool felted any ends away very quickly, so there was no need for lining.
NEEDLES AND GAUGE
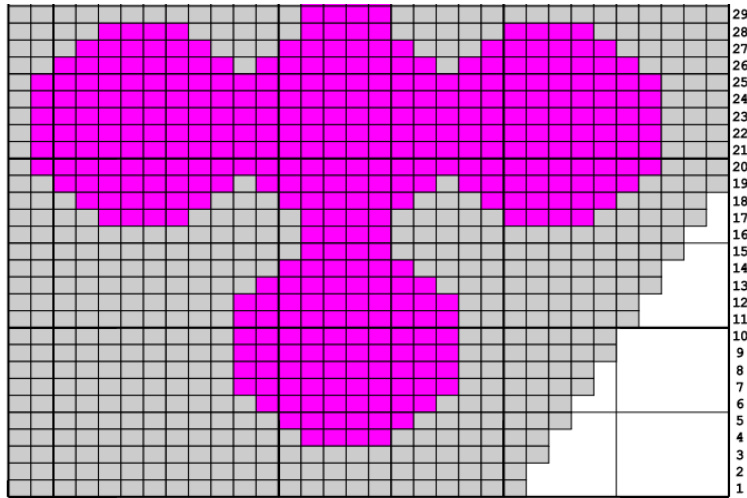
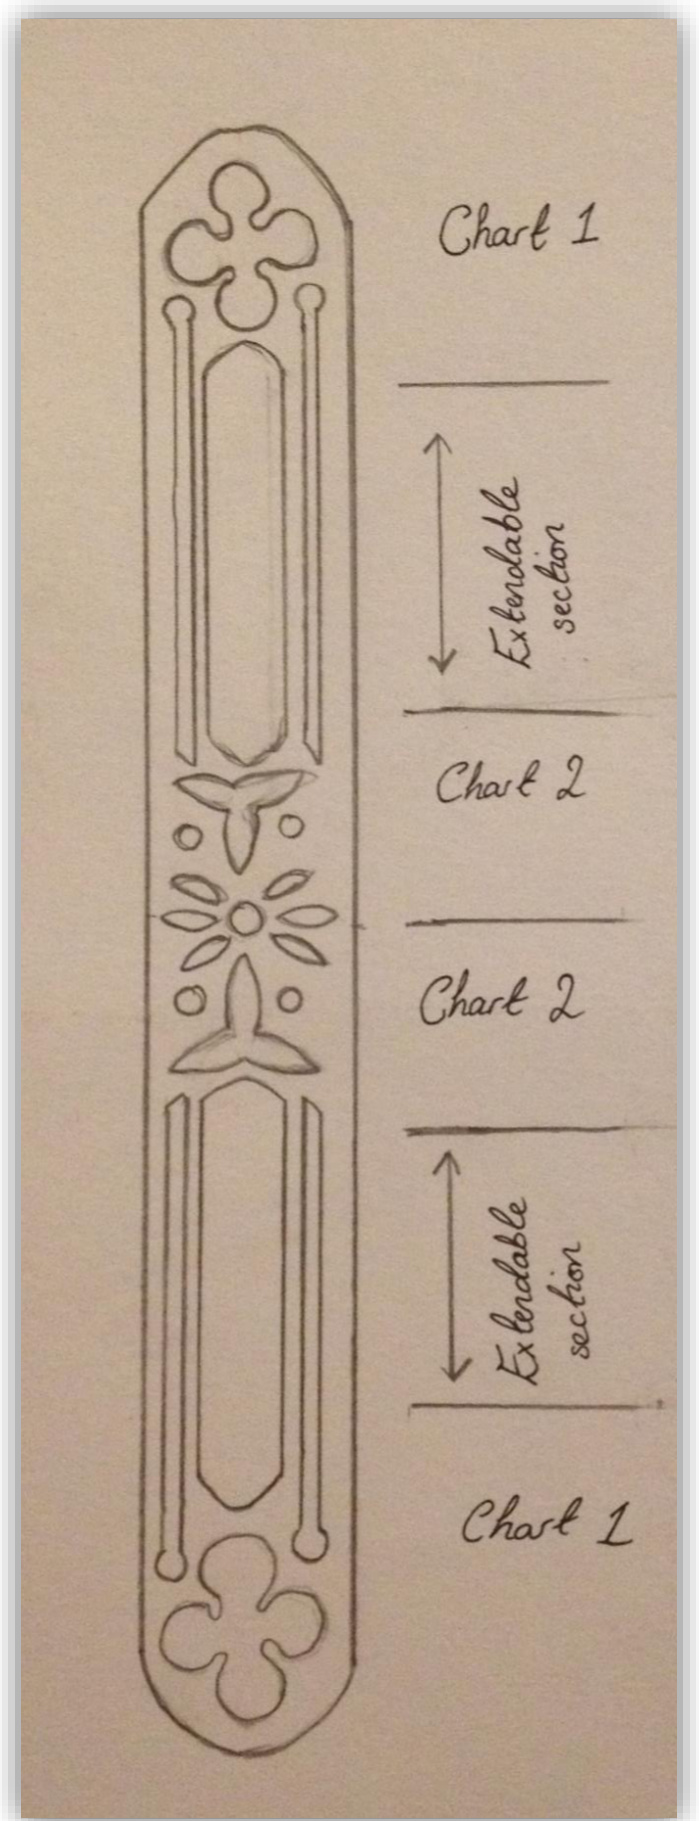
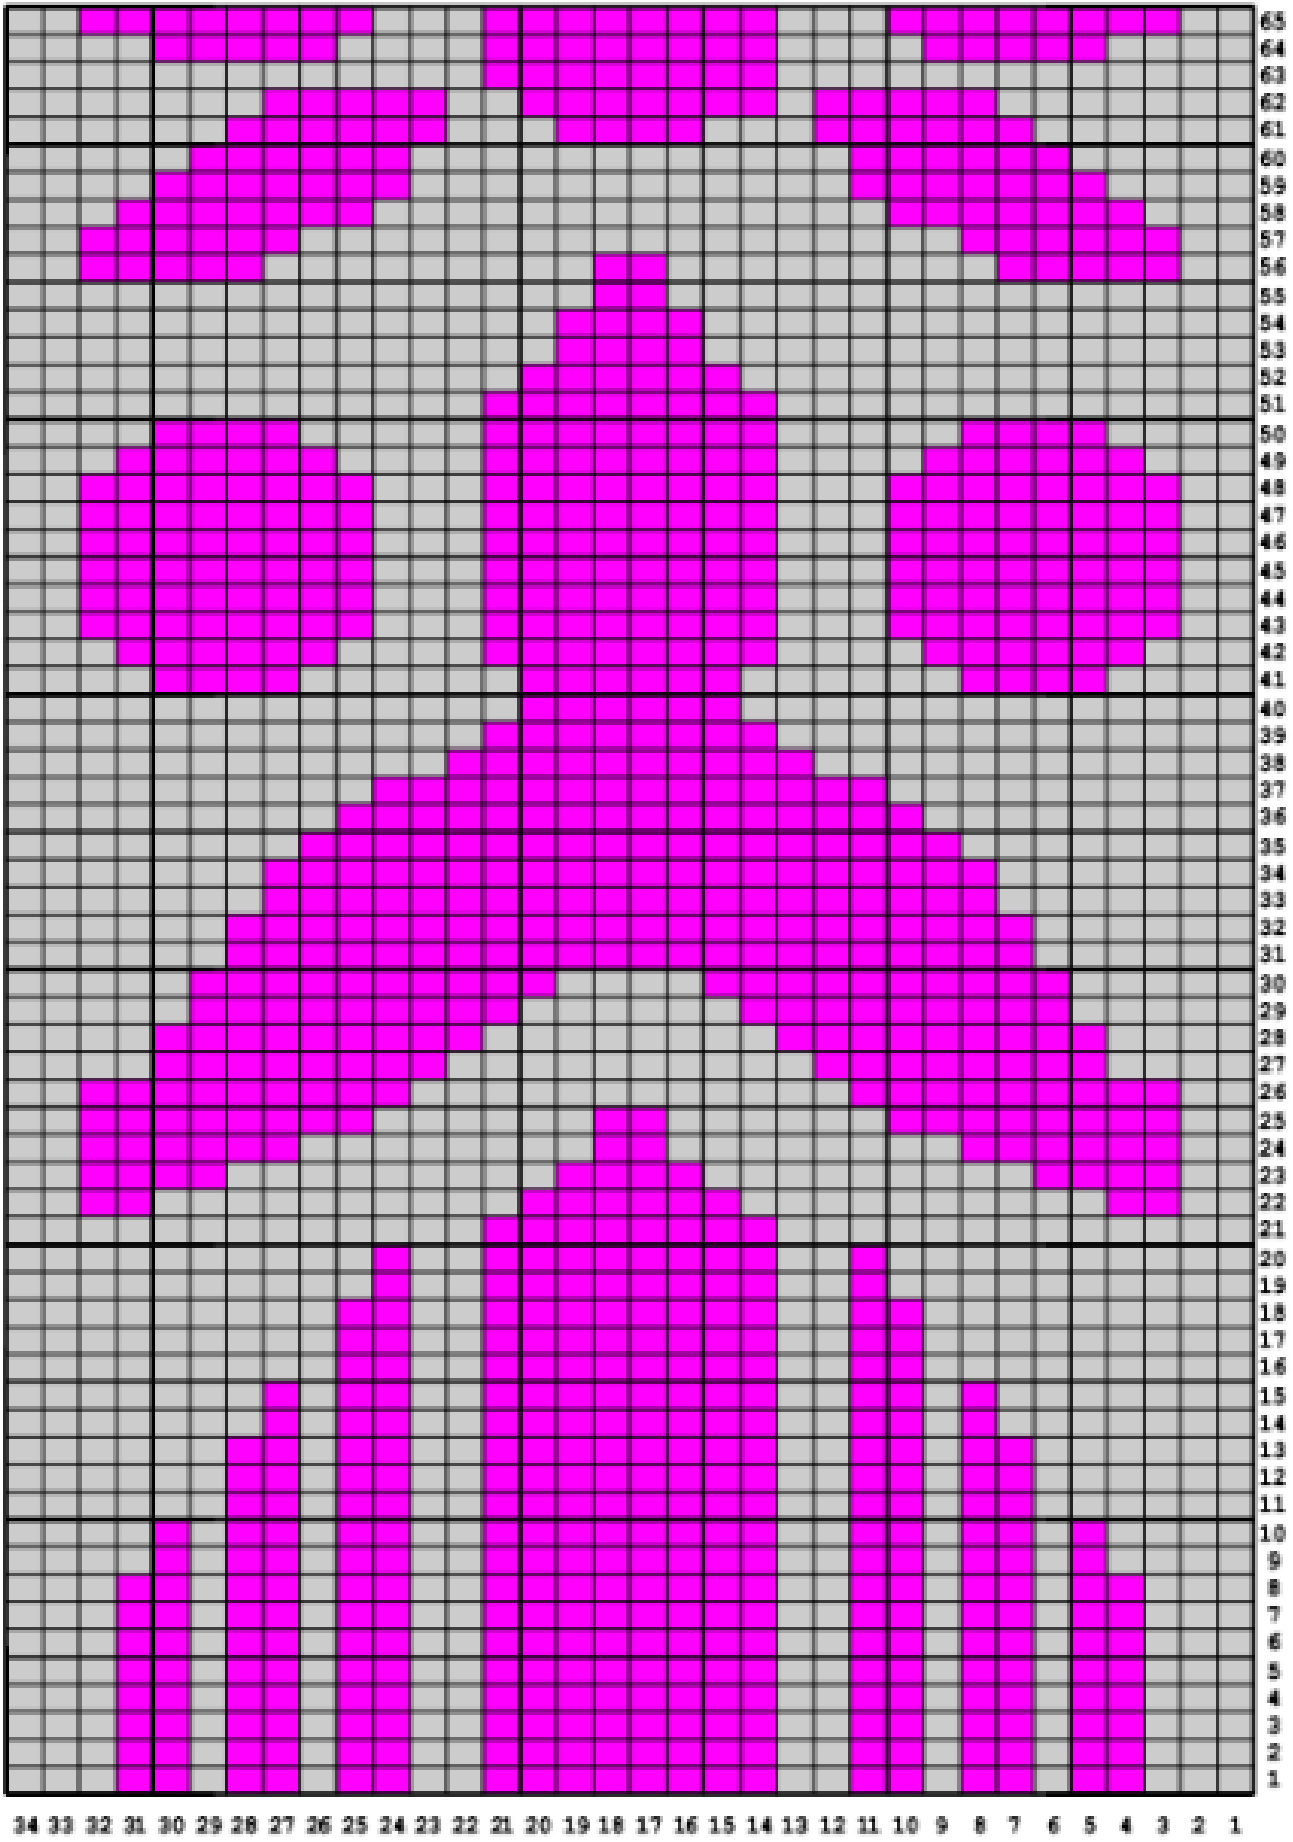
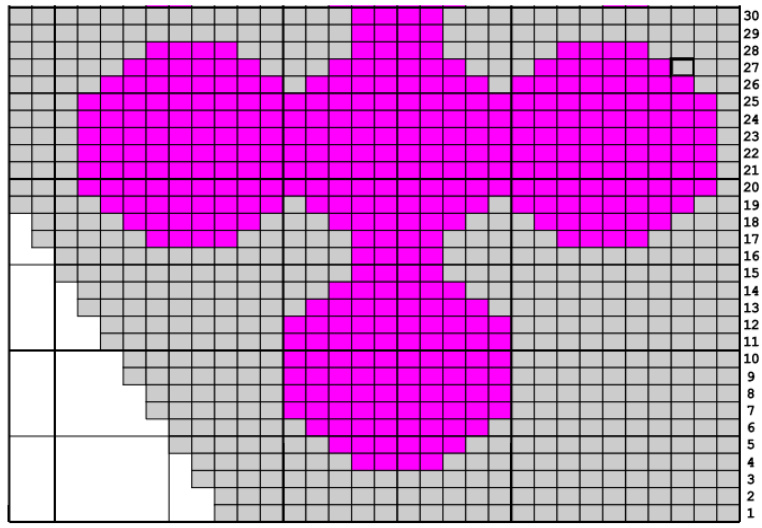
I used 5mm needles (US size 8). The shawl was worked back and forth on circular needles, in order to accommodate width. Gauge is not important to this project, and you could change the weight of the yarn if you wished (although anything under aran/worsted would make a very thin scarf!) On the 3rd row k1, kfb, knit to last two stitches, kfb, k1. Begin working Chart 1 in stocking stitch, starting with a knit row. When you have 34 stitches (row 18) stop increasing and continue in stocking stitch.
SCARF
With Colour A (Solid Colour), cast on 16 stitches. Continue with the pattern, increasing by 2 stitches every other row, as in third row.
At row 50, you will notice that the pattern is now made up of straight lines. How long you continue this stage of the pattern before starting Chart 2 will determine how long your scarf will be. The scarf in the photo has an extended section of approximately 30cm (12"), but you can continue this section for as long as you wish. When you have reached your desired length, work Chart 2. The end of this chart marks the centre point of the scarf. When you have reached this point, work the chart once again backwards, from top to bottom. This forms a mirror image to the knitting you have already done. Knit the extendable section for the same length as you used on the previous side. Then continue to Chart 1 again, working from the top down. When you reach the middle of the chart you will be decreasing the number of stitches as part of the pattern. To decrease, k1, sl 1, k1, psso, knit to last 3 stitches, k2tog, k1. Continue this decreasing of 2 stitches every other row until you reach the end of the pattern, and there are 16 stitches remaining. Cast off. Block as required.
SHAWL
Knitting the shawl is very similar to knitting the scarf, the pattern is just repeated the number of times of your choice. The shawl in the photograph has 3 repeats, but you can add as many as you want. When casting on, remember that you will still be adding increases on either side of the whole shawl (as with the scarf), but in this case the increases will only fall on the far right and far left of the two edge panels. The same will occur when decreasing. I have provided three small charts to help you visualise this. The only other difference is the removal of a couple of columns in Yarn A at the inner sides of the panels - this allows them to flow much more evenly across the work. Otherwise continue as with the scarf. Edging You may wish to finish the shawl with extra edging, as pictured. If so, using Yarn B, pick up and knit all edge pieces (depending on the size of your shawl, you may wish to do this all at once, or edge by edge). Knit 6 rows garter stitch, then cast off. If you find that the stitches are too tight, and causing the edges to roll up, then kfb twice at every corner. Block as desired.
DIAGRAM OF SECTION LAYOUTS
CHART

CHART
Shawl end - Left hand side:
(c/o 23 stitches) Shawl end - centre (repeat as many times as you wish):

(c/o 30 stitches) Shawl end - Right hand side: