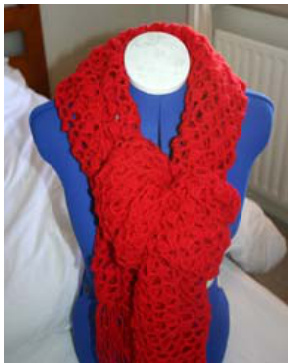
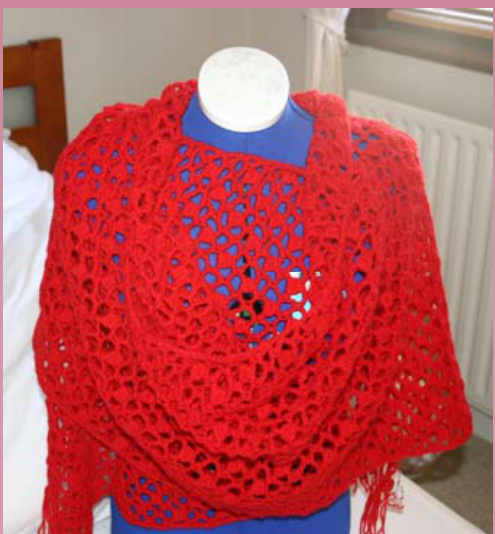
HUGS AND KISSES WRAP
February 2011 US Version Gauge not critical
BACKGROUND
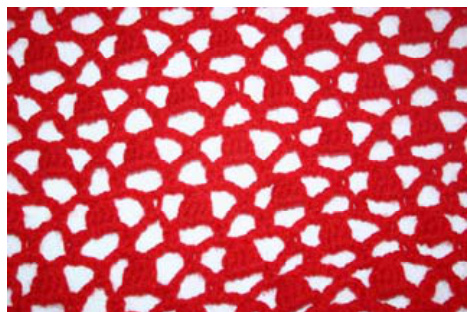
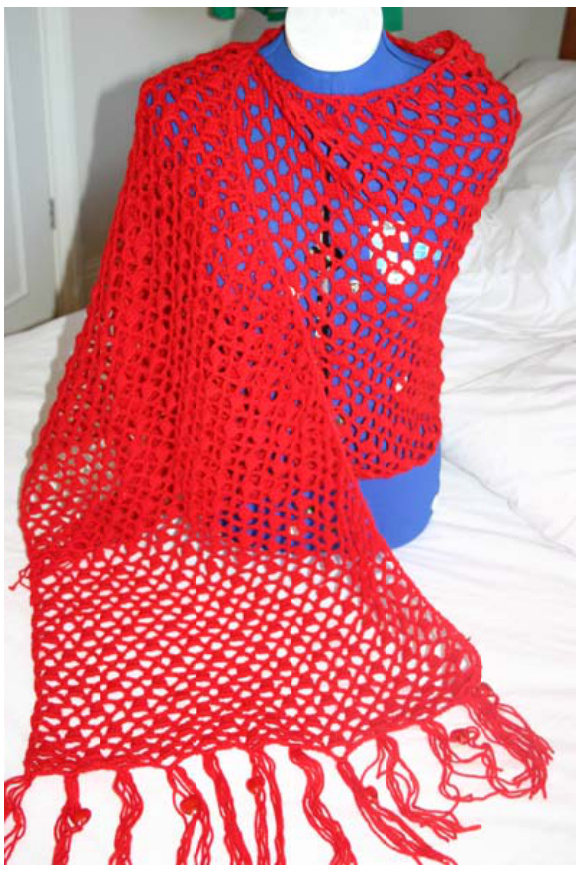
This Shawl was designed as a gift for a friends' birthday. I wanted something that was light (and big enough) to use as a wrap during summer but also ‘scrunchy' enough to use as a warm scarf in the winter. Skill Level Easy or - A beginner looking for something a little more challenging. Concentrate for the first few rows until you see how the pattern works, then this becomes a very easy pattern to do. This beautiful reversible open weave pattern of spaces and bobbles creates a light airy wrap that traps air for surprising warmth. I deliberately chose an easy care ‘no think' yarn for the original, but I think this would work well in lighter yarns and variegated yarns as well. The stitch pattern reminded me of the kisses and hugs that people sometimes put on the bottom of letters - xoxoxoxo...- hence the name!
Time:
Depends on your speed and size of garment, but the pattern as written took me about 5 hours (excluding blocking).
Notions
4.5mm hook (7 or H size hook) 2.5 balls of 100g Double Knit (yardage unknown) I used YarnFair 100% acrylic in 'Red' (having sat with a ruler, 1 ball is about 320yds of this particular brand) If you use a different yarn you may wish to change your hook to a more appropriate size.

Stitches used:
Chain Single Crochet (hook under stitch, yarn over, back through stitch, (two loops on hook) yarn over and through both loops) Double Crochet (yarn over, hook under stitch, yarn over, back through stitch (three loops on hook), yarn over, through two loops, yarn over, through remaining two loops) Hug (Cluster/Bobble) (see opposite)
Abbreviations and terms used:
Ch = chain Hug = see detail Chain loop = a set of chain creating a little ‘arch' SC = Single Crochet DC = Double crochet
Special Stitch-Hug
Short Notes: Start a DC but leave last two loops on hook. Do another 3 DC leaving last stitch on hook each time to get a total of 5 loops on hook. Yarn over and off all stitches to create a cluster/bobble/hug Detailed “Walk Through' instructions for the Hug 1. Yarn over (YO) hook and then hook under chain loop 2. YO and draw up stitch (3 loops on hook) 3. YO and off two loops (2 loops on hook) 4. YO, under chain loop, YO and draw up stitch (i.e. repeat first two steps) (4 loops on hook) 5. YO and off two loops (3 loops on hook) 6. YO, under chain loop, YO and draw up stitch (i.e. repeat first two steps) (5 loops on hook) 7. YO and off two loops (4 loops on hook) 8. YO, under chain loop, YO and draw up stitch (i.e. repeat first two steps) (6 loops on hook) 9. YO and off two loops (5 loops on hook) 10. YO and off all loops There's a more detailed photo process on the next page.
Notes
To make different widths (such as a scarf) chain a multiple of 8 plus 5 and 4 extra turning chain. If using a finer yarn you might want to increase the foundation chain by a few more '8's to get the same width as we've done here. Different yarns will give different mileage obviously, but blocking really did make a massive difference to how open the lacework in this shawl showed up. Apologies, I'm left handed and therefore for you right handed crocheters the details pictures will be the 'wrong way' around. It's not that difficult to ‘flip it’ I've been doing it for years ;-)
Detail of ‘Hug' Stitch
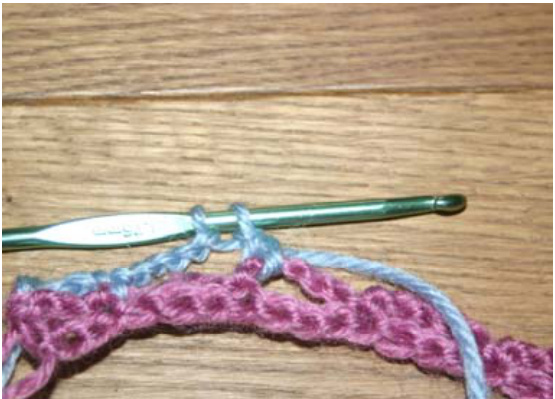
ATTHEENDOFSTEP3 (YO, UNDER CHAIN LOOP, YO, BACK THROUGH LOOP(3LOOPSONHOOK)YOANDTHROUGH2 LOOPS
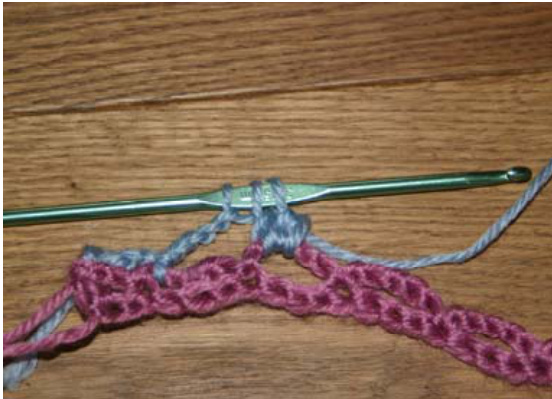

ENDOFSTEP5REPEATTHESTEPSABOVETOENDWITH3LOOPS ONHOOK
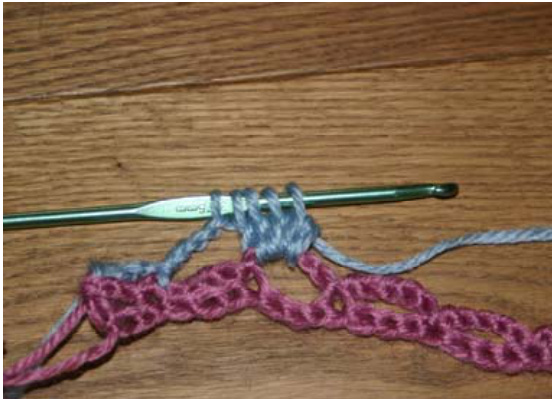
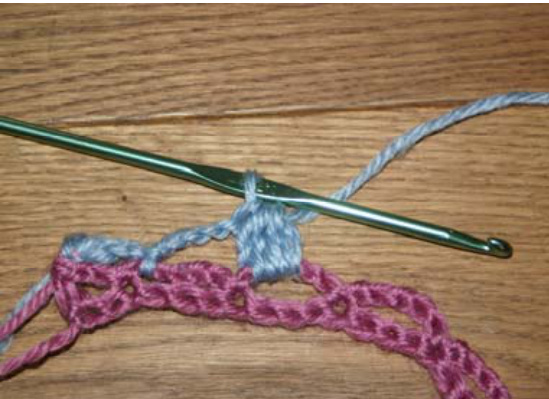
ENDOFSTEP9REPEATTHESTEPSABOVETOENDWITH5LOOPS ONHOOK ENDOFSTEP10YOANDDRAWTHROUGHALLLOOPS
Method
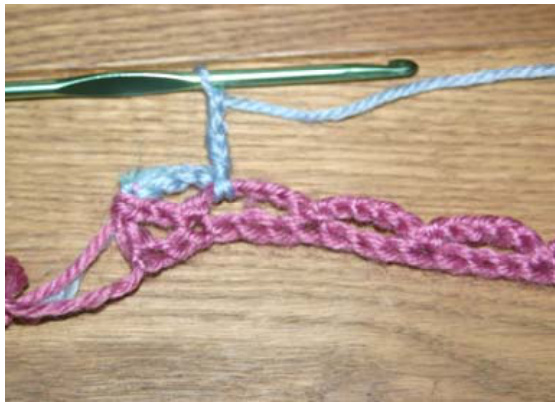
Foundation Row ('right' side of pattern) - pink yarn in photos. Chain 93 1SC into 7th chain from hook \*Chain 5 Miss 3 chain, 1SC into 4rh chain\*\* Repeat from \* to \*\* until last 2 chain. 2 chain, miss 1 chain and DC into last chain. Row 1 of pattern (in blue yarn) Ch 5 \*1SC into first 5Ch loop / Ch 5 / Hug into next 5Ch loop / Ch 5, \*\* Repeat from \* to \*\* to 1SC in last full 5 chain loop. (note: this is for a foundation of 93 chain, more or less you might end with a hug' in the last 5 chain loop-same as ‘row 3’) Ch2 and 1DC into 4th of first 6 chain (very first row only-after that it will be into the 2 chain/TC loop created by the row 2 pattern) Row 2 of pattern (orange yarn) Ch3 1SC into 2Ch loop. Ch5 \*1SC into next 5Ch loop, Ch5\*\* Repeat from \* to \*\* to last loop 1SC into last loop, Ch 2 and 1DC into first of first 5Ch. Row 3 of pattern (second (or top) pink row on photo below) Chain 5 \*Hug into next 5Ch loop / Ch 5 / SC into next 5Ch loop / Ch 5\*\* Repeat from \* to \*\* to Hug in last 5 chain loop. Ch 2 and 1DC into 1st of 5 chain. Repeat Row 2 of Pattern. Repeat Row 1 of Pattern. Repeat Row 2 of Pattern. Repeat Row 3 of Pattern...
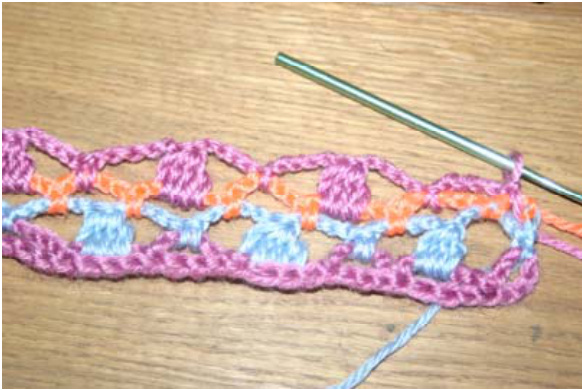
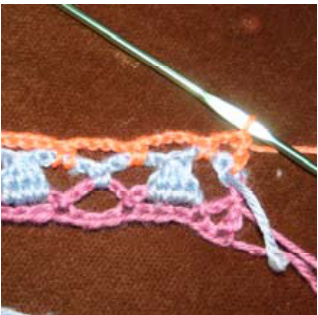
Second row of pink is Row 3 of pattern. Note how the pink 'hugs′ are offset with the blue ones! Continue alternating Row 1 and Row 3 of the pattern with row 2. This way you'll do one row with Hugs and one without. Continue until pattern is long enough for you.
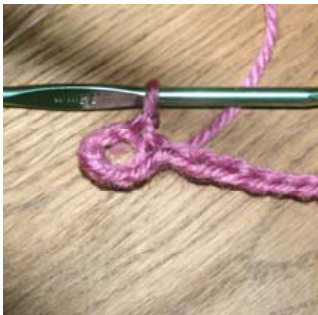


DETAILOFFOUNDATION ROWANDLASTTWOCHAIN.
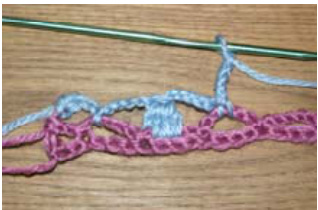
Row 1 START END OF ROW 2
Finishing
Block if you think it needs it and add fringe as you like. I did 4 strands (each 22inches long by wrapping around a DVD case) in a group. Then I folded the group in half and put it through a loop and feed the ends of the group through that loop before pulling tight. I did this in every other loop across each end. I also added a heart bead into every other one of the fringe groups for weight and drape-you can just see them in this photo starting with the second fringe in from the left as you look at the photo.
Other Stuff
I am TuesdayFortnite on Ravelry, when not holding hooks or needles I do far too much other stuff-and then wonder why I don't seem to have any time! I would love to see pictures of your finished projects! I would like to hear your comments and suggestions on this pattern (particularly as this is the first one I've written!) All rights reserved. Please feel free to make these as many of these as you like. Please link to this pattern, don't reproduce it. Pattern is free and not for resale. I would like credit for personal use please, and if you make your millions selling finished items I want a cut ;-) Original Pattern released September 2010 Pattern reviewed, rewritten and photo tutorial added February 2011


