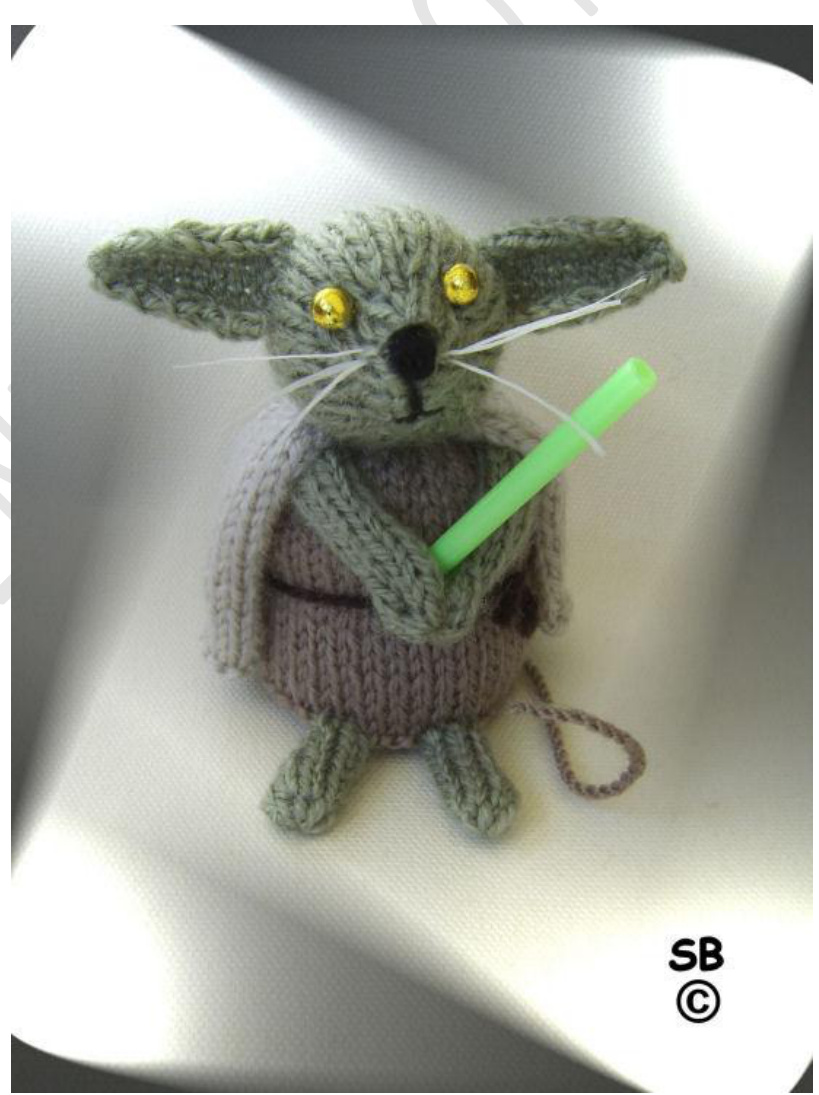
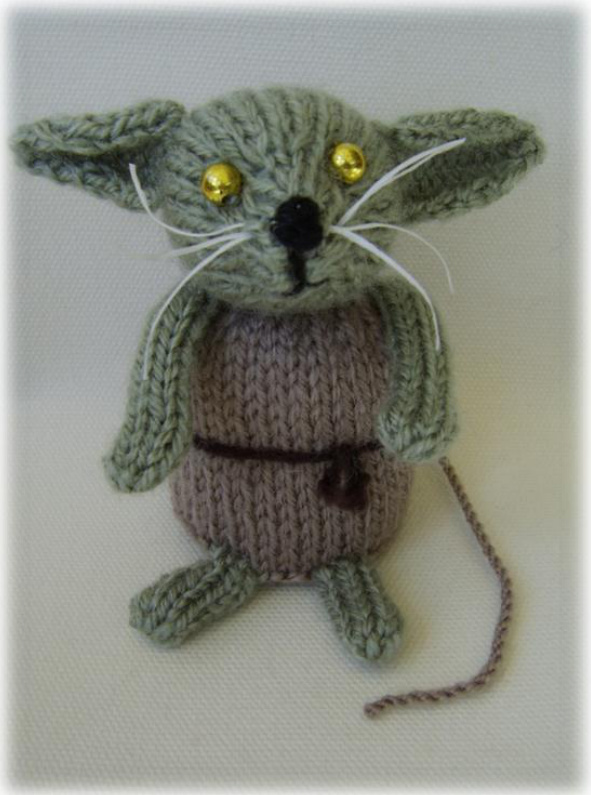
Maythe mousebewithyou
Page1of 5 Designed by Phoeny Phoenixknits http://www.ravelry.com/stores/phoenixknits
Size made 3 % inches high
Materials needed
Dk or equivalent Yarn in the following: Less than 25g in Moss green Less than 25g in Pale brown Less than 25g in Stone Scraps of black, and dark brown 3mm needles Pair of 3mm beads for eyes Dental floss for whiskers (optional) One green plastic straw for light sabre Circle of stiff card 1 % inches diameter Fibrefill
Abbreviations
K = knit P = purl Ss = stocking stitch (right side knit, Wrong side purl) St/sts = stitch/stitches Inc1 = knit into the front and the back of the stitch to make a new stitch PLEASE NOTE: if you use any other method than this to increase, your stitch count will not work out. Tog = knit or purl the next stated amount of stitches together to make just one stitch.
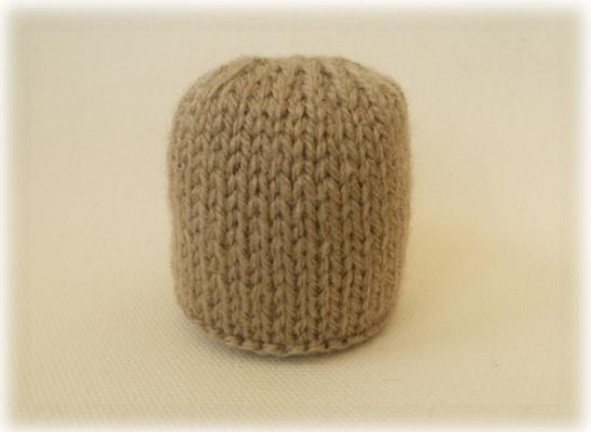
Body
Using pale brown Cast on 6 sts Next row, (inc1) into every st to the end of the row (12sts) Next row, p Next row, (inc1) into every st to the end of the row (24sts) Next row, p Next row, (k1, inc1) to the end of the row (36sts) Purl the next 3 rows Starting with a k row Ss 14 rows Next row, (k2tog) to the end of the row (18sts) Next row, p Cast off
Head
Using moss green Cast on 6sts Next row, (inc1) into every st to the end of the row (12sts) Next row, p Next row, (inc1) into every st to the end of the row (24sts) Starting with a p row Ss 3 rows Next row, (k3, inc1) to the end of the row (30sts) Next row, p Next row, (k2tog) to the end of the row (15sts) Next row, p Next row, (k1, k2tog) to the end of the row (10sts) Page 2of 5 Designed by Phoeny Phoenixknits http://www.ravelry.com/stores/phoenixknits Starting with a p row Ss 3 rows Cast off Ears (make two) Using moss green Cast on 8 sts Starting with a p row Ss 5 rows Next row, k2tog, k4, k2tog (6sts) Next row, p Next row, k2tog, k2, k2tog (4sts) Next row, p Next row (k2tog) twice (2sts) Break the yarn and draw through these, two stitches and pull up tight, weave the end down through the ear and cut off. Feet (make two) Using moss green Cast on 8 sts Starting with a p row Ss 7 rows Break the yarn and draw through these 8 sts. Draw up tightly and join down the row ends. Do not stuff. Arms (make two) Make as the feet but ss 13 rows instead of 7. Finish off as feet.
Cloak
Using stone Cast on 32 sts Purl 2 rows Starting with a k row Ss 16 rows Next row, (k2tog) to the end of the row (16sts) Cast off knit wise
To make up
Body: Sew a gathering thread around the cast on edge, draw up tightly and join the row ends as far as the purl row edge, make sure this matches up neatly then continue to join the row ends for % an inch, at this stage you need to put the 1 % inch card circle into the bottom of the body, when you have done this, continue to sew up the row ends STUFFING AS YOU GO, when you reach the cast off edge, keep the seam at the back and over sew to form the shoulders.
You should have already joined the row ends of legs and arms. Page3of 5 Designed by Phoeny Phoenixknits http://www.ravelry.com/stores/phoenixknits The head, starting at the nose (cast off) end, draw up the yarn tightly, and then join the row ends STUFF AS YOU GO, sew a gathering stitch around the cast on edge and draw up tightly.

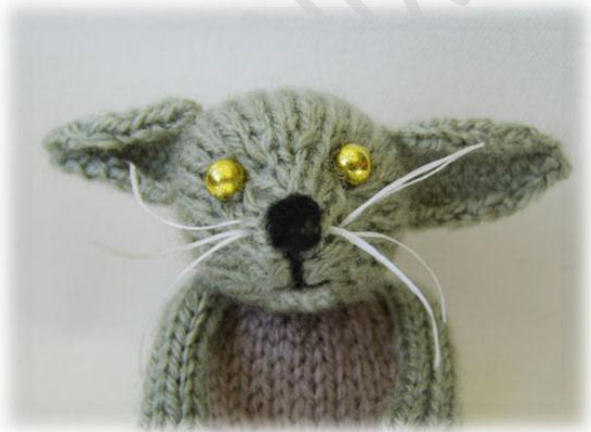
Sew the arms and legs onto the body; make sure you keep the body seam to the back. Add the ears, and embroider on a nose and little mouth, add the eyes. Using dental floss, sew on whiskers, knotting each one securely. Facial positions
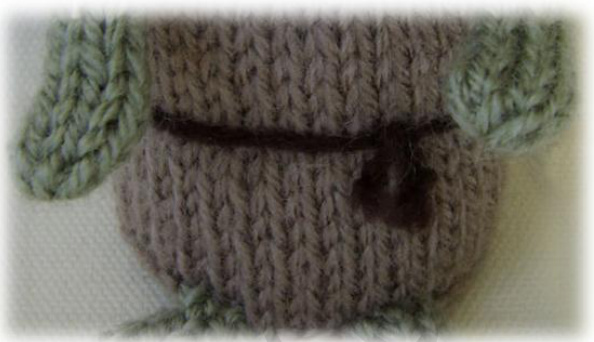
Using a length of dark brown DK yarn, tie around the middle of the body as a belt, trim to length and tie a knot in each end to stop it fraying.
Join the head onto the body, positioning it centrally on the shoulder, secure all around. Make a tail by making a single twisted cord (instructions at the bottom of the pattern) approximately 4 inches long; use the knotted end to secure inside the body centre back. Secure all around.
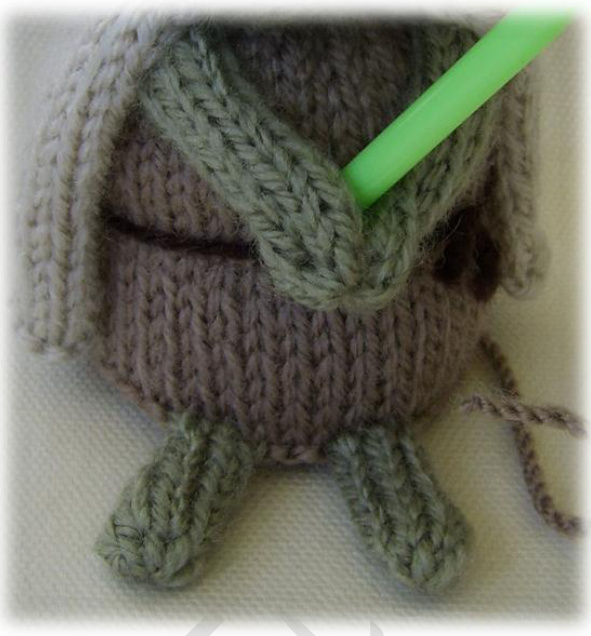
Take your plastic straw and cut two Page 4of 5 Designed by Phoeny Phoenixknits http://www.ravelry.com/stores/phoenixknits 2 % inch long pieces, cut one straw length-wise from top to bottom, roll slightly and push it inside the un cut section - this will make it stronger. Using the picture as a guide, attach the straw to the body. Firstly, securing a length of yarn to the body just above the belt, then, sew the yarn through the straw,(you may need to make a pilot hole with a sharp needle first) then sew through the arms, then back into the body, pull up tightly and secure firmly.
Sew the cast off edge of the cape around the neck and shoulders and tie off tightly. All done! The boring bit, sorry but has to be said. Make this toy for family, friends and for charity, but please do not go into mass production for personal profit. Please do not rewrite, copy or sell the pattern, the text, or graphics in any form this includes putting it on CD's. Please do not put the pattern on the Internet for free download as it is covered by section 77 of the Copyright, Designs and Patents act of 1988, identifying Phoenixknits as the sole owner and author of this pattern. Thank you :0) All rightsreserved Phoenixknits @ 2012 You can find more fun patterns by Phoenixknits here:- http://www.ravelry.com/stores/phoenixknits


