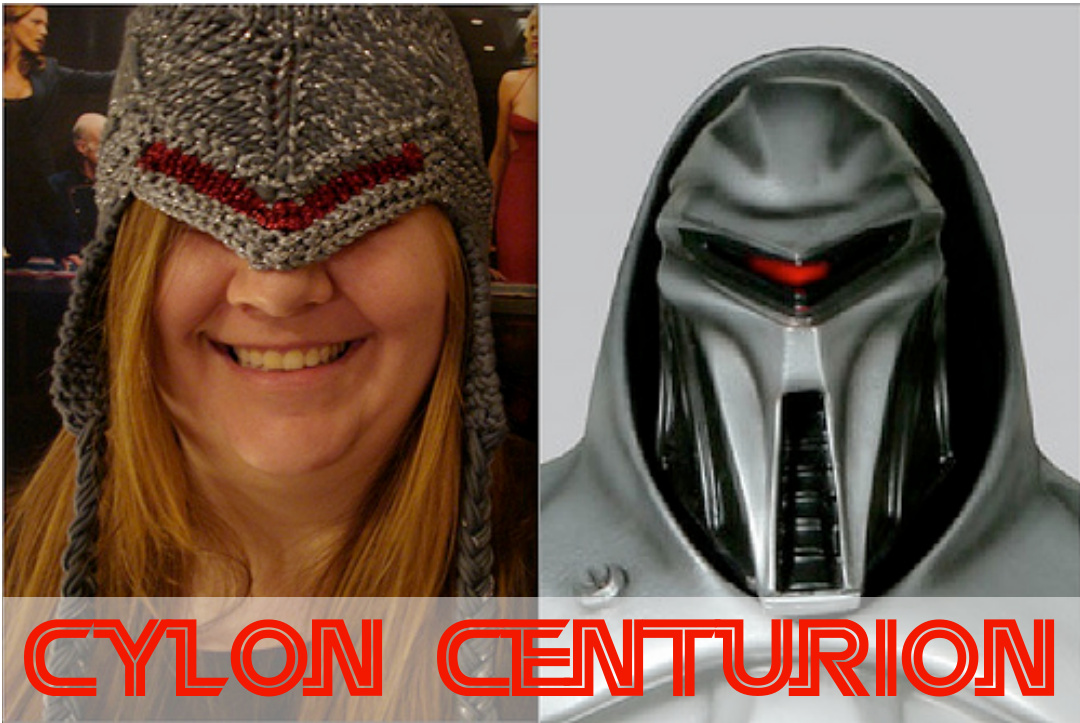
BY ThEA eSCHilMAN
Yarn:
-Please note the gray and silver yarns are held together 200 yds Aran/Light Bulky Weight gray yarn -example used Karabella Aurora Bulky (Similar yarns would include Lion Brand Superwash Merino Cashmere or Debbie Bliss Cashmerino Aran) 200 yds Sport Weight shiny silver yarn used as 2 strands held together -example used Karabella Glimmer (similar yarns would include Gastby by Katia and Berroco Metallic FX, in a pinch Lion's Brand Vanna's Glamour works too. 5 yds Aran/Light Bulky red yarn -example used Karabella Stardust (unfortunately it has been discontinued)
Needles and Notions:
7 US Size 10 or 11 DP needles (Lion Brand has some great long inexpensive plastic DP needles in size 10, the easiest size 11 DP needles I have been able to find are bamboo) Large Safety Pin (big enough to use as a stitch marker for the start of the pattern) Crochet hook or large eye tapestry needle, whichever you prefer for weaving in ends.
Gauge:
13 stitches = 4 inches (just slightly over 3 stitches per inch) 5 rows = 1 inch (stockinette portion of hat) -A Note on the Gauge: Holding all the yarn together makes a very bulky yarn and the needles you are using are smaller than you should ideally use. It is a pain on your hands but the only good way to get the helmet shape.
Finished Measurements:
22.5 inches in circumference. 11 inches from crown to point, 8 inches from crown to nape.
Directions:
-Stitch abbreviation key located on last page of pattern. Holding the gray and 2 strands of silver yarn together: Cast on 6 stitches divided evenly on 3 needles and join. Kfb 6 times. (12 stitches total) -Using the safety pin as a stitch marker place it between the first and second stitches on the first needle.
Crown:
Row 1: (k1, kfb)\* (18 stitches total) Rows 1,2,3,5,7,9,11, 13,15, 17 Row 2: (k2, kfb)\* Row 3: (k3, kfb)\* \* repeat 6 times Rows 4, 6, 8, 10, 12, 14, 16: k row Row 5: (k4, kfb)\* Row 7: (k5, kfb)\* Row 9: (k6, kfb)\* -At this point redistribute the stitches to 6 needles, one needle per repeated section. -Remove the safety pin and pin it to a section of the hat above the first needle. This will let you know which needle marks the start of the hat and keeps the safety pin out of the way. Row 11: (k7, kfb)\* Row 13: (k8, kfb)\* Row 15: (k9, kfb)\* Row 17: (k10, kfb)\* (72 stitches total)
Hat Body:
Row 18: k11, kfb, k to marker (73 stitches total) Row 19: k to marker -Redistribute the stitches so the number of stitches per needle is as follows. 1" needle= 12 stitches, 2d needle=- 13, 3'd, 4,5\*, and 6\* needles=- 12.
Point Shaping:
-The next rows shape the point that makes the V of the Cylon eye possible later. These rows are worked back and forth across the first 25 stitches of the hat (the first 2 needles) and are not knit in the round. Point Row 1: k25, wrap the following stitch and turn Point Row 2 (4, 6, 8, 10, 12, 14, 16, 18, 20, 22): sl st, p22 (20, 18, 16, 14, 12, 10, 8, 6,4, 2), wrap the next stitch and turn. Point Row 3 (5,7,9, 11, 13, 15, 17, 19, 21): sl st, k21 (19, 17, 15, 13, 11, 9,7,5,3), wrap the next stitch and turn. \*The wrapped stitches should wrap from the wrong side then around to the right side of the stitch. \*The wrapped stitch should not be counted as a stitch in the following row. Point Row 23: sl st, k to marker. -From this point on you will resume knitting in the round. -When working Point Row 23 and Hat Body Row 21, pick up and knit all wraps with the stitch they are wrapped around.
Hat Body Continued:
Rows 21-30: ssk, k9, kfb2, k10, k2tog, k to marker
Hat Band:
-In rows 33-35 you will be knitting short portions in the front of the hat with red yarn to make the Cylon eye. The only way I have found to gracefully accomplish this is to cut the grey yarn, tie on the red, and vice versa at the end of the red portion. Then after the hat is complete weave in the ends. Row 31: p2tog, p9, pfb2, p10, p2tog, p to marker. Row 32: ssk, k9, kfb2, k10, k2tog, k to marker. Row 33: p2tog, p2, Switch to red yarn, k7, kfb2, k8, Switch back to grey yarn, p2, p2tog: p to marker. Row 34: ssk, k1, Switch to red yarn, k8, kfb2, k9, Switch back to grey yarn, k1, k2tog, k to marker. Row 35: p2tog, Switch to red yarn, k9, kfb2, k10, Switch back to grey yarn, p2tog, p to marker. Row 36: ssk, k9, kfb2, k10, k2tog, k to marker. Row 37: p2tog, p9, pfb2, p10, p2tog, p to marker. Row 38: ssk, k9, kfb2, k10, k2tog, k to marker. Row 39: bind off 25 stitches, p20, Bind off 8 stitches, p20. Cut thread and weave in ends.
Earflaps:
-Ear flaps are stitched using only the gray yarn held double. -Ear flaps are garter stitched.
Left Earflap:
-The left earflap is started on the right side of the hat working from the front of the hat tc theback. Left Earflap Row 1: k row and turn. (20 stitches) Left Earflap Row 2: k row and turn. Left Earflap Row 3: k18, ssk and turn. (19 stitches) Left Earflap Row 4, (6, 8, 10, 12, 14, 16, 18, 20, 22): k row and turn. Left Earflap Rows 5, (7,9, 11, 13, 15, 17, 19, 21, 23): k17 (16, 15, 14, 13, 12, 11, 10, 9, 8), ssk and turn. Left Earflap Row 24: k row. Cut threads leaving roughly a 4"' tail but leave last 9 stitches on needle and work on the right earflap.
Right Earflap:
-The right earflap is started on the right side of the hat working from the back of the hat to the front. Right Earflap Row 1: k row and turn. (20 stitches) Right Earflap Row 2: k18, ssk, and turn. (19 stitches) Right Earflap Rows 3 (5, 7, 9, 11, 13, 15, 17, 19, 21): k row and turn. Right Earflap Row 4 (6, 8, 10, 12, 14, 16, 18, 20, 22): k17 (16, 15, 14, 13, 12, 11, 10, 9, 8), ssk and turn Right Earflap Row 23: k row. Cut threads leaving roughly a 4”' tail but leave last 9 stitches on needle.
Braids:
-For the bottoms of the ear flaps Step 1: Cut 18 long strands of yarn. Cut them about 2 arms lengths long (about a yard and a half). Step 2: Thread a strand through each of the stitches left on the needles at the bottoms of the earflaps and remove the needles. Step 3: Center the strands in the stitches and separate the strands into 3 even groupings 0: yarn. Be sure to include the 4" tail in one of the groupings. Step 4: Braid the strands. Step 5: Cut a 2 foot piece of yarn and use it to tightly wrap the bottoms of the braids and tie it off. Step 6: Trim the ends of the braid so they are even.
Blocking:
Using a crochet hook or large tapestry needle weave in all ends. Get the hat wet and gently push the hat out into a more even hat shape. Do not pull down the hat band or the earflaps, just stretch the width of the hat into shape. Let hat dry. Sl st: slip stitch P purl stith K knit stitch Kfb: knit front and back of stitch Pfb: purl front and back of stitch Ssk: slip slip knit K2tog: knit 2 together P2tog: purl 2 together


