PONTIUS
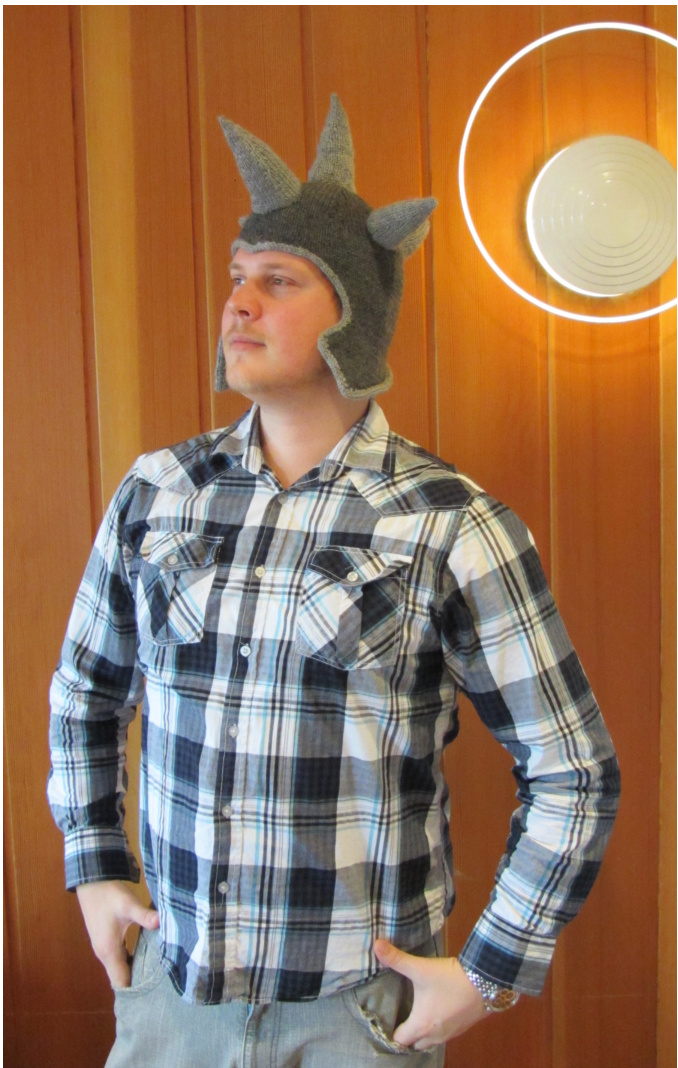
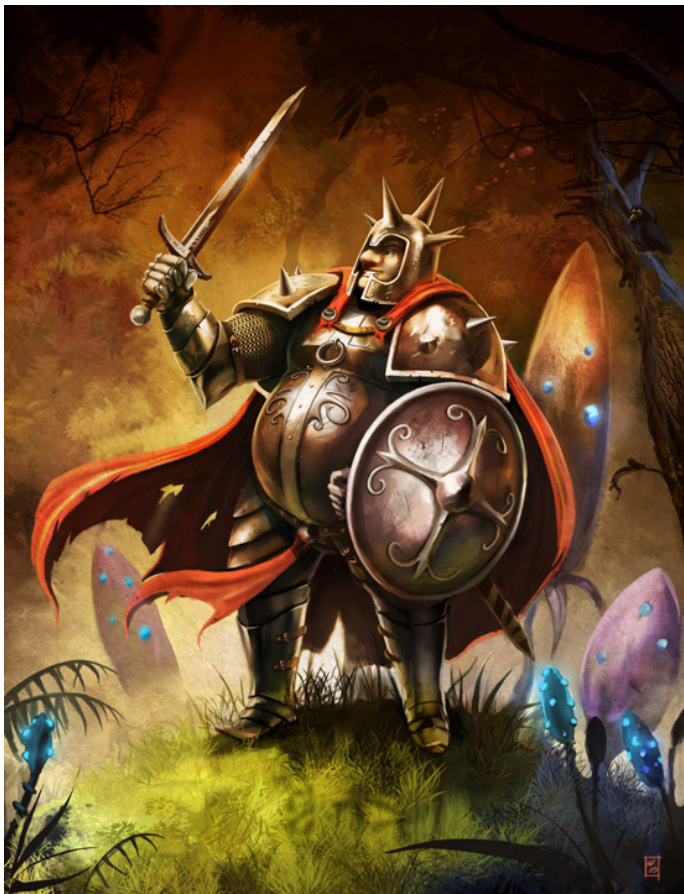
Pontius is one of the three heroes of Trine 2. He is the king's valiant knight - or at least he would like to be. What he is best known for at the moment is his healthy appetite and that nice spiky helmet. Pontius' helmet is cast on provisionally and knit in the round. The shape is defined by a neat i-cord edging. The five spikes are knit separately, stuffed lightly and sewn on. The hat fits an adult male head. For a slightly smaller size, I recommend substituting a smaller needle size; Pontius looks and holds its shape even better with a smaller gauge.
Recommended skills
provisional cast on knitting in the round short rows i-cord edging crochet cast on kitchener stitch
Supplies
2 skeins of color 1: Drops Karisma, color no 16 1 skein of color 2: Drops Karisma, color no 21 gauge 22 st and 32 r / 10 cm 3,5 mm circular needle / dpns, or the right size to achieve gauge stuffing of your choice scrap yarn crochet hook darning needle spray bottle and pins for blocking
TOP
Using your provisional cast-on of choice, CO 104 stitches. Join in the round. Leave the other stitches on some scrap yarn or a spare set of circulars. K 13 rounds before beginning the decreases. The instruction rows where the stitch count changes have the number of stitches you should have on the needles after working that row. On the rows without numbers you should have no changes in your stitch count.

Decrease the amount of knitted stitches on round one by 1 and repeat these three rows 8 times until 40 sts remain. Start decreasing more frequently:

Decrease the amount of knitted stitches on round one by 1 and repeat these three rows 3 times until 8 sts remain. Cut the yarn and pull through all remaining stitches a couple of times.
BACK
Transfer 80 st from the scrap yarn or circular needle onto your working needles. The other 24 will be worked later. Place a marker in the middle of the row. You will be working fat over these 80 stitches.
| 1. (RS) BO 2 st and k to the end. | (78) | |
| 2. | (WS) BO 2 st and p to the end. | 76) |
| 3. BO 2 st and k to the end. | (74) | |
| 4. BO 2 st and | p to the end. | (72) |
| 5. BO 1 st and k to the end. | (71) | |
| 6. BO 1 st and | p to the end. | (70) |
Repeat rows 5 and 6 two more times (66 sts remain). Knit stockinette for 6 rows. Next row, start shaping the cheek plates with short rows and increases asfollows: 1. (RS) kfb, k to 1 st before marker. Wrap and turn. (67) 2. (WS) p to 1 stitch before edge, pfb. (68) 3. kfb, k to 4 st before marker, w&t. (69) 4. Same as row 2. (70) 5. kfb, k to 7 st before marker, w&t. (71) 6. Same as row 2. (72) 7. kfb, k to 10 st before marker, w&t. (73) 8. p 9. k to 13 st before marker, w&t. 10. p 11. ssk, k to 16 st before marker, w&t. (72) 12.p 13. ssk, k to 19 st before marker, w&t. (71) 14. p 15. ssk, k to 22 st before marker, w&t. (70) 16. p 17. ssk, k to 25 st before marker, w&t. (69) 18. p 19. ssk, k to 28 st before marker, w&t. (68) 20. p 21. ssk, k to the end of row picking up and knitting the wraps as you go. (67) 22. (WS) pfb, p to 1 st before marker, w&t. (68) 23. (RS) k to 1 stitch before edge, kfb. (69) 24. Same as row 2. (71) 26. pfb, p to 7 st before marker, w&t. (72) 27. Same as row 2. (73) 28. pfb, p to 10 st before marker, w&t. (74) 29. k 30. p to 13 st before marker, w&t. 31. k 32. p2tog, p to 16 st before marker, w&t. (73) 33. k 34. p2tog, p to 19 st before marker, w&t. (72) 35. k 36. p2tog, p to 22 st before marker, w&t. (71) 37. k 38. p2tog, p to 25 st before marker, w&t. (70) 39. k 40. p2tog, p to 28 st before marker, w&t. (69) 41. k 42. p2tog, p to the end of row picking up and purling the wraps as you go. (68) BO all 68 sts on the needles.
FRONT
Return to the remaining 24 sts.
| 1. (RS) BO 6 st, k to end | (18) |
| 2. (WS) BO 6 st, p to end | (12) |
| 3. BO 4 st, k to end | (8) |
| 4. BO 4 st, p to end | (4) |
| 5. BO 2 st, k to end | (2) |
| 6. BO 2 st, cut and pull through the last stitch. yarn 1 | (0) |
I-CORD EDGING
Using crochet cast on, CO 4 sts. Knit a couple of rounds of icord before attaching it to the edge of the hat as follows. Start from the middle of the neck and proceed to the left. 1. k 3, sl 1, insert left needle through the BO edge from the WS to the RS, k and pass the slipped stitch over. 2. k Repeat rows 1 and 2 around the helmet as follows: K into every st on straight parts of the hat. For crisp corners, k into one or two sts twice. For the parts curving inwards, only k into every other edge st. For the best result, do a bit of experimenting to find your perfect style. Knit i-cord all around the edge of the helmet. When you get back to the crochet cast on, unravel it transferring the stitches back on a needle. Kitchener stitch the ends of the i-cord edging together.
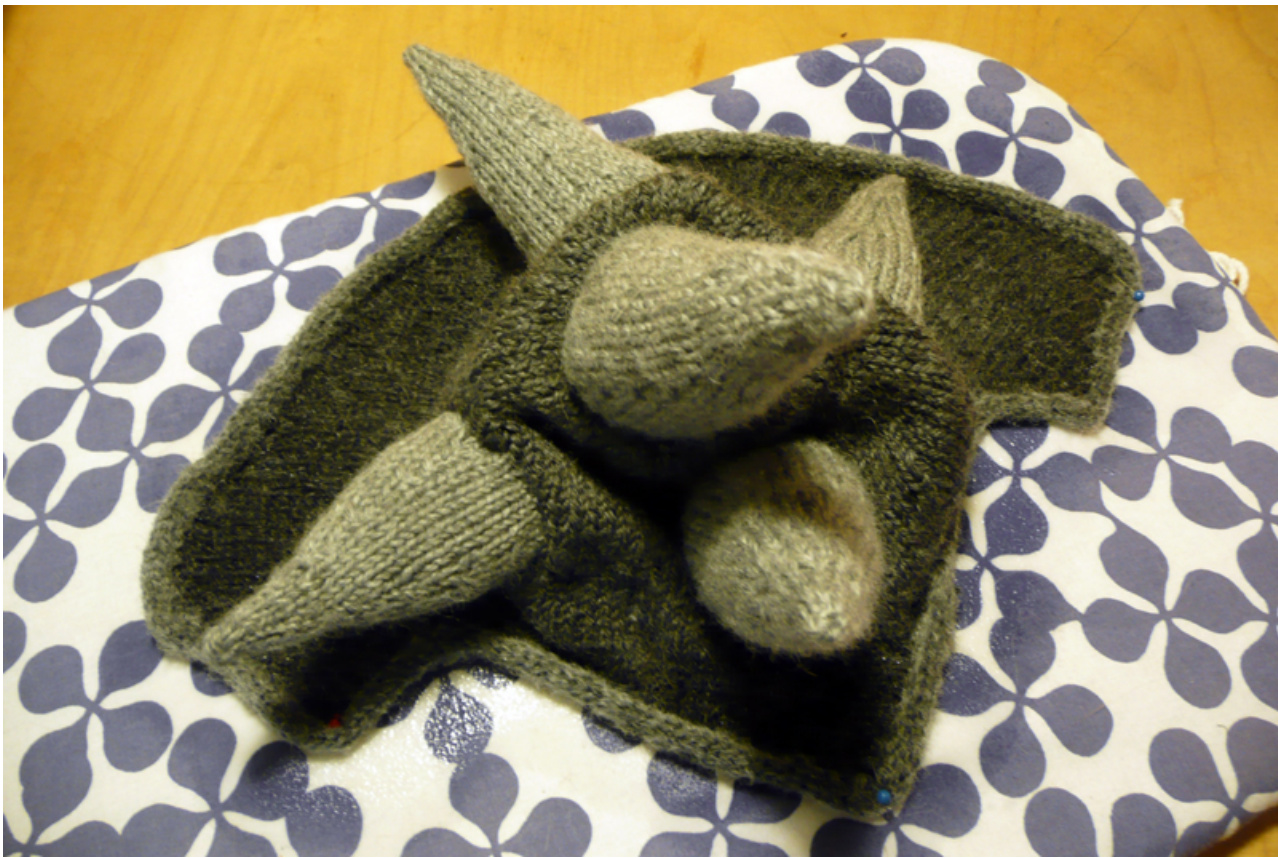
BIG SPIKES
CO 32 st leaving a long tail and join in the round. You will use the tail to sew the spike on later. Knit five rounds before starting decreases.
| 1. *k 6, k2tog * repeat ** four times. | (28) | |
| 2. k | ||
| 3. k | ||
| 4. k | ||
| 5. k | ||
Decrease the amount of knitted stitches on round one by 1 and repeat these 5 rounds 7 times until 4 stsremain. Cut the yarn and pull through all the remaining sts a couple of times. Weave in the end. Knit three big spikes.
SMALL SPIKES
CO 24 st leaving a long tail and join in the round. You will use the tail to sew the spike on later. Knit five rounds before starting the decreases as follows.
| 1. *k 4, k2tog * repeat ** four times. (20) | |
| 2. k | |
| 3.k | |
| 4. k | |
| 5.k | |
Decrease the amount of knitted stitches on round one by 1 and repeat these 5 rounds 5 times until 4 sts remain. it the yarn and pull through all the remaining sts a couple of times. Weave in the en Knit two small spikes.
FINISHING TOUCHES
Stuff the spikes lightly and, using the yarn tail, sew them on to the hat. Sew one big spike on the very top of the hat. The second big one goes midway between the front point of the hat and the middle spike. Sew the last one on at the same distance towards the neck Of thehat. Sew the two smaller spikes on both sides of the middle spike at the same distance as the other Ones. Weave in all the remaining yarn ends. Pin the side faps and front point in shape as in the picture. Spray with water until damp. Let the hat dry completely. Unsheath your sword controller and wear your helmet with pride.
List of abbreviations k = knit p = purl RS = right side / knit side WS = wrong side / purl side CO = cast on BO = bind off w&t = wrap and turn kfb = knit through both the front and the back of a stitch pfb = purl through both the front and the back of a stitch k2tog = knit two stitches together p2tog = purl two stitches together ssk = slip two stitches individually and knit together through the back loop