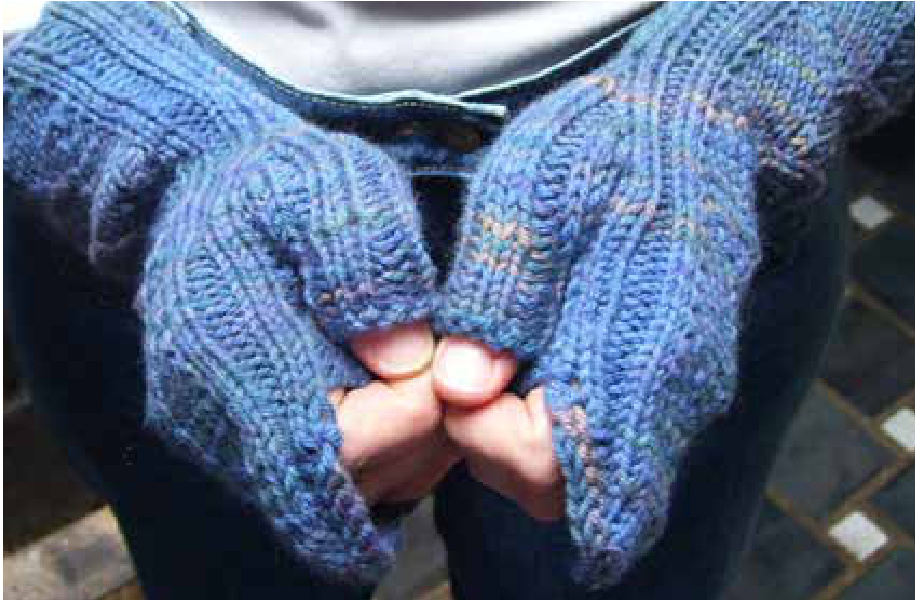
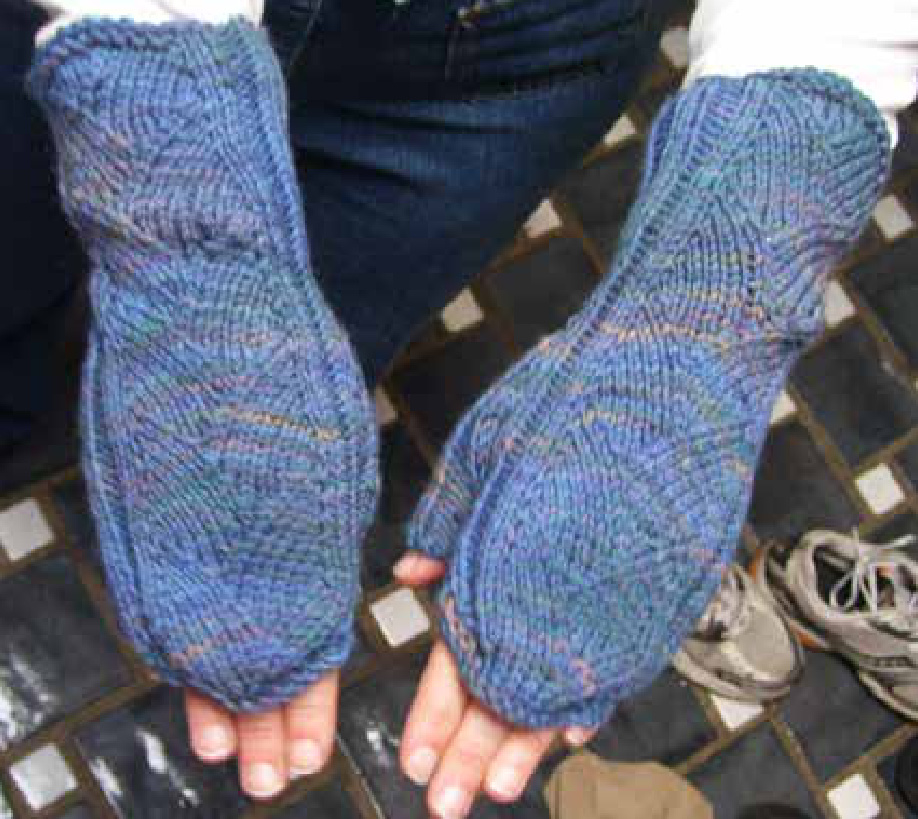
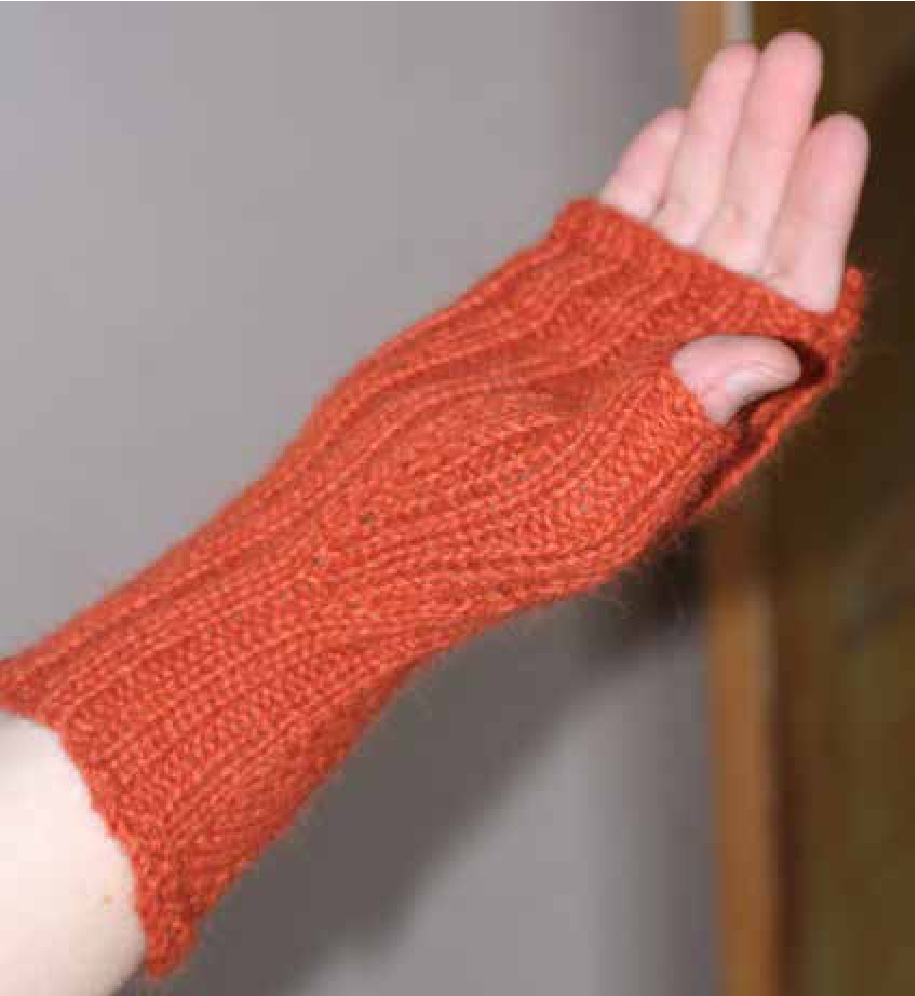
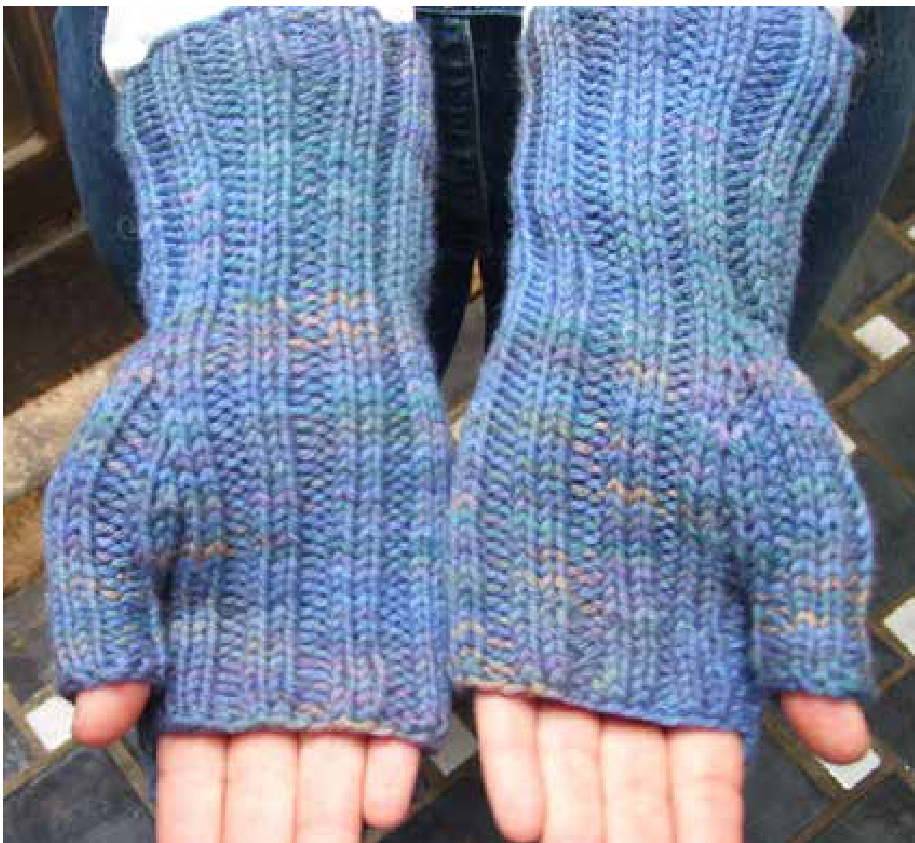
+3 Dragonskin Gauntlets ofWarming
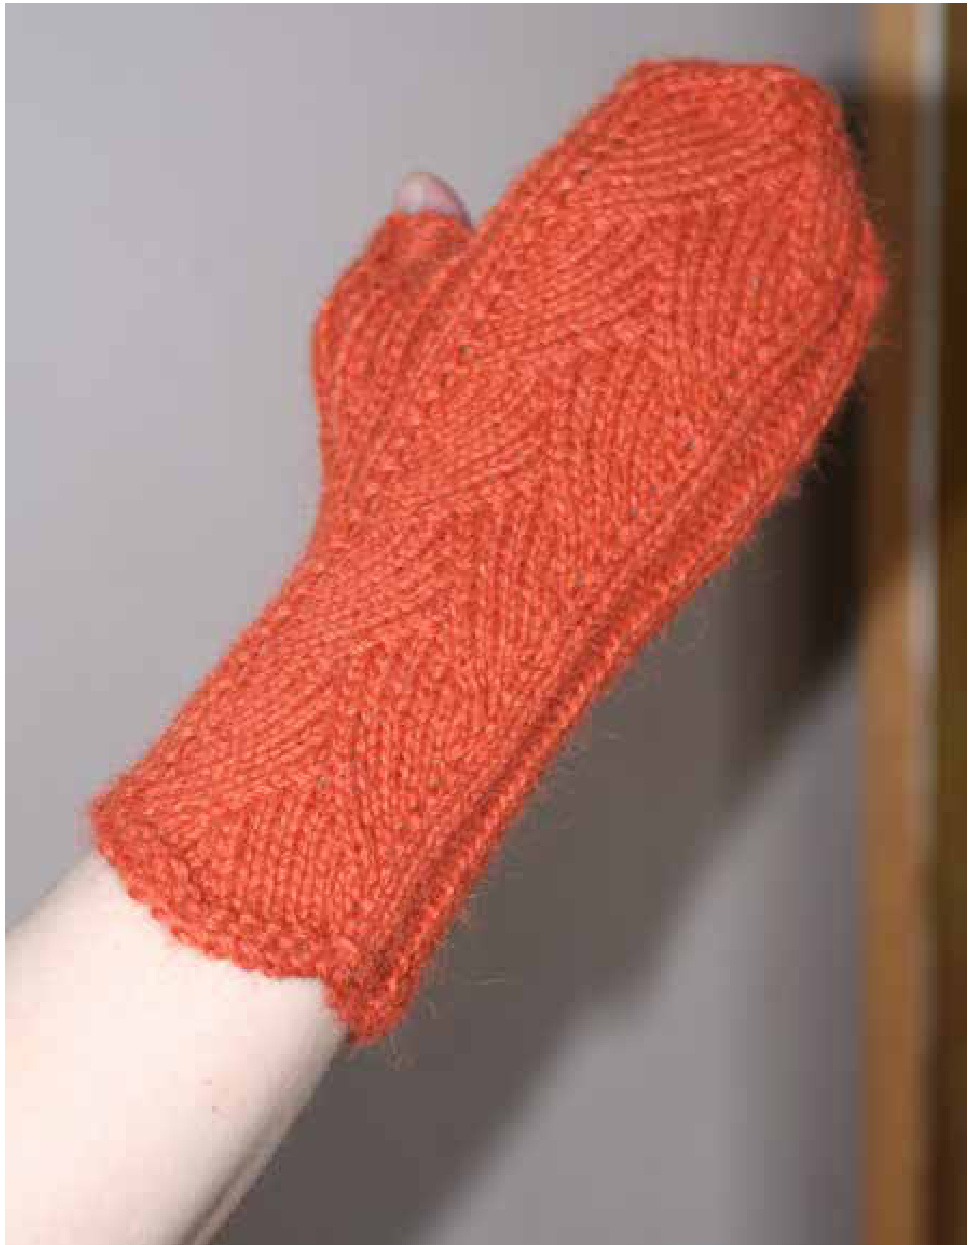
Fingerless mitts with a gusseted thumb and a short-rowed knuckle guard
Introduction:
These are vorpal gauntlets of warming because of the tight knitting gauge and the alpaca. They might only be plus 1's if you knit in plain wool, but they wil still be cozy and fun! These gauntlets are also an introduction in heavier weight wool to techniques you need for sock knitting. There are short rows, a sewn bind-off, a couple Kitchener stitches, and a chart to read. They are also an exercise in understanding the various m1 increases, left and right leaning, as well as knit and purl. Since you're working in larger yarn on larger needles, it's easier to see how the yarn is moving, and understand how these techniques work.
Materials:
· about 150 yds of Aran weight yarn. I used Alpaca, for the +3 warming factor. · tapestry needle · size 6 dpn's, or weapons of your choosing for working your yarn in the round.
Gauge:
· across the 15 pattern stitches: 2.75" · in unstretched ribbing: 6 st/inch ●in stockinette: 18st / 4 inch (4.5 st/in)
Notes:
m1t - make 1 twisted. (Make one through back loop) Lift the running yarn between stitches in the row below from front to back, so that it sits like a knit stitch, and knit through back loop. m1r - make one reversed. Lift the running yarn between stitches in the row below, lifting it from back to front, so that it sits backwards on the needle. Knit through the front leg. m1tp - make 1 twisted, purl. (Make one Purl through back loop) Lift the running yarn between stitches in the row below from front to back, so that it sits like a knit stitch, and purl through back loop. m1rp - make one reversed, purl. Lift the running yarn between stitches in the row below, lifting it from back to front, so that it sits backwards on the needle. Purl through the front leg.

Directions:
Cast-on 41 with a stretchy cast-on. I used the long tail. I recommend dpn's, with the first 15 stitches on the first dpn and the remainder distributed more or less evenly, but do as you like. I divided them as 15-8- 10-8 on my 4 working needles. You could also do 12-14 if you prefer 4 dpn's -shouldn't matter. Working on two circs is also nice; in that case I would put the pattern stitches on one set and the ribbing stitches on the second. round 1: place marker, k15, place marker, (p2, k2)six times, p2. (No markers needed if you're keeping the first 15 on their own dpn.) round 2: k2, p11, k2, (p2, k2)six times, p2. (This gives a garter edge to the pattern, keeping it from curling and helping it look nice. :-) round 3: begin following chart over first 15 st, then continue the remainder in ribbing as set. Work until you have two complete repeats of chart.

make one reversed make one twisted / k2tog ssk
Thumb increases:
NOTE: Continue pattern stitch as set on the first 15 st. Directions below are for the ribbing stitches only. If you're working on two circs, shift the stitches a bit so that you make the thumb on the pattern stitch needle-- otherwise you will end up with too many stitches on the back needle. If you work two at a time this way, you would shift the outer stitches on each gauntlet to the front needle, so that you get a right and a left gauntlet.
Right glove:
Round 1: p2, k2, m1t, p2, m1r, (k2, p2)five times. Round 2 and all even rows: work stitches as established. Round 3: p2, k2, m1t, k1, p2, k1, m1r, (k2, p2) five times. Round 5: p2, k2, m1tp, k2, p2, k2, m1rp, (k2, p2) five times. Round 7: p2, k2, m1tp, p1, k2, p2, k2, p1, m1rp, (k2, p2) five times. Round 9: p2, k2, m1t, (p2, k2)2 times, p2, m1r, (k2, p2) five times. Round 11: p2, k2, m1t, k1, (p2, k2)2 times, p2, k1, m1r, (k2, p2) five times. Round 13: p2, k2, m1tp, (k2, p2) 3 times, k2, m1rp (k2, p2) five times. Round 15: p2, k2, m1tp, p1, (k2, p2) 3 times, k2, p1, m1rp, (k2, p2) five times.
Left glove:
Round 1: (p2, k2) five times, m1t, p2, m1r, k2, p2. Round 2 and all even rows: work stitches as established. Round 3: (p2, k2) five times, m1t, k1, p2, k1, m1r, k2, p2. Round 5: (p2, k2) five times, m1tp, k2, p2, k2, m1rp, k2, p2. Round 7: (p2, k2) five times, m1tp, p1, k2, p2, k2, p1, m1rp, k2, p2. Round 9: (p2, k2) five times, m1t, (p2, k2) 2 times, p2, m1r, k2, p2. Round 11: (p2, k2)five times, m1t, k1, (p2, k2) 2 times, p2, k1, m1r, k2, p2. Round 13: (p2, k2)five times, m1tp, (k2, p2) 3 times, k2, m1rp, k2, p2. Round 15: (p2, k2) five times, m1tp, p1, (k2, p2) 3 times, k2, p1, m1rp, k2, p2. Knit 4 more rounds, or until the gauntlet edges wrap around the base of your thumb, and easily touch.
Removing thumb stitches
Slip the increased stitches to waste yarn, so that there is a purl stitch on either side of the opening, and rejoin the round. You will have p1, (k2, p2)three times, k2, p1 on the waste. PULL THE STITCHES TIGHT as you work past the join the first couple times.
Work until you have 4.5 pattern repeats, and check length. I worked 5 repeats in the initial pair, but others are finding 4.5 is a better fit. Continue until the gauntlets are desired length. You can either work a finishing row of garter across the pattern stitches and bind off, or make the short row knuckle guard as shownbelow:
Optional knuckle guard:
NOTE: Start this when the palm side of the glove is the desired length after an odd row in the chart rather than an even row.
Knuckle Guard set-up
Work the 15 pattern stitches one more round as set. p2, k2, then bind off 17 stitches. k2tog so that the last bound off stitch doesn't interrupt the ribbing, but merges into it. 23 st. total on your needles. Move all remaining stitches to a single needle, preparing to work back and forth. You will have k2, p2, 15 pattern stitches, p2, k2 on the needle. From here on, you will not work the increases in the pattern, but continue to work the decreases.
Short Rows
Row 1: Work 22 stitches in pattern, excluding the increases. The two decreases will reduce the stitch count. Turn your work to the purl side; you will have one stitch on the first needle from the previous row that you didn't work. (21 st. total; 1 resting) Row 2: YO, and then work back 20 stitches across the purl side of the knuckle guard in pattern. Turn your work. (21 st. total; 2 resting) Row 3: YO, work the pattern, excluding the increases, for 16 st. turn your work. (19 st total, because of two decreases; 3 resting) Row 4: YO, and then work back 15 stitches across the purl side of the knuckle guard in pattern. Turn your work. (19 st. total; 4 resting) Row 5: YO, work the pattern, excluding the increases, for 14 st. turn your work. (17 st total; 5 resting) Row 6: YO, work the purl side for 11 st. Turn your work. (17 st total; 6 resting) Row 7: YO, work the pattern, excluding the increases, over 10 st. Turn your work. (16 st total; 7 resting) Row 8: YO, work the purl side for 7 st. Turn your work. (16 st total; 8 resting) Row 9: YO, work the pattern, making only one decrease over 6 st. Turn your work. (15 st total; 9 resting) Row 10: YO, work the purl side for 5 st. Turn your work. (15 st total; 10 resting) Row 11: YO, knit the 5 stitches, then pick up all of the resting stitches by knitting a YO together with each one. So you will knit through the stitch left from row 9's wrap, and then knit the YO with the stitch from row 7, etc, until all stitches are worked. (15 stitches; 5 resting) Row 12: turn, and purl back across the row, picking up the short rows at the other end of the knitting. (15 stitches) Row 13: turn, and purl back across the row, creating a garter ridge. Bind off.
Thumb:
You are going to slide off two stitches on each side of the thumb, knit and bind off the thumb, and then Kitchener those four stitches at the end, with the yarn tail. Starting on the third stitch, on the waste yarn, pick up all stitches save the last two. I worked the thumb on four dpn's, but you can work on circs if you prefer. Snip the yarn in the middle, and pull it out of the stitches now on the needle(s), keeping the two stitches on each end on the waste. Leave a generous tail to use later for Kitchenering. 12" should be more than plenty. Now work in the round, in the established ribbing pattern, until thumb is desired length. I worked 8 rounds on the original, but 6 worked better for test knitters. Try it on to see what works for you!
Sewn Bind-off
Once you have enough length on the thumb you will cast-off with a sewn bind off. Sewn bind-off's are great because, when worked properly, they are nicely stretchy. The first one I ever worked was impossibly tight, though. The trick is to leave a fair amount of slack when you work it so you're not distorting the stitches you're binding off, just sort of looping yarn through them to keep them from raveling. Not too tight, not too loose, just enough to hold them. A good way to test is to work a couple, and then stretch your knitting. If there are big loops when it's stretched tight, you are leaving too much slack. If the bind-off is less stretchy than the knitting, you're working too tight. Adjust your tension as needed. Cut your yarn. Leave yourself lots of slack. Thread end of yarn on your tapestry needle. You need to work about 3 inches, probably, to get around your thumb. Technically you need at most 4x that, or 12", to work the sewn bind off. I would cut two feet of yarn. maybe three. Running out mid bindoff is annoying, to say the least. Looking at the stitches you have to work, imagine numbering them from the first stich on the needle: 1, 2, 3, etc. Sew through stitches 1 and 2, working in the direction you are knitting.
yarn. Picking up and Kitchenering makes for a seamless join at that point. There are many sites with tutorials. Here are a few: ·techknitting.blogspot.com ·knitty.com stitchdiva.com ·knittinghelp.com video The goal is to sew the loose stitches together. You are doing this in a way that mimics the path yarn takes through a knitting stitch, so it appears seamless. This is where you start Kitchenering. It's intimidating, but not hard. Deep slow breaths. Chocolate. Wine, if you like. It's only a couple stitches-- honest!! Sew back through stitch 1, in the opposite direction, back towards where you started. Drop stitch 1 off the needle. You've bound off one stitch! this is what you repeat for each stitch, but I'll go thorugh it once more: Sew through stitch 2 and 3, working in the direction you are knitting. Sew back through stitch 2, in the opposite direction. Drop stitch two off the needle. Repeat for remaining stitches. Do not fear the Kitchener. Strictly speaking you don't have to Kitchener; you could just work all the thumb stitches as set and have a sort of loose thumb that's too close to your palm. But you're up for the challenge,aren'tyou?
Thumb Gusset
There are several reasons to work the thumb in this manner: · It mimics the shape of your hand better. There is space between the thumb and the palm, and closing off some stitches makes for a better fitting glove. ·Your thumb is smaller around than the base of your thumb, so you needed to increase more stitches to get to the thumb comfortably than you actually need to work to make the thumb itself. It's hard to start a finger in a glove without having a little gap at the base where you join on the new
To Kitchener:
Pick up the first two live thumb stitches on either side of the opening on dpn's, removing them from the waste yarn. You want to have two stitches from the palm side on one dpn, and two stitches from the pattern or back side of the gauntlet on the other. There will be a purl stitch close to the hand, and a knit stitch close to the thumb. It will probably make this pricess easier if you tuck the thumb into the glove. Using your main yarn, starting with the stitches closer to the thumb, working towards the hand, you're going to Kitchener off these 4 stitches, in pattern if you feel adventurous. Hold the needles parallel with the tips pointing in the same direction and the wrong (purl) sides facing inwards. To set up, use the tapestry needle to draw the yarn tail through the first stitch on the back needle, from front to back. Give yourself about a foot of yarn. That will be more than plenty for four stitches, plus leave you a tail to tighten the join up when you weave in theends. The mantra for kitchenering is "knit, purl -- purl, knit." This is why: 1. Insert the needle into the first stitch on the front needle as if to knit, while slipping it off the end of the needle. 2. Insert the needle into the next stitch on the front needle as if to purl, but this time, leave it on the needle. Pull the yarn all the way through. 3. Insert the needle into the first stitch on the back needle as if to purl, and slip it off the end of the needle. 4. Insert the needle into the next stitch on the back needle as if to knit, and leave it on the needle. Pull the yarn through. Do that twice, and you're done!!
Finishing:
Weave in tail left from the Kitchenering so that it closes up any remaining hole at the base of the thumb. Weave in ends, and enjoy!
About Jennigma:
Jennifer "Jennigma" Leigh has been knitting since she was three, when her grandmother taught her one summer while sitting on the beach. She lives in Seattle, WA with dogs, cats, her son, her sweetheart, and an occasional visiting horse or cow from the farm acrossthe street. In addition to knitting she is working on a project she calls "Hack Your Clothes," the goal of which is to help people reclaim the skills needed to make off-theshelf clothes fit their shape, personality, and style, and perhaps to make new things from scratch. See more at her blog: www.jennigma.net and her project website: www.hackyourclothes.com


