MADDCROCHETER
Fingerless Cuffed Gloves
Crochet Pattern Susan Hinton 2008
Fingerless Cuffed Glovesea
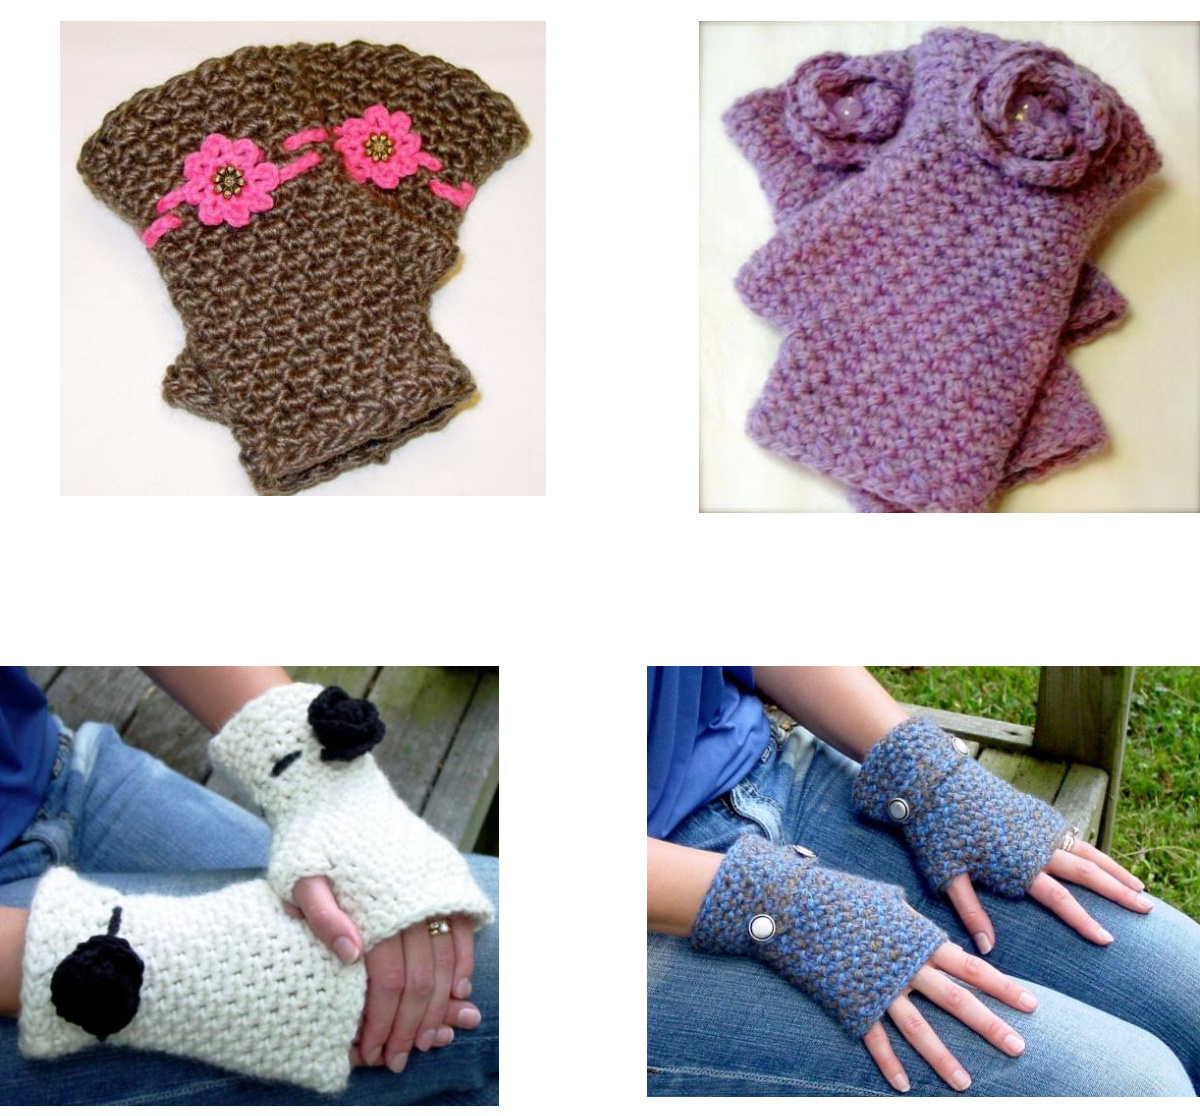
Description: This pattern is written for acrylic worsted weight yarn. However, any yarn in a similar size can be used. Luxury yarns are especially nice. The first instruction is for the basic glove. Then you may add any of the three cuff styles listed below, or you can leave your gloves without cuffs. Special thanks to Luisa Patterson for creating the models shown.
Materials:
3.5 oz. worsted weight acrylic yarn for pair of basic gloves and smallamounts of contrasting colors for buttons and trims. You can also use any other worsted weight yarn such as wool, cotton, or blends. This stitch pattern works especially well for tweeds, nubby, or luxury yarns. · U.S. sizes G and H crochet hook Gauge: 4 sts ${\bf\omega}=1^{\prime\prime}$ $3.5\;\mathsf{r o w s}=1^{\prime\prime}$ . Adjust hook size as needed to obtain correct gauge. Basic glove is $8^{\prime\prime}$ in diameter
Basic Glove:
Make 2 gloves in desired main color. The first number is for heavy worsted weight yarn, the second in parentheses is formedium worsted. Beg: At wrist end, with larger hook, ch 28 (32). Keeping ch straight, slst in $1^{\mathrm{{st}}}$ ch to form a loop. Do not turn work; you will be working in rounds. Rnd 1: Ch 1, 2 sc in same ch as joining. (Skip 1 ch, 2 sc in next) around. When you arrive back at the first st, do not sl st, just keep working rounds as directed. 14 (16) 2-sc groups. Place marker (use a safety pin or scrap of yarn) at beginning of rounds to keep track. Rnd 2: 2sc in first sc of previous nd.Skip 1, (2 sc in next, skip 1) around. (Note:always be sure you are putting your 2-scgroup in the $1^{\mathrm{{st}}}$ stitch of the 2-sc group on the previous round. If you put it in the $2^{\mathsf{n d}}$ stitch, yourstitch pattern will look completely different! Examine your work periodically to check the placement of your stitches!) Rnd 3 (increase round): (3 sc in next, skip 1 sc) twice. (2 sc in next, skip 1 sc) remainder of round. Rnds 4-9 (11): Repeat rnds 2 and 3, three (four) more times. Rnd 10 (12): Repeat rnd 2. Rnd 11 (13):2sc in next st. Skip 11 (13)sc forthumb.2 sc in next st, skip1. (2 sc in next, skip 1 sc) around. Rnds 12-17 (14-19) rnds: Repeat rnd 2. Rnd 18(20): Change tosmaller hook. Continuing around top of glove,skip1st, (sc and dcin next, skip1) around.Sl St in next 2 sc. Finish off and weave in end.
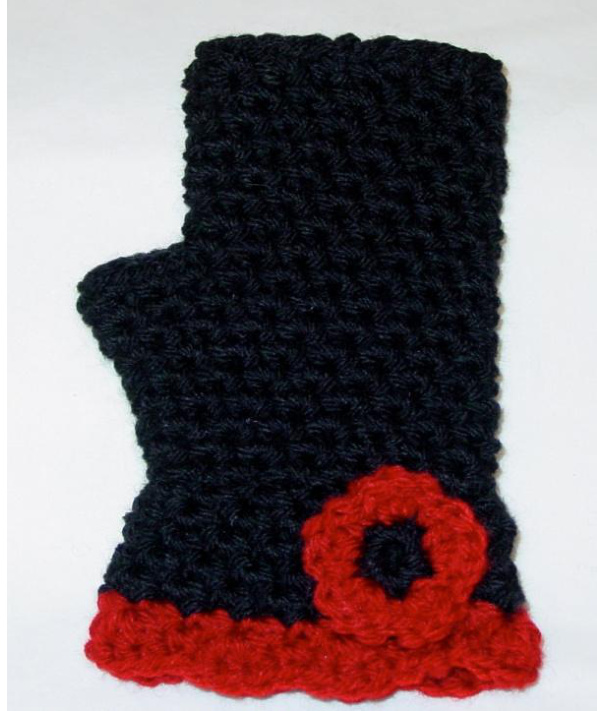
Short Buttoned Cuffed Gloves
Using the larger hook and main color, make 2 basic gloves.
Short Buttoned Cuffs:
Row 1: Use main color and smaller hook. Working in bottom (wrist) edge with glove upside down, right side facing. join yarn at outside wrist side (opposite thumb) in one of the remaining loops of beg ch. Ch 1, 2 sc in same loop. (Skip 1 loop, 2 sc in next) around. Do not join. You willnow turn work and work in rows. Row 2 (increase row): Ch 1,turn. 1 sc in $1^{\mathrm{{st}}}$ st. \*Skip1, (3scin next, skip1,2sc innext, skip1)\*Repeat from\*to\* across. Skip 1, 3 sc i last. Increased by 7 (9) sts. Row 3: Ch 1, turn. 1 sc in $1^{\mathrm{{st}}}$ st. (Skip 1, 2 in next) across. Skip 1, 2 sc in last. Rows 4-5: Repeat row 3. $\circledcirc$ Susan Hinton, Maud and Pearl's Crafts, July 2008 Button loops: For right glove, at end of round 5, ch4 for buttonloop. Do not twist ch, join ch with sl st in corner fold of cuff. Fasten off and weave in ends. For left glove, finish off after row 5. Join yarn in opposite corner. Ch 4 for button loop, join ch with sl st in row 1 of cuff. Fasten off and weave in ends. Plain Button: Use eitherthe same color ora contrasting color yarn. With larger hook and leaving a long tailfor sewing, ch 2. Work 8 sc in $2^{\mathsf{n d}}$ ch from hook. SI st in $1^{\mathrm{{st}}}$ sc. Fasten off. Center the button on the cuff and about ${\bf1}/2^{\prime\prime}$ from the side. Sew to edge of cuff.
Slip on Gloves with Flower Button
Basic Glove: Make two basic gloves as above using main color. Slip on Cuff: Rnd 1: Use main color and smaller hook. Working in bottom (wrist) edge with glove upside down, right side facing, join yarn anywhere in one of the remaining loops of beg ch. Ch 1, 2 sc in same loop. (Skip 1 loop, 2 sc in next) around. Do not join, continue working in rounds. Rnd 2 (increase row): Skip1, (3 sc in next, skip1,2 sc in next, skip 1) around. Increased by5 (7)sts. Rnd 3: (Skip 1, 2 sc in next) around in pattern. Rows 4-5: Repeat row 3. In last stitch, change to contrasting color for scallop edging.
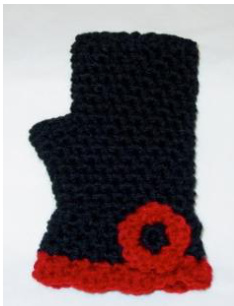
Scallop Edging: Use smaller hook and contrasting color. Rnd 1: Repeat row 3 from cuff. Rnd 2: Skip1, sc in next st. (Skip 1, 3 dc in next, skip 1, 1 sc in next) around. Join with slst in first sc. Finish off. Flower Button: Start with main color. With smaller hook and leaving a long tail for sewing, ch 2. Work 10 sc in $2^{\mathsf{n d}}$ ch from hook. SI st in $1^{\mathrm{{st}}}$ sc. Change to contrasting color. Ch 2, 2 dc in same st, (sc in next, 3 dc) in next around. End with sc in last st. Join with sl st to top of ch 2. Finish off and weave in ends. Center and sew to wrist edge
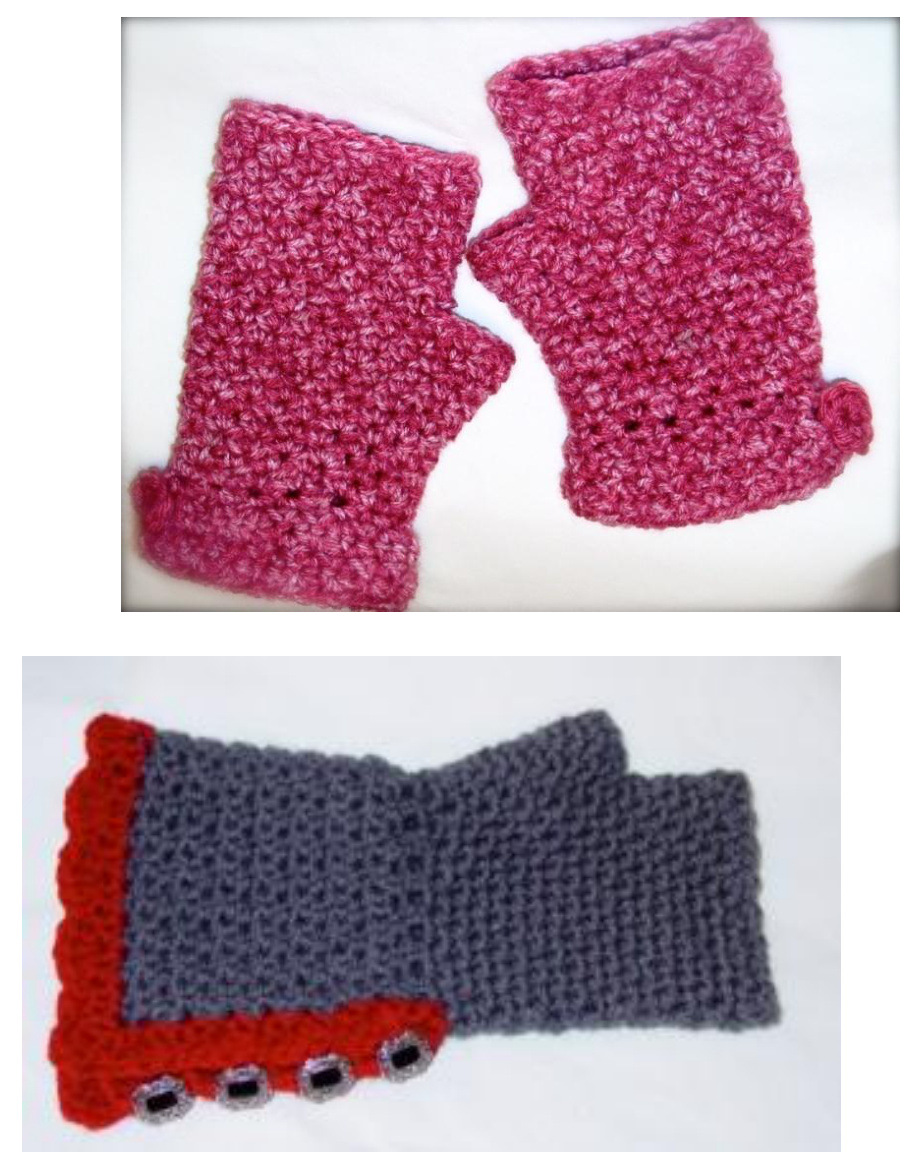
Buttoned Gauntlets
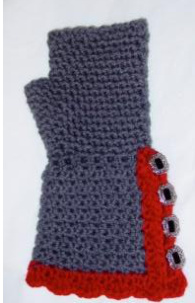
Basic Glove: Make two basic gloves as above using main color. Long Buttoned Cuffs: Row 1: Use main color and smaller hook. Working in bottom (wrist) edge with glove upside down, right side facing and using larger hook, join yarn at outside wrist side (opposite thumb) in one of the remaining lops of beg ch. Ch 1, 2 sc in same loop. (Skip 1 loop, 2 sc in next) around. (36 sts.) Do not join. You wil now turn work and work in rows. Row 2 (increase row): Ch 1, turn. 1 sc in $1^{\mathrm{{st}}}$ st. Skip1, (3 sc in next, skip1,2scin next, skip1)across. Skip1,3sc in next to last st, skip last st. (44 sts.) Row 3: Ch 1, turn. 1 sc in $1^{\mathrm{{st}}}$ st. (Skip 1, 2 in next) across. Skip 1, 2 sc in last. Rows 4-10: Repeat row 3. Rows 11-15: Change to larger hook. Repeat row 3 five more times. Finish off main color. Contrasting trim: Use larger hook and contrasting color. With wrong side facing, join yarn in last st from previous row. Repeat row 3 same as for long buttoned cuffs. Do NOT fasten off. Turn work 90 degrees and work in row ends along the opening in the cuff. Ch 1 at the corner and work 2 sc in same as last sts. Skip 1 row end, (2 sc in next row end, skip 1) to corner (you should have 9 2-sc groups on the side). Continuing on the opposite side of cuff,(2 sc, in next row end, skip 1) to corner (again, 9 2-sc groups). Ch 1 and sl st in $1^{\mathrm{st}}\,\mathfrak{s c}$ Scallop trim row: Ch 3, turn. 2 dc in same st, sc in corner, (skip 1, 3 dc in next, skip 1, 1 sc in next) to fold. Skip 1, sc in next, (skip 1, 3 dc in next, skip 1, 1 sc in next to end. Do not skip 1 at corner, 3 dc in next, Turn work 90 degrees to work on bottom edge. Skip 1, (3 dc in next, skip 1 sc in next, skip 1) across. Join with sl st in top of ch 3. Fasten off. Buttonhole loops: Work with wrong side of cuff facing. With smaller hook and starting at one end of cuff make loops on left side (for right glove) and on right side (for left glove). Join yarn by inserting hook front to back ("front post" sc) of first sc (you are putting these BEHIND the scallops, not on top of them), work( ch 4, front post sc in bars of next sc) across. (4 loops) Fasten off. Buttons: Make 4 plain buttons in contrasting colorasfor plain buttoned cuffed gloves, or used purchased buttons. Sew one button on outside of each scallop opposite buttonhole loops.
Other Ideas:
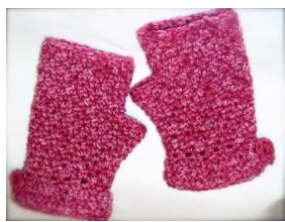
Ihave made these gloves in many different size yarns with much success. If you feel you need to change the beginning chain to accommodate youryarn size, just be sure to add or subtract stitches in multiples of 4.For example, beg ch $=20$ , 24, 28, 32, etc. This is necessary to have the stitch pattern look correct. Decorate your gloves in many ways by adding pretty buttons, straps, flowers, or by using 2 or 3 colors of yarn. Experiment and be creative!I have added some pictures ofa few variations Ihave doneto give you an idea of what you can do!