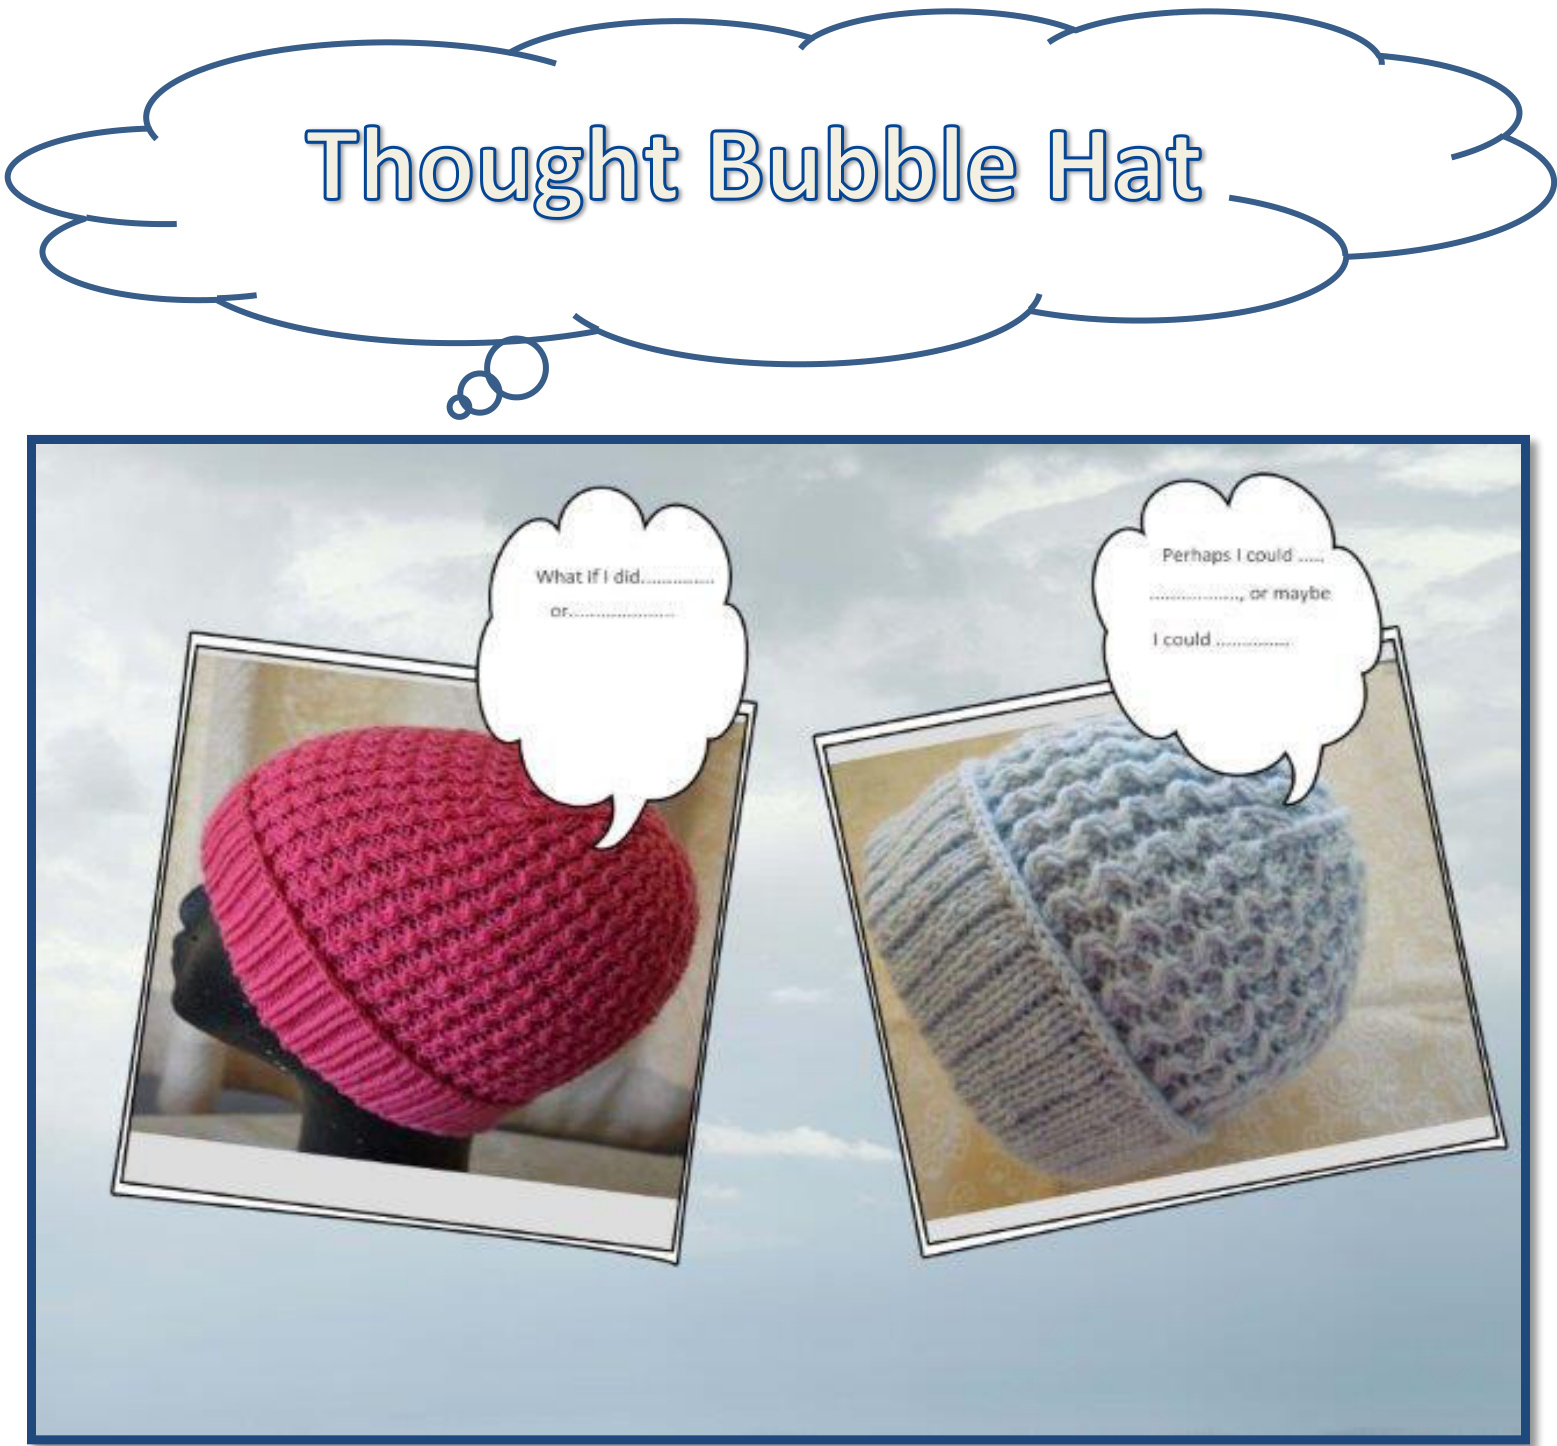
A BEANIE DESIGN BY Linda Pomerenke For some time I've been working with this simple zig-zag rib design, incorporating it into a beanie, and each time I make it, I seem to change it. I have come to the conclusion that each change is just a result of a series of thought bubble moments, but each one I've made has a particular element I quite like. I will try to give an overview of the pattern I feel works best with the zig-zag rib. I am not sure if this will qualify as a pattern, or merely a combination of ideas, a recipe for a beanie perhaps?? These instructions are for working with fingering weight yarn, bottom-up, in the round, and the magic loop method. The crown features a decrease that results in a cross effect. The instructions given are for two different stitch counts, but once the idea is set in your mind, you can vary the sizes, not only with different stitch counts, but also with the use of thicker yarn and/or different needle sizes. At first I made the beanie top-down, using DK yarn. I am very happy with both bind-off edges for these beanies, but not so enamoured of the crown, which in my opinion, looks better worked using a decrease rather than trying to increase out from the centre, ie it was just not working satisfactorily. Let's get started - Stitch gauge: 39 stitches/4 inches & 40 rows/4 inches using 3.25mm needles; 33 stitches/4 inches & 38 rows/4 inches using 3.50mm needles. This gauge achieved with fingering weight yarn. Needles: Varying sizes to suit your needs - 2.75mm, 3.00mm, 3.25mm, and/or 3.50mm in a circular needle long enough to accommodate working the magic loop method. Size: Variable, depending on yarn/needle combinations. Sample beanies fit newborn to 3 months; and child 8-10 years. Yarn: Any 4 ply yarn suitable for this purpose. Suggestions also given for using DK weight. Pattern given for two sizes, instructions for larger size in heavy type, and there are two different cast on methods suggested. Please feel free to use either, or another method of your own choosing. co 1: iCord CO - https://www.youtube.com/watch?v=KxNtbWYXrvg cO 2: German Twisted CO -https://www.youtube.com/watch?v=BfFadEumBak Cast on 111 {132} stitches - 2.75mm {3.00mm} - join to form a circle, being careful not to have a twist in your stitches. Work entire round in P1, K2 rib. Continue working each round in this manner until you are satisfied your turn-back ribbing is suitable for size being made. At this point the work is turned inside out, and when doing this a W&T is worked at the end of last row. To do this, rib to end of last round, yarn will be at back, bring forward, slip the first stitch {purlwise} from the other end of the needle, take yarn to back, and slip the stitch back to other needle. You need to do this to avoid creating a small hole as you work back in the other direction.
Increase round:
Small size - Change to 3.25mm needles, \*K11, Kfb to end, increase of 9 stitches to make 120. Large size - Change to 3.50mm needles, \*K10, Kfb to end, increase of 12 stitches to make 144.
Zig Zag Rib Pattern:
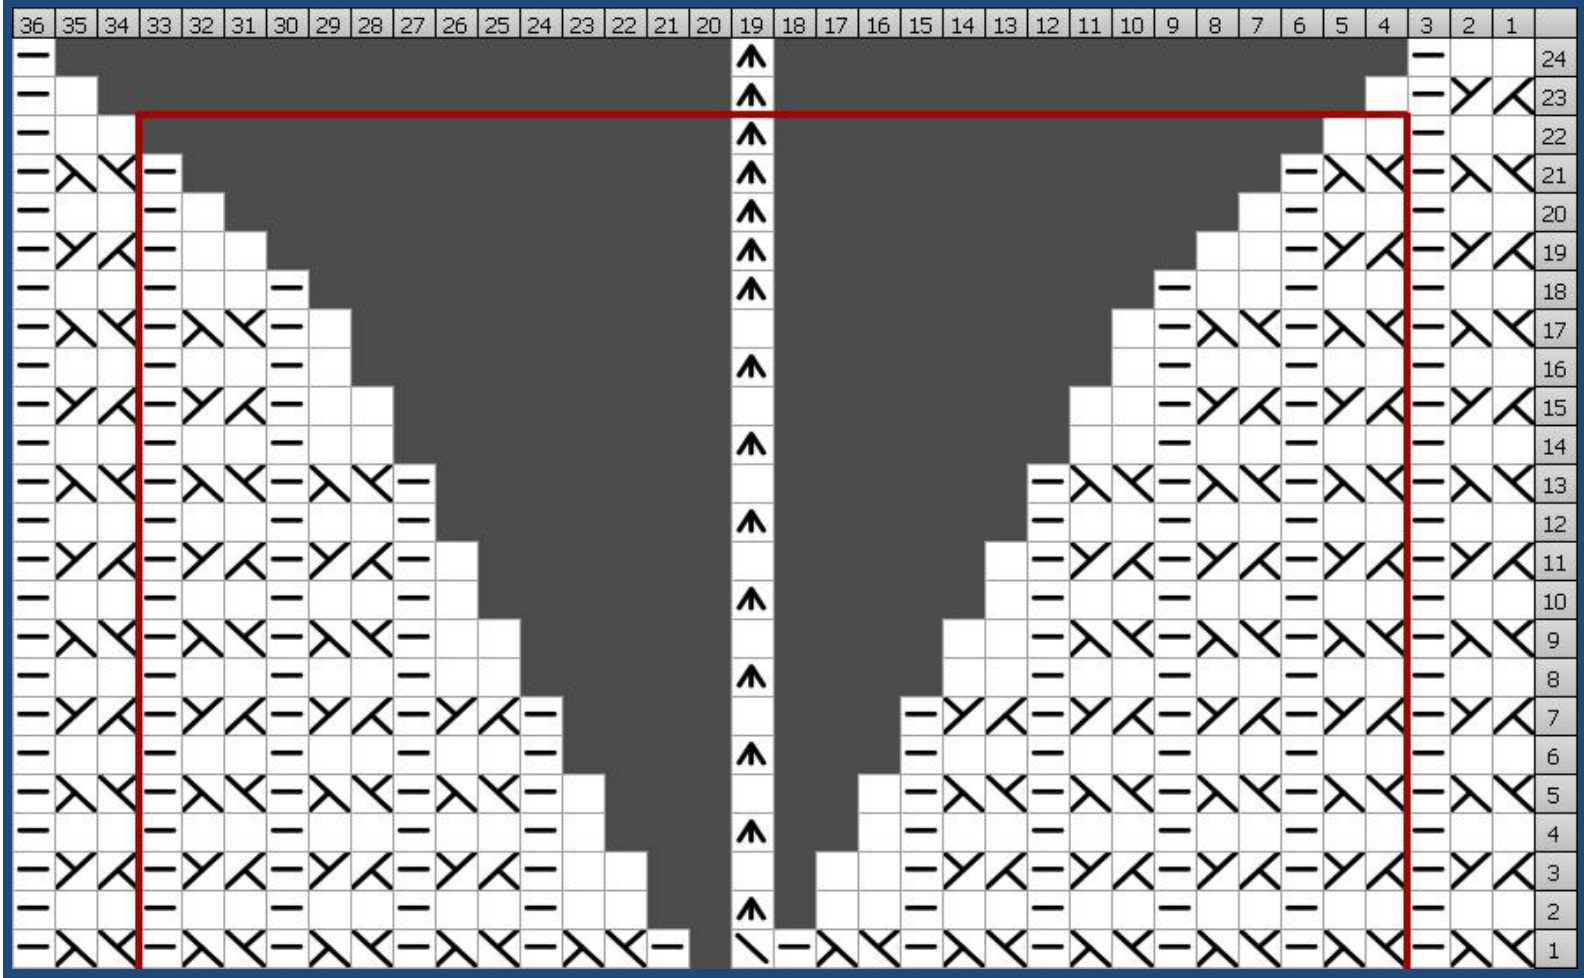
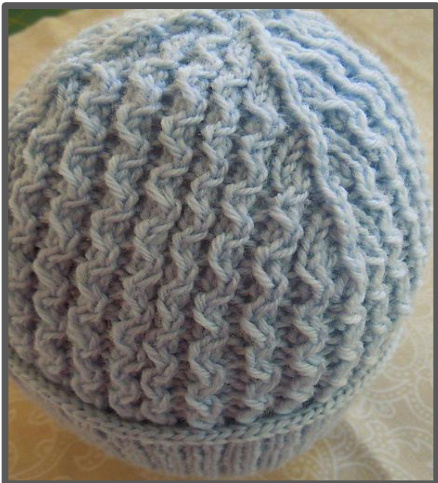
Rnd 1: \*K2, P1, repeat from \* for entire round. Rnd 2: \*Tw2L, P1, repeat from \* for entire round. Rnd 3:As Rnd 1. Rnd 4: \*Tw2R, P1, repeat from \* for entire round. Charted pattern opposite. Small size will have 40 repeats of the pattern and larger size 48.
Repeat these four rows for body of beanie. Suggested size for small beanie is 3% - 4 inches, and larger size 4% - 5 inches, that is the measurement of the zig zag pattern, excluding the ribbed turn-back. In order to prepare for the crown decreases, work a Rnd 1, and then follow chart on page 4 {or written instructions, pg 3} working small size within red perimeter {stitches 4-33/rows 1-22}. Larger size uses full chart, and Rnds 23 & 24 of written instructions. After working last row in each size, cut yarn, thread onto darning needle and pull through all stitches, weave in loose yarn on wrong side. R1: \*[Tw2L, P1] x 5 (6); SSK; P1; [Tw2L, P1] x 4 (5); rep from \* to end. R 2: \*[K2, P1] x 4 (5); K2; Cdd; [K2, P1] x 4 (5); rep from \* to end. R3: \*[Tw2R, P1] x 4 (5); K5; P1; [Tw2R, P1] x 3 (4); rep from \* to end. R 4: \*[K2, P1] x 4 (5); K1; Cdd; K1; P1; [K2, P1] × 3 (4); rep from \* to end. R 5: \*[Tw2L, P1] x 4 (5); K3; P1; [Tw2L, P1] x 3 (4); rep from \* to end. R 6: \*[K2, P1] x 4 (5); Cdd; P1; [K2, P1] x 3 (4); rep from \* to end. R 7: \*[Tw2R, P1] x 4 (5); K1; P1; [Tw2R, P1] x 3 (4); rep from \* to end. R 8: \*[K2, P1] x 3 (4); K2; Cdd; [K2, P1] x 3 (4); rep from \* to end. R 9: \*[Tw2L, P1] x 3 (4); K5; P1; [Tw2L, P1] × 2 (3); rep from \* to end. R 10: \*[K2, P1] x 3 (4); K1; Cdd; K1; P1; [K2, P1] x 2 (3); rep from \* to end. R 11: \*[Tw2R, P1] x 3 (4); K3; P1; [Tw2R, P1] x 2 (3); rep from \* to end. R 12: \*[K2, P1] x 3 (4); Cdd; P1; [K2, P1] x 2 (3); rep from \* to end. R 13: \*[Tw2L, P1] x 3 (4); K1; P1; [Tw2L, P1] x 2 (3); rep from \* to end. R 14: \*[K2, P1] x 2 (3); K2; Cdd; [K2, P1] x 2 (3); rep from \* to end. R 15: \*[Tw2R, P1] ×2 (3); K5; P1; [Tw2R, P1] × 1 (2); rep from \* to end. R 16: \*[K2, P1] x 2 (3); K1; Cdd; K1; P1; [K2, P1] x 1 (2); rep from \* to end. R 17: \*[Tw2L, P1] x 2 (3); K3; P1; [Tw2L, P1] x 1 (2); rep from \* to end. R 18: \*[K2, P1] x 2 (3); Cdd; P1; [K2, P1] x 1 (2); rep from \* to end. R 19: \*[Tw2R, P1] x 1 (2); K2; Cdd; K2, P1; (large size only Tw2R, P1); rep from \* to end. R 20: \*[K2, P1] x 1 (2); K1; Cdd; K1; P1; (large size only K2, P1); rep from \* to end. R 21: \*[Tw2L, P1] x 1 (2); Cdd; P1; (large size only Tw2l, P1); rep from \* to end. R 22: Small size \*K2; Cdd; rep from \* to end round. Large size \*K2, P1; K2; Cdd; K2, P1; rep from \* to end. R 23: \*Tw2R; P1; K1; Cdd; K1; P1; rep from \* to end. R 24: \*K2; P1; Cdd; P1; rep from \* to end.
And now for some ideas about making this design/pattern suit your needs.
If you wish to use DK yarn, that is fine. Following the pattern as written will result in hats to fit adult sizes. I have made the beanie with 120, which fits me, and 144 which is quite large, fits my husband, but I quite like the fit on me as well, but I don't like extremely head hugging beanies. I haven't tried with fewer stitches than 120, but each up or down size requires a difference of 24 stitches in order to accommodate an odd number between the ‘four corner ziggies'. I call them this simply because they are the ones that lead up into the centred double decreases. You can, of course have an even number, which would only need a change of 12 stitches per size. I would suggest trying 96 stitches for a child. The DK beanies were made from the top down, and each rib has a different bind off, both favourite techniques of mine. If you like the bind off better than the cast on edge, then try knitting the body of the beanie from a provisional cast on, and then come back to the rib when you are finished the crown shaping. You can cast on the required stitches for beanie body {120, 144}, and then after picking up the live stitches from the provisional cast on, decrease by 10-12 stitches, something that is divisible by three if you wish to do a K2, P1, or an even number if you wish to do a simple 1 x 1 or twisted 1 x 1 rib. I like this bind off - https://www.youtube.com/watch?v=17aN3T3Rub0&feature=youtu.be which gives a lovelybraided edge. I use this stitched tubular B0 often - https://crankygrrrrl.wordpress.com/2007/01/15/k1p1-invisible-bindoff-tutorial/, it leaves a very professional edge to your work. I hope you have fun with this pattern, and use it often. It is intended to give you food for thought
Abbreviations:
Kfb - Knit into front and back of stitch
| Key |
| YK Tw2R-knitintofrontof2nd stitchonleftneedle,leaveon needle,knitintofrontof1ststitch,then lift bothstitchesofftogether |
| Tw2L-knitintobackof2nd stitchonleftneedle,leaveon needle,knitintofrontof1ststitch,thenlift bothstitchesofftogether |
| CentralDoubleDecrease pP (RS)slip2sts,knit1,pass2slip stsover (S)slip2sts together,purlnextst,pass2slip stitches over |
| Knit k (RS)Knit (WS) Purl |
| Purl P (RS)Purl (WS)Knit |
| SlipSlipKnit ssk (RS)slip,slip,knit slipped sts together (S)slip,slip,purl slipped sts together |
| No Stitch X (RS)No Stitch (WS) No Stitch |


