Clever Colourwork Case!
This is a crash course on stranded chart knitting with two colours so that you can tackle stranded and fair isle projects with confidence! Make a wicked little pocket for your iPhone, money, or other small cherished item. Peeps must know how to cast on, knit, purl, and cast off.
Materials:
2 balls of Diamond Select Chunky in contrasting colours 5.0 mm straight needles 1 toggle button 2 5.0mm DPNs (optional) Tapestry needle
Terms:
MC Main Colour CC Contrast Colour CO Cast On K Knit P Purl St(s) Stitch(es) DPN Double Point Needles St St Stockinette stitch
Pattern:
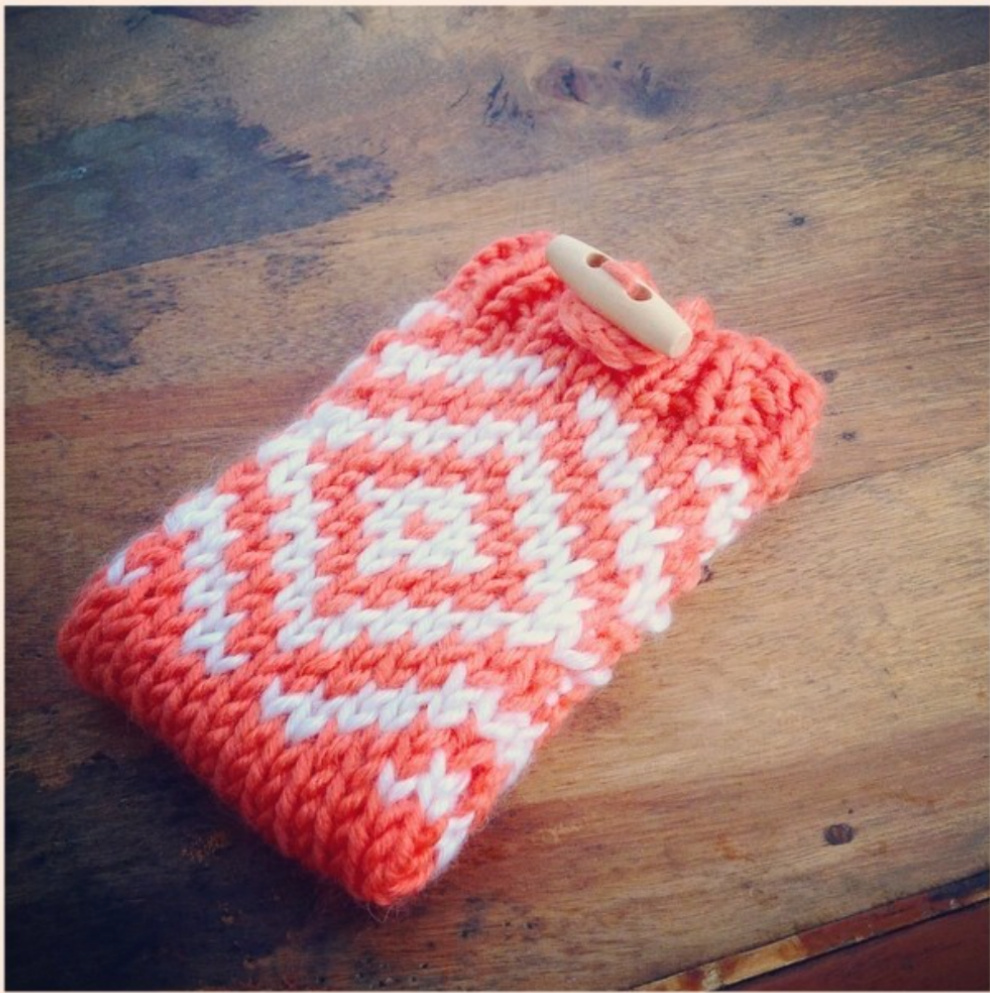
1. With MC, CO 17 sts. 2. \*K1, P1\*, repeat between \*\* to end of row 3. \*P1, K1\*, rep between \*\* to end of row. 4. Repeat steps 1 and 2 one more time (tota of 4 rows of ribbing) 5. K one row 6. P1 row 7. Refer to a chart/pattern for the pattern! 8. Work steps 8 to 12 with MC as follows: 9. P1row 10.Knit 1 row 11. Purl 1 row 12.Knit 1 row 13.Purl 1 row 14. Refer to a chart/pattern for the pattern! 15. Work steps 16 to 21 with MC as follows: 16.P 1 row 17.K 1 row 18.\*K1, P1\*, repeat between \*\* to end of rov 19.\*P1, K1\*, rep between \*\* to end of row. 20.Repeat steps 18 and 19 one more time (total of 4 rows of ribing) 21.Cast off(see last page for finishing tips). Woot!
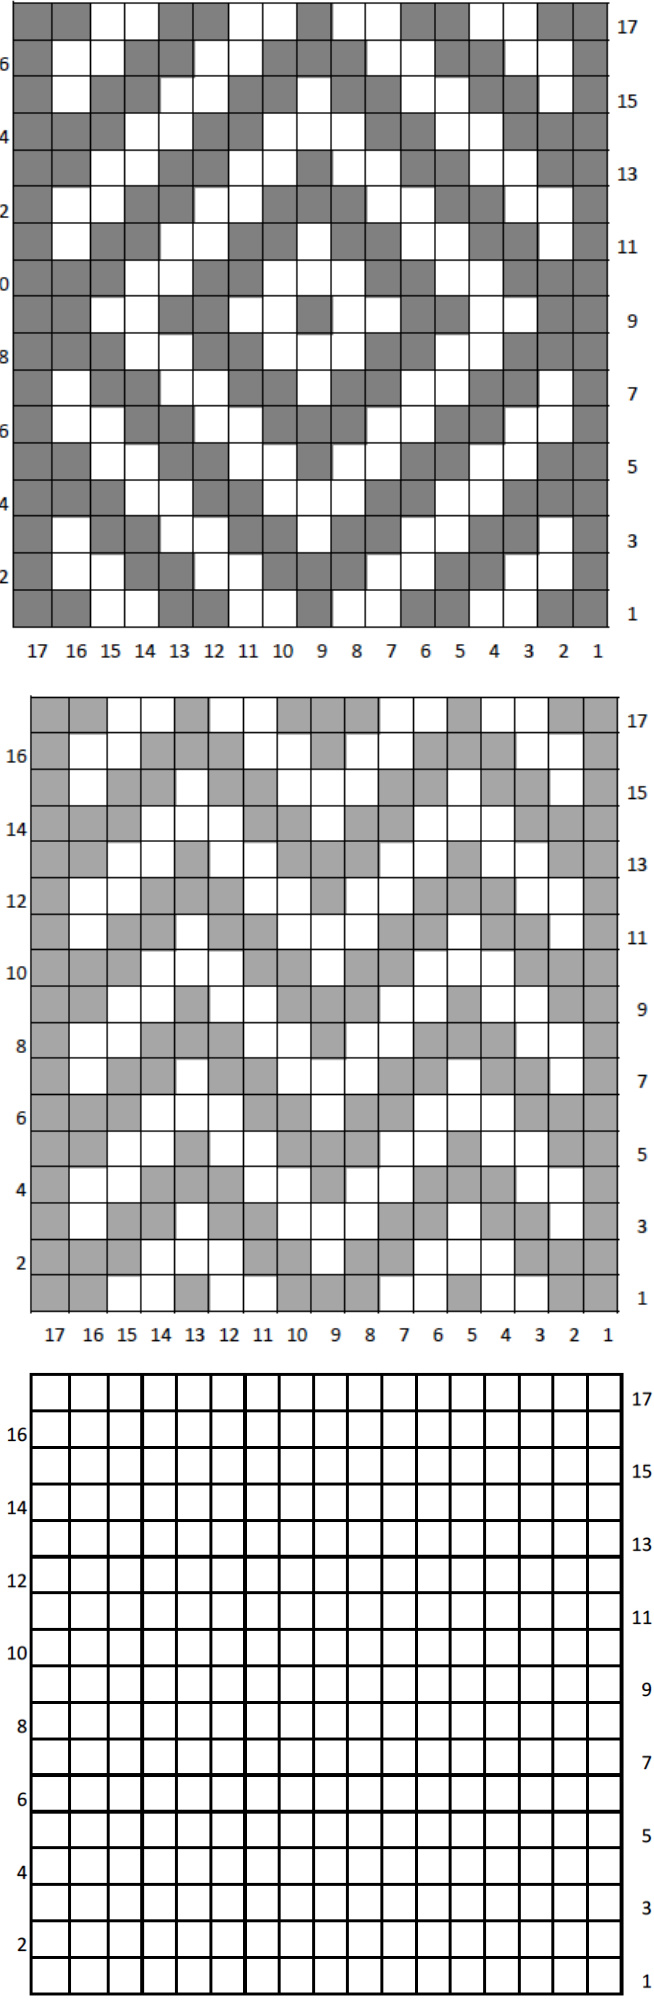
New to charts?
Here are a few tricks! Charts are an easy way to communicate colours and patterns to knitters without writing the patterns out in long form. When using a chart, you start in the BOTTOM RIGHT CORNER of the chart grid, and read the chart from RIGHT to LEFT. When knitting flat (on straight needles) you would read the chart from LEFT to RIGHT, effectively zig zagging your way through the chart pattern. You would also Ineed to purl these even rows. When knitting in the round (on DPN's or circular needles) you would always ready every row of the chart from RIGHT to LEFT, and you would knit every single stitch (unless a pattern says otherwise). ·To make a pattern repeat, you will repeat a chart line over and over until the round of knitting is completed.
New to stranding?
Here are a few tricks! Stranding is a technique used when knitting with two or more colours and when the pattern used has frequent colour changes. Stranding involves carrying the yarn not in use while knitting behind your work. The strand being carried behind the work will need to be long enough to span the distance between use. If it is too long, the stitches knit with that colour will be loose; too short and your colour work will pucker! · Once you start knitting with the second colour, there is no need to ever cut the second colour yarn off, instead it will be carried to the next stitch as needed. The hardest part about stranding is managing the two colours of yarn. One way to help with this is to put one ball of yarn n your left, and the other ball of yarn on your right. If your work ever becomes too tangled, make sure that all stitches positioned in the middle of the needle and then "dangle" your work by the yarns and let any tangles unwind themselves.
Finishing Tips
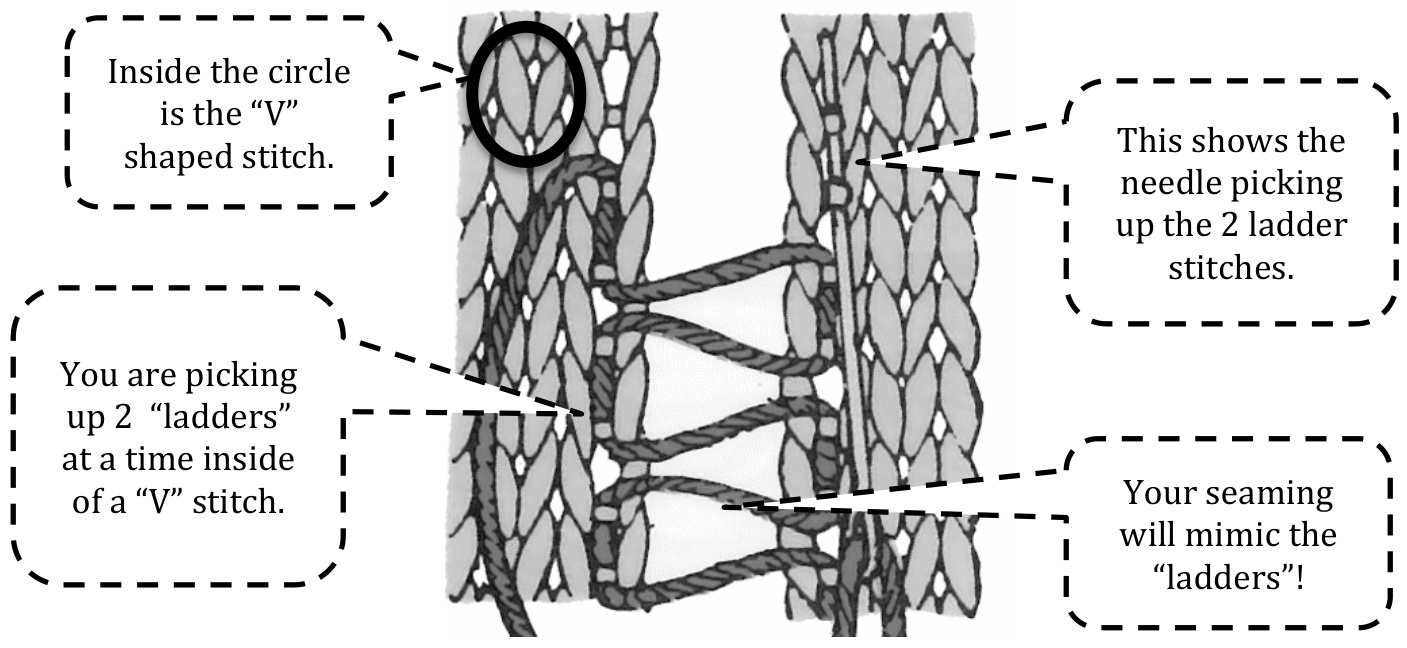
Seaming your work: This case is seamed up along the sides using the mattress stitch. Thread your needle using a long tail or leftover yarn from your project. Start at the finishing end of the work and seam according to the diagram. Pull your yarn enough so that it pulls your work together seamlessly, otherwise you will have a visible "ladder" in your work. We don't want that!
I-cords:
I-cords are a fun way to knit up a "shoelace" like piece for buttons, toggles, or other decorative elements. With a DPN, pick up stitch #7 & #8 of your cast off edge and knit a two-stitch icord until it measures 7 cm long or desired length. With a tapestry needle, sew your two icord stitches on to stitches #10 & #11 of the same cast off edge. This makes a lovely loop! · Sew your toggle button on to the front of your cast on side of your case. You can also braid to create this cord, or crochet a chain!


