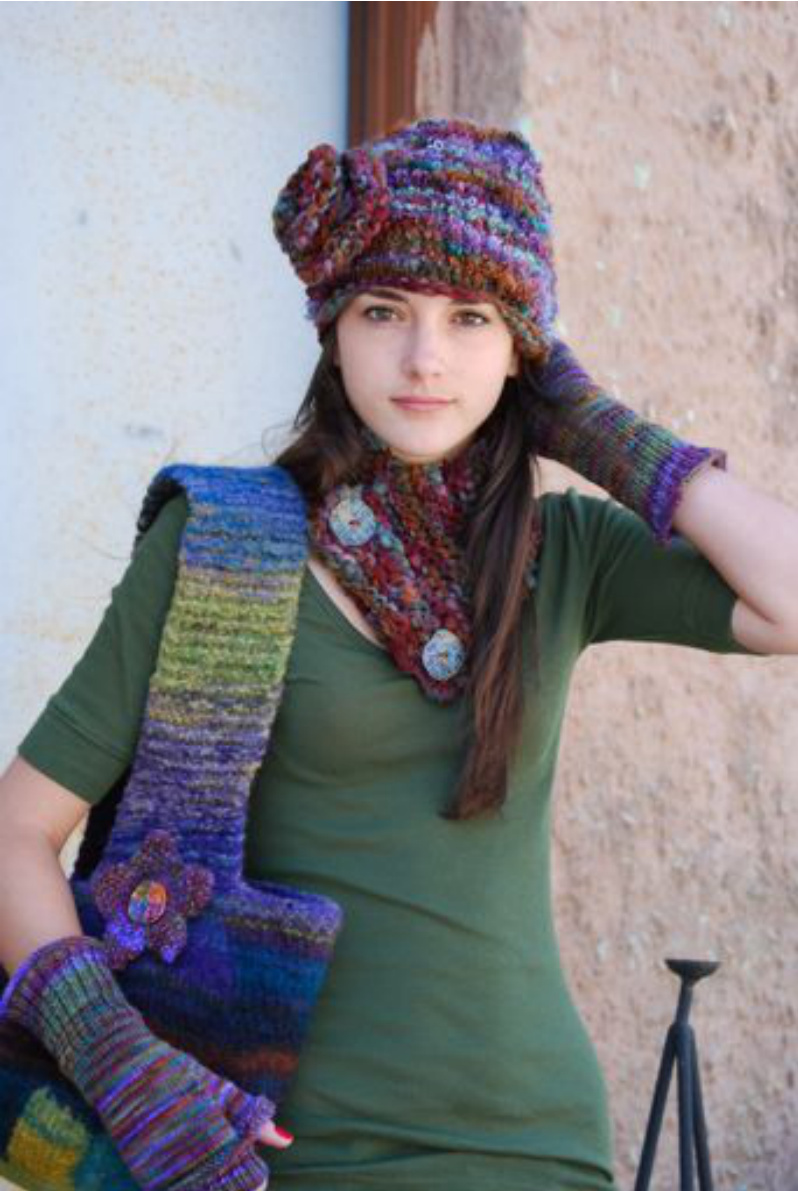
Hat, Scarf, Cow1, Mitts and Flowers
a collection of basic patterns for the Superfluity Yarn Kit
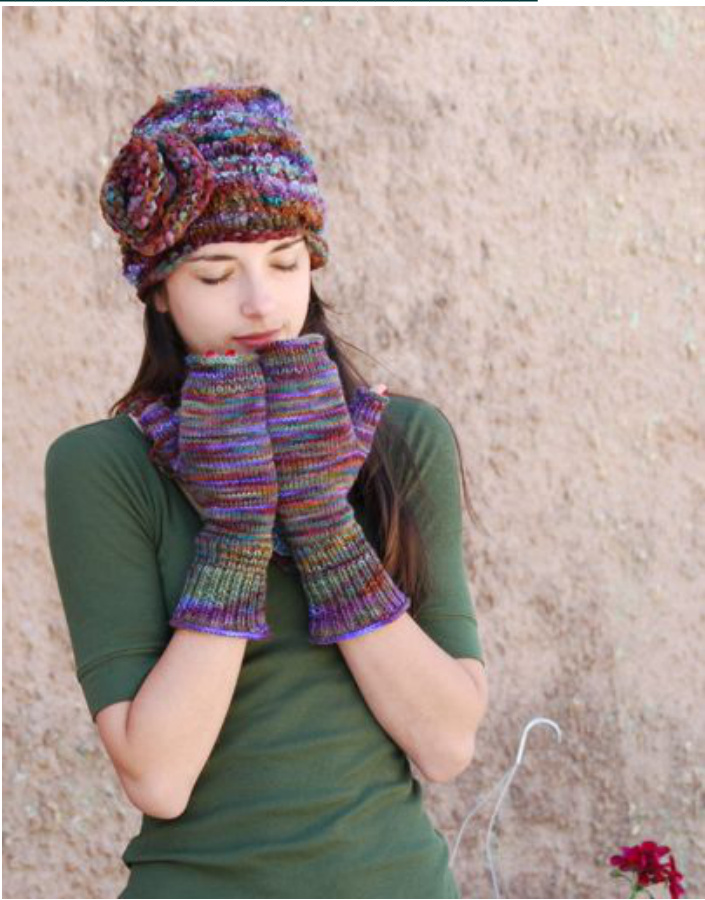
Knit a hat, scarf, cowl, mitts and two flowers from one yarn kit. (Bag not included)
Yarns and Yardages:
The Three Waters Farm Superfluity Yarn Kit contains the following 4 yarns. You may substitute yarns of equal weight and texture. You can knit all the patterns in this collection with one Superfluity Kit. Yarn A: Mohair/Silk boucle (worsted/loopy); one 200 yd skein Yarn B: Alpaca/wool (worsted/smooth); two 120 yd skeins, slightly different Yarn C: Thick and Thin Wool (bulky/matte): one 125 yd skein Yarn D: Mohair boucle (bulky/shiny): one 65 yd skein Needles: US size 15 double points or circular (hat, cowl, rose) US size 3 double points (mitts) US size 13 circular (scarf) US size 5 straight or circular (3-D flower) One large tapestry needle for finishing Ceramic Buttons shown are from http://anniessweethandspun.com @ Lynne Vogel 2009
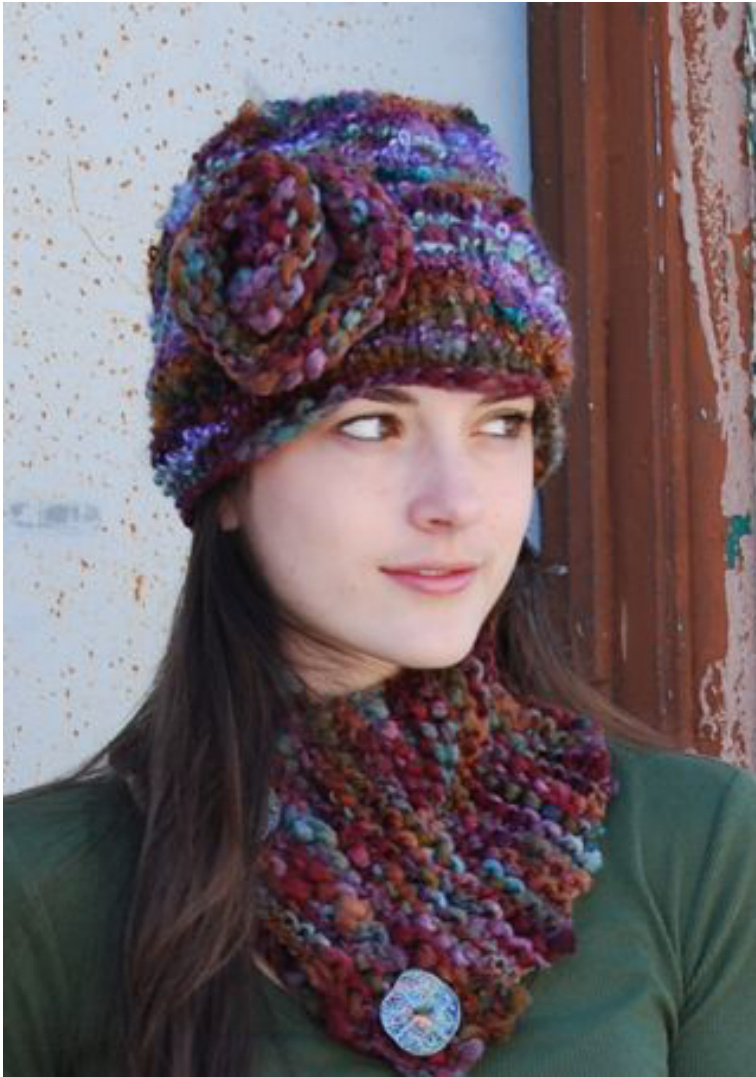
ONE FINE HAT with ROSE
Yarns and Yardages: Yarn C: Thick and Thin Wool (bulky/matte): approx 35 yds (not incl rose below) Yarn D: Mohair boucle (bulky/shiny): one 25 yds Needles OnesetUs15/10mmdouble pointed needles (or circulars if you like working with two circulars or magic loop technique). Gauge In stockinette, approx 2 sts per inch, 4 rows per inch Finished Measurements: Circumference 2o" (stretches to 24") Length: 10 "
Cast on 42 sts in C
Join rnd, being careful not to twist the row. Knit 4 rnds in C.
Begin Alternating Stripes
Tie on D Knit one rnd in D. Knit one rnd in C\* Repeat this pattern, switching yarns every row, until hat measures 8" Decrease to Shape Crown On a C row: K4, K2tog until end of row. The decreases will not come out evenly, not a problem. Knit one row D. In C: K3, K2tog until end of row. The decreases will not come out evenly. Knit one row D. In C: K2, K2tog until end of row. The decreases will not come out evenly. @ Lynne Vogel 2009 Knit one row D. In C: Kl, K2tog until end of row. The decreases will not come out evenly. Knit one row D. Break yarn. In C: K2tog around. Bind off by threading yarn tail through tapestry needle. Run tapestry needle through all stitches and draw up tight. You may want to run tail through all stitches a second time for security's sake.
Finishing
Run in Ends. Knit one Rose is a Rose (below) and sew on hat.
Rosg is a Rosg
Yarns and Yardages Yarn C: Thick and Thin Wool (bulky/matte): approx 10 yds Needles: US size 15/10mm (if you only have double points, fashion a needle cap by winding a wide rubber band around and around one end of each of two double points. Now you have two straights!) Finished Measurements Assembled Rose is 5" in diameter. Abbreviations M1 = make one by casting on with backward loop cast on. Cast on 12 sts. Leave a tail of at least 8 inches so that you can sew the base of the rose when you are done. Try to have this be the thinner part of the yarn...it's easier to sew With. Rows 1, 3, 5 & 7: Knit. Rows 2 & 4: [p1, ml] to last st, p1. Rows 6 and 8: purl Row 9: Bind Off With cast on row serving as the base of the rose, with right side facing, coil the fabric in a spiral so that it resembles a rose. Fabric will curl automatically to show purl side along edge of rose. Use yarn tail to sew spiral in place. Sew Rose to hat, or alternately, sew it to a pin so you can remove it as you like.
Two Button Cow1
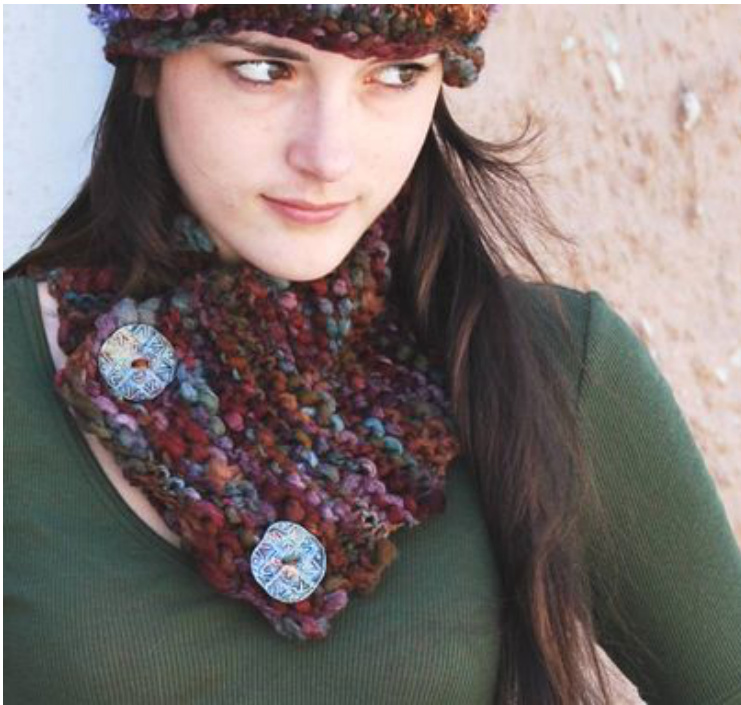
Yarns and Yardages: Yarn C: Thick and Thin Wool (bulky/matte): approx 65 yds Needles: Us 15/10mm. Gauge in garter st: 9 sts over 4 inches. Notions: Two large (approx 1 %2 ") buttons. Ceramic buttons shown are from http://anniessweethandspun.com Finished Measurements: Length: 25 inches Width at Cast on edge: 8" Width at Bind off edge: 4" Cast on 21 sts. Rows 1-4: knit
Work Buttonholes
Row 5: knit three sts, bind off 1 st, knit to the last four sts, bind off one st, k3. Row 6: knit three, cast on one, knit to last three sts, cast on one, k3.
Shape Cowl
Row 7 is a RS row. Mark the right side of the fabric with a marker or pin. Ijust tie on a piece of colored yarn if I don't have a clipping marker or safety pin handy. Rows 7-1oo: knit, working decreases on the following rows as directed: RS Rows 11, 21, 31, 41, 51, 61, 71, 81, 91: knit the first two sts of the row together. Row 101: Bind Off Fold wide end over narrow end of cowl so that the garter ridges are
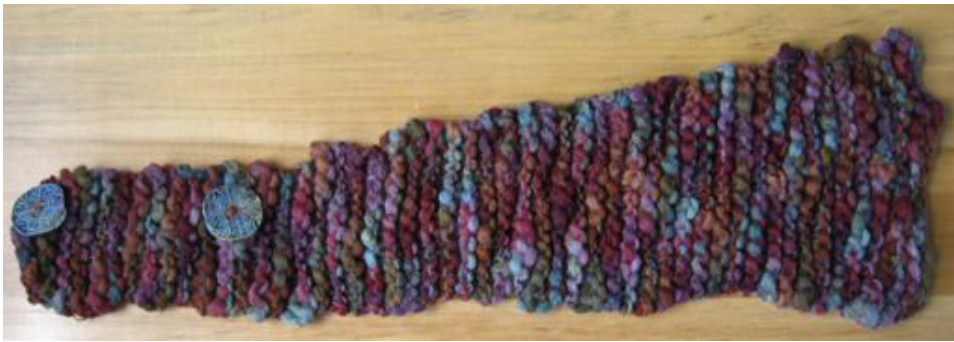
perpendicular to each other at the overlap and mark button placement. Sew on two large buttons to the narrow end of cowl. @ Lynne Vogel 2009
QUICK & EASY SCARF
Knit this little accessory in an evening. Yarns and Yardages: Yarn A: Mohair/Silk boucle (worsted/loopy); one 200 yd skein Needles US 13 /8mm 24" or longer circular Finished Measurements Length: 65 inches Width: 6 inches Cast on 120 sts. Knit in garter stitch until you have approx 6 yds of yarn remaining. Bind off loosely.
QUICK & EASY SHAWL
U can use the entire Superfluity Kit to make this simple self fringing sha
Yarn and Yardages:
Yarn A: Mohair/Silk boucle (worsted/loopy); one 200 yd skein Yarn B: Alpaca/Wool (worsted/smooth); two 120 yd skeins, slightly different Yarn C: Thick and Thin Wool (bulky/matte): one 125 yd skein Yarn D: Mohair boucle (bulky/shiny): one 65 yd skein Needles: Us 13/9mm 36" or longer circular Gauge: approx 6 sts & 26 rows in 4 inches. Finished Measurements: Length; 78" not counting fringe. Width: approx 14""
Before You Knit
This is your opportunity to flex your creative muscles. Choose from your assortment of yarns as you go. Remember that there is more yardage in the lighter weight yarns than the heavier ones with the least amount of yardage in the mohair boucle. You may want to stagger the heavier yarns throughout the shawll, or group them in stripes for emphasis. The choice is up to you. No matter which yarns you use, you will always break the yarn at the beginning of the row to leave the tail for the fringe (see instructions below). This is a great stash busting pattern. If you knit it with other weights of yarn, remember that if you reduce your needle size you may want to increase the number of stitches. For each smaller needle size, increase your number of stitches by 1 sts over 4 inches.
@ Lynne Vogel 2009
Another variation is to knit in stockinette instead of garter. This will make a wider, somewhat less textured shawl. For this variation, cast on 5 extra stitches, as it wil not be as long as the garter stitch version in the same number of stitches.
Cast On 120 stitches with B
You have the option to knit to your desired width or till you run out of yarn (approx 85 rows). You need approx 7 yds of Alpaca/wool to bind off. At the end of every row, cut yarn leaving at least a 6 inch tail (if you want longer fringe, leave more). Tie on new yarn also leaving an equal length tail. Tie overhand knot as close to fabric as possible to join yarns and knot fringe. Bind off loosely.
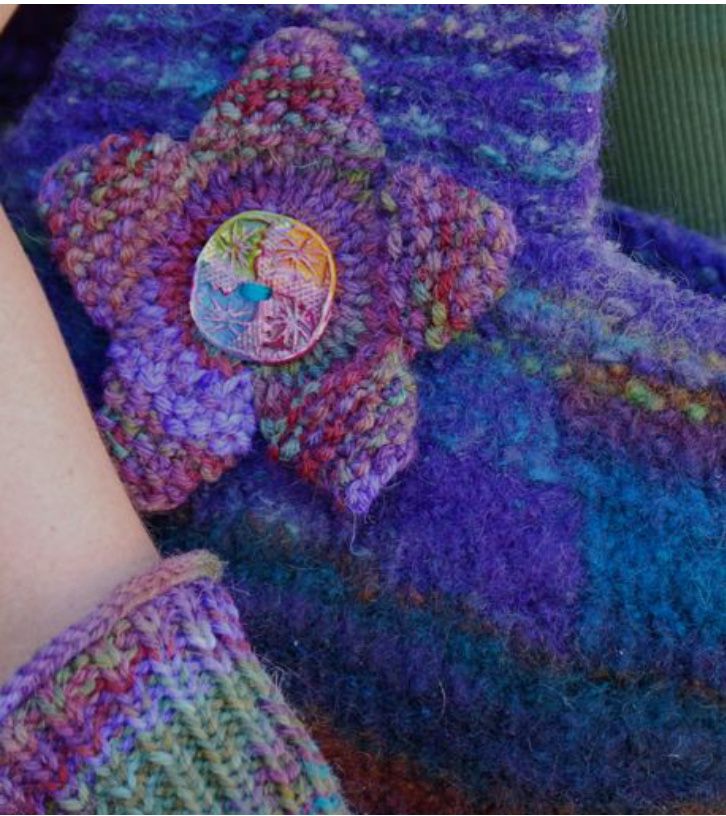
3-D FLOWeR in two sizes Yarn and Yardage" Yarn B: Alpaca/wool (worsted/smooth); approx 35 yds per flower. Finished measurement: Assembled flower is 4" in diameter Needles: US 5/3.75mm Gauge: Notions: One large button (approx 1 % " or larger). Ceramic button shown is from http://anniessweethandspun.com
Large 3-Φ Flower with Button Center
Cast on 12 sts Row 1: knit Row 2: [purl 1, make one (with backwrd loop cast on)] to end, purl 1. -23 sts total Row 3: knit Row 4: purl Row 5: knit Row 6: [pl, make 1] to end, p1 -45 sts total Row 7: knit Row 8: purl Row 9: [kl, pl] to end, kl Row 10: make petals as follows: Lynne Vogel 2009 Petals 1, 3, and 5 (tie on new yarn for 3 and 5) Row 10: [K1. P1] 4 times, k1 (9 sts), turn Rows 11-18: kl, pl] to end, kl (9sts) Row 19: bind off in pattern Petals 2 and 4: tie on new yarn Row 10: [p1, kl] 4 times, p1, turn Rows 11-18: [p1, kl] to end, pl Row 19: bind off in pattern Sew side seams of first 8 rows (stockinette portion) of flower. Run in ends. Using the tail from the bind off row, sew last st of bind off row to first st of bind off row to form curled petal. Run in ends. Sew button to center for simple flower.
Smal1 3-Φ Flower with Stamen Center
Add these flowers to your cuffs or use them to accessorize other items. Needle size: US 5/3.75. Takes approx. 20 yds. Cast on 10 sts Row 1: knit Row 2: [purl 1, make one (with backwrd loop cast on)] to end, purl 1. --19 sts total Row 3: knit Row 4: purl Row 5: k1, [k1, make 1], k2—35 sts total Row 6: purl Row 7: [kl, pl] to end, kl (seed stitch) Row 8: make petals as follows: Petal l: Row 8: [K1. P1] 3 times, k1 (7 sts), turn Rows 9-13: kl, p1] to end, kl (7 sts) Row 14: bind off in pattern Petal 2: tie on new yarn Row 8: [p1, k1] 3 times, p1, turn Rows 9-13: [p1, kl] to end, p1 Row 14: bind off in pattern @ Lynne Vogel 2009
Tying on new yarn, repeat Petal 1, petal 2, and petal 1. Run in ends. Curve flower so you can sew the side seam of the stockinette portion of the fabric leaving the petals free. Fold end of each petal in half long ways and sew first and last st of last row together to form a pointed petal. Run in ends. Knit Stamen Center.
STAMEN CENTER
Cast on 6 sts. (counts as row 1) Row 2: bind off 4 sts, k2 Row 3: k2, cast on 4 Row 4: bind off 4 sts, k2 Repeat rows 3 and 4 four more times, ending with row 12 (6 stamens total) Row 13: k2, cast on 6 Row 14: bind off 6, k2 Repeat rows 13 and 14 six more times ending in row 26 (7 long stamens, 13 total stamens) . Row 26: Instead of binding off 6, bind off all sts. Twist stamens into a spiral so that the short stamens make one round and the long stamens make another with the short stamens sitting on top. Sew base of stamens together to secure. Sew stamens onto center of flower. Sew bead to center of stamens. Sew to your favorite knitted item or sew onto a pin.
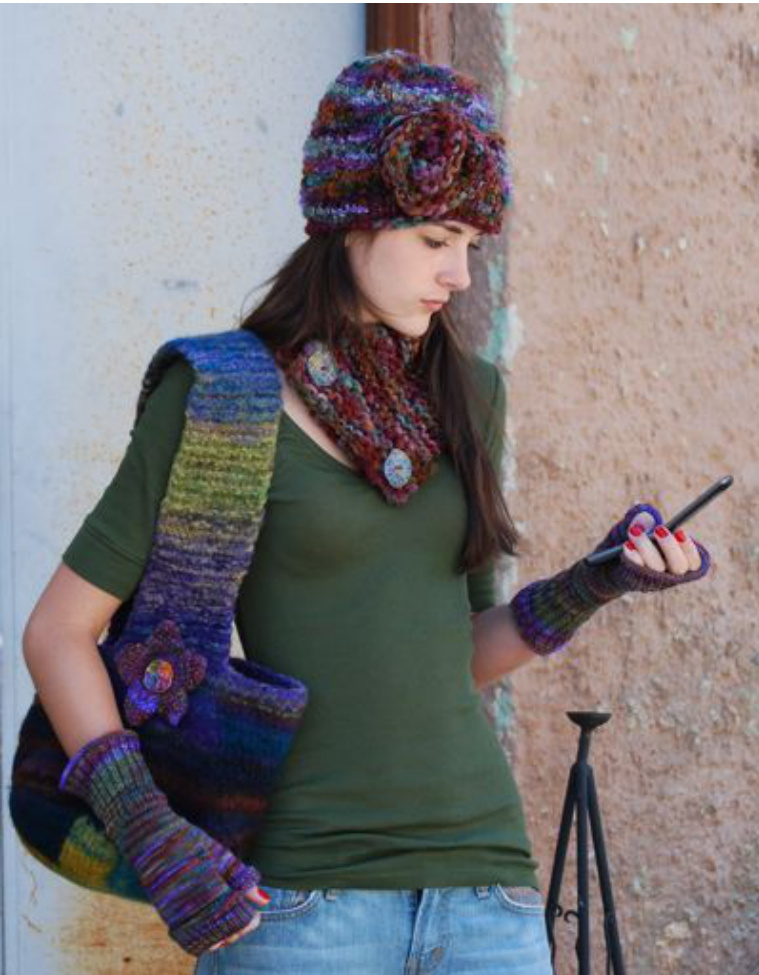
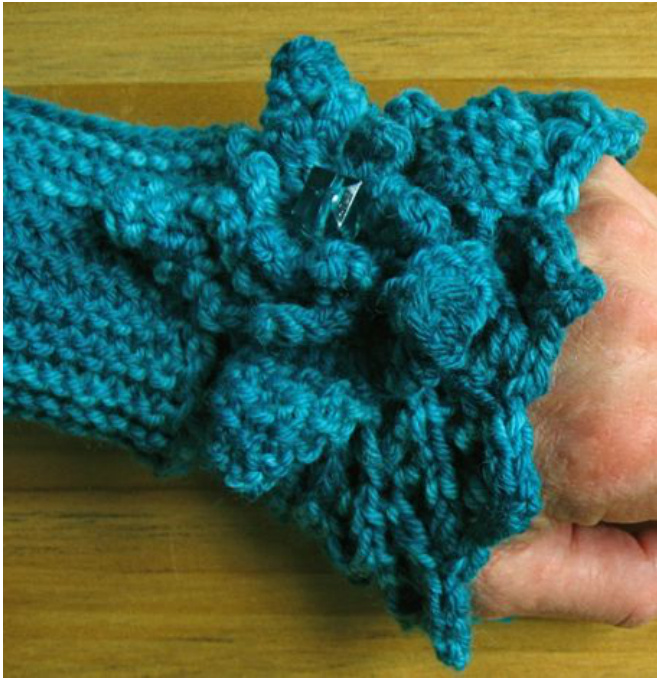
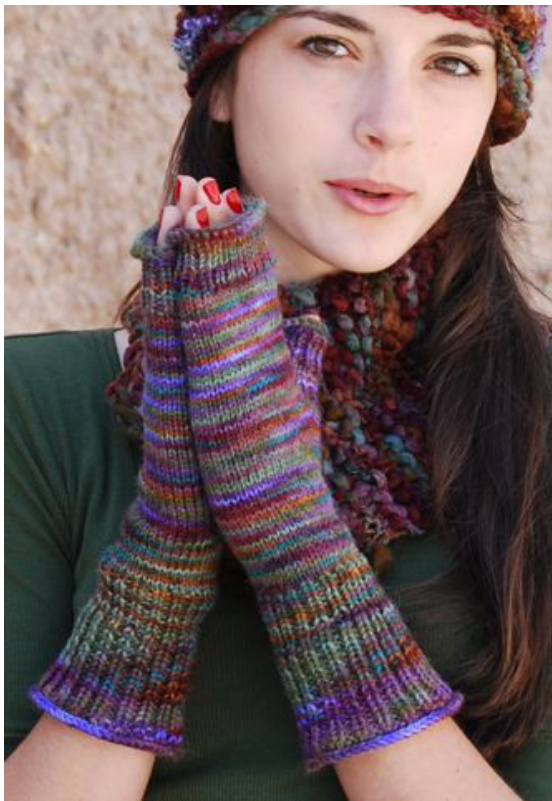
Touch Screen Mitts
These fingerless mitts cover fingers and thumbs to the fingertips so it's easy to stay warm and still manage a touch screen device. For more finger and thumb exposure, just fold back the fabric like a cuff. These mitts are knit from fingertips to Wrist. Yarn and Yardage: Uses approx 180 yds of any worsted weight yarn. Size: Women's medium/finished measurements: Palm Circumference: 6 %2 " (stretches to fit 7 %") Wrist Circumference: 5 ′%2 " (stretches to fit 7”) Length: 11 inches
@ Lynne Vogel 2009 Needles: one set Us size 3 dpns (set of 5). For narrow hands, knit palm with US size 2 needles. Ample hands, knit pattern with Us size 4 Gauge Us 2: 12 sts over 2 inches: 18 rnds over 2 inches Gauge Us 3: 11 sts over 2 inches; 17 rnds over 2 inches
ABBREVIATIONS
Dpns: double pointed needles pm = pass marker Nl: needle one N2: needle two N3: needle three N4: needle four
BEFORE YOU KNIT!
If you don't have a lot of experience knitting gloves, follow the pattern as written. If you are an experienced knitter, you may want to use a provisional cast on when you get to Thumb Placement. Just cast on the number required using waste yarn and your favorite provisional cast on. I prefer chain cast on for this purpose as it's easiest to handle. when it's time to knit the thumb, remove the chain and place your live stitches back on the needles and knit a seamless thumb.
HAND
Cast on 40 sts. Divide stitches onto 4 double points, 10 sts each needle. Join Rnd. Rnd 1: knit Rnds 2-10: k1, p1 around Rnds 11-35: knit THUMB PLACEMENT: Thumb placement (Rnds 36 and 37) different for Right and Left Hand Mitts (see boxes, pg 10). Instructions for remainder of mitt are appropriate for both hands.
RIGHT HAND MITT N1:K5, place next five stitches onto stitch holder. Cast on 15 sts (20 sts total on N1) N2: Join round, knit N3: knit N4: knit Rnd 37: Place markers and arrange sts for thumb shaping as follows: N1: knit 4, place marker, knit 11 (5 sts remaining on N1), slide remaining 5 sts from N1 onto N2 (15 sts total on N). N2: (15 sts total) knit 6, place marker, knit 9. N3 : knit N4: knit. Proceed to Thumb Shaping, pg 3. N1: knit N2 : knit N3: knit N4: place first 5 sts on st holder. Cast on 15 sts . Join round and knit remaining 5 sts. Total number of sts on N4 -20 sts. Rnd 37: Place markers and arrange sts for thumb shaping as follows: N1: knit N2: knit. N3: knit 9, place marker, knit remaining st from N3. Continuing with your same needle, letting the freed needle wait idle, knit the first 5 sts from N4. N4: Using your free needle, knit 11, place marker, knit 4 (15
THUMBSHAPING
Rnd 38: knit Rnd 39: knit to marker, pm, ssk, knit to two sts before second marker, k2tog, pm, knit. Rnds 40, 41: knit Rnd 42: knit to marker, pm, sk, knit to two sts before second marker, k2tog, pm, knit. Rnds 43. 44: knit Rnd 45: knit to marker, pm, ssk, knit to two sts before second marker, k2tog, pm, knit. Rnds 46, 47: knit Rnd 48: knit to marker, pm, sk, knit to two sts before second marker, k2tog, pm, knit. @ Lynne Vogel 2009 Rnds 49, 50: knit Rnd 51: knit to marker, pm, sk, knit to two sts before second marker, k2tog, pm, knit. Rnds 52, 53: knit Rnd 54: knit to marker, pm, ssk, knit to two sts before second marker, k2tog, pm, Knit. Rnd 55: knit, removing markers as you go. You will have 38 sts total. WRIST Rnds 56-65: knit
CUFF
Rnds 66-75: k1, p1 around Rnd 76: [kl, p1, increase one by purling into the stitch below the P st you just worked] around. 57 sts, Rnds 77-93: k1, p2 around Rnds 94, 95: knit Rnd 96: Bind off.
THUMB
Place 5 sts from holder on needle (N1). Mark the halfway point of the thumb opening: With a new needle (N2) , pick up 9 stitches into first half of thumb opening. With a new needle (N3) pick up 9 sts into second half of thumb opening. Join Rnd. Rnd 1: knit Using N1, slide the first stitch off N2 onto N1 (6 sts total). Place markers at both ends of N1. Slide two stitches from N2 onto N1 so that you have two stitches past the second marker. Then slide three stitchs from N3 onto N1 so that you have 3 sts before the first marker-11sts total on N1. You should have 6 sts each on N2 and N3. Rnd 2: knit Rnd 3: Knit to marker, pm, ssk, knit 2, k2tog, pm, knit around Rnd 4: knit Rnd 5: Knit to marker, pm, ssk, k2tog, pm, knit around Rnd 6: knit Rnd 7: knit to marker, remove marker, ssk, remove marker, knit around. (18 sts total on three needles). Rnds 8-12,: knit Rnds 13-19: k1. P1, around Rnds 20, 21: knit Rnd 22: Bind off. Run in ends! Voila! Wear with confidence.
@ Lynne Vogel 2009
Provisional Cast On
with a crochet hook and a piece of waste yarn, cast on as follows. Make a slip knot and cinch it onto your crochet hook. Take yarn under your needle, then grab it over the top of the needle with the hook, pulling it through the loop on the hook. Cinch yarn. Repeat until you have the desired number of stitches. Break waste yarn and pull tail loosely thru last loop of chain. Knit these stitches with your working yarn as though it was a normal cast on row. To resume knitting from the provisional row, undo the tail from the chain and undo that row, placing the resulting live stitches onto your needles one by one as you undo the chain.