Rose Trellis
2007 Terry L. Ross, Terry Ross Designs A nice, well-ventilated spring and summer sock written especially for knitting two socks at a time on two circular needles or the Magic Loop method. At first glance, the instructions may seem daunting. But don't be afraid to stroll into the garden with me. . . just take it one step at a time and follow the path of my very detailed instructions, and I'll lead you right down the garden path. We'll end up in the roses! Don't forget to stop and smell them along the way.
Materials:
2 U.S. #1 $(2.25\;\mathsf{m m})$ circular needles, 20" to 24" each, or 1 40" or longer circular needle for Magic Loop method 1 hank Blue Moon Fiber Arts Sock That Rock lightweight sock yarn in Rhodonite wound into 2 equal balls 2 stitch markers Tapestry needle for grafting toes and weaving ends
Gauge:
8 stitches per inch and 11 rows per inch in stockinette stitch in the round
Dimensions:

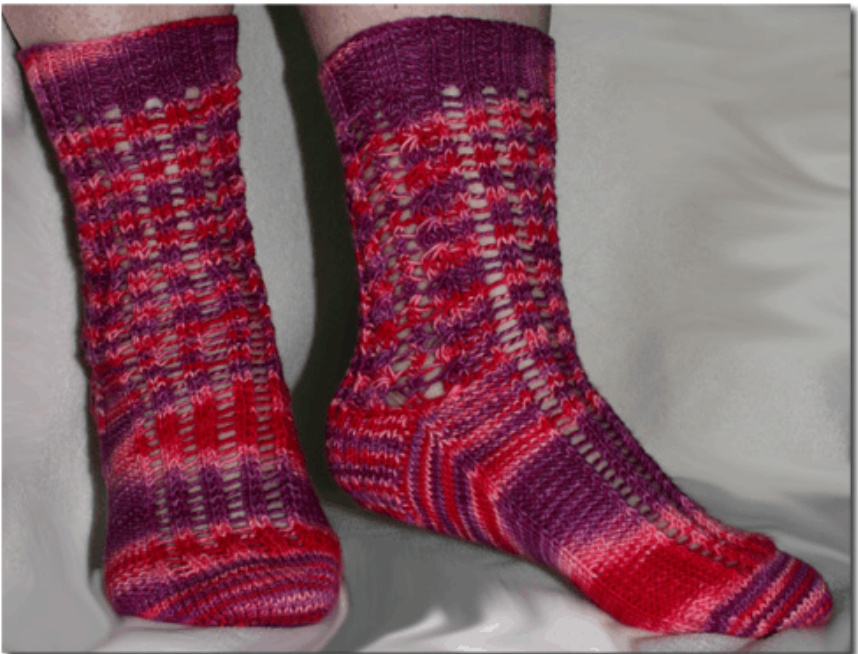
Paired Roses Stitch Detail (side panels) Sized to fit a medium woman's foot. Those with longer feet than US size 8 or $81/_{2}$ may need to shorten the cuff and/or purchase additional yarn. Another option would be to work the ribbing, heel flap and turn, and/or the toe in a contrastingcolor yarn.
Abbreviations and Stitch Glossary:
CO Cast on P Purl K Knit SSK Slip, Slip, Knit (Slip each of two stitches to the right needle as if to knit, then insert the left needle though the front of them both and knit them through the back loop. Left slanting decrease.) YO Yarn over (Wrap the yarn around the right needle once coming underneath from front to back.) YO2 Yarn over twice (Wrap the yarn around the right needle twice coming underneath from front to back.) YO2b Yarn over twice backward (Wrap the yarn around the right needle twice, coming over from back to front.) K2tog Knit 2 together (Knit two stitches together. Right slanting decrease.) K3tog Knit 3 together (Knit three stitches together. Right slanting decrease.) P3tog Purl 3 together (Purl three stitches together. Left slanting decrease.) T3 Twist 3 stitches (Insert the right needle into the third stitch on the left needle and knit it, leaving it on the needle, then knit the first stitch, the second stitch, and then slide the third stitch from the needle. One 3-stitch twist completed.) Kf/b Knit front and back (Knit into the front of a stitch, then into the back of the same stitch. An increase of 1 stitch.) Pf/b Purl front and back (Purl into the front of a stitch, then into the back of the same stitch. An increase of 1 stitch.) Ktbl Knit through back loop (Knit the stitch through its back loop.) RS Right Side WS Wrong Side SI Slip one stitch purl-wise to the right needle Ytf Yarn to front (Bring the yarn to the front of the work.) Ytb Yarn to back (Bring the yarn to the back of the work.) BO Bind off
Cast on:
Cast on 64 stitches for each sock, using either 2 short circular needles or 1 long circular needle. The sock will begin by working the flower panels center on the stitches on each needle, and then during the heel set up, they'll be moved around so they lie along the sides of the cuff.
Ribbing:
The ribbing pattern is not a traditional one, but is laid out so that it leads into the ladder and roses pattern.
$\star\kappa_{1}$ , P2, K2, P2, K1, P2, K4, P4, K4, P2, K1, P2, K2, P2, $\mathsf{K}\mathbf{1}^{\star}$ (64 stitches)
Work ribbing for 14 rows (11/2") then work a set up decrease row as follows on Round 15: $\star\kappa_{1}$ ,P2, K2, P2,K1, P2, K1, SSK,K1, P1, P2tog, P1, K1, sSK, K1, P2,K1, P2, K2, P2, $\mathsf{K}\mathbf{1}^{\star}$ around(58 stitches)
Leg Pattern:
The stitch pattern for the leg is very stretchy, so the number of stitches in the leg has been reduced to 29 on each needle, for a total of 58. We'l work back up to 32 on each needle/64 total when we get to the heel and foot. The stitch count will vary over the course of the pattern as increases are made in the center of each rose on Round 2 and then decreased again in Round 4. If you have a tendency to knit tightly, you may want to make conscious effort to knit as loosely as you can, since in subsequent rounds you'll be doing lots of K2tog, K3tog, SSK, and P3tog. Having the underlying stitches knit more loosely will help you execute those decreases. You'll son find yourself memorizing the patten, which only looks more complicated than it rally is. Work the following fourroundsuntil theleeasures frmthecastonedgeoryourwpreferredengthForth socksshw, pattern repeats were worked for the leg before starting the heel flap. End the leg after a Round 4, and prepare to set up for the heel. Ladder sections are shown in red. The rose pair panel section is shown in blue. Round 1 (SSK, YO2, K2tog) twice; P2, T3, YO2, P3tog, YO2b, T3, P2; (SSK, YO2, K2tog) twice Round 2 (K1, K1 into ${\sf1}^{\bf s t}$ YO, P1 into $\pmb{2}^{\mathsf{n d}}$ YO, K1) 2 times; P2, K1, P1-YO-P1 into the same stitch, K1, P1/drop $\pmb{2}^{\mathsf{n d}}$ YO, P1, P1/drop $\pmb{2}^{\mathsf{n d}}$ YO, K1, P1-YO-P1 into the same stitch, K1, P2; (K1, K1 into ${\sf1}^{\,\mathrm{st}}$ YO, P1 into $\pmb{2}^{\mathsf{n d}}$ YO, K1) 2 times Round 3 (SSK, YO2, K2tog) twice; P2, K1, P3, K1, YO2, P3tog, YO2b, K1, P3,K1, P2; (SSK, YO2, K2tog) twice Round 4(K1, K1 into ${\sf1}^{\bf s t}$ YO, P1 into $\pmb{2}^{\mathsf{n d}}$ YO, K1) 2 times; P2, K1,K3tog, K1, P1/drop $\pmb{2}^{\mathsf{n d}}$ YO, P1, P1/drop $\pmb{2}^{\mathsf{n d}}$ YO, K1, K3tog, K1, P2; (K1, K1 into ${\sf1}^{\bf s t}$ YO, P1 into $z^{\mathsf{n d}}$ YO, K1) 2 times
Heel Set Up:
As you are setting up for the heel, you'll be moving stitches so that the rose panel is on the sides of the sock. You will have just finished a Round 4 of the Leg Pattern and you should be prepared to begin another round. To preview what we'll do, we will knit the first 16 stitches and these will be moved onto the back needle. We'll then knit the next 14 stitches, which will become the first 14 stitches of the instep. The next 14 stitches of the same sock which are on the back needle willbe moved to the front needle and become the second 14 stitches of the instep. That willeave the last 16 stitches to be knitted, bringing you to the middle of what willbecome the heel. At this point, until you have gotten all the stitches moved, you may find it easier to use a third circular needle to transfer stitches back and forth. So, let's begin the steps set up for the heel. Step 1 (SSK, Y02, K2tog) twice; P2, T3, P1, Kf/b (first 16 stitches that will be moved for the heel) Step 2 P1, T3, P2, (SSK, YO2, K2tog) twice (first 14 stitches for the instep) Step 3 (SSK, YO2, K2tog) twice, P2, T3, P1 (second 14 stitches that will be moved for the instep) Step 4 Kf/b, P1, T3, P2, (SSK, YO2, K2tog) twice (second set of 16 stitches for the heel) After the these for steps are knit and the stithes are rearranged, the working yarn will be in the middle of the neede facing you, which is the mid-point of the heel. We are ready to begin kniting the heel flap.
Heel Flap:
Right side facing, beginning at the middle of the heel stitches and working back and forth, begin the flap as follows: Row 1: K16, turn. (When you come to the YO2, simply knit into the first one and purl into the second one.) Row 2: $\mathbf{\Psi}^{\star}\mathbf{\mathtt{S}}\mathbf{\mathbf{I}}$ 1 $\mathsf{P1}^{\star}$ acrosstheWt.Whenyou cmetothYO,pul thfirstYthenbs t second o,Ytf and continue.This wraps the secondYOand stabilizes it forknitting on the nextrow.) Row 3: SI1,K31,turn Row 4: $\bf{\ast}\tt{s}\tt{1}$ , P1\* across, turn Repeat Rows 3 and 4 until the heel flap measures approximately 2/4" and you have 15 elongated stitches on each side of the heel flap. End after having worked a WS row, ready to knit the RS.
Turn the Heel:
RS facing, turn the heel with the following short rows. Row 1: SI 1, K17, SSK, K1, turn Row 2:SI 1, P5, P2tog, P1, turnRow 3: Sl 1, K6, K2tog, K1, turn Row 4: SI 1, P7, P2tog, P1, turn Continue in the same manner to increase the number of K or $\mathsf{P}$ stitches after the first slipped stitch by one until you have worked the following rows: Row14:S1, P15, P2tog, P1, turnRow15: Sl 1, K18 to the end of the row (20 stitches on needle)
Pick up Gusset Stitches:
Pickup1 stitch through both loops of eachof the 15 elongated sliped stitches at the edeof thehel flap, and pick up1 stitch in the V where the sole joins the instep. 16 gusset stitches picked up.
Establish Instep pattern:
You are positioned to begin the instep at this point. Establish the instep pattern with this row of set up stitches, and then continue to pick up the remaining opposite gusset stitches. P3, Pf/b, P1, Pf/b, (K1, K1 into $\mathbf{\nabla}\mathbf{1}^{\mathbf{st}}$ YO, P1 into $\pmb{2}^{\mathsf{n d}}$ YO, K1) 4 times, Pf/b, P1, Pf/b, P3 (32 instep stitches) Pick up more Gusset Stitches: You are now at the end of the instep needle. Continue with the heel/sole needle to pick up the remaining 16 gusset stitches, beginning with one in theVwhere the sole joins the instep. After picking up the stitches, K10 to the center of the heel and place a stitch marker to denote the beginning of the round.
Gusset Decreases:
Round 1 Knit to the last 3 stitches before the end of the sole needle,K2tog,K1,work Instep Round 1, K1, SSK, K to the marker. (Knit the 32 picked up stitches through the back loop on the first round only. This will twist them and tighten them to remove any potential holes along the flap-) Round 2 Knit to the end of the sole needle, work Instep Round 2, K to the marker Repeat Rounds 1 and 2 until the gusset stitches are all decreased and there are 32 sole stitches remaining on the sole needle. Instep pattern: Round 1 P8, (SSK, YO2, K2tog) 4 times, P8 (32 stitches) Round 2 P8, (K1, K1 into ${\bf{1}}^{\bf{s t}}$ YO, P1 into $\pmb{2^{\ n d}}$ YO, K1) 4 times, P8 (32 stitches) After the gusset decreases, knit the sole in stockinettestitch and the instep in the established pattern until the foot is 2" shorter than the length you need. End the foot and prepare to begin the toe after a Round 2 of the instep pattern. Toe: Begin at the first stitch on the sole needle for Round 1 of the toe decreases, removing the marker when you come to it. Round 1 $\star\kappa_{1}$ , SSK, K to the last 3 stitches on the needle, K2tog, $\mathsf{K}\mathbf{1}^{\star}$ around Round 2 K Repeat rounds 1 and 2 untilyou have 8 stitches left on each needle. Cut the yarn and graft the toe closed using the Kitchener stitch. Weave in ends.


