By CanarySanctuary http://canaryknits.blogspot.com
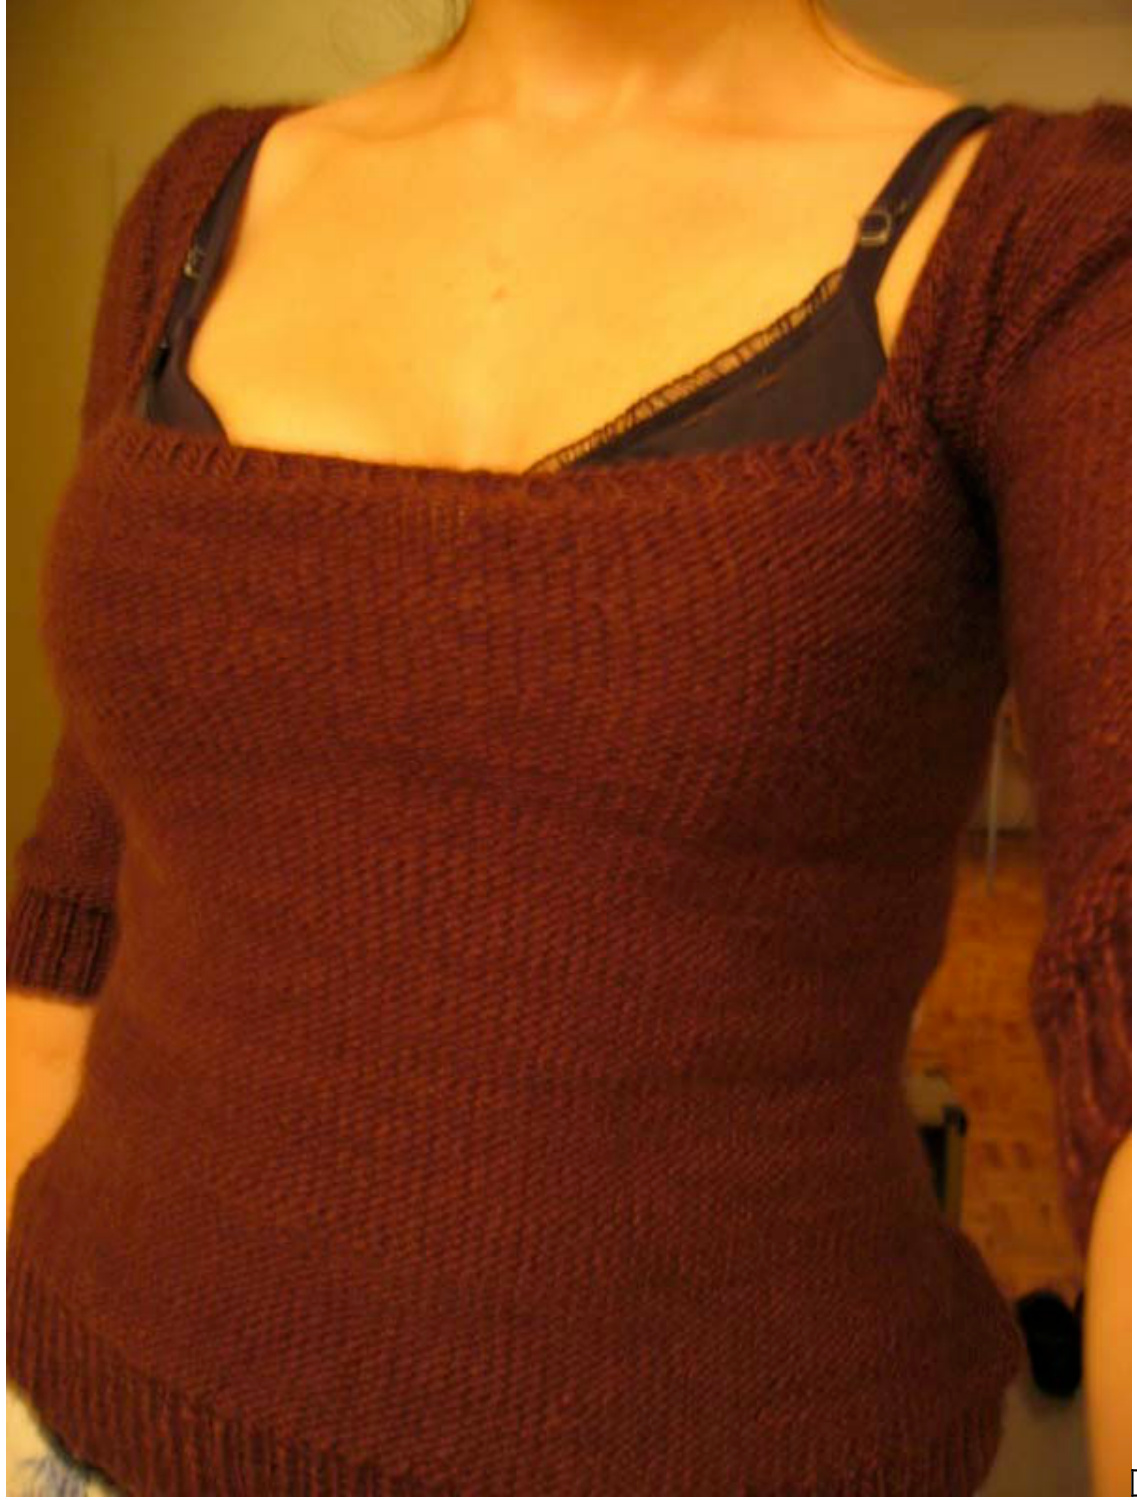
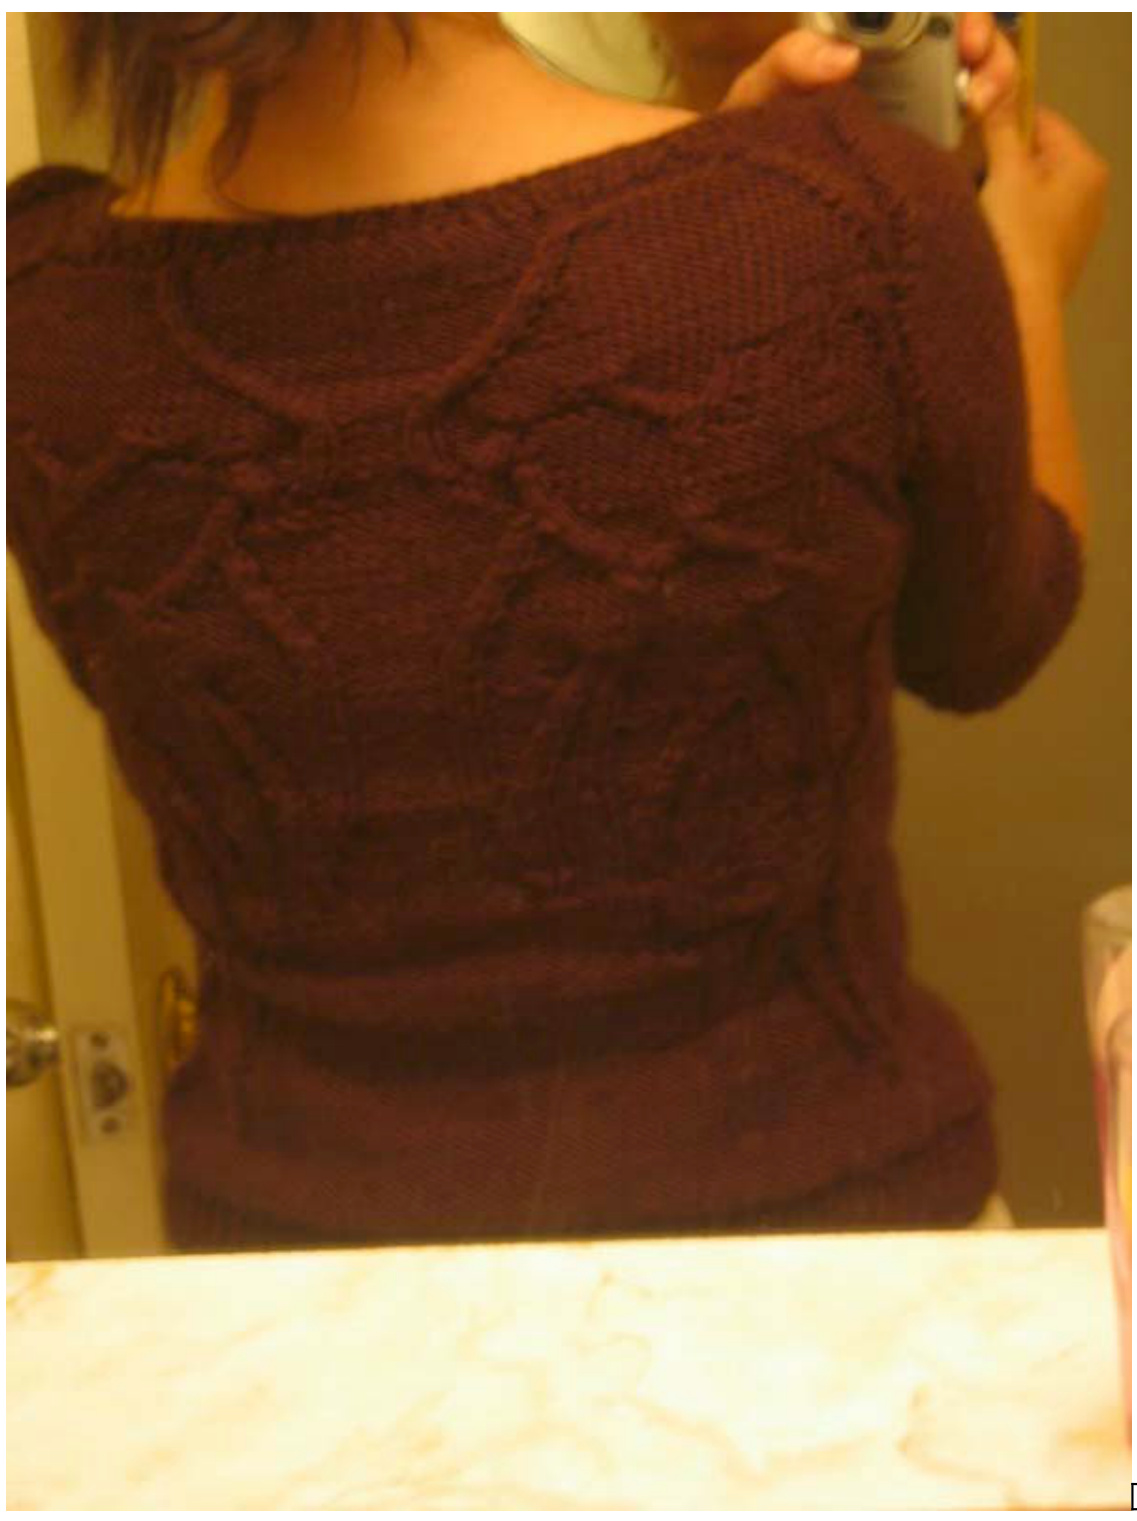
I decided I wanted to learn how to chart cables, and this is the finished product. From the front,
For more details, please see my blog http://canaryknits.blogspot.com/2007/09/alatus.html
\*\*\*Edited to add pattern\*\*\* Alatus TUT:
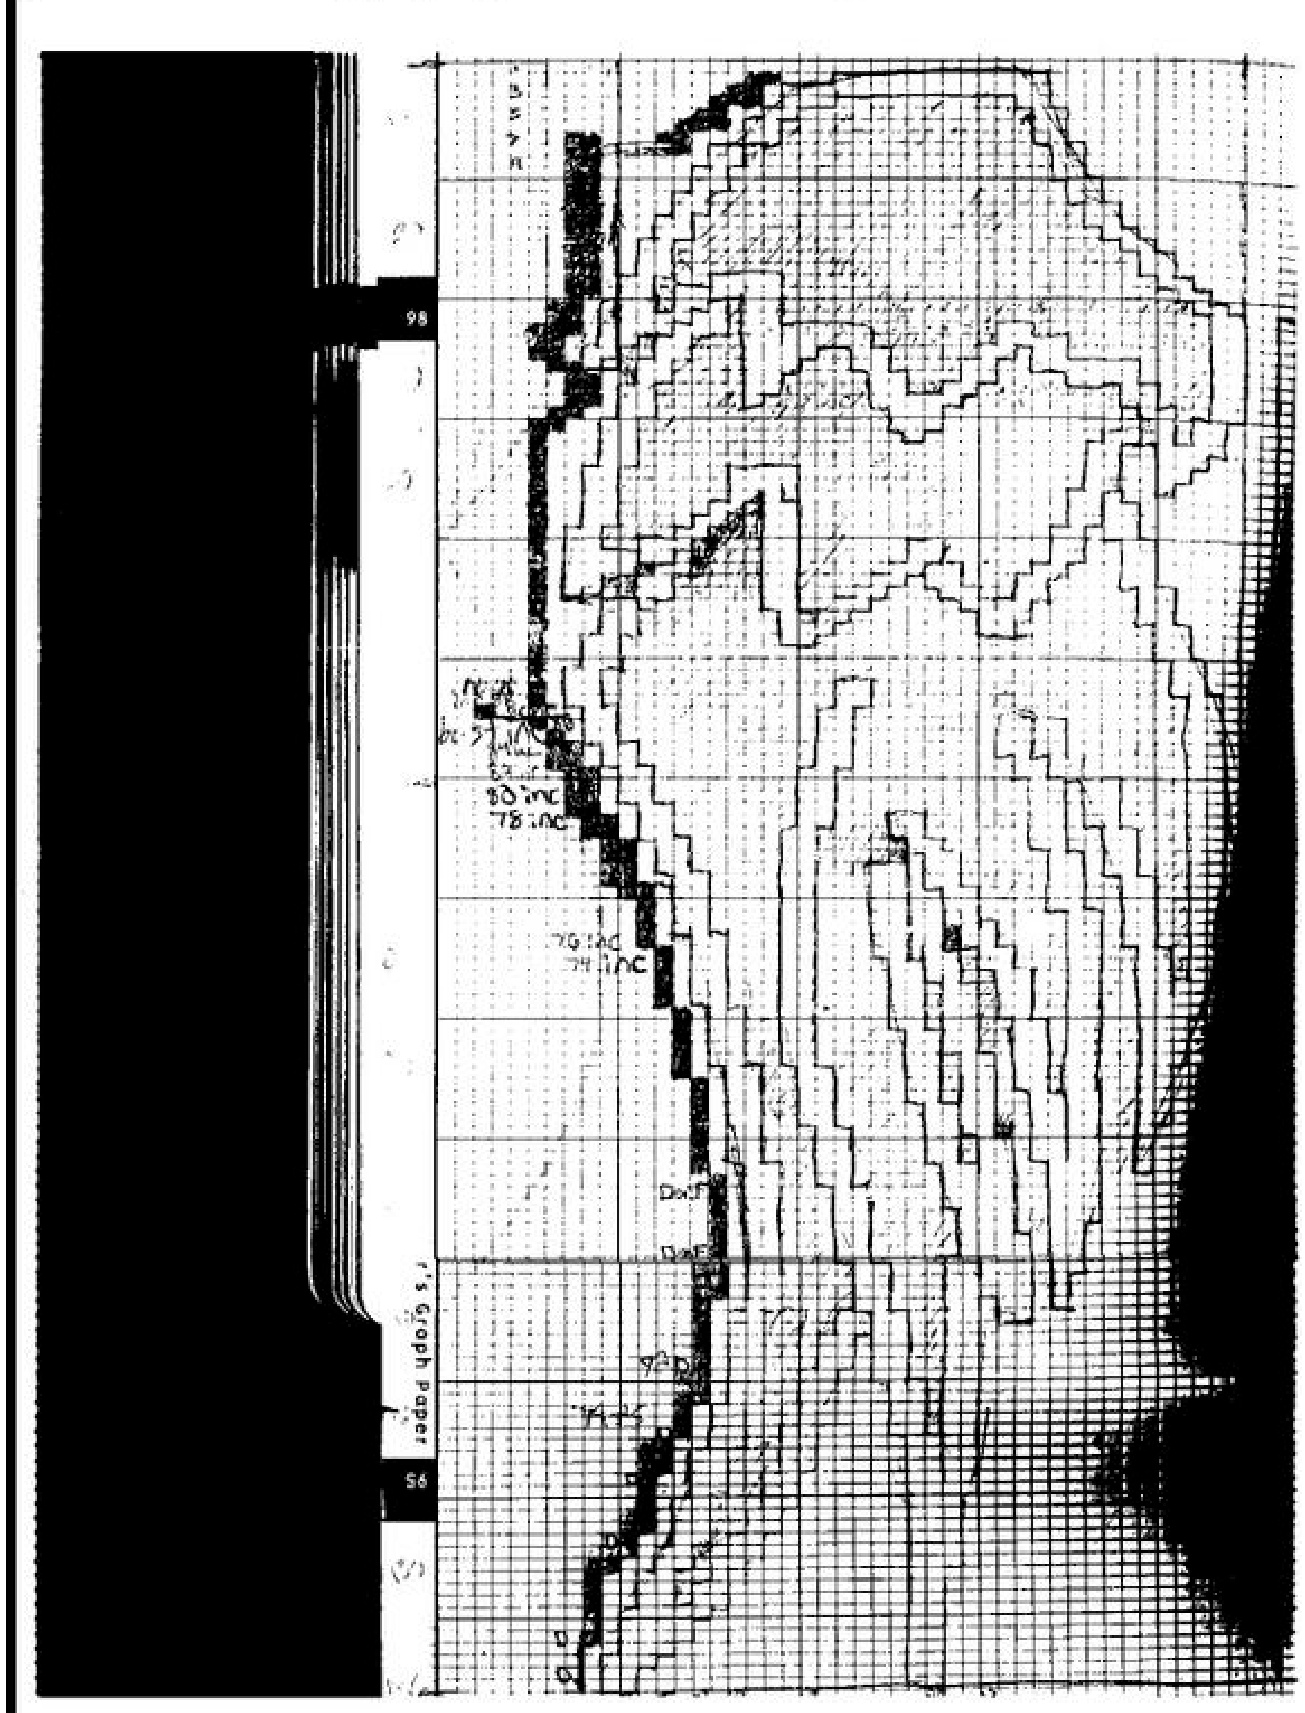
Please be forewarned: I'm new at this! I'll scan the cable chart as soon as I get my hands on a scanner! But for now, I can explain the shaping and the way I made the cables. I'm coming to this assuming that you will understand how to do cables (which is actually very easy!) and how to play with gauge. I'm working from the context of being $5^{\circ}1$ , with 35-27-36 measurements. If this is you, then you can follow the same numbers I did to make the sweater just like mine. Shaping the sweater: I wanted a low-cut, almost square-necked sweater with $\%$ length sleeves, a close-fit, and minimal seaming. I luckily had a sweater to match my work up against, but in order to make a close-fitting sweater, just make sure you're knitting it to about 1'" negative ease. It's constructed as a bottom-up, knit in the round sweater. The gauge was $22\mathtt{x}30$ I cast on 182 stitches, joined the work, and did a 1x1 ribbing for about $2^{\circ}$ Then I switched to purling around and around for about 1"'. I made sure to mark the beginning of the round (which was the left-front), the right front, and the half-way point in the back (this is for easy insertion of the cable pattern). Decreasing for the waist: unfortunately, I didn't make notes on how many rows I decreased until I got to the waist - I was just working dec. every few rows until I got from my starting number of 182 cast-on stitches to 142 stitches for the waist. Actually working the Decrease Round: I worked them as follows: For the left-front, (that is, the left side of the sweater when you're wearing it, as opposed to when you're looking at it) I slipped the marker, worked one stitch, then s, p, psso (slip one, purl, pass slipped stitch over) then worked the round until... Dec for the right-front, I worked until 3 stitches before the marker, p2tog (purl 2 together), purl one, slip the marker. Decreasing for the back is the same: You've just done the p2tog and slipped the marker from the front. The next step is: Purl one stitch, s, p, psso. Work across the back until you get to three stitches before the end of the round. P2tog, purl one, slip the marker, and you've just done your decreases! This whole Decrease Round will dec. 4 stitches each time you work it. The waist is $8^{\circ}$ up from the cast-on edge. I started increasing for the bust at $9^{\circ}$ up from the cast-on edge. Increasing for the bust: Worked by inc. from 142 stitches at the waist to 182 at the arm-pits. Increase Round: Slip the marker, purl one stitch, then inc. 1 (you can use whatever preferred method you have to inc. I purled into the front and back of the second stitch from the marker). Work across the front of the sweater to 2 stitches before the side marker. Do your increase, purl one stitch, slip the marker. Do the same for the back as well. The Increase Round will add 4 stitches to your sweater each time you work it. Neckline: The neckline is worked very low - it's actually begun 2 rounds before you start shaping the arm holes. At this point you've done all your increases, and you're back up to 182 stitches. What I did was knit 21 stitches, place 48 stitches onto a big stitch-holder $(48\ \mathrm{sts}{=}9^{\circ})$ , then joined a new ball of yarn to work the right side of the front (there should be about 22 stitches here). Now you're not working in the round anymore! Work two rows. Neckline and Arm Holes: Here's where it gets tricky: Remember that you've now got a back piece and two front pieces you're working on separately, but at the same time! Neckline: Every other row, create a curved neckline by working to one stitch before the neckline, and instead of working that stitch, leave it be! Use whatever method you want to remind yourself not to work these “curved edge”’ stitches. You can put it on a stitch holder (you can use bobby pins, safety pins), you can place a marker before the stitch, whatever. ATTHESAMETIME, Armholes: Every other row, I dec. one stitch on each side of the arm hole. I worked like this, remembering to shape the curved neckline, until there was only 10 stitches for each of the front sides. The armholes, when I was done, measured $7^{\circ}$ . I would suggest knitting a few extra rows here for extra room in the pits. Sleeves: Cast on 50 stitches. Work 1x1 ribbing for about $2^{\circ}$ . Then work in stockinette stitch. Starting on a knit row, inc. one stitch each side every 10 rows six times. You've increased from 50 cast on stitches to 62 stitches. Work the sleeve until it's $10^{\circ}$ long. Sleeve Cap: This frustrated me near the end and I had to fudge it a bit. When the arm measured $10^{\circ}$ I cast off 5 stitches at the beginning of the next two rounds. Then I would dec 2 sts every knit row. I worked that for a few inches. When I cast-off for the sleeve cap, I had 10 stitches, and the sleeve cap was approximately $5^{\circ}$ long. I'm sorry I don't have the math for this! The sleeve caps didn't turn out very well, so I'm sure you'll be able to improve on them! Finishing: I just sewed up the top of the front and back, sewed in the sleeves, and picked up and even number of stitches all around the neckline. I did a 1x1 rib for about 1". Voila! Charting the Cables: What I needed to chart the cables: Knitter's graph paper (or regular graph paper) pencil Favourite sweater Measuring tape Calculator (or a big amazing brain that can do math all by it's lonesome) Inspiration for wings (whether that be from your brain or a picture/rough sketch) How I Began: I started by reading Eunny's Un-venting a cable: http://www.eunnyjang.com/knit/2005/11/technickety_how_to_unvent a si.html This gave me the courage to try it myself! The way that she explained the cables as "STRANDS" that you can follow up helped my brain compute. long it is in the back, and how wide it is at the shoulders (the widest part of the sweater), and how wide it is at the waist (the smallest part of the sweater). This gives you the parameters of your “play space". Then I fell in love with a yarn and (I blush as I write this) relied upon the gauge stated on the ball band to calculate how many stitches I had in my “play space'. My gauge came to 5.5 stitches/inch, and 7.5 rows/inch. With these numbers, I found that I needed (big scary number ahead) 136 rows to make $18^{\circ}$ of wings going down my back. I also found that, at it's widest, I had 94 stitches across the back, and at it's smallest, 72 stitches. I got out some trusty knitter's graph paper (and I'm not sure you NEED knitter's graph paper. Regular graph paper may work too). I counted out 47 squares across, and 136 squares down. Why 47 squares instead of 94? Because I'm lazy, and didn't want to draw one wing perfectly, only to have to make it's mirror-image on the other side. I drew out the wing with pencil. I made sure each line ofthe wing was a "strand"; I made each line/strand two stitches wide. Now your lovely curvy wing drawing is boxy-looking. I must warn here: what I REALLY did was make twists, not cables. I always kept in mind that I had strands that needed to be KNIT, whereas the background is all PURLED. This also makes it easier to follow your work along. When I wanted one of the strands to move to the LEFT, I: worked to one stitch before the strand Put that one stitch on a cable needle, and placed that at the BACK of my work I then knit the two stitches of the strand I then purled the one stitch from the cable needle When I wanted one of the strands to move to the RIGHT, I: worked right up to the strand put the two stitches of the strand on a cable needle and kept it at the FRONT of my work PURLED one stitch from the work Then KNIT the two stitches of the strand from the cable needle