Marywarmers
Overview
Description
These armwarmers have a striking ribbed pattern that wraps around the forearms. The ribs radiate outwards from the inside forearms and come together again on the backs of the forearms. The thumb shaping grows cunningly out of the radiating ribs.
Example:

Contents
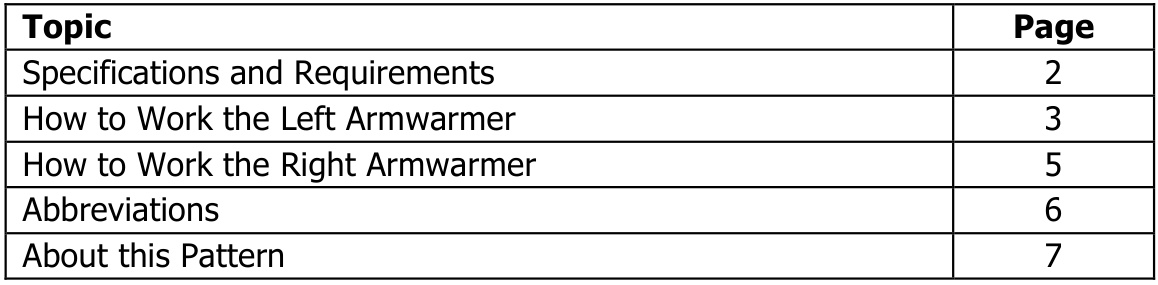
The following table lists the topics in this pattern.
Specifications and Requirements
Size
To fit an average woman's forearms, wrists and hands. The armwarmers are 29 cm long and comfortably fit wrists up to 20 cm around.
Tension
30 st over $10\;\mathsf{c m}$ , measured over stocking stitch. Exact tension is not essential, because the ribbing pattern is very stretchy.
Yarn
2 balls $(2\times509)$ Maizy by Crystal Palace Yarns. This innovative vegan yarn is $82\%$ corn fibre and $12\%$ elastic nylon. The yarn is quite loosely spun, but when knitted up it feels cool and smooth. Maizy is designed for sock knitting, so it wears well and has some elasticity. The sample pair shown is worked in the Bittersweet colourway, which is a very dark brown, almost black, with a touch of plummy purple. The yarn for this sample was kindly provided by Yarnomat.
Tools
To make these armwarmers, you need the following tools: $2.5\;\mathsf{m m}$ knitting needles (set of 4 or 5 DPNs, two circulars, or one long circular, depending on your preferred method of knitting in the round), or size required to achieve correct tension 1 stitch marker · stitch holders or waste yarn for holding the thumb stitches large-eyed blunt sewing needle for finishing.
Skill level
This pattern is suitable for an advanced beginner, preferably with some experience working in the round.
Specific skills
To make these armwarmers, you need the following skills: · working in the round (with DPNs, two circulars, or magic loop) picking up stitches (for thumb).
How to Work the Left Armwarmer
Procedure
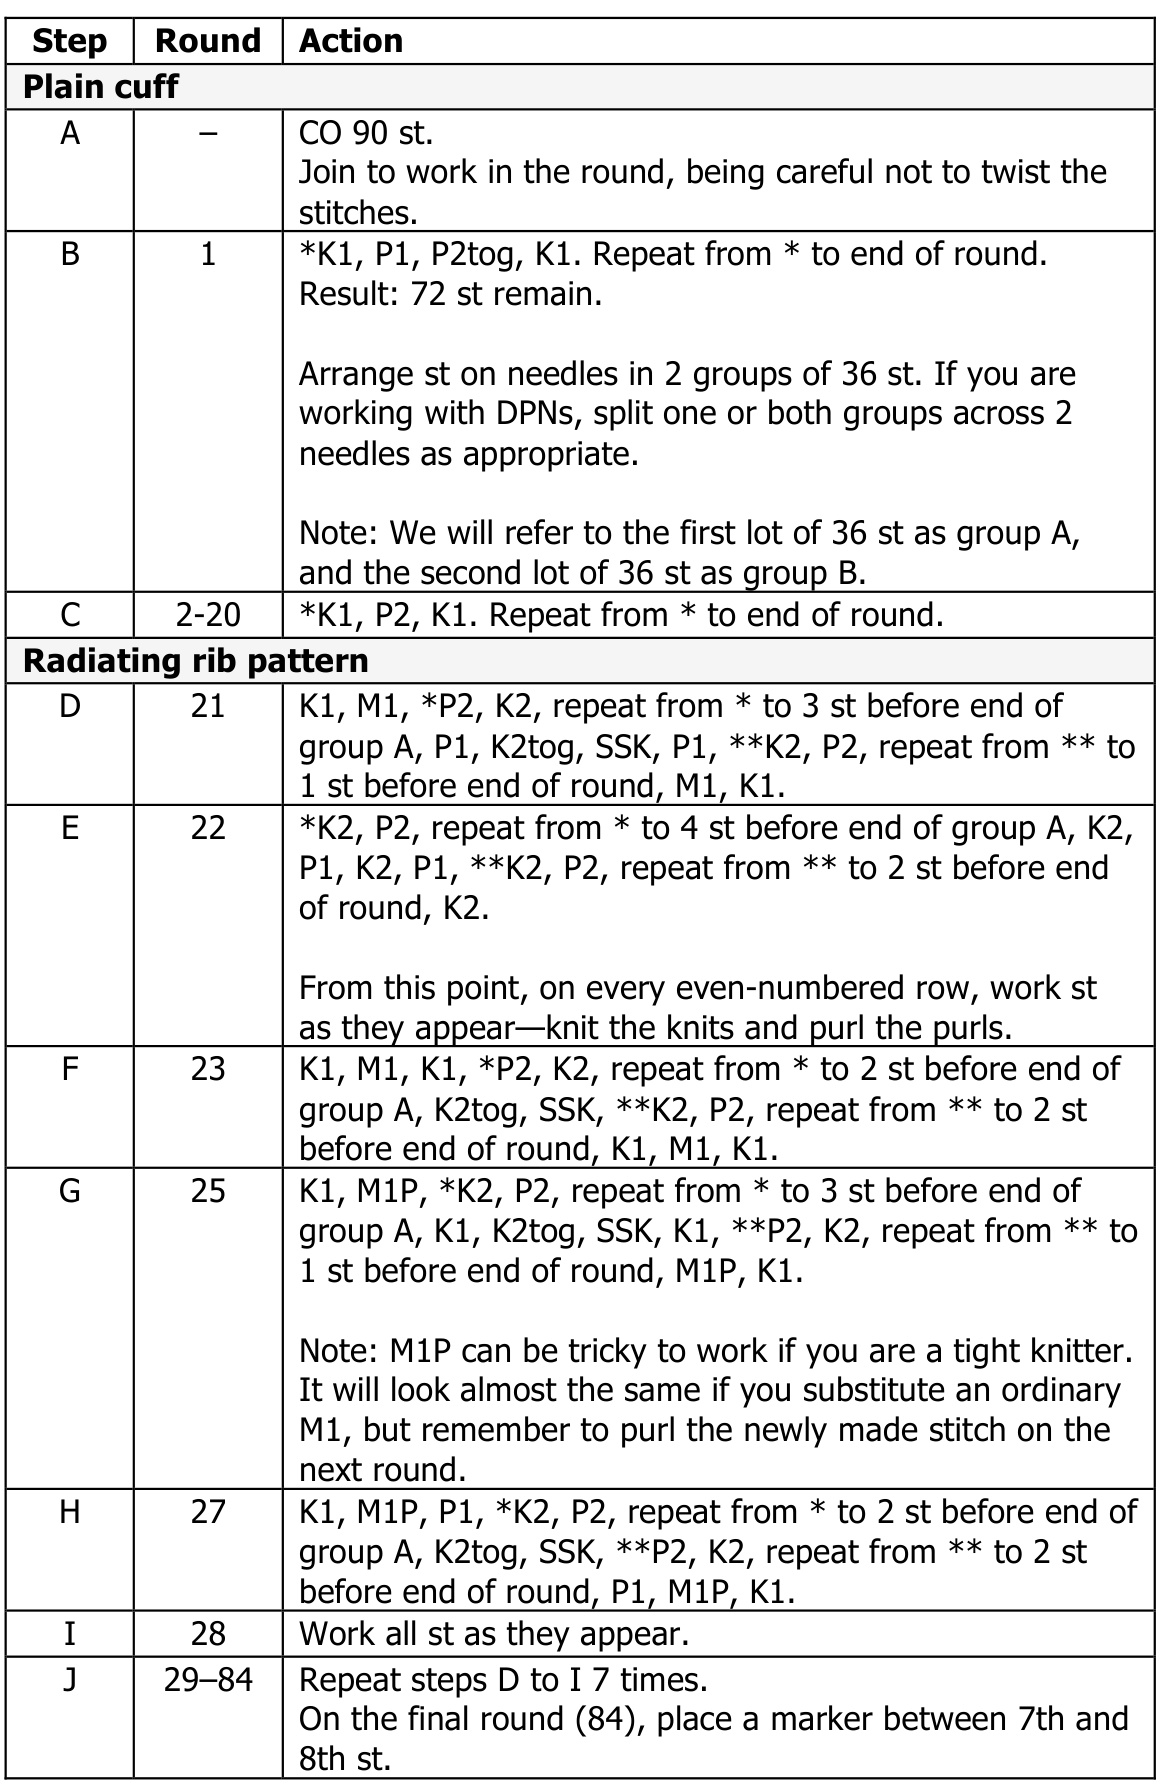
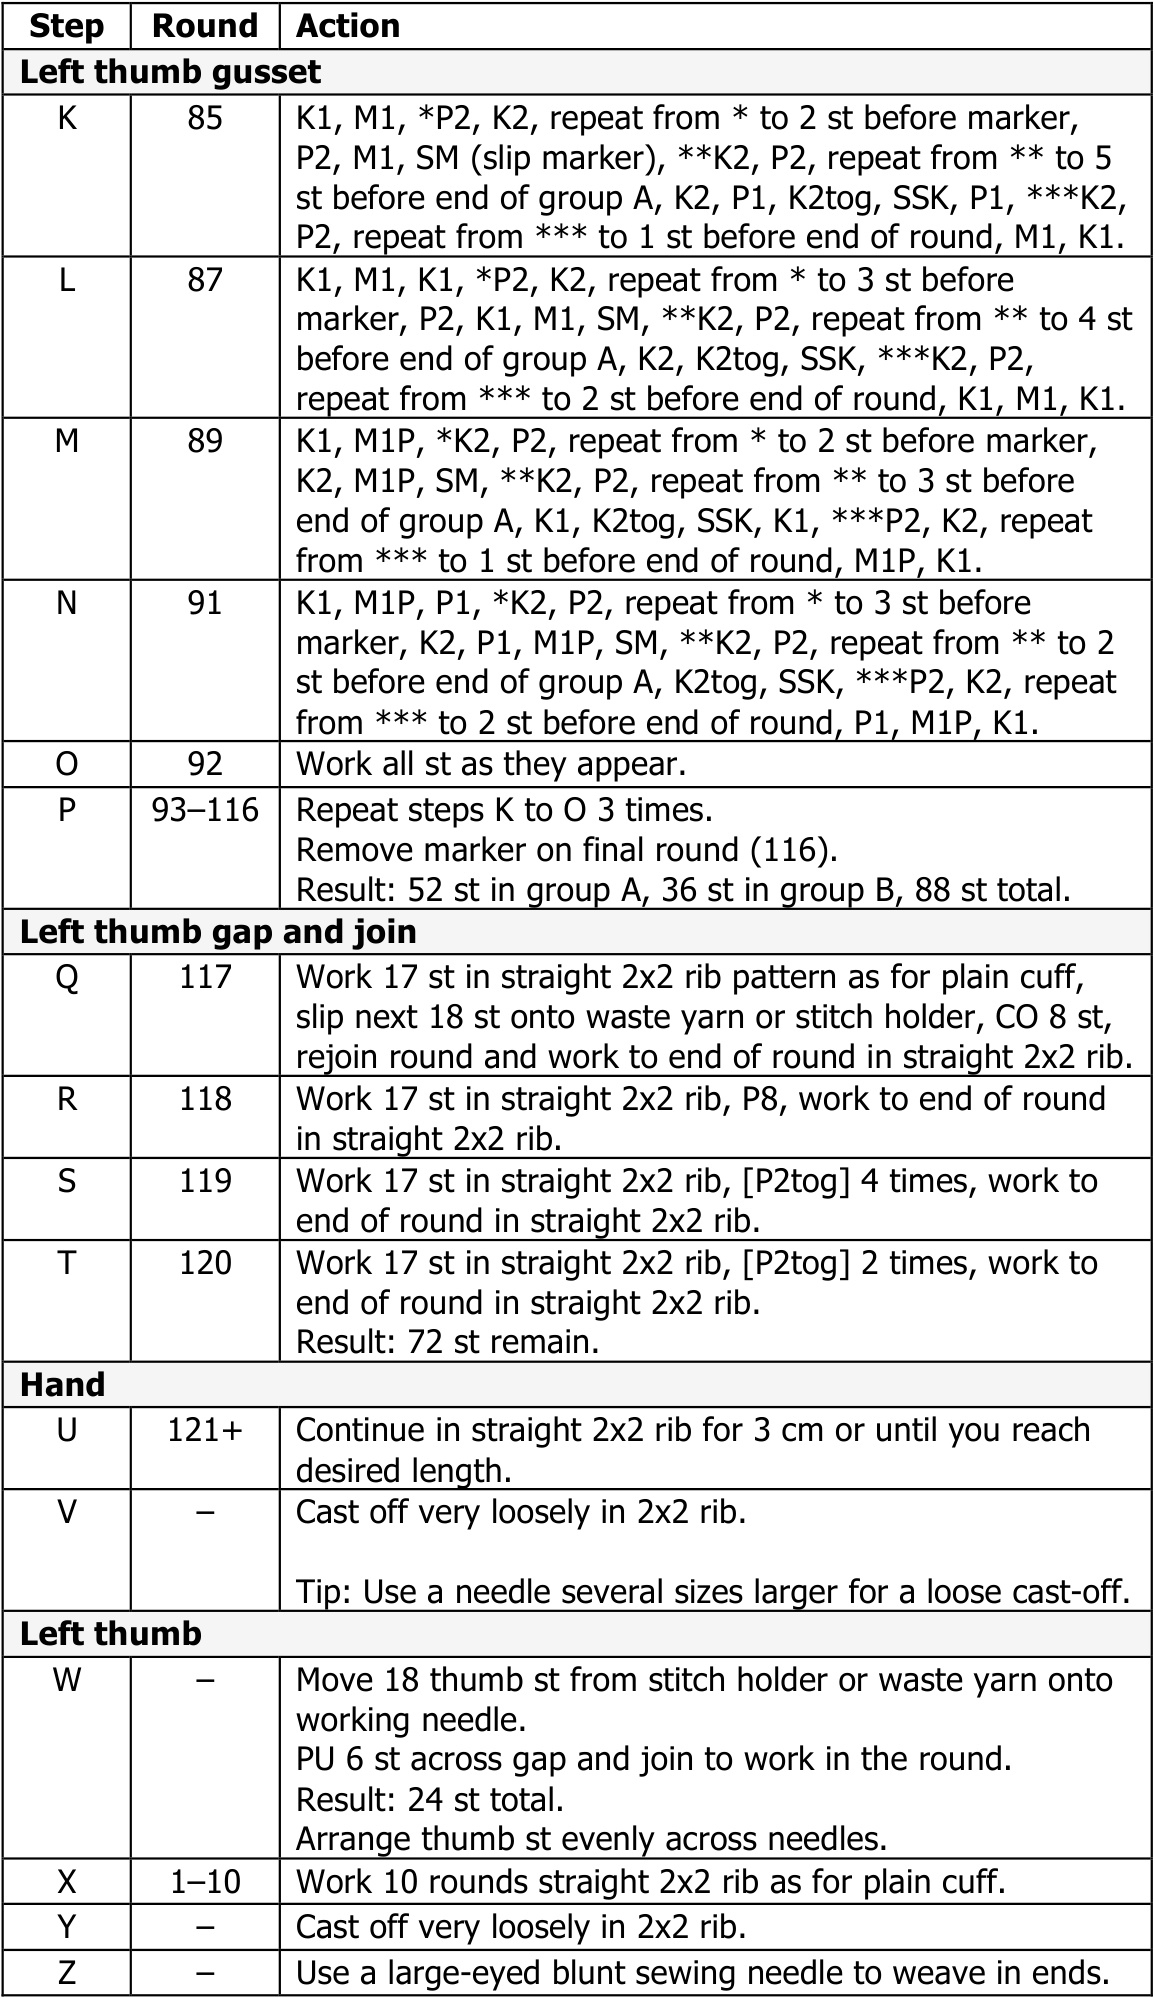
To work the left armwarmer, complete the following steps.
How to Work the Right Armwarmer
Procedure
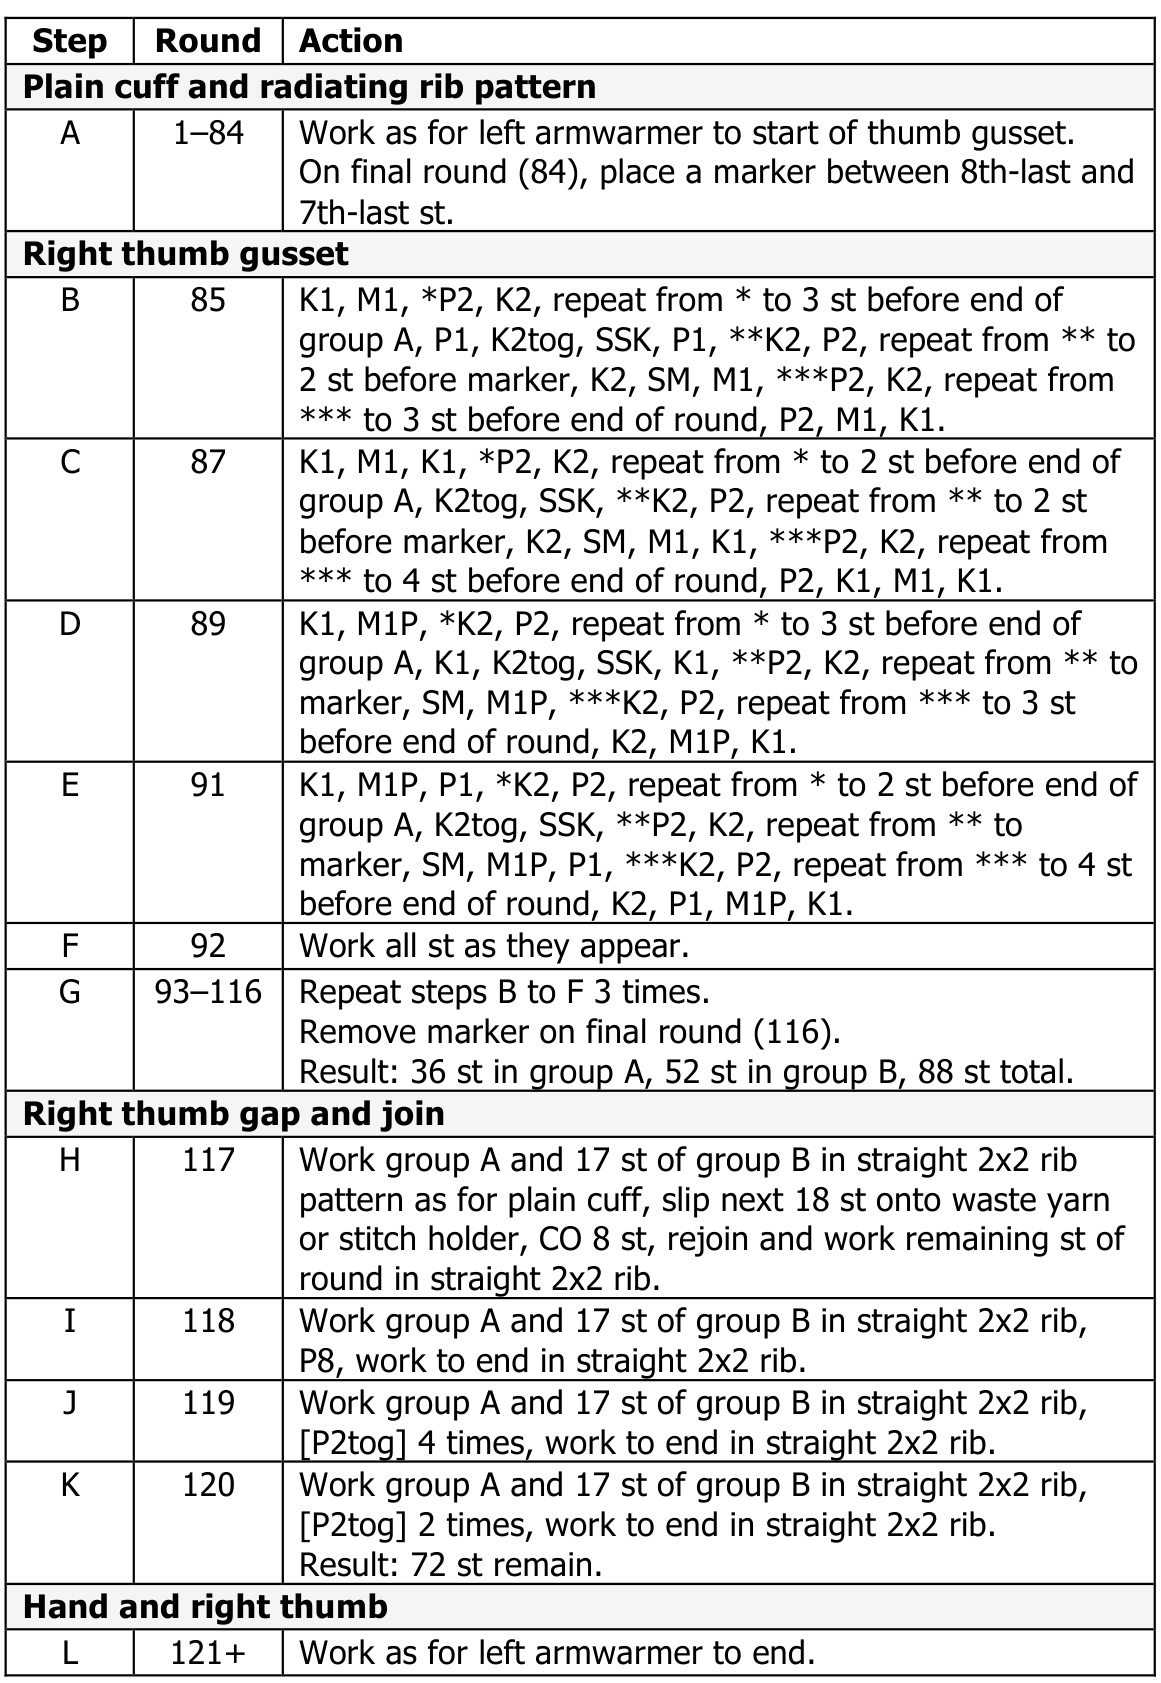
To work the right armwarmer, complete the following steps.
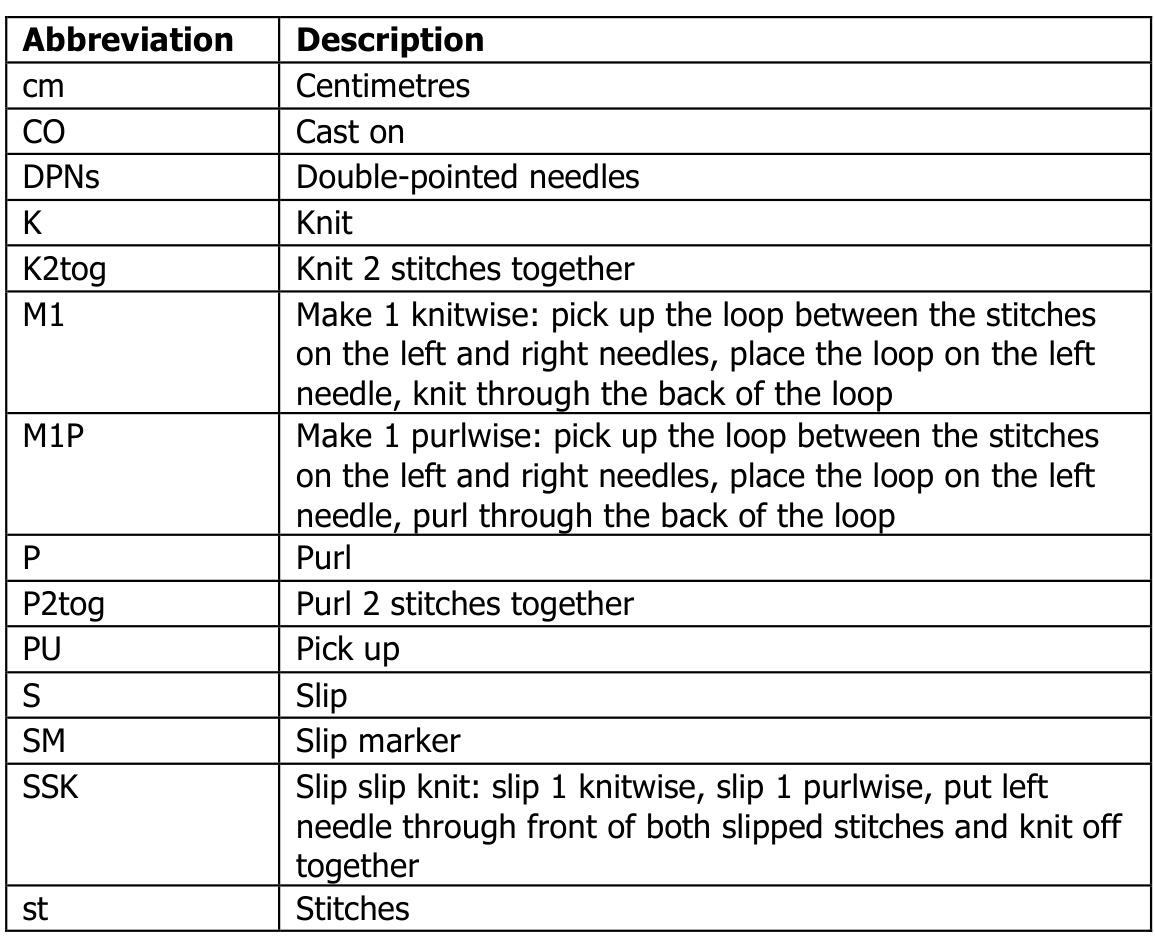
Abbreviations
List of abbreviations
About this Pattern
Construction summary
Starting from the elbow end, knit a short section of straight 2x2 rib. Then start the radiating rib pattern, increasing on the inside forearms and decreasing on the outside forearms. At the wrist, start adding extra increases for the thumb gusset. Place the thumb stitches on a holder and continue knitting straight $2\!\times\!2$ rib for the rest of the hand until the cast-off just above the knuckles. Pick up stitches for the thumb and work in straight $2\!\times\!2$ rib to finish. Work both armwarmers the same way except for the thumb gussets, which are different for the left and right armwarmers.
Customisation ideas
To make longer armwarmers that go all the way up to the elbows, work a longer plain cuff before switching to the radiating pattern. The straight ribbing of the plain cuff is stretchier than the radiating ribbing and you will be able to pull it further up the arm. For shorter wristwarmers that only just cover the wrist, start the thumb gusset shaping at the same time that you start the radiating rib. You may even be able to squeeze a pair of wristwarmers out of a single ballof Maizy. To fit thicker or thinner forearms, increase or decrease the total number of cast-on st in increments of 9 st.
Credits
Lisa Reeve designed and wrote this pattern. Lisa's online store, Yarnomat, specialises in great sock yarns from Australia and overseas. Visit Yarnomat at http://yarnomat.com.au. This pattern was originally published in the February 2009 issue of Australian Knitting magazine.
Background
Lisa's dear friend Mary collects tattoos, including many bold and fabulous designs on her arms. Mary needed an equally bold and fabulous set of armwarmers to complement her dramatic body art, and her sensitivity to wool made Maizy the ideal yarn choice. Maizy's corn and nylon composition feels smooth and comfortable on sensitive skin, and as a bonus the knitted fabric has excellent stitch definition.


