Here it is :) The long awaited new pattern post. This pattern gave me some trouble when I sent it to testers. I realized last night (with the help of my best friend) that I was just using the wrong stitch name. It made it confusing. There are so many variations of the "star stitch". The stitch used in this pattern is actually the "5-Star Marguerite Stitch" -- so I decided to give them a lovey nick-name. Presenting the MaggieLegWarmers!
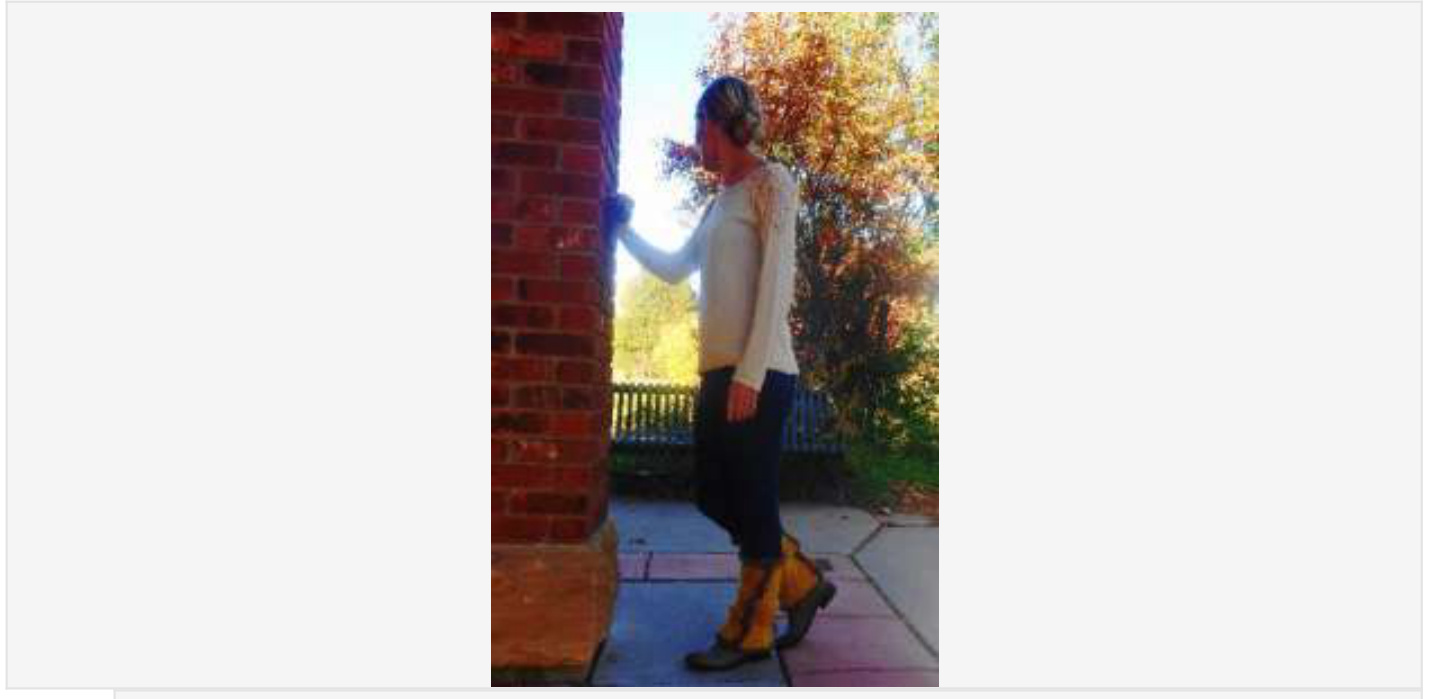
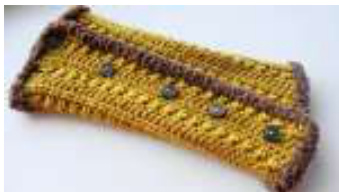
Ta-daah! (Modeled by my BFF) In Colorado "Fall" can mean picturesque brisk days with beautiful falling leaves in varying shades of reds, greens, and yellows. Sometimes, I walk around the neighborhood and just stare in wonder and adoration at this gorgeous place I am lucky enough to call home. However. "Fall" in Colorado can also mean HOT days of "Indian Summer". It can also mean two feet of snow and blistering wind. I prefer the perfect days (ha, who doesn't?!) One of the very best things about Fall? Big, comfy, lovely accessories! I'm eheap frugal, so I prefer to make my own. I've been admiring outfits on Pinterest for quite sometime, and one of my very favorite looks is the pairing of knee high boots with some cozy leg warmers. I like boot cuffs, but I wanted to come up with a warmer that can go over the boots. you what I came up with over the weekend (you know.. that weekend 3 weeks ago..) It took some help from testers to get it looking right AND functional, but I am happy with the end result! Now, since I've saved money on the accessories, I can spend more on the boots... right? Finished dimensions: 12" (height) x \*13" (width) \*This pattern is easily adjusted to fit any size leg -- Just measure the circumference of your calf before you get started, and add or subtract rows to adjust the width. This pattern is meant to overlap, so it should be bigger around than your calf. Materials used:
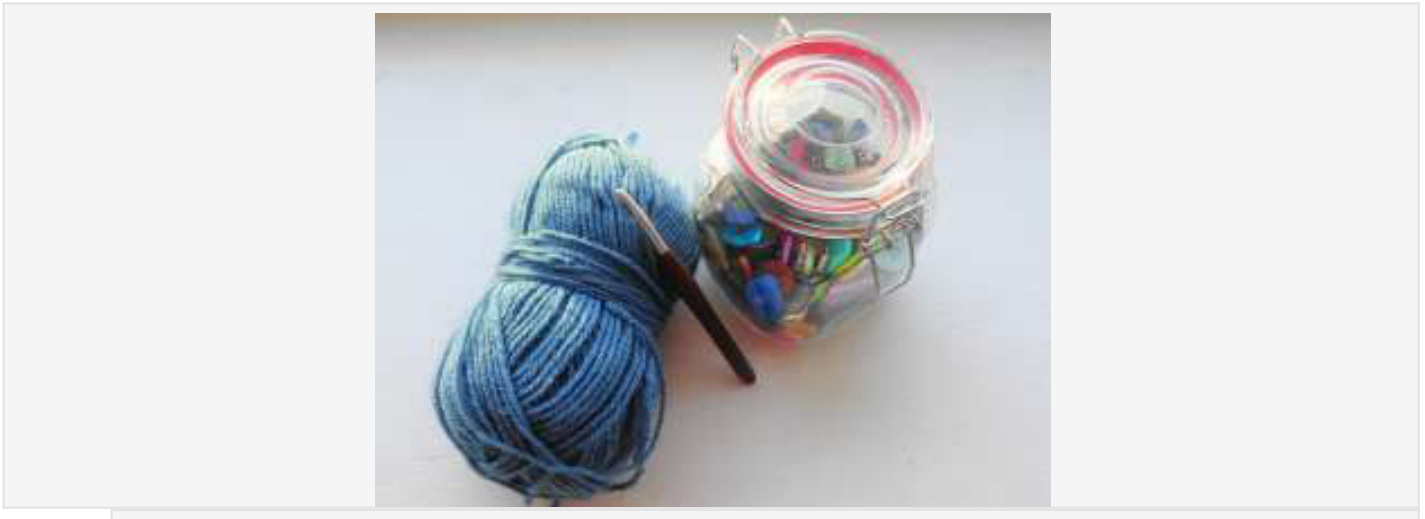
Materials needed ( ^ That is not enough yarn for a pair) J hook (6.omm) \*Approx. 6 oz (\*Approx. 300 yds) worsted weight acrylic yarn (shown - I Love This Yarn in Sungold) Trim shown - Bernat Pipsqueak in Chocolate Buttons (I used 5 buttons on each leg warmer) Stitches/Terms used (US terminology): st - stitch sc - single crochet (insert hook into st, yo, pull up loop, yo, pull through both loops hdc - half double crochet (yo, insert hook into st, yo, pull up loop, yo pull through all 3 loops) dc - double crochet (yo, insert hook into st, yo, pull up loop, yo pull through 2 loops, yo, pull up loop, yo, pull through both loops) Beginning Marguerite cluster st (BegMC) - insert hook into same st (hdc in this pattern), yo pull up loop, \*insert hook into next st, yo pull up loop\* repeat from \* 3 times (you should have 6 loops on hook), yo pull through all loops, ch 1 (creating the "eye" of the star) Marguerite Cluster St (MC)- insert hook into "eye" of star, yo pull up loop, insert hook into front of last loop of star, yo pull up loop, insert hook into same st as the last loop of the previous star, yo pull up loop (you should have 4 loops on hook) \*insert hook into next st, yo pull up loop\* repeat from \*one time (vou chould have 6 loone on hool) vo null through all loonc ch 1 (oreating the "ove" ofthe ctar) I cannot find a video for this stitch the way that I do it. I had a link here, but opted to remove it. I'm going to make my own video (..maybe..) and add it here, so if you NEED the video -- have no fear -- it's coming soon(ish)! For now, I've got that nifty photo tutorial at the end of the pattern. \*Make sure you have enough material to make two. :) -- The amount listed is a ROUGH estimate. 2 skeins of a basic worsted weight should be plenty. Ch 42 R1: hdc in 2nd ch from hook and in each chain to the end (41 hdc) lain does not count as a stitch here, or anywhere throughout the pattern. R2: Ch 2, turn, hdc in same st, begMC, MC (x18), hdc in same st (top of first st of previous row -- total of 19MCsts) R3: Ch 1, turn, sc in first hdc, 2 sc in "eye" of star st, and every star st down the row, 1 sc in last hdc, sc in top of first st of previous row (41 sc) R4: Ch 2, turn, hdc in same st and every st down row (41 hdc) R5 (buttonhole row): Ch 2, turn, dc in same st and every st down the row (41 dc) R6-R8: Repeat rows 2-4 R9: Repeat row 4 (41 hdc) (or desired circumference is met): Repeat rows 6-9, ending with a hdc row At the end of your final row, finish last st with trim yarn. sc around the top, the beginning length edge, and the bottom fasten off, weave in ends and attach buttons to front side on the un-trimmed edge. Your double crochet row will function as the buttonholes.
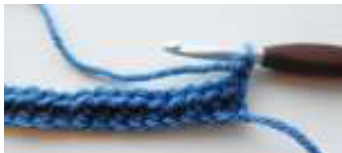
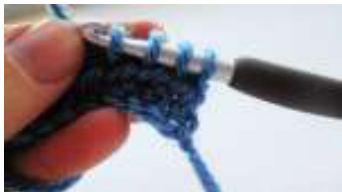
After the first (base) hdc row, ch 2 and hdc into the same st
Insert hook into the same st as that hdc
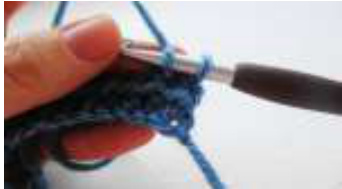
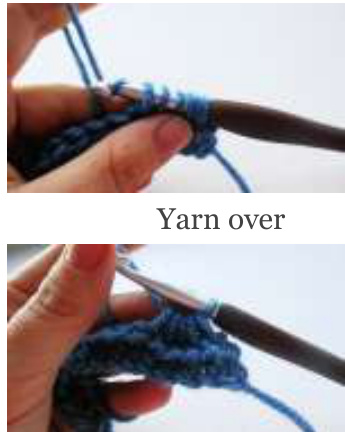
Yarn over and pull up a loop (2 loops on hook)
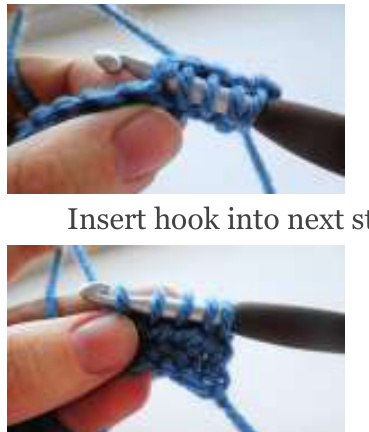
Insert hook into the next st
Yarn over and pull up a loop (3 loops on hook)
Insert hook into next st
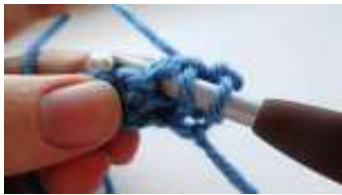
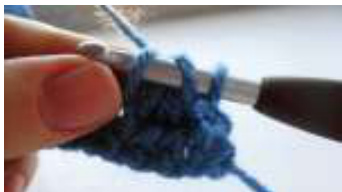
Yarn over and pull up a loop (4 loops on hook)
Yarn over and pull up a loop (5 loops on hook)
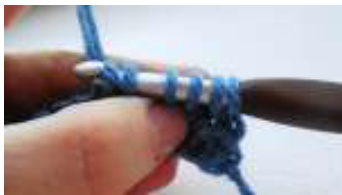
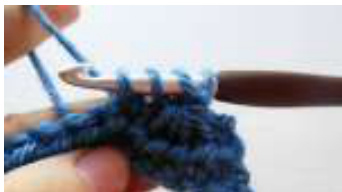
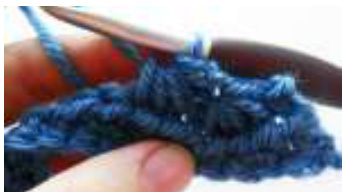
Insert hook into next st, yarn over and pull up a loop (6 loops on hook)
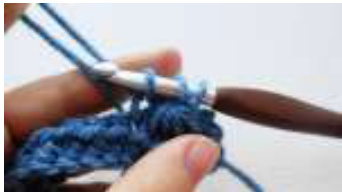
Pull through all 6 loops on the hook
This creates the "eye" of the star
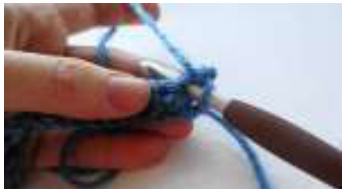
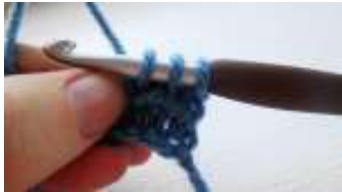
Insert hook into the eye of the star you just created

Yarn over and pull up a loop
2 loops on hook
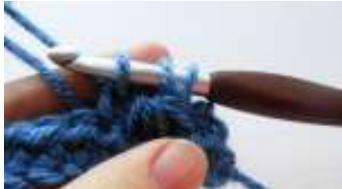
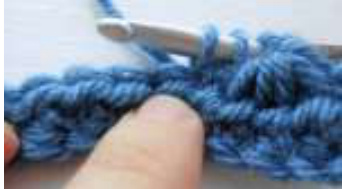
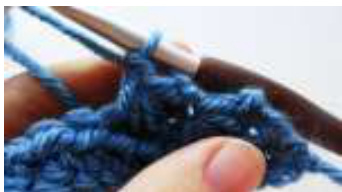
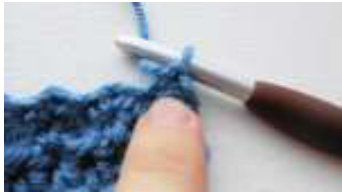
Insert hook in the front loop of the last spike of the previous star (The one my finger is pointing to)
This is a close picture of my hook inserted into that st
Yarn over and pull up a loop
3 loops on hook
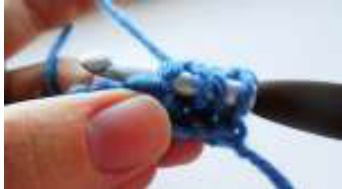
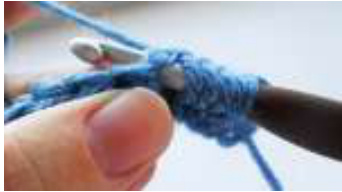
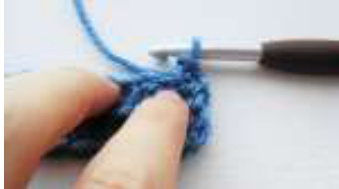
Insert hook into the same st as that last spike from the previous star (The one my finger is pointing to)
Yarn over and pull up a loop (4 loops on hook)
Insert hook into the next st

Yarn over and pull up a loop (5 loops on hook)
Insert hook into next st
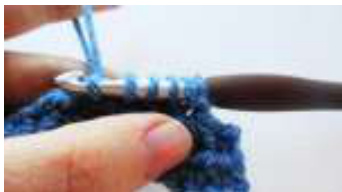
Yarn over and pull up a loop (6 loops on hook)
Yarn over and pull through all 6 loops on the hook
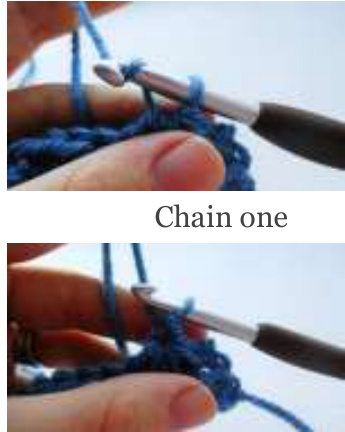
Chain one to create the eye. This completes the Marguerite Cluster (MC)
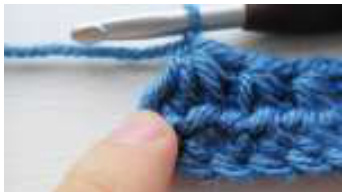
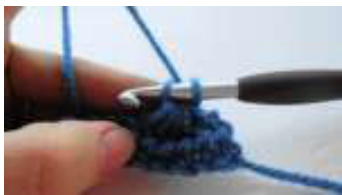
Continue with the MC's to the very end of the row
Hdc into the same (last) st to finish the row
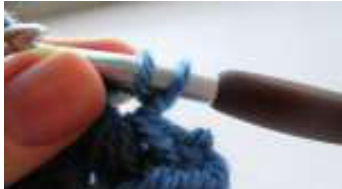
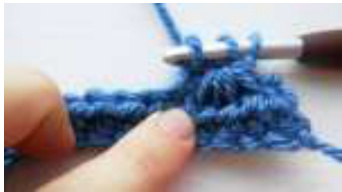
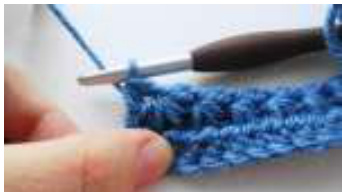
Chain one , turn, and sc into the first st
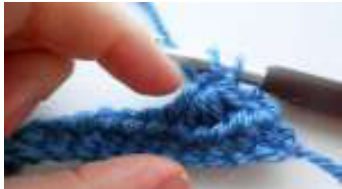
2 sc into the eye of the star and each star down the row I originally wrote this pattern using an I hook. When I switched it up to the J hook, I also added the dc row to be used as the buttonhole row (assuming I would still need a buttonhole row). If your gauge is like mine, You really don't HAVE to use a dc row when using a J hook (the hdc's would have sufficed for me), but --- it was already added, so there it stays haha! Feel free to move that dc row to wherever you would like your buttonhole row to be (Just switch it out with a hdc row). As long as it's near the beginning somewhere, you should be fine. Also, I considered making it taper down -- I didn't. On purpose. I didn't design these legwarmers to go over leggings. I designed them to go over BOOTS, so they are supposed to be a little wider around the bottom to accommodate boots. Personally, I think the pair I made for myself I've been nervous about posting this one. I don't know why, exactly. I don't typically stray away from head/neck wear, I guess. I hope you guys love it as much as I do! My Little has already demanded requested a pair for her in pink and purple (of course). She even picked out her own buttons at Hobby Lobby :P Who else is in love with the texture of the Marguerite Cluster Stitch??
I LOVE this texture -- it makes me want to pet it.
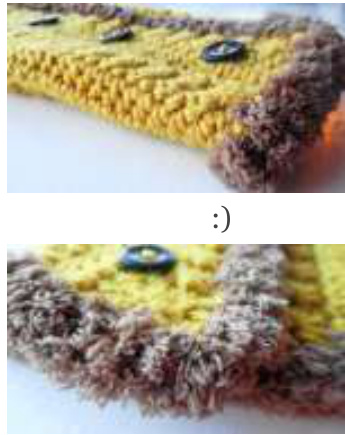
"It's so FLUFFY!" I don't want to get all repetitive with this stitch, but I do have plans for a couple more accessories featuring it. It's just. so. pretty. :)


