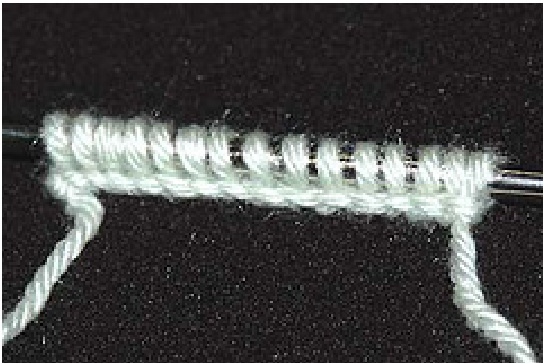
Contigous KAL The sweater is asymmetrical. One half will have a 1-stitch shoulder seam, no back neck shaping, and no front neckline shaping. The other half will have two shoulder seam stitches, one back neck increase area, and a front neck increase every second row. The back neck increases will be on the first purl row, and then on knit rows only, for just a few rows. Increasing every row makes the fabric pucker. ou can see and assess the difference such shaping makes. It will be lop-sided. It's a mini-sampler, doll size, and I don't think dolly will mind the lack of symmetry. In fact, as you progress, that could be your personal challenge - how to make it work as an asymmetrical design. I suggest working in an 8-ply (DK?) on size 4mm needles in a light colour with good stitch definition (no mohair!) Cast on 15 sts. Use the cast-on of your choice, but possibly not the simple thumb-method. I use a knit cast-on: because it casts on to a similar tension to my knitting; and it looks like a row of knitting; and I don't have to guess how long a tail I have to leave. Here's how the cast-on looks:
Step 2 Row 1 Set-up row: k1, pm, k2, pm, k3, pm, k7, pm, k1, pm, k1 so, looking at your row once you've done that, but without turning, it should look like this, with V = a knit st and 0 = a marker
VOvOVV VOVVVOVVOV
(this is a visual representation of what is sitting on the needle, before you turn to knit the next row, and isn't intended as a chart or instruction.) The left side is the plain working of the method and the right side is the variation which has two shoulder seam sts and one back neck increase. It will be this side which will also have front-neck increases a bit later. I recommend working this on a circular needle, even though we won't be working in rounds. The sts can be bent around the bent circ to get the look of the rounded shoulder cap, later.
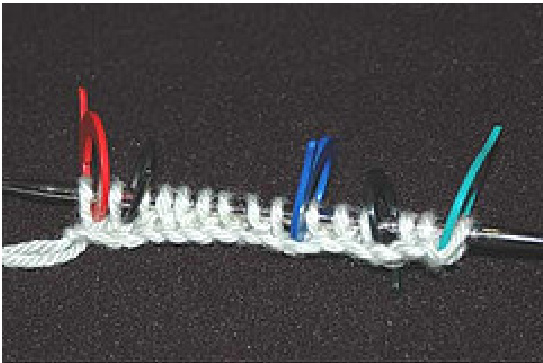
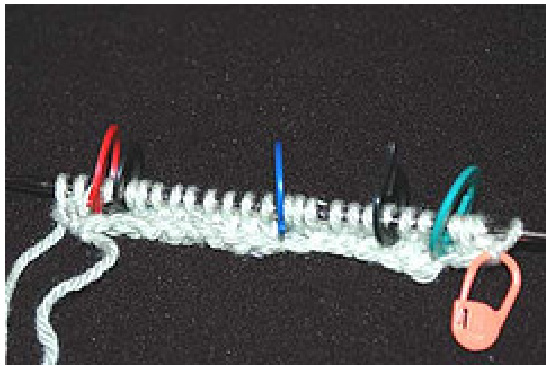
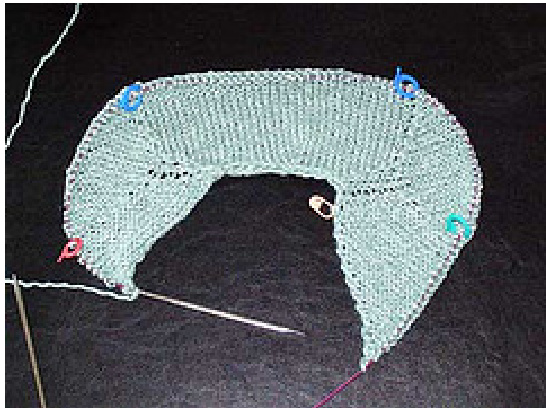
I colour-code my markers: My first marker is green (for go), 2nd is black (back side of shoulder seam), 3rd blue one marks where the back neck increase will be done, another black one (4th) at the other back side of shoulder seam, and 5th is red (for éstop') marks the other front side of shoulder seam. Sorry the black markers don't show up very well, but on any other colour background I tried, the rest of it didn't show up well.
Step 3
The first increases are on a purl row. I've designated the increases as pfb (or kfb on the knit rows); you can use the increase of your choice. There is a discussion about the types of increases and their effects, over here on Ravelry. sm = slip marker
Row 2 Purl Row
pfb, sm, p1, sm, pfb, p5, pfb, sm, p2, pfb, sm, p2, sm, pfb = 20 sts You will notice as we go that the increases are on the ^outside' of the markers which mark the shoulder seams, and for the back neck increase, on the (far) back side of the marker.
The photos will show the row just knitted, before turning the work to start the next row, so the needle tip will be on the left. Step 4 We now start doing our increases for our right side éevery-second-row’ front neck shaping, as well as continuing the other increases. In the photo, there is one extra (orange) marker - this is to remind me to do that increase!
Row 3 Knit Row
kfb, kfb, sm, k2, sm, kfb, k3, sm, kfb, k7, kfb, sm, k1, sm, kfb, k1 = 26 We have done four increases for the shoulder seams, one for the back neck shaping and one for the front neck shaping. Again, the photo shows this row having been just knitted, before I turn the work to do the next row.
Row 4: Purl row
p2, pfb, sm, p1, sm, pfb, p10, sm, (note: no increase here), p4, pfb, sm, p2, sm, pfb, p3 = 30
Row 5 Knit Row
Row 5: kfb, k3, kfb, sm, k2, sm, kfb, k5, sm, kfb, k10, kfb, sm, k1, sm, kfb, k3 = 36
Row 6 Purl Row
row, is like Row 4 - increase in the same places, next to the markers - note: n back neck increase. = 40 (no photo) : switched the black markers for ones that should show up better in the photos
Row 7 Knit Row
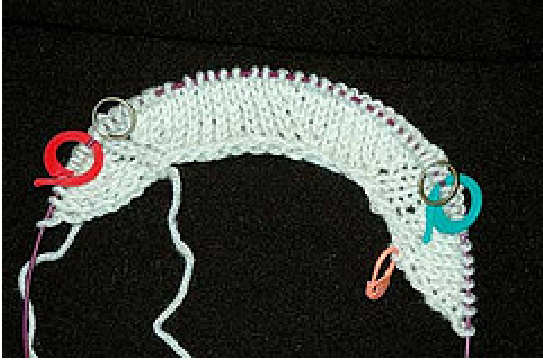
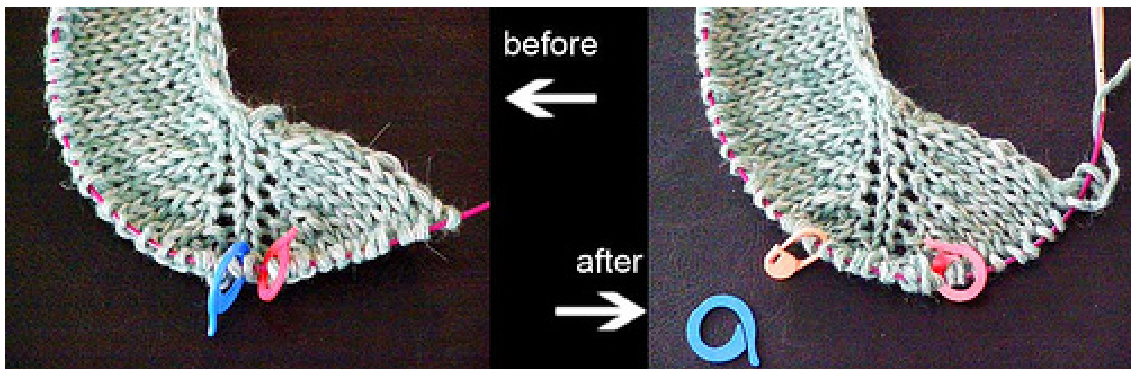
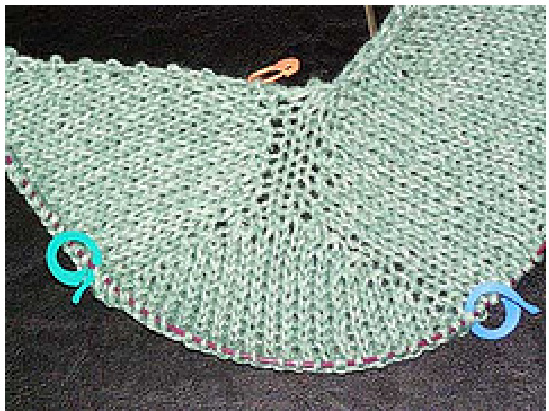
As per row 5 - but the stitch count will be different by now. So, kfb the first stitch, knit to marker, kfb, sm, knit to next marker, sm, kfb, now knit to back neck shaping marker, remove the marker, kfb, this will be the last increase for the back neck shaping, knit to one stitch before marker, kfb, sm, knit to next marker, sm, kfb, knit to end of row = 46 Here is a close-up photo of that back neck increase, with the marker removed.
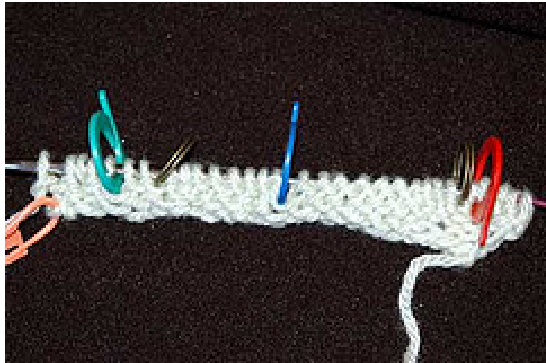
And here's a photo of the whole thing, stretched out along the circ - you can start to see the magic of the shaping even at this early stage.
Row 8 Purl row.
ore - increasing before one marker and after the next, x 2 = 4 increases = 50 s Row 9 Knit row same as before but without back neck increase, so kfb first st, increase before one marker and after the next, x 2 = 5 increases for the row = 55 sts
Row 10 Purl row.
increase before one marker and after the next, x 2 = 4 increases = 59 sts
Row 11 Knit row
kfb first st, increase before one marker and after the next, x 2 = 5 increases = 64 sts
Row 12 Purl row.
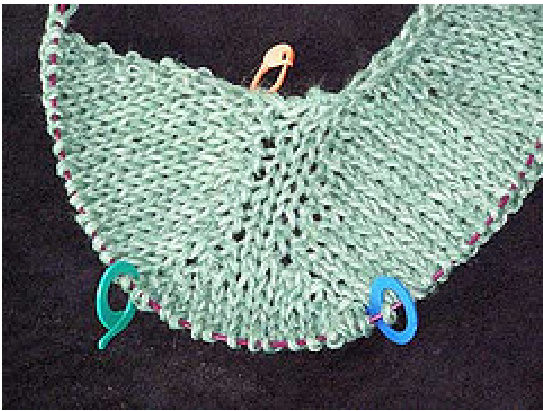
increase before one marker and after the next, x 2 = 4 increases = 68 sts I have to say, if I was starting this again, I would move the marker one stitch closer to the shoulder seam after each increase, as I don't much like the angle of the line. This sampler shows how it looks when I did the back neck increase after the marker:
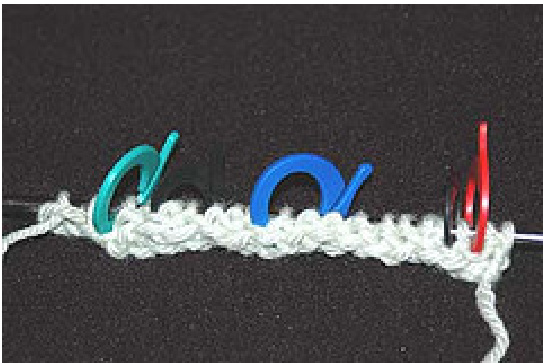
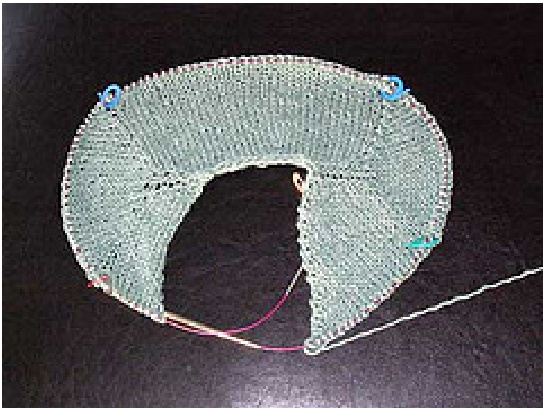
This is where we are up to:
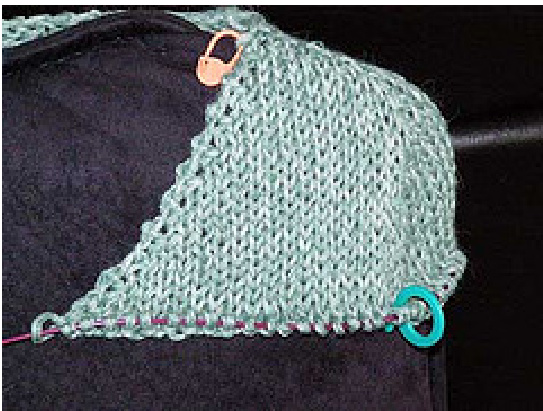
Now we are going to do a knit row AND move markers - so go grab a couple of spare markers. AT THE SAME TIME, you will continue to do the increase at the beginning of each knit row. If I forget to mention it - you still do it! kfb, knit to two sts before marker, place marker, kfb, k1, remove marker, k2, remove marker, k1, kfb, place marker nere are now 8 sts at the end of the shoulder seam which used to have two sts. knit across back to two sts before marker, place marker, kfb, k1, remove marker, kfb, remove marker, k1, kfb, place marker, knit to end of row. this places 8 sts at the end of the shoulder seam which used to have only one st - the extra kfb is so the sleeves have the same number of sts. On a proper garment which has both shoulder seams the same, this extra kfb is not needed. this photo is the 2-stitch shoulder seam side:
and this is the 1-stitch shoulder side:
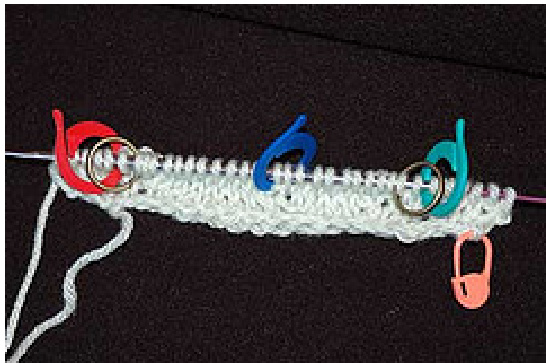
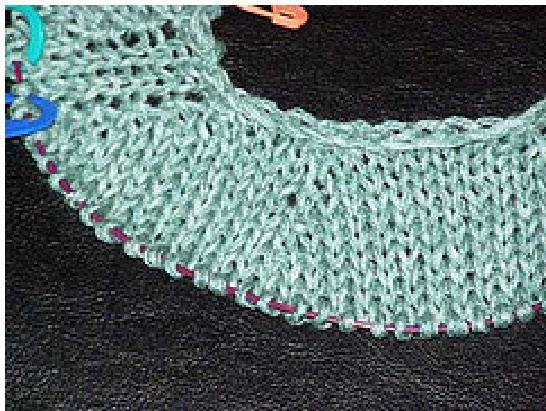
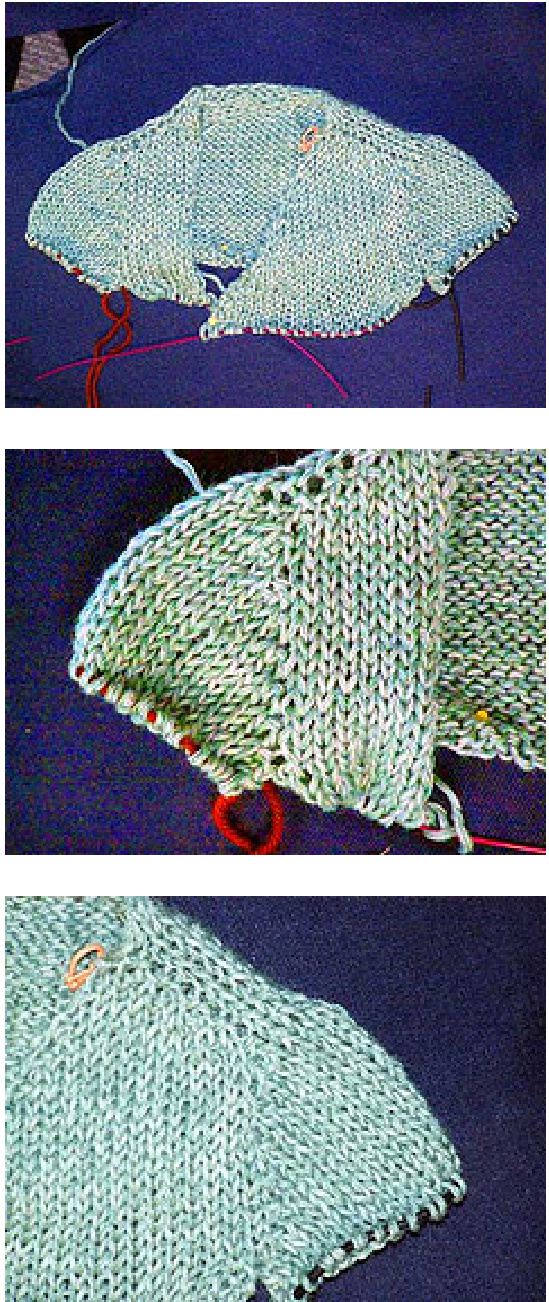
Make a note of the number of back sts between the markers - I had 33, but yours may be different. Now, there should be 8 stitches between each of the two sets of markers. sleeve caps. When I mention “between the markers", these are what I refer to I can't use the asterisk symbol for 'repeat', as Rav uses this for coding (italics) and many of the other symbols I would use are also not available. I will use % for repeat. Now % purl to the marker, slip marker, pfb, purl to 1 st before next marker, pfb, sm, repeat from %, purl to end of row = 10 sts between each pair of sleeve cap markers Count the back sts - they should still equal what you noted down at the end of the last post of instructions. If you have more - you have probably done a pfb the wrong side of a marker. This is very easy to do - ask me how I know! Yes, counting is tedious - but not as tedious as undoing and re-knitting a row. So, as established, kfb the first st of each knit row. % knit to the marker, slip marker, kfb, knit to 1 st before next marker, kfb, sm, repeat from %, knit to end of row = 12 sts between each pair of sleeve cap markers count those back sts again! repeat the purl row = 14 sts between the markers repeat the knit row = 16 sts between the markers This is what it looks like after you have done these rows:

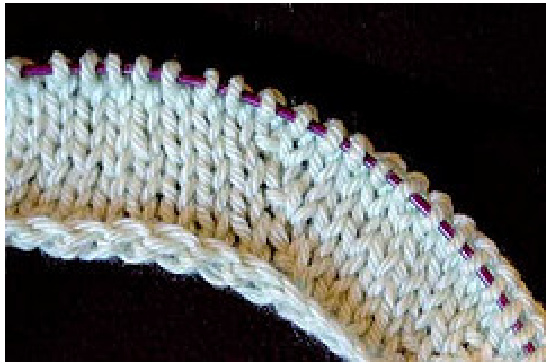
and a close-up
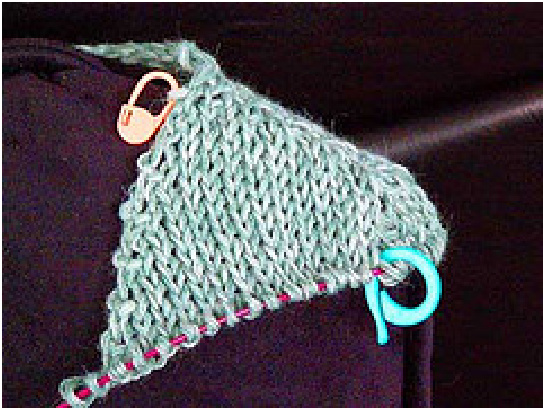
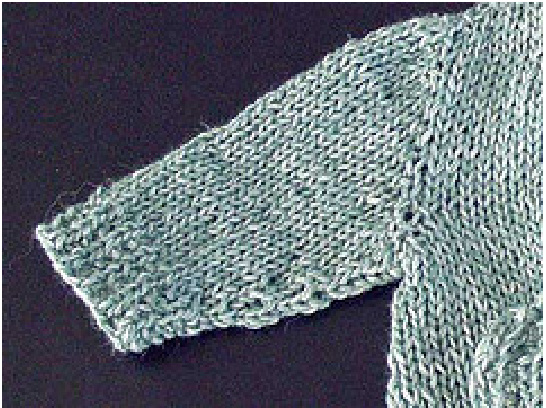
and even at this early stage, you can see the sleeve shaping if you drape your sample over a cushion corner:
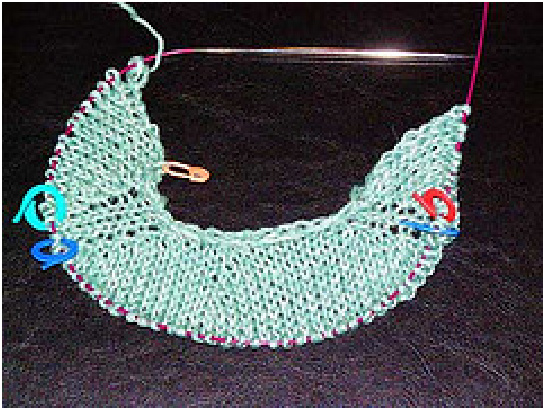
Technically, you have reached the end of this method as it differs from BW's simultaneous topdown set-in sleeves method. From now on, the rest is like any other top-down. Continue to increase one stitch at the start of every knit row. Between the sleeve cap markers, now increase only on the knit rows. Do NOT increase every row for the whole armscye! So Purl = 16 sts between each set of markers Knit = 18 sts Purl = 18 sts Knit = 20 sts Purl = 20 sts Knit = 22 sts Purl = 22 sts Knit = 24 sts (don't do the next purl row yet) Count those back stitches again - they should still be what they were; in my case, 33. After doing that knit row, it should look something like this:
and a close-up of one sleeve:
and shaped over that cushion again:
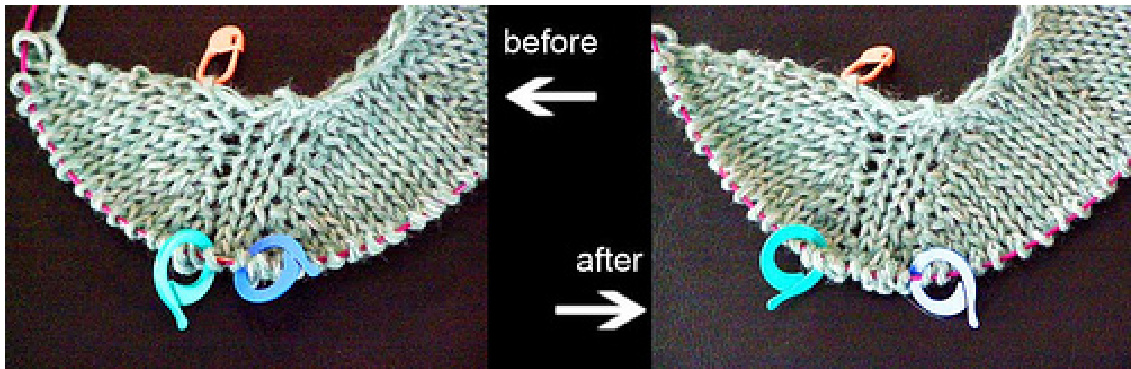
The underarm shaping will be next. The next three rows provide shaping for the underarm area. Purl row - increase before and after each marker = 8 increases = 26 sts between each set of sleeve markers. Check the number of back sts - there should be two more. My count is now 35. The other 2 increases will be on the fronts. Knit row - front increase as per usual, then increase before and after each marker = 8 increases = 28 sts between each set of sleeve markers. Check the number of back sts - there should be two more. My count is now 37. The other 2 increases will be on the fronts. Purl row - increase before and after each marker = 8 increases = 30 sts between each set of sleevemarkers. Check the number of back sts - there should be two more. My count is now 39. The other 2 increases will be on the fronts. It was hard to photograph this in a way that showed those increase areas:
This doesn't seem like much, but for dolly size, it's enough for the underarm area. It forms 3 + 3 = 6 sts for each side. We've done the underarm shaping; now we separate sleeves and body. remove all markers as you come to them. kfb, knit to marker, remove marker. slip sleeve sts onto spare needle, or a stitch holder, or waste yarn. knit the back sts to marker, remove marker slip second sleeve sts onto spare needle, or a stitch holder, or waste yarn knit to end of row.
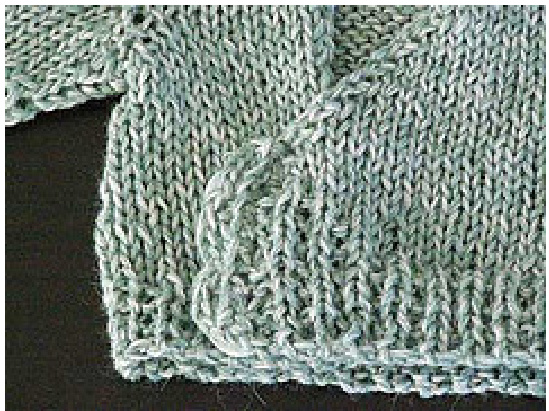
On a full-size garment, there would usually be extra stitches cast on between the fronts and the back, and later when picking up the sleeves, more would be cast on then, too. Continue to knit the body, maintaining the increase on the front. Or not, if it suits your design. Now, you know that if you keep increasing that one side, it will meet up with the other side when their combined stitch total = number of back stitches. If the increase side number of stitches + non-increase side number of stitches is more than the number of back sts, the front will overlap. If the increase side number of stitches = back stitches, the front will wrap right across to the side seam (if there was a seam) I knitted a further 16 rows, then 8 rows of rib. I used a “lazy rib” stitch pattern = knit rows - knit all sts, purl rows - p1, k1 across, making sure the purls stack on purls and the knits on knits on the next purl rows. Cast off. (bind off) stopped doing the increase on the front edge when the front overlapped a bit. I then started the lazy rib, but only one column at a time, so it started a row lower on the next row, and so on, so the line formed by the starts of those rib columns is a slope down from the edge. Whew, that concept is so hard to explain. How about a photo:
I then finished my overlap edge with crab stitch (crochet, also known as backward stitch) and crochet simple chains for buttonholes. Sleeves: Pick up and knit one sleeve, joining to knit in the round (or not, if you prefer). I used 'magic loop'; you can too, or dpns, or two circs, or anything that works for you. Knit for about 16 rows, doing some decreases, then do some more rows for the cuff in a stitch pattern of your choice - rib, garter, seed, or let it curl. Repeat for second sleeve. eve sts - I calculated that I wanted 22 at the wrist. So I needed to decrease 8 st Now, for dolly size, there wasn't much length for spacing those decreases. I don't like the double decrease technique - I think it gives too jagged a line, especially on a small scale like this. So I placed those 8 sts + 1 extra between two markers where the arm seam would be. The I extra st is the ‘seam' st. Then I decreased 1 st every second row, alternating which side of the seam st I decreased on. Those markers make it really easy for me to see how I am going with the decreases. I did 16 sleeve rows, plus a further 8 of “lazy rib'. Cast off. (bind off) Then repeated this for the second sleeve. Cast off. (bind off) The sleeves could have had a couple more rows for my dolly's arm length.
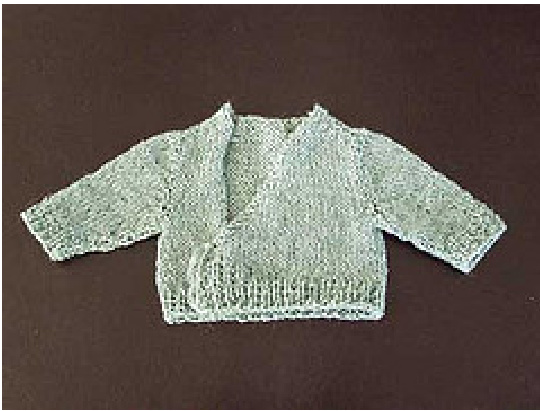
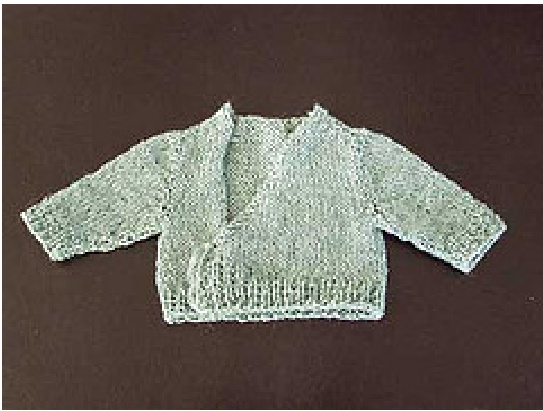
And here is my finished mini-sampler:
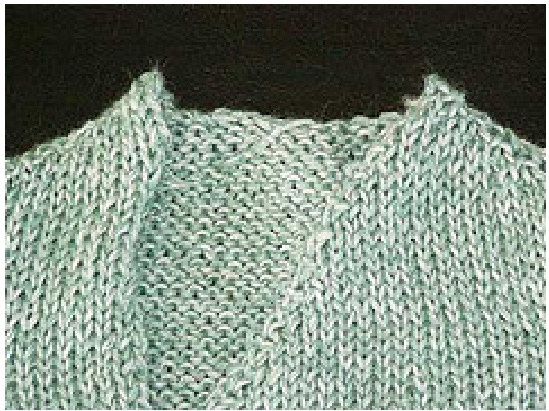
And a close-up of the neck area:
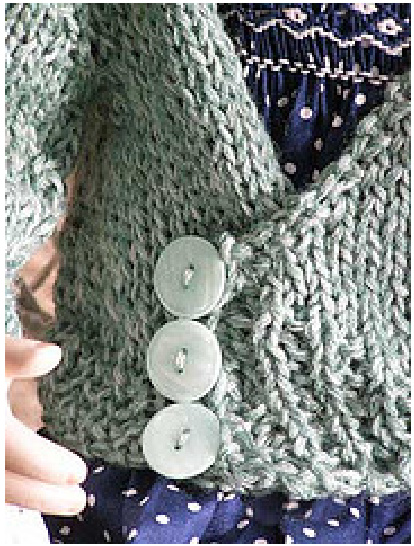
And a close-up of the buttons I used:
Saskia models the finished sampler:
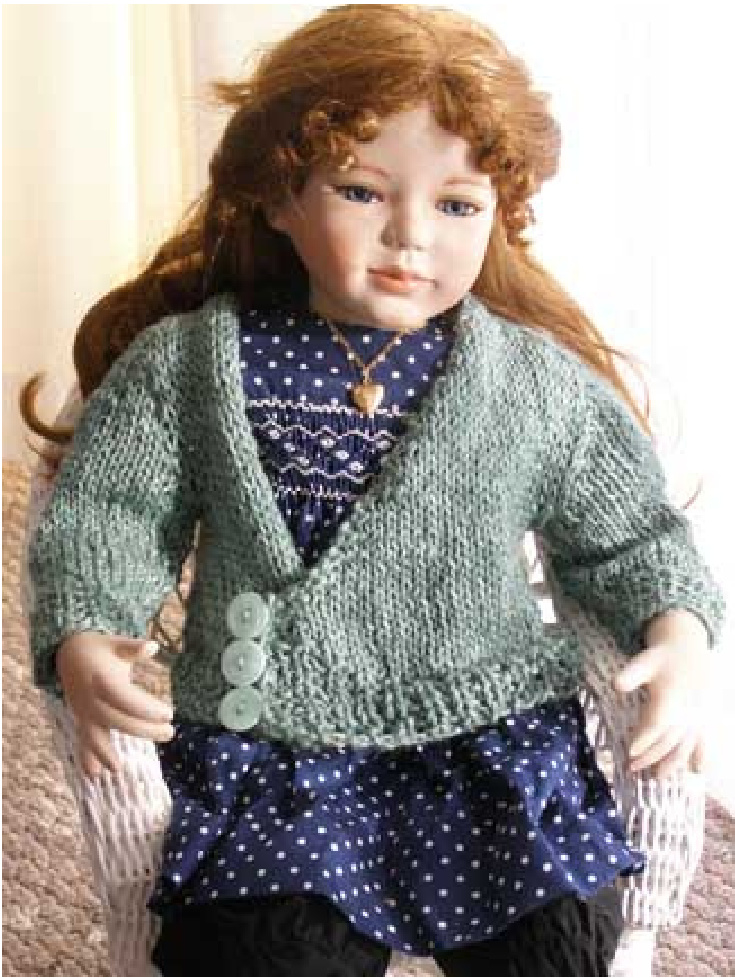
The sleeve caps may seem puffy, but they don't look puffy at all when worr. Compare the two halves and see how one shoulder lays a little flatter, and is a little less steep, with 2 shoulder seam stitches compared to 1 seam stitch. It's also very helpful to look at the two different kinds of neck shaping and get ideas for how to do others. Any questions, you can ask me on Ravelry at http://www.ravelry.com/people/SusieM or post a question in the Contiguous Group.


