Crazy Quilt
3y Anastacia E Zittel / http://anastaciaknits.net / anastaciaknits@gmail.com Please note: This is NOT a pattern & not intended for beginner crocheters, & for best results, you should have some experience with freeform. This is a recipe / tutorial / my notes on how to turn freeform into a large project, such as a lapghan or afghan. Let's call it a crazy quilt :) All terms are US terms. Some sections of this tutorial are cut & pasted directly from this thread on Ravelry: http://www.ravelry.com/discuss/afghans--blankets/1940396/1-25 Day 1: Inspired by this thread (please read if you haven't already & chime in your thoughts), we're going to have a cal/kal freeform / quilt / art afghan a long, starting the beginning of January. I'm going to attempt to lead you all through the process, trying to be general enough to keep it "freeform" and allow our own creativity, but specific enough to guide you through. Day 2: Start gathering up your supplies, & start thinking about exactly what you want to make: remember that this is freeform, so your ideas need to be fluid, but start your plan. Do you want to make a blanket big enough for your bed?A small throw? A baby blanket? You need to know what size you are aiming for, so you know how much yarn to gather.
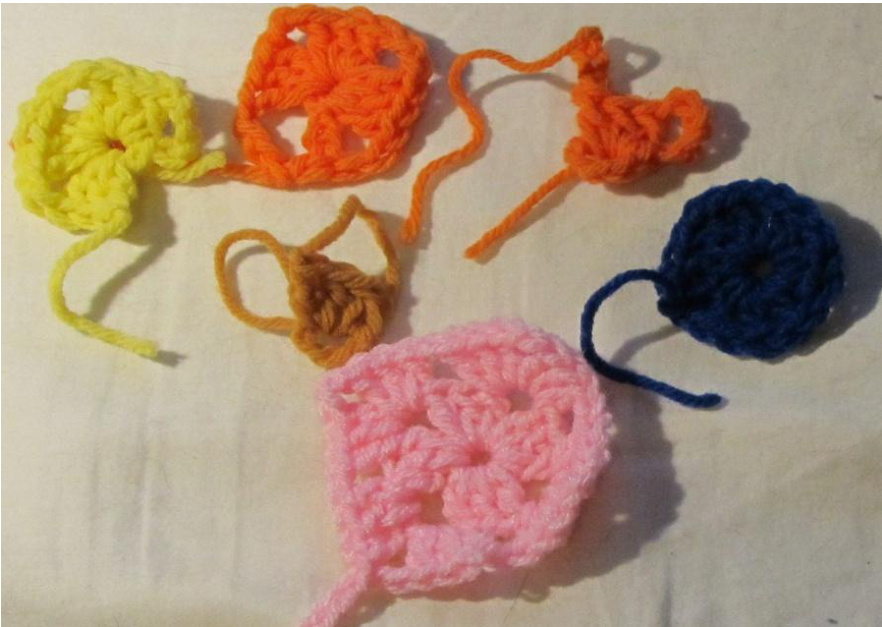
gather up any of my bits & bobs from crocheting / knitting - gauge swatches, maybe the start of that scarf that you didn't like & never frogged, maybe you have some leftover Put together your yarn - gather all your scraps. Freeform works best when you stick with a few main colors / shades & a couple of contrasty shades, but it's fun to go completely wild with color, too - it's all up to you. I like to make sure I have about a pound for my main color, if I'm making a throw & a little more if I'm trying to make a bigger blanket. At this stage, I also like to Crazy quilt v. 1.20.12 granny squares from an afghan... we all end up with bits & bobs, so gather those together. See what works with your stash yarn, & what doesn't, and add it to your pile. Day 3: Grab yourself your favorite hook, grab your main color, grab a stitch dictionary or a favorite reference source online, pick a stitch at random, and work up a small sample of the stitch. For today, let's pick a one color stitch. Aim for a 3-4" square, but don't make it look tooperfect. Day 4: Grab your next color... and your favorite hook - ch about 2" or 3". Dc in ea st across. Ch 3, turn. Dc in next st, & throw random popcorns across the row, in between random dc. Ch 3, turn. Dc in the same st (increase made), dc across the row, throw in a couple of increases if you'd like... Ch 3, turn. Random popcorns across row. Continue in this manner until you have a rectangle. Day 5: Have any experience with cables? If you've never cabled before, play with something really easy & do a few cable crosses (knit if you're a knitter, crochet if not). If you have some experience, do something more complicated! Day 6: knit a 2" by 4" (roughly, don't measure!! just guess, or make totally different size if you prefer) garter stitch square if you knit, or sc BLo if you only crochet. Don't like BLO? Just make a plain square using just sc Day 7: Use this pattern http://www.ravelry.com/patterns/library/how-to-crochet-a-heart or any other heart pattern (or your own design), make a few hearts Day 8: Have you ever made this great charity square pattern ? http://www.ravelry.com/patterns/library/chain-stitch-square It's awesome for using up scraps / odds & ends. Grab a hook & your tiniest size scraps & work up a couple of these beauts - or another square if you prefer. The twist: keep the finished size small, less than 4" (again, don't measure) & end off somewhere in the middle of a side, not on a corner. This block tends to be a bit wonky in the first few inches because of the way it's made already, & ending off in the middle of the row makes it wonkier still... perfect for freeform. Day 9-14: Continue in this fashion, using various stitches as inspiration, doodle away to your hearts content making up motifs/scrumbles. Just play. art putting together all of these pieces, & let's start building ourselves an
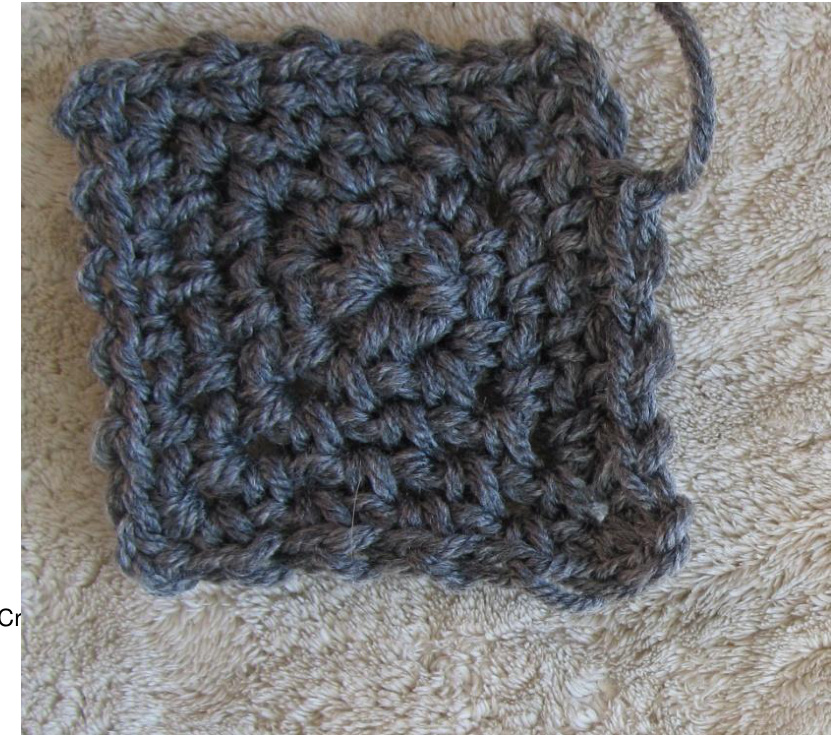
afghan. Making something large like this, I like to combine my smaller scrumbles into slightly larger, combined pieces, that have roughly straight sizes, & then combine those pieces together, to make an even bigger piece. Notice, I'm calling them pieces & not squares or rectangles -because those the sides may be straight, they are most definitely not going to be a perfect square, nor do you want them to be. You will obviously be using colors that work well together - for my
tutorial, I tried to use colors that contrasted nicely from the previous part so that you can more easily see what I am doing.
not, make one today, as that's my basis for today's tutorial. Try to weave in your ends as you go / crochet over your ends, or at least, work on them once in a while: freeform creates a LoT of yarn ends!
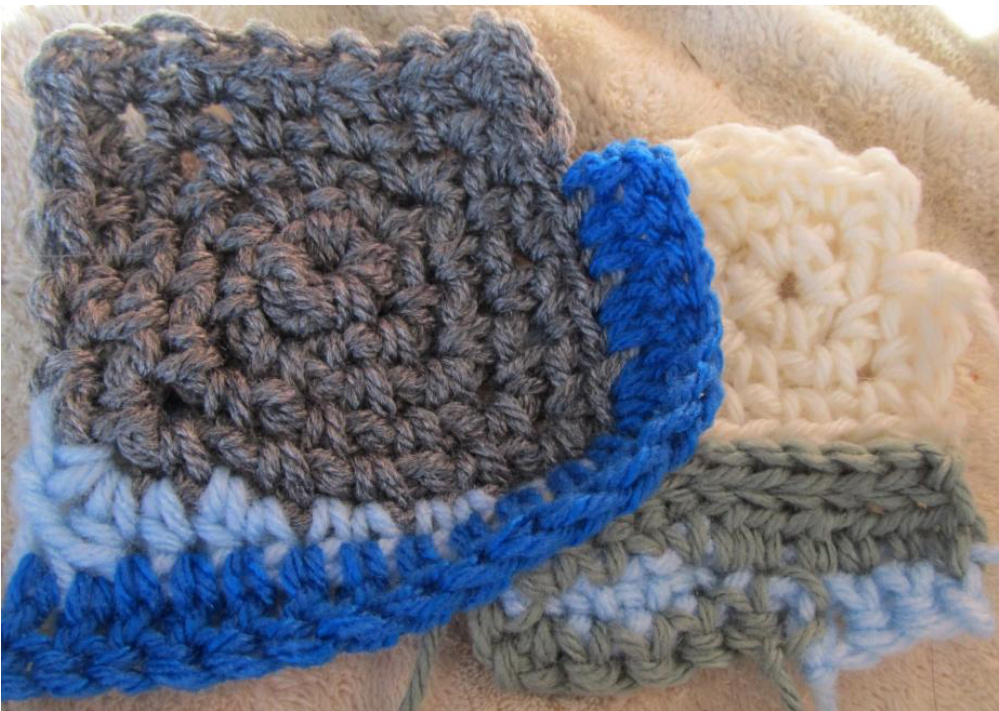
Can you tell what I did?
I single crocheted over two stitches in the corner, filling in the gap at the end of the row. I chained 2 for the corner, worked a few half double crochets at the beginning of the row, switched to single crochet for the rest of the row, and worked a slip stitch at the very last stitch: evening out the wonkiness in the square, so it's a more Let's even out this piece a bit, shall we? Work a single crochet decrease over the side, single crochet around the right size of the piece, working a few extra single crochets in the corner to keep the work lying flat.
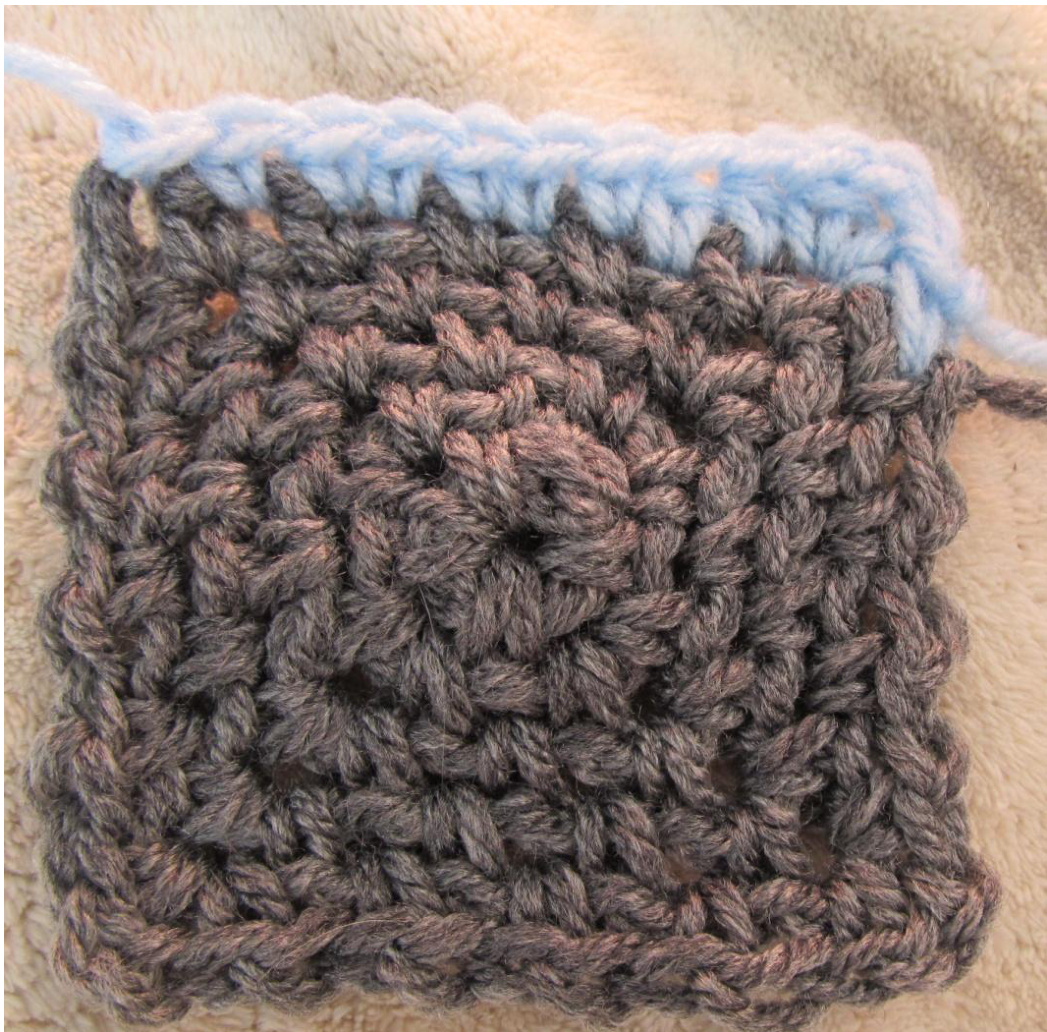
perfect shape.
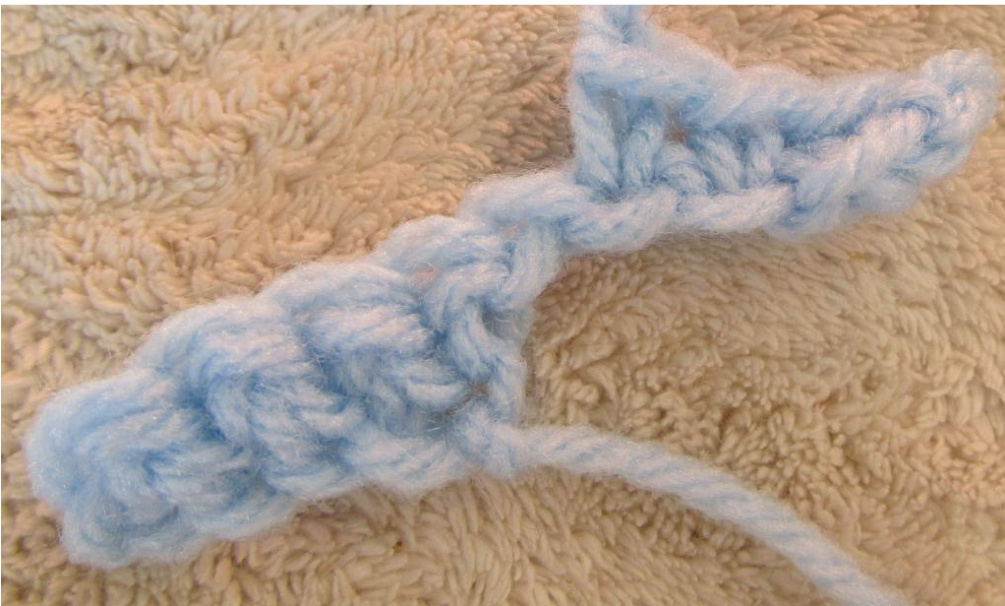
Pick up your next shape: This one I made with about a yard of leftover yarn, I chained 5, worked single crochets in each chain across. I chained 7, turned my work, & single crocheted into the next few chains.
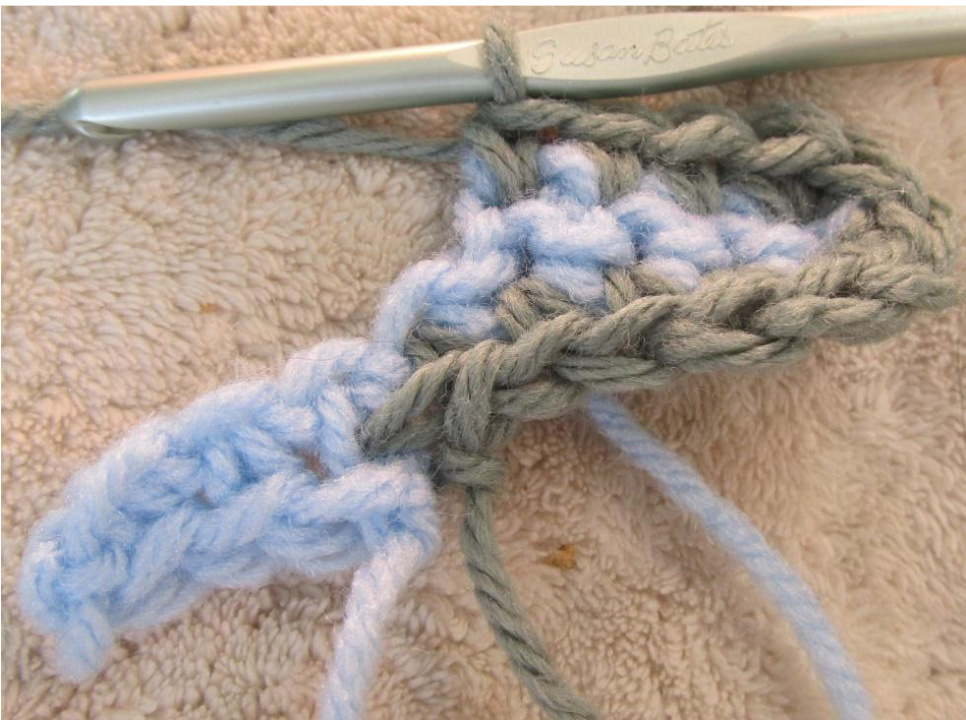
We're going to keep going, but we'll switch to double crochet now, to even out the difference in heights.
Now, we're going to pick up another chain stitch square, & we'll join it to the section we justworked.
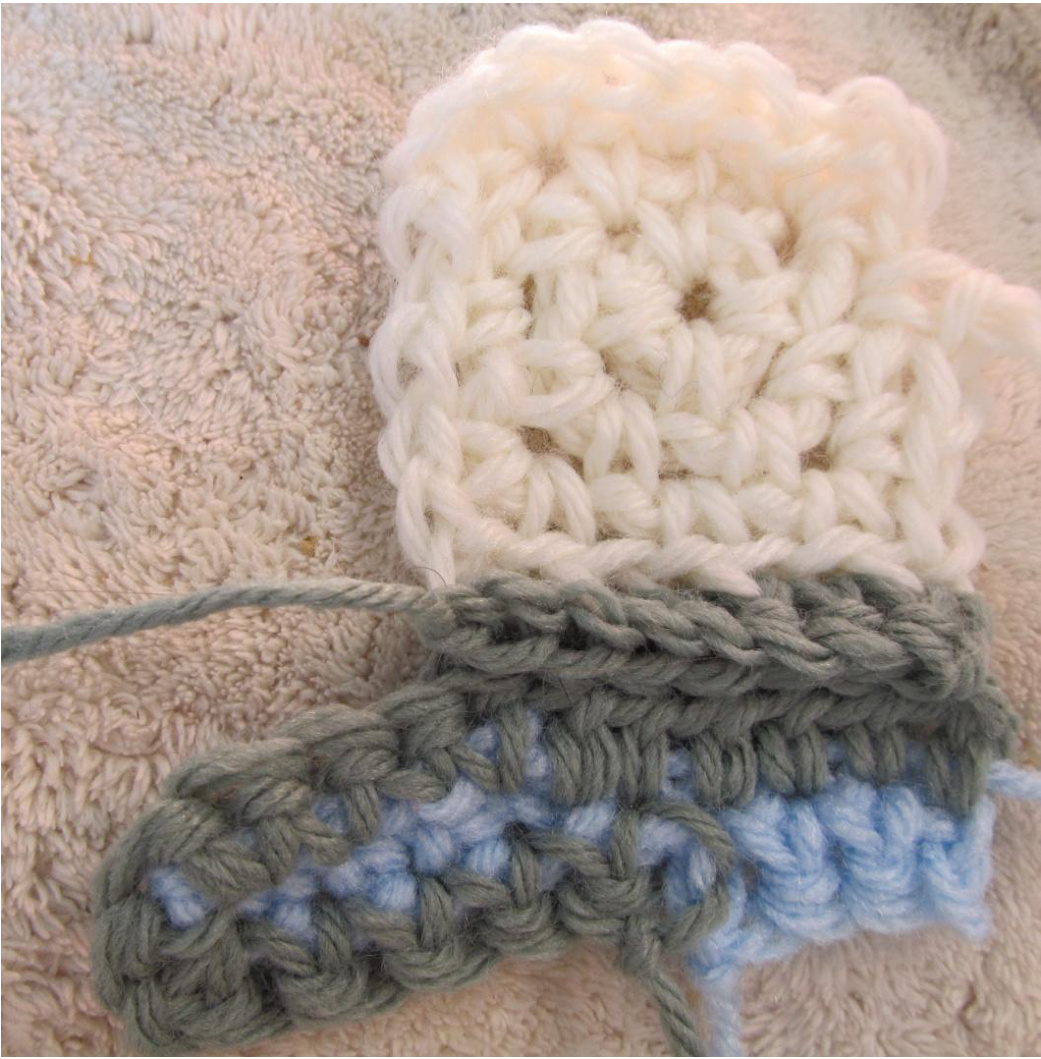
Grab your first chain stitch square that we worked on earlier, do you see how these two pieces match up? You don't have to grab a chain stitch square, just grab a piece that will fit. All I did was chain 1, & single crocheted through both pieces using the back loops only of the blue & gray piece, & the front loops only of the white chain stitch square - this is for a little bit of texture.
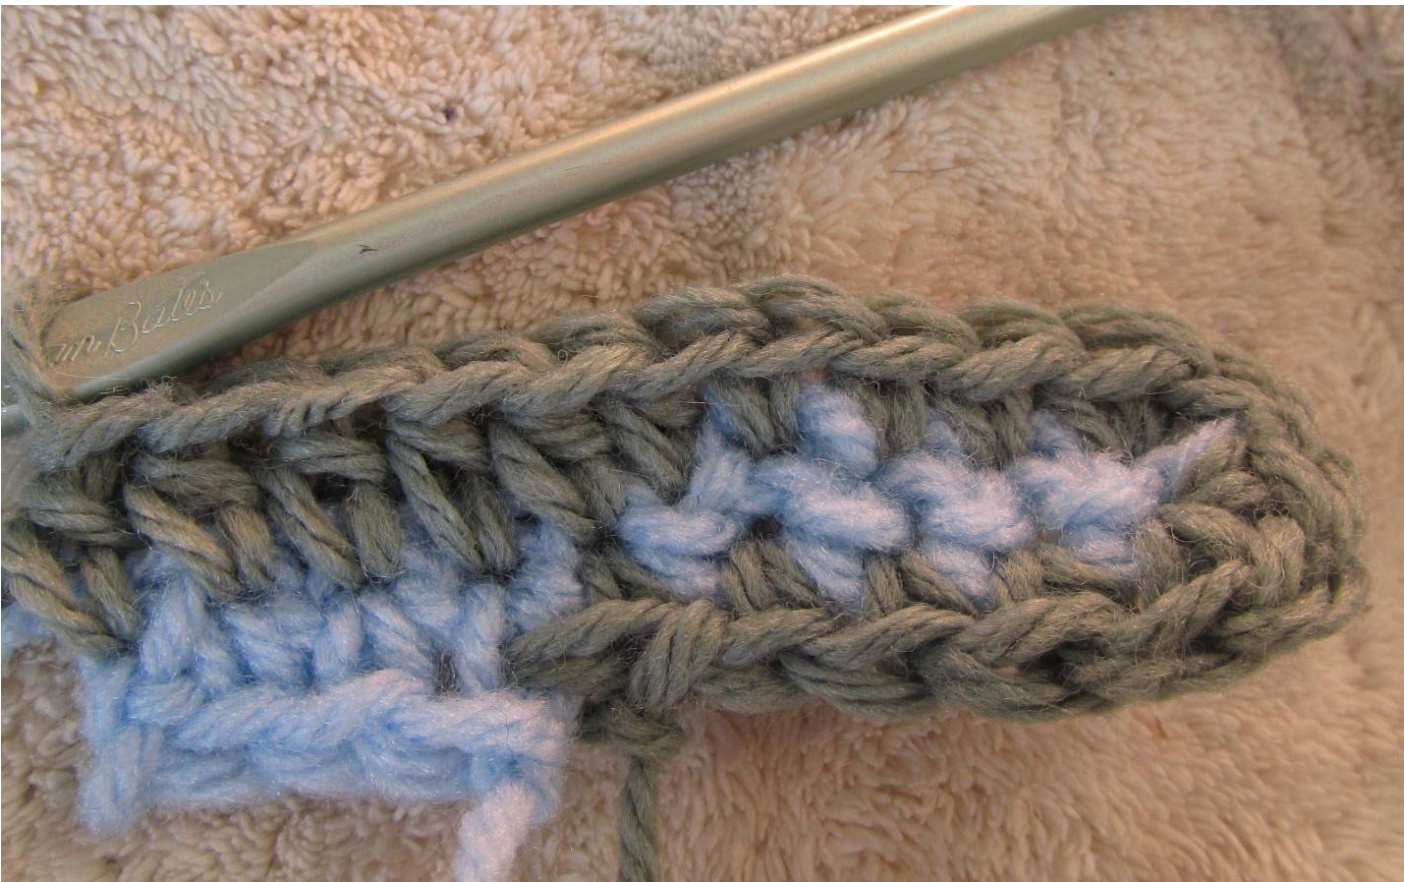
Crazy quilt v. 1.20.12 Nowjointhemup!Iuseddouble crochet to join them this time, using the back loops of one piece & the front loops of the other piece, just like last time.
and then I just kept going to even out the side of the section a little, still using double crochet. Now let's even out this section a little bit, shall we?
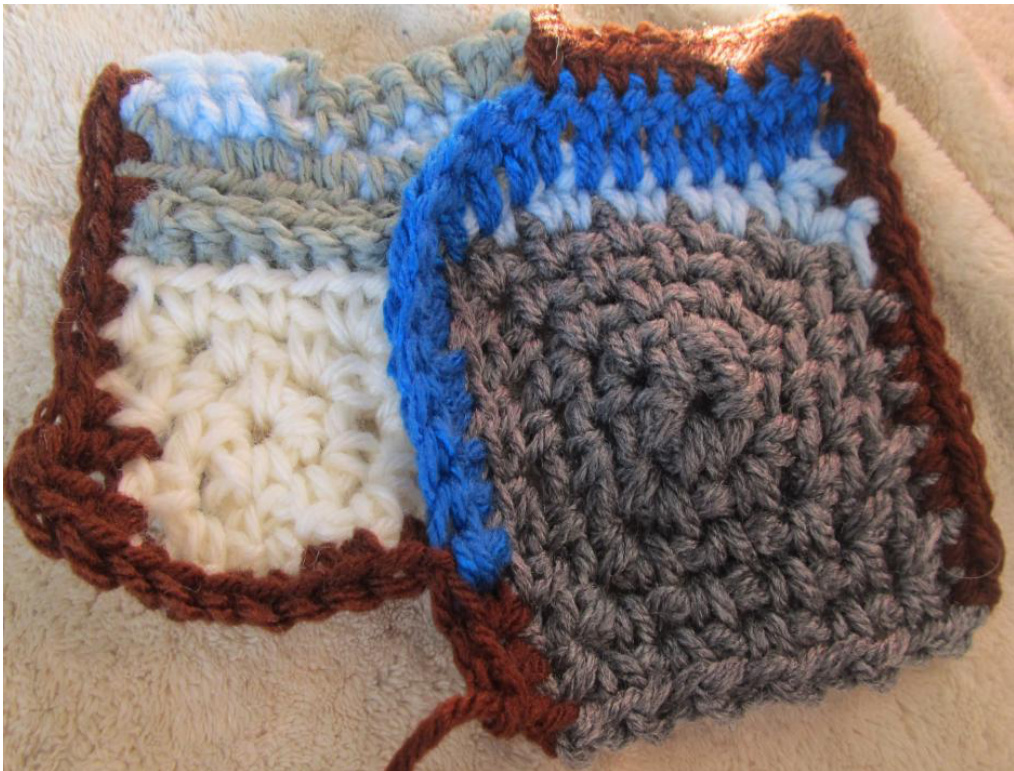
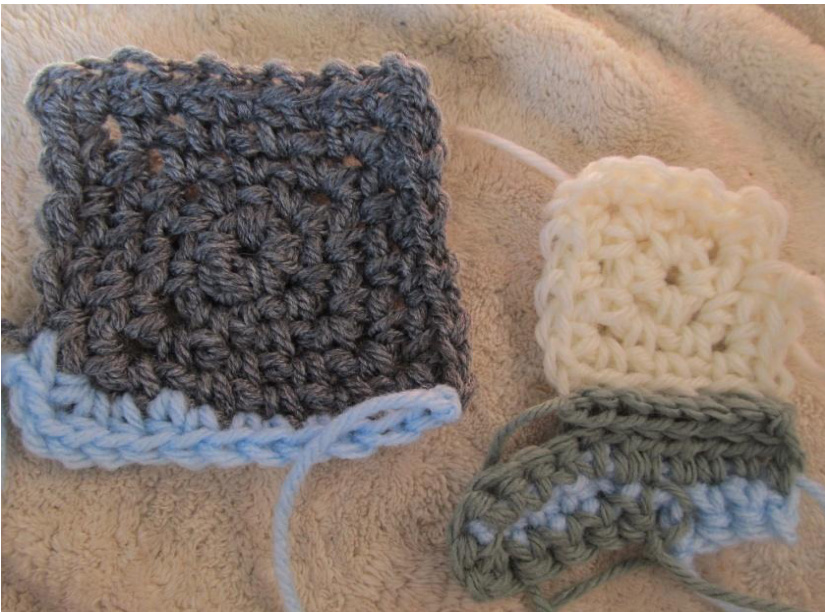
Can you guess what's next? Grab yourself another puzzle piece that will fit into a corner, and join them together. And that's really all there is to it! Continue making small scrumbles, join them together into bigger pieces, and join those pieces together.


