Liller by Josie Mercier
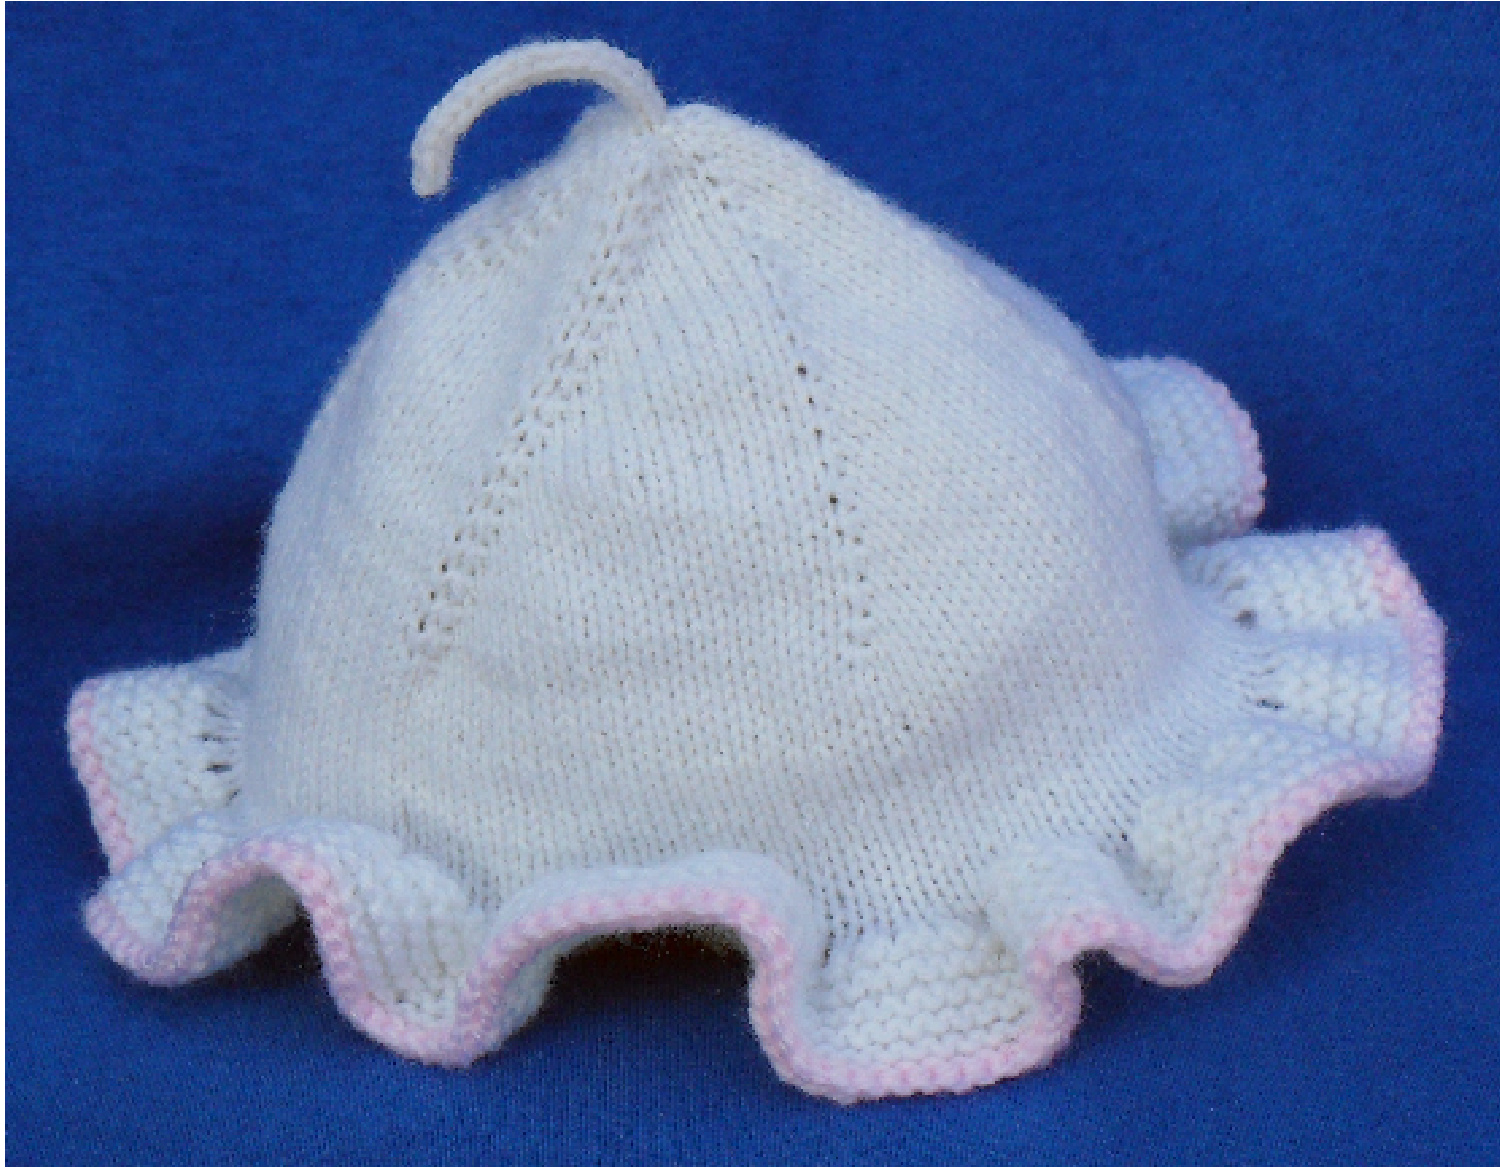
A top-down, any-gauge pattern for a pretty, frilly baby hat trimmed with a delicate contrast-color edge. The pattern includes seven sizes ranging from newborn to age four and includes instructions for seven gauges of yarn ranging from 16 to 32 stitches to 4 inches/10cm. Measurements are written in inches and centimeters.
Sizes
Newborn, 3 months, 6 months, 12 months, 18 months, 2 years, 4 years Finished Circumference: 13.75, 15.25, 16.75, 17.5, 18.25, 18.5, 19.25 inches / 35, 39, 43, 45, 46.5, 47, 49 cm Materials Main Color: 16-18 stitches per 4"/10 cm: 125-175 yards / 114 - 160 m 20-22 stitches per 4"/10 cm: 150-200 yards / 140 - 180 m 24 stitches per 4"/10 cm: 200-275 yards / 180 - 250 m 28-32 stitches per 4"/10 cm: 275-350 yards / 250-320 m Contrast color: small amount of yarn Set of 4 double-pointed needles in size indicated on ball band (to make body of hat) Set of 4 double-pointed needles one size larger than those used on main hat (to make brim) Three stitch markers Darning needle
Pattern Notes
The hat is worked from the top down beginning with a short piece of i-cord. Increases then flow from the i-cord and are worked in six places around the crown of the hat. With this method of construction, you may choose to knit a gauge swatch before beginning, or you may choose to measure your gauge as you go. Be sure to measure your gauge over a section of your knitting that does not contain any increases - your measurements may be less accurate when making a smaller size and/or using a larger yarn. Decide what margin of error you are comfortable with. If in doubt, make aswatch. A chart is included that indicates the total number of stitches needed for the body of the hat. Read down the left-hand side to find the size you want to make and read across the row until you reach the box under the gauge that best matches your yarn. Increase according to the directions until you reach this number of stitches.
Special stitches and Abbreviations
kfb: increase by knitting into the front and back of the stitch dpn: double-pointed needle I-cord: (worked using two dpns) \*Knit across all stitches. Do not turn work. Slide all stitches back to the right hand side of the dpn.\* Repeat from \* to \*. Garter stitch: knit one row, purl one row to work garter stitch in the round.
Directions
Cast on 3 stitches. Work i-cord for 2 (2, 2.5, 2.5, 3, 3, 3) inches / 5 (5, 6.5, 6.5, 8, 8, 8) cm. Put one stitch on each of three dpns to prepare for working in the round. Round 1: kfb all stitches (6 stitches) Round 2: kfb all stitches (12 stitches) Round 3: (kfb in first stitch, k1, place marker, kfb, k1) three times (18 stitches) Round 4: knit all stitches Round 5: (kfb in first stitch, knit to marker, slip marker, kfb, knit to end of needle) three times - six stitches were increased Round 6: knit all stitches Repeat rounds 5 and 6 until you have increased to your desired number of stitches (see chart). Knit even until hat measures 4 (5, 5.75, 6.25, 6.5 7, 7 3/4) inches / 10 (13, 15, 16, 17, 18, 20) cm. Final Number of Stitches
| Stitches per 4"/10 cm | |||||||
| Size | 16 | 18 | 20 | 22 | 24 | 28 | 32 |
| NB | 54 | 60 | 72 | 72 | 84 | 96 | 108 |
| 3 m | 60 | 66 | 78 | 84 | 90 | 108 | 120 |
| 6 m | 66 | 72 | 84 | 90 | 102 | 114 | 132 |
| 12 m | 66 | 78 | 84 | 96 | 106 | 120 | 138 |
| 18 m | 72 | 78 | 90 | 102 | 106 | 126 | 144 |
| 2y | 72 | 84 | 90 | 102 | 108 | 132 | 150 |
| 4 y | 78 | 90 | 96 | 106 | 114 | 138 | 156 |
Change to larger needles and increase for the brim as follows: \*knit 1, yarn over\* across round. Work in garter stitch for 1 (1, 1, 1.5, 1.5, 1.5, 1.5) inches / 2.5 (2.5, 2.5, 3.5, 3.5, 3.5, 3.5) cm, ending with a purl round. Change to contrast color and knit one round. Without removing the hat from the needles, turn the hat inside-out. Bind off loosely with the wrong side facing - you will be binding off knitwise (by making knit stitches) in the usual way and working from right to left. This will form a small gap where the direction of the work changed. When bind-off is complete, sew this gap closed. Weave in the rest of the yarn ends. Wash the hat according to the washing instructions on your ball band and stuff the hat with plastic bags or polar fleece fabric until it is nicely shaped. Let the hat dry before removing the stuffing.


