sarujin presents
The Heffalump Tea Cozy
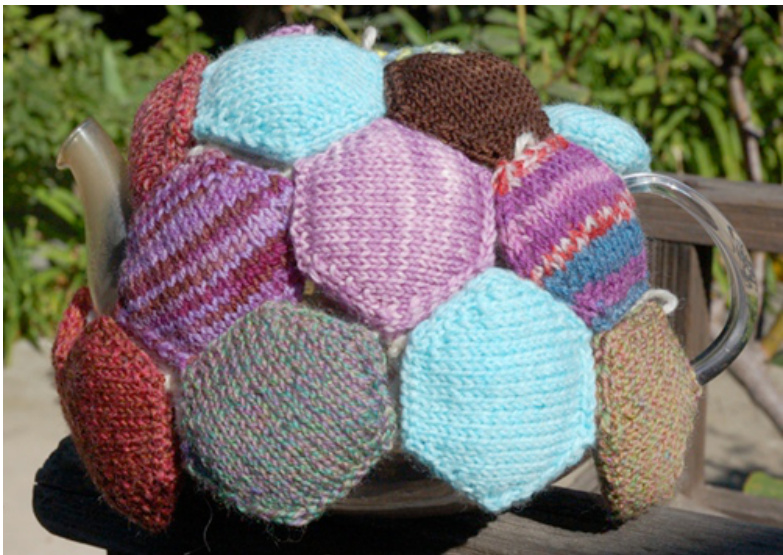
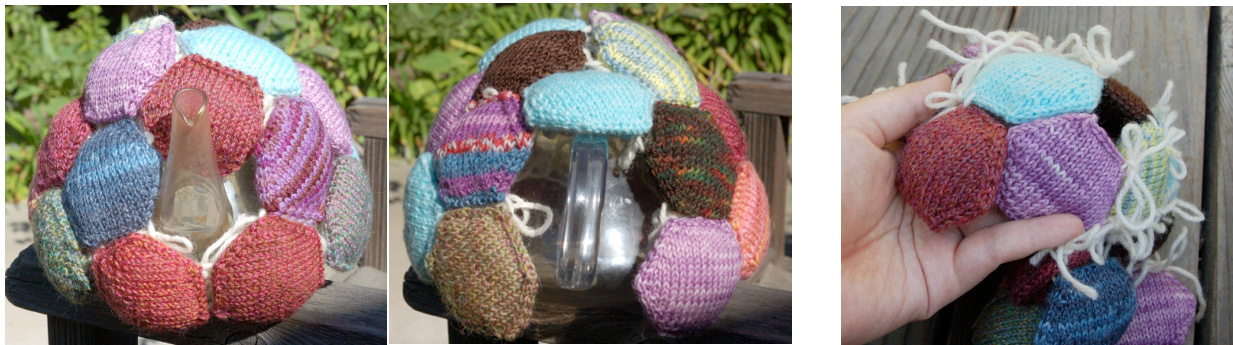
based on tinyowlknits′ "the beekeeper's qu This tea cozy was made as a result of a discussion in the "What can you do with your Hexis?" thread in the \*tiny owl knits\* group. tinyowlknits herself was kind enough to let me post this recipe for a tea cozy which uses her hexipuffs as building blocks. This is not a standalone pattern. It's called the Heffalump Tea Cozy because it reminds my sister and myself of the heffalumps in Winnie the Pooh - all squishy and cuddly!
Made to fit a teapot \~18 inches around at the widest point (the base),and\~5inchestall
Materials:
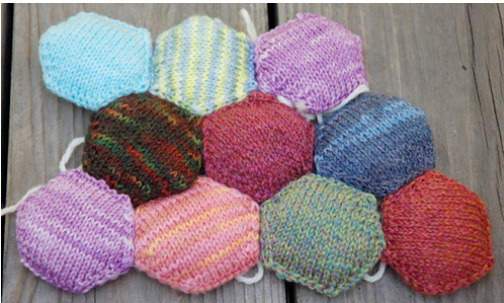
· 20 hexipuffs, \~2.25 inches from side to side · scrap yarn (for tying puffs together) · darning needle (for the scrap yarn) ·patience!^_^
Notes:
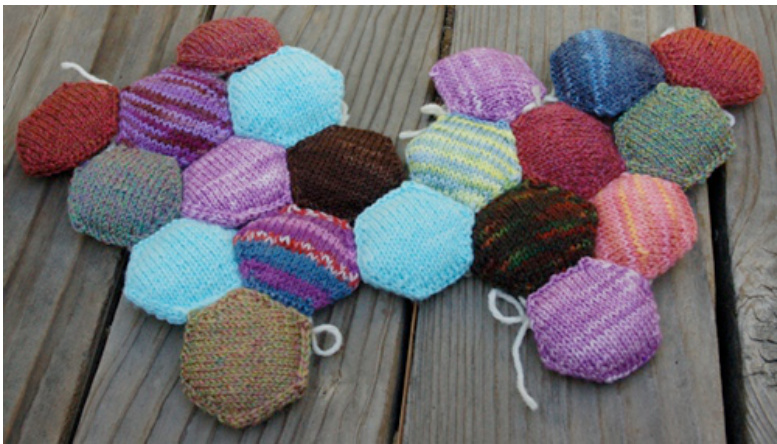
All puffs to be made and joined as per tinyowlknits' beekeeper's quilt pattern. First, join 10 hexipuffs together as shown below:
This forms one side of your cozy! Make a second side to match. Then, attach the sides together like so:
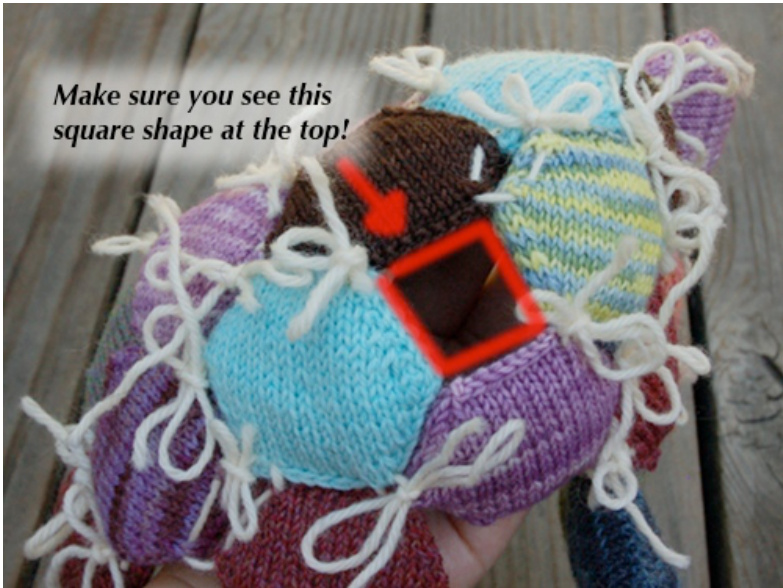
Turn the whole thing around... and connect the hexipuffs as shown:
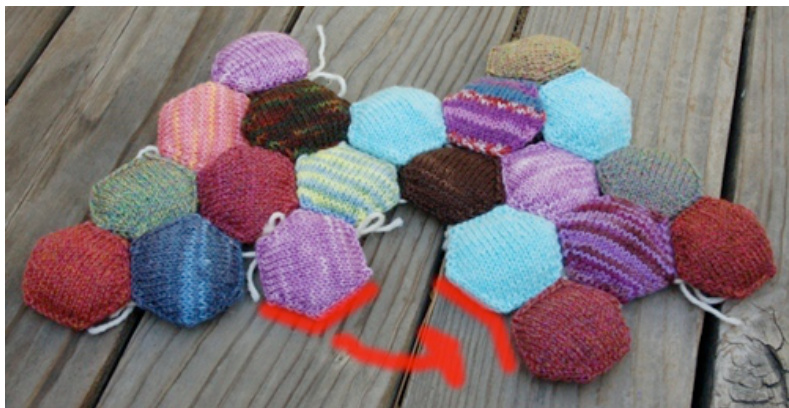
It's going to feel awkward, and odd, but persevere! This is where it becomes 3-dimensional. <-- additional detail (Above, you see the right side of the work. In the detail shot you see the wrong side of the work.)
HeffalumpTea Cozyv1 201l, sarujinknits Itemsmadefromthispatternnottobeused commercially Make sure that you have a square-ish hole at the top, and that each puff is attached at all 6 corners.
You should now have a dome-ish shaped thing with two openings that look something like this:
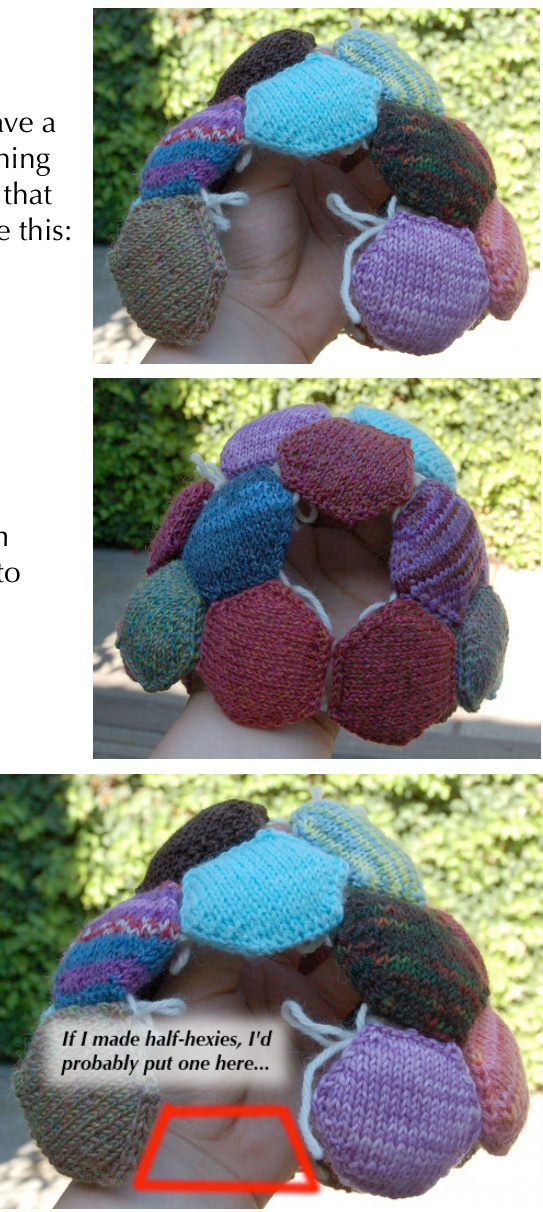
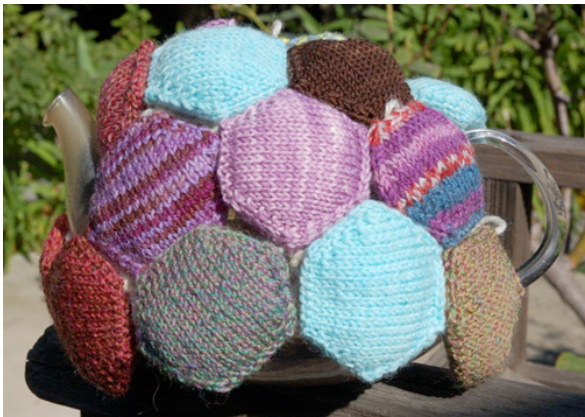
Pick one side and connect the bottom hexipuffs together to form a hole for the spout. Yay! You're done! The other side will be for the handle. As this was sort of a spur-of-the-moment project, I did it with puffs piratedfrommyscarfpile.All theweirdyarnbows aretheresult of wanting to be able to take it apart again easily. It was only temporary, and it has since been dismantled. I do plan to make a proper one afterI finishmyscarf though! In the meantime, I hope you have fun using this pattern as a jumping off point for your own tea cozies!I'm looking forward to seeing what everyone else comes up with. And please do go thank tinyowlknits for the awesomeness of her pattern.^_^Without her thiswouldn'texist!


