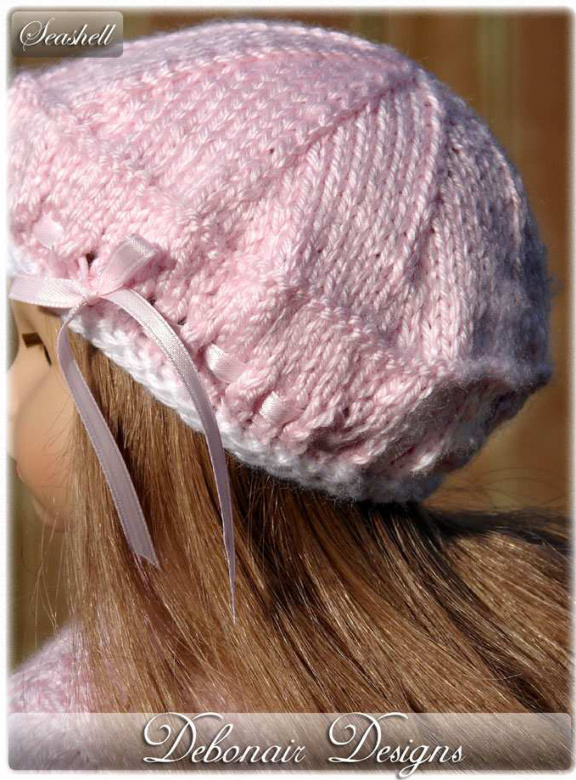
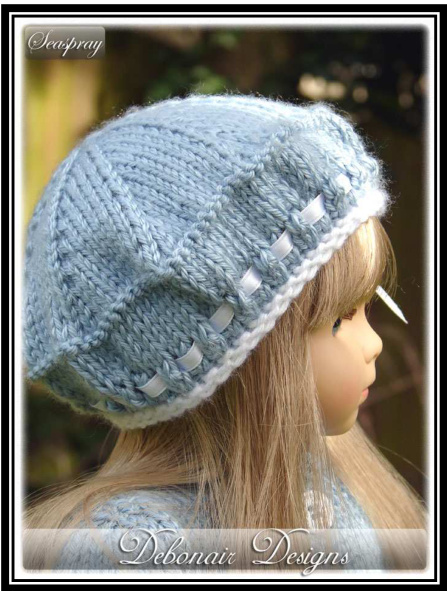
Euelet Beret
An eyelet beret pattern for dolls by Debonair Designs Lily is modeling this new Eyelet Beret patteru, which is based on wodifications I made to my Newsboy cap A versatile beret, that offers creativity by combining various ribbon choices with different color combinations ~ 'Eyelet Beret'isalso a perfect addition to complete Your doll's seasonal wardrobe Designer's Note: Worked flat, back and forth in rows \~ my preferred knitting technique using bamboo straights Experience Level: Beginner - Advance beginner Materials: 50 - 65 yards (approx.) of medium weight yarn #4 (total weight used) (1 used caron Simply Soft and Bernat Satin acrylic Yarns) Knitting Needles: Pair of 3.25mm (USA 3-UK 10) throughout Gauge: Using 3.25mm needles: 7 sts = 1 in over stockinette stitch (Approx. gauge based on given needle size and recommended yarn) Notions: 1 yd of 14" (7mm) ribbon (1 used approx. 28 inches)
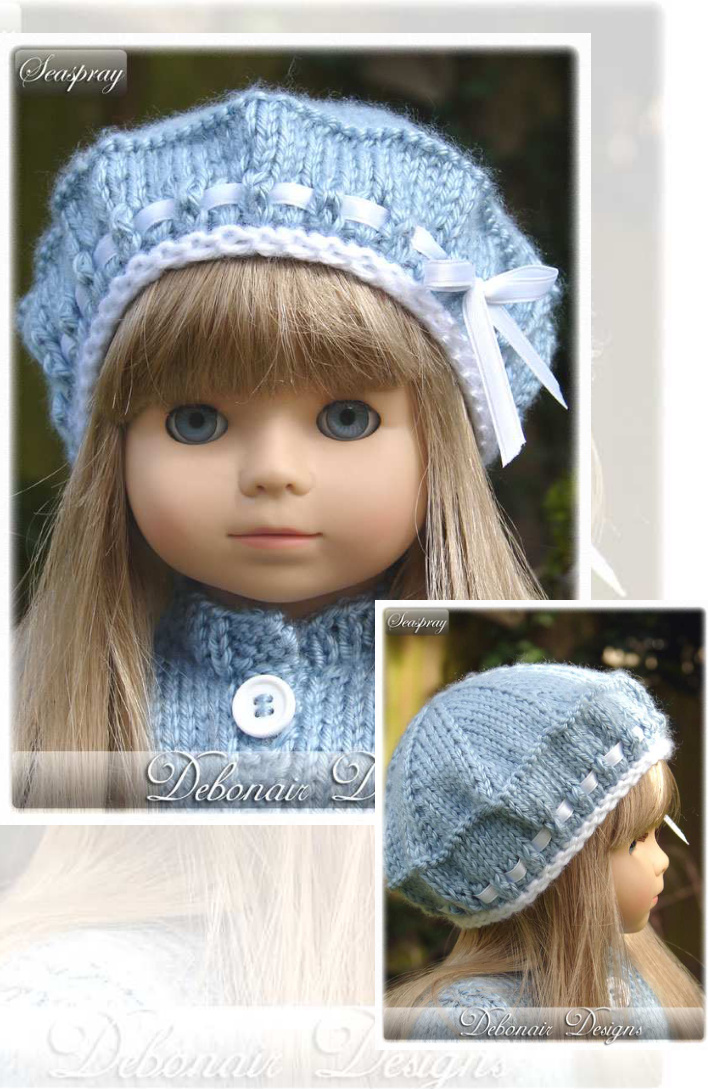
Designed to fit: American Girl Dolls & 18" Gotz Dolls like my models Lily (above) & Katie (pictured on page 2) from Gotz Little Sisters Collection Approx. head circumference of 13" (33cm) Eyelet Beret by Debonair Designs 20i1. All Rights Reserved. Updated format \~ 6/25/2012
Abbreviations:
K = knit P = purl Sts = stitches Rep = repeat Stockinette stitch = knit a row, purl a row Garter stitch = knit every row Kfb = knit into front and back of stitch YO = yarn over K2tog = knit 2 stitches together P2tog = purl 2 stitches together
Main Body:
Begin at lower edge and cast on 46sts, work as follows: Work two rows of garter stitch (Variation: work these two rows in contrast) Beginning with a knit row, work two rows in stockinette stitch (Variation: join on main color if contrast was used for the initial first two rows) Row 5: (increase) (right side) K1, \* increase in next stitch (kfb); rep from \* to last stitch, K1 = 90 sts Next Row: Purl across all sts Eyelet Row: K1, \* YO, K2tog; rep from \* to last st, K1 Next Row: Purl across all sts Row 9: (increase) \* K8, kfb in next 2 sts; rep from \* to end = 108 sts ...Cont Beginning with a Purl row, work four rows in stockinette stitch Next Row: (wrong side) Knit across all sts to form a ridge Beginning with a knit row, work two rows in stockinette stitch Next Row: (decrease) (right side) \* K8, K2tog, K2tog; rep from \* to end = 90 sts Next Row: P across all sts Continue on to crown Updated format \~ 6/25/2012
Crown:
Row 1: (right side)\* K8, K2tog; rep from \* to end = 81 sts Rows 2, 4, 6, 8, 10, 12, 14: P across all sts Row 3: \* K7, K2tog; rep from \* to end = 72 sts Row 5: \* K6, K2tog; rep from \* to end = 63 sts Row 7: \* K5, K2tog; rep from \* to end = 54 sts Row 9: \* K4, K2tog; rep from \* to end = 45 sts Row 11: \* K3, K2tog; rep from \* to end = 36 sts Row 13: \* K2, K2tog; rep from \* to end = 27 sts Row 15: \* K1, K2tog; rep from \* to end = 18 sts Row 16: \* P2tog; rep from \* to end = 9 sts To Complete:Break yarn and thread through remaining stitches, drawing up firmly and fasten securely. Join seam.Thread ribbon through eyelet row starting at desired side.Fasten and form a bow. Weave in yarn breaks
Caution:
Please be extra cautious of accidental choking on ribbon if presented to young ones. Copyright: Please respect my designer rights, and as such the copyright of this pattern will always remain with me; it's text, photos copyright 2011 Debonair Designs. Pattern must not be duplicated and sold without the author's permission. Feel free to use this pattern for your knitting pleasure, a courtesy acknowledgment would be greatly appreciated and welcomed.
Pattern Support:
Pleasefeel free to contact me with your comments and/orquestions Email: debonair@tekayintl.com

Be sure to browse more knitting patterns for dolls from the needles of Debonair Designs, created for your knitting pleasure, and designed with your dolls ease of dressing in mind \~ enjoy


