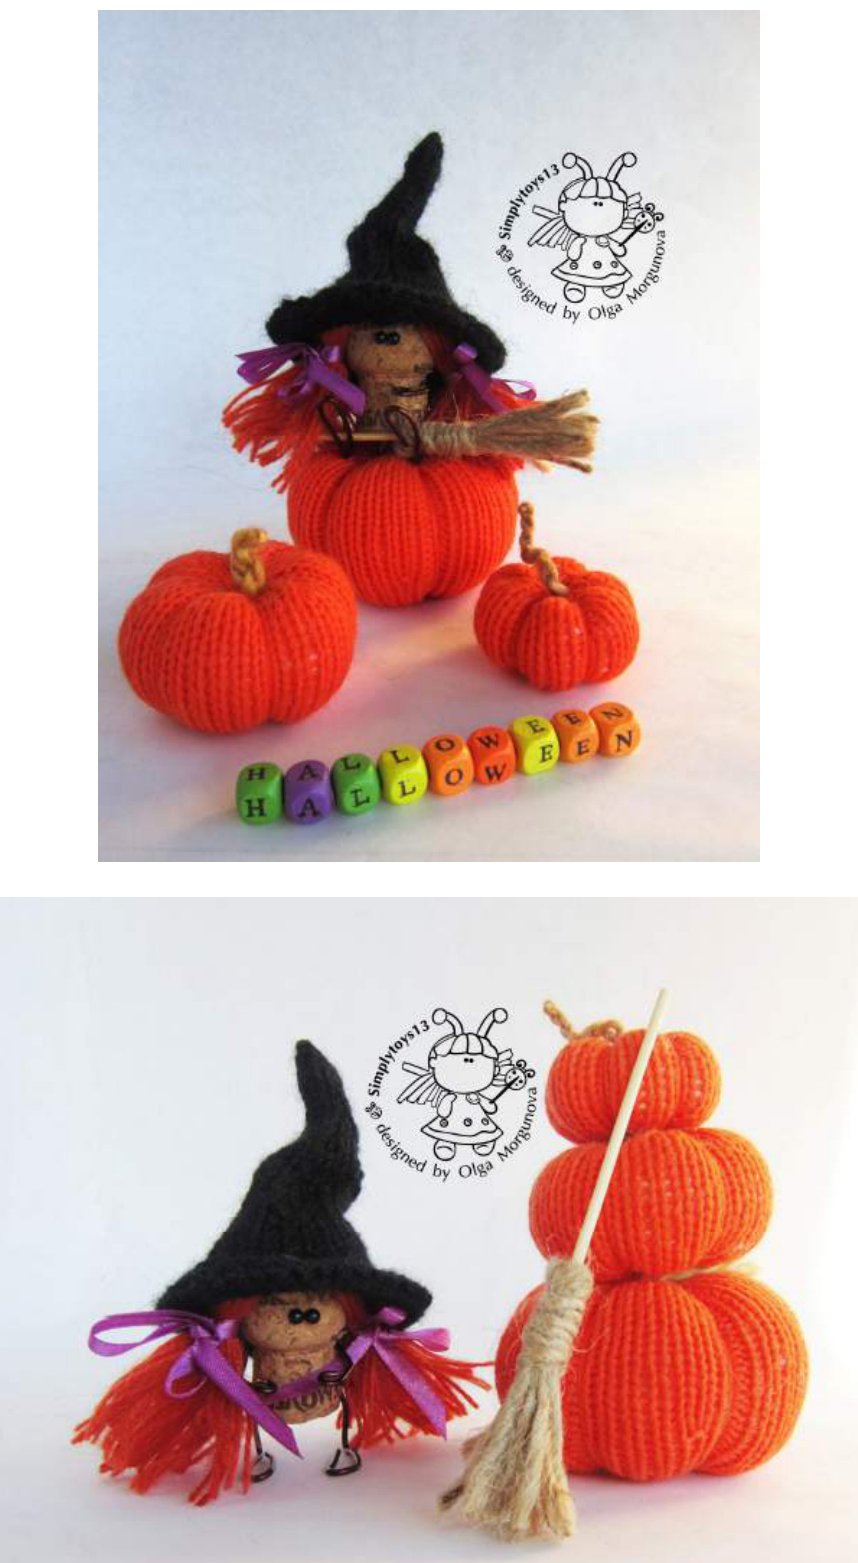
Young Witch and 3 Pumpkins - easy knitting pattern
Designed by Olga Morgunova
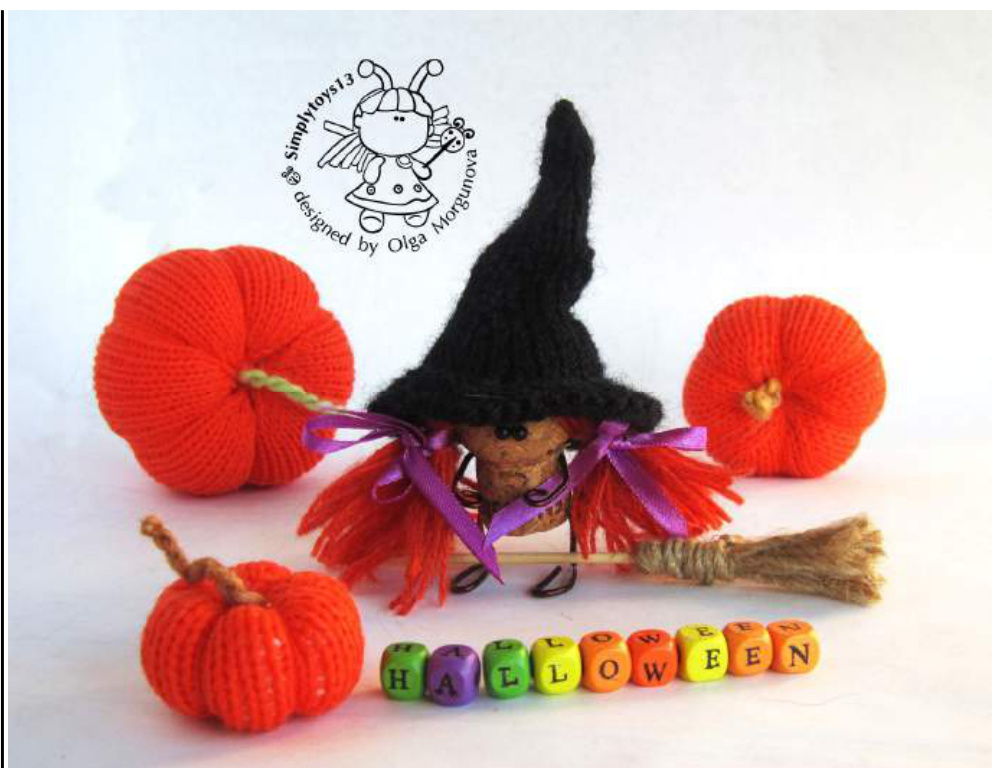
Happy Halloween! I hope that young witch and 3 pumpkins will please you, your friends and acquaintances! Will give you a good mood and positive charge. antasy, champagne corks, wire and yarn will help to create You can use the young witch and 3 pumpkins to decorate the Halloween table. Toys made of cork. The size of the little man at approximately 4,3 inches (11 cm) tall. Big pumpkin diameter 3,15 inches(8 cM) Midi pumpkin diameter 2,36 inches(6 cm) Mini pumpkin diameter 1,77 inches(4,5 cM).
Abbreviations
K = knit P = purl Sts = stitches K2tog = knit 2 together CO = cast on RND = round St st = stockinette stitch Odd-numbered rows - knit. Even - numbered rows - purl.
Materials needed
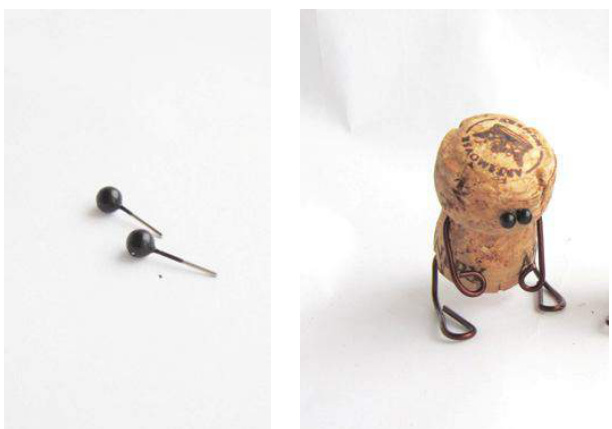
●1 cork from champagne Wire segments 3,14 in (8 cm) and 5,9 in (15 cm) - for the hands and feet. 4 double-pointed needles in a size suitable for the yarn weight you are using. I recommend using needles a size or two smaller than the yarn calls for, to produce a firm fabric. I used Needles size 2 (3mm) Orange yarn for a pumpkin Orange yarn for a hare A little black yarn for hats . Plastic eyes or 2 pins Stitch holder Awl Needle nose pliers Broom sticks length 10cm Jute for brooms
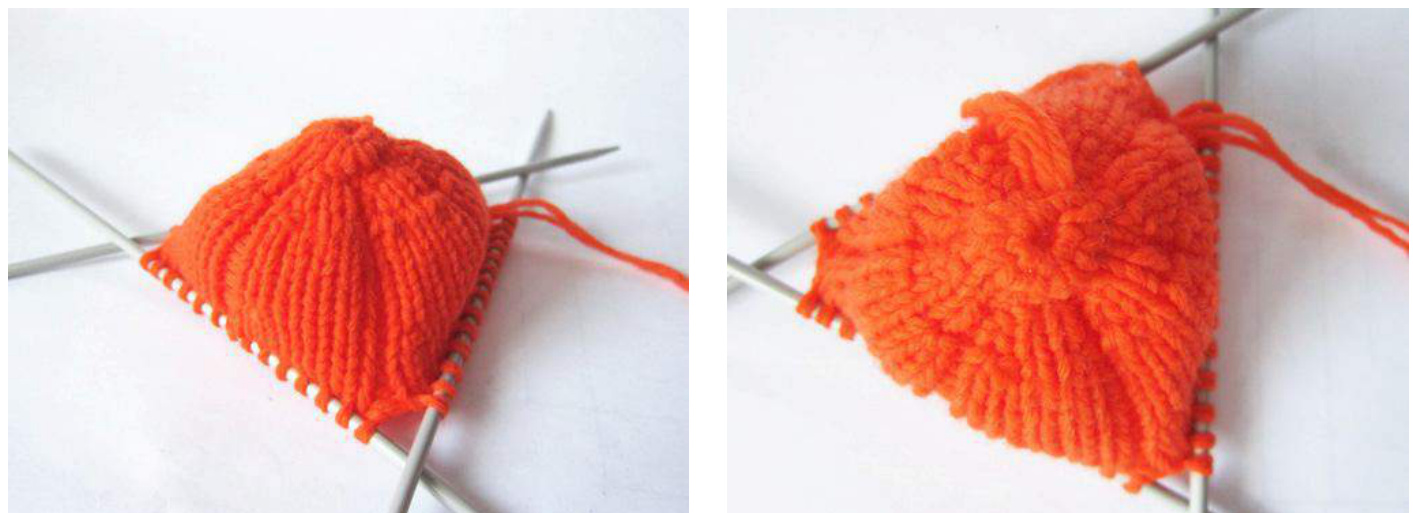
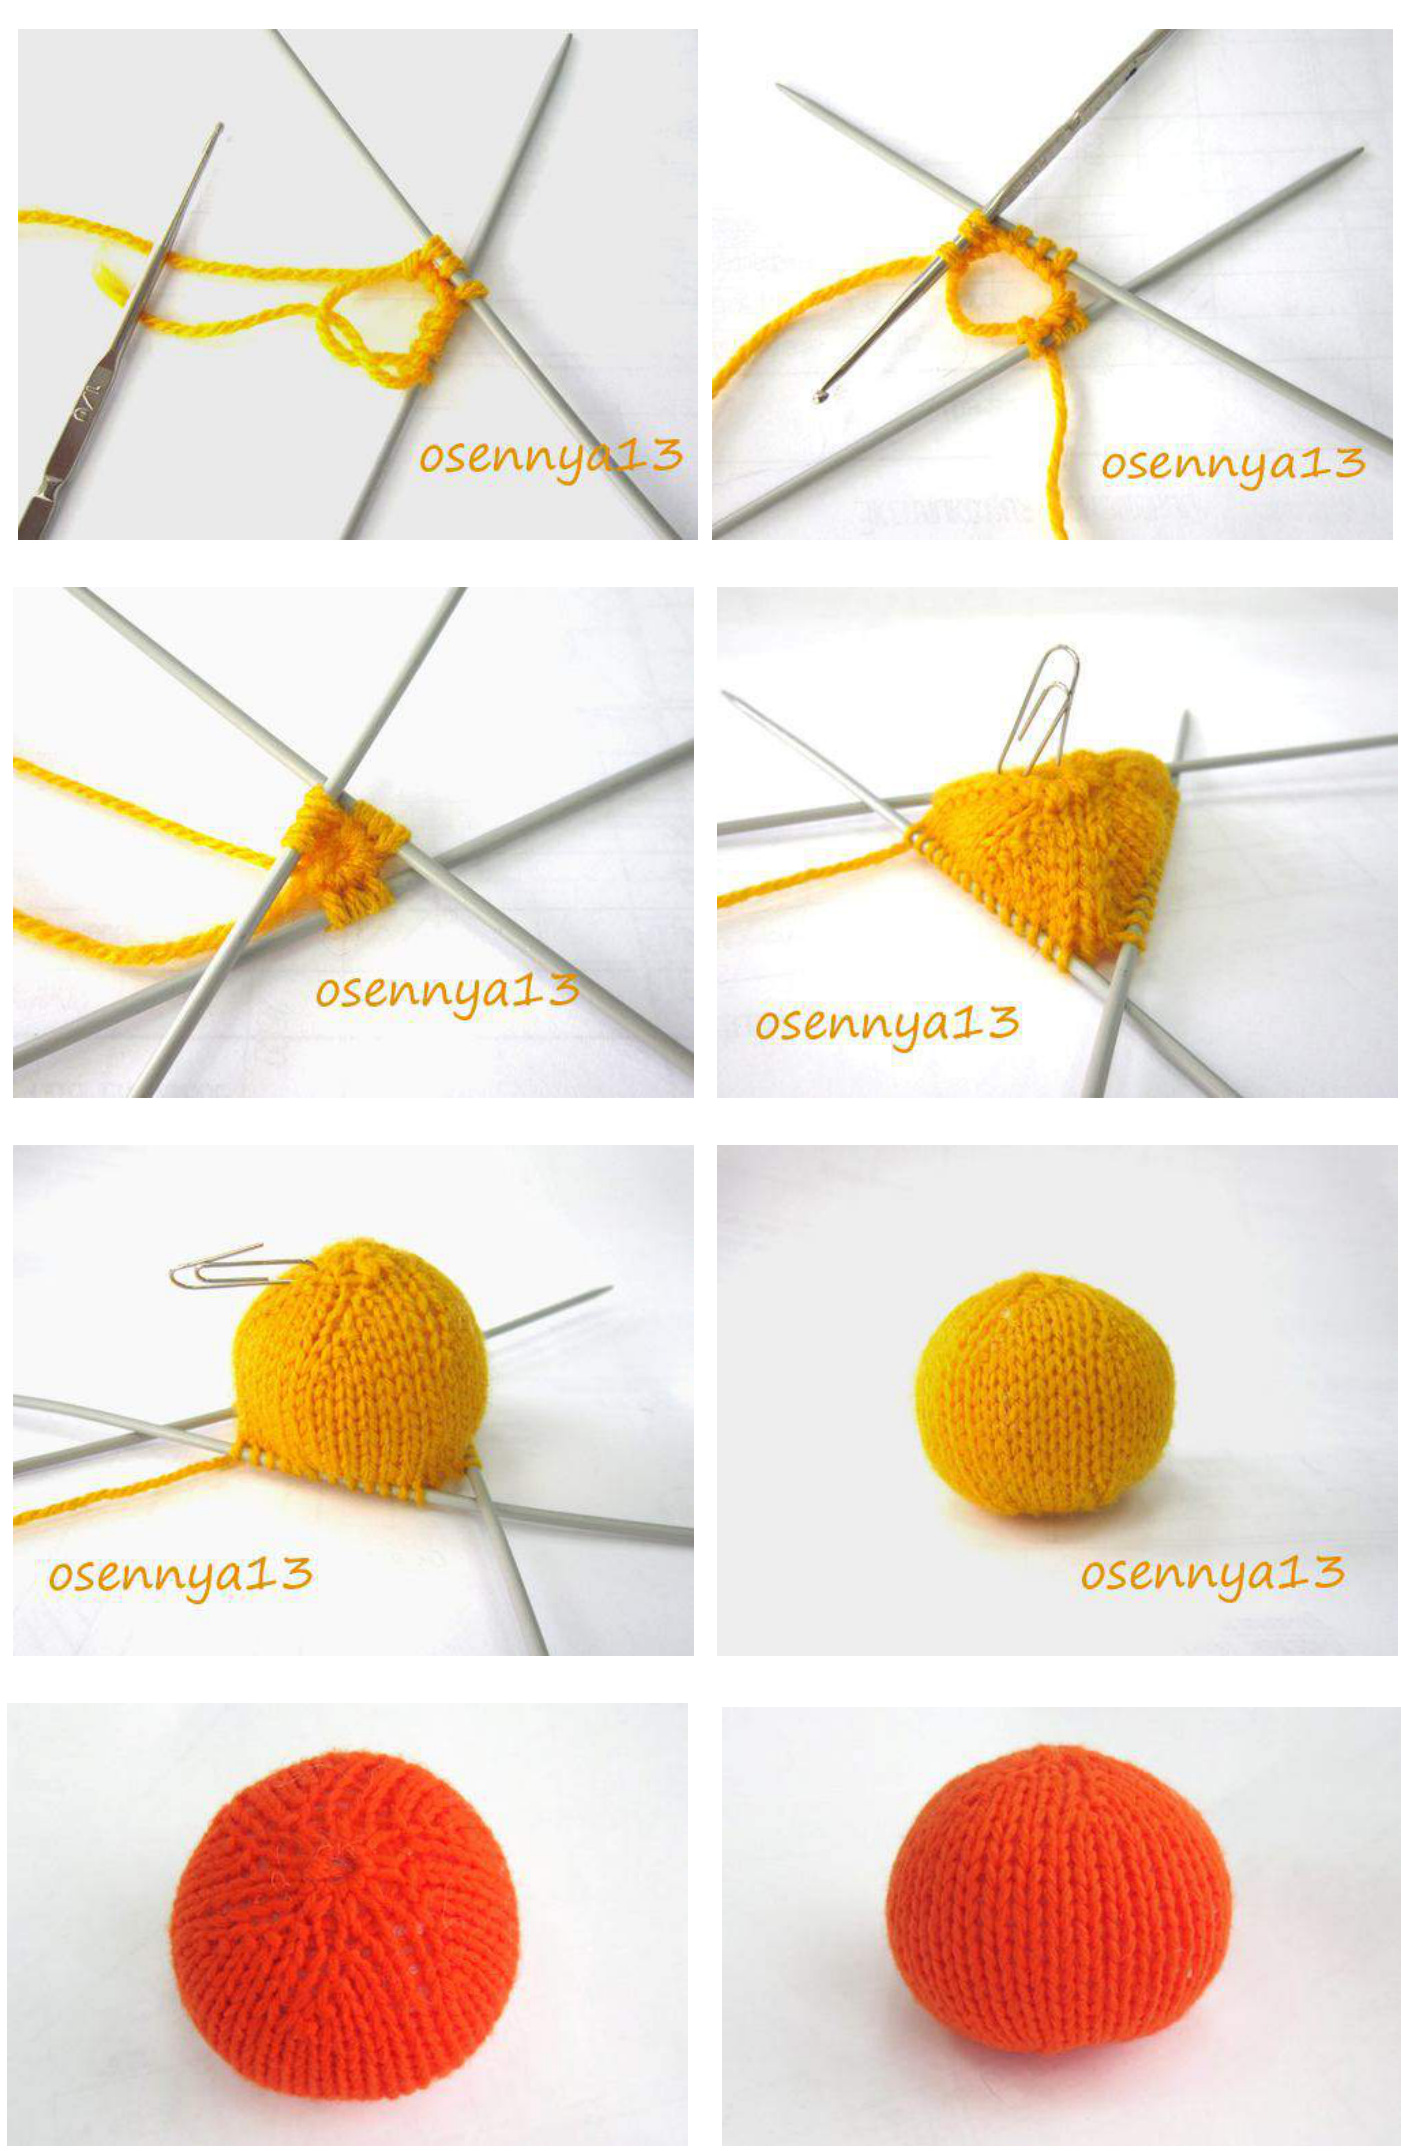
Hat
Thes is knitted round. All time I am working in the round. This help avoids the ugly seams . You can use the yarn in any color you prefer.
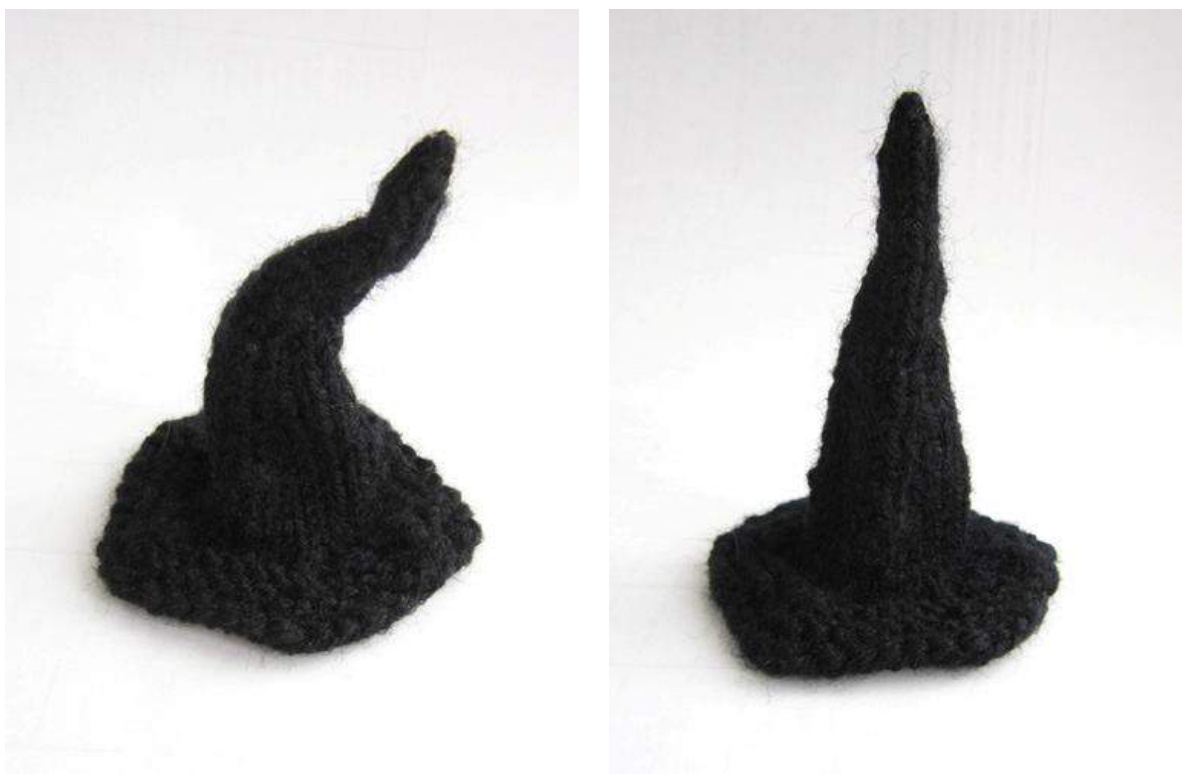
Cast on 40 stitches. Distribute among 3 needles and join to work in the round, being careful not to twist sts. Place marker. RND2: P all (40 sts ) RND4: P all (35 sts ) RND5: K2tog, K5 (5times ) (30 sts )
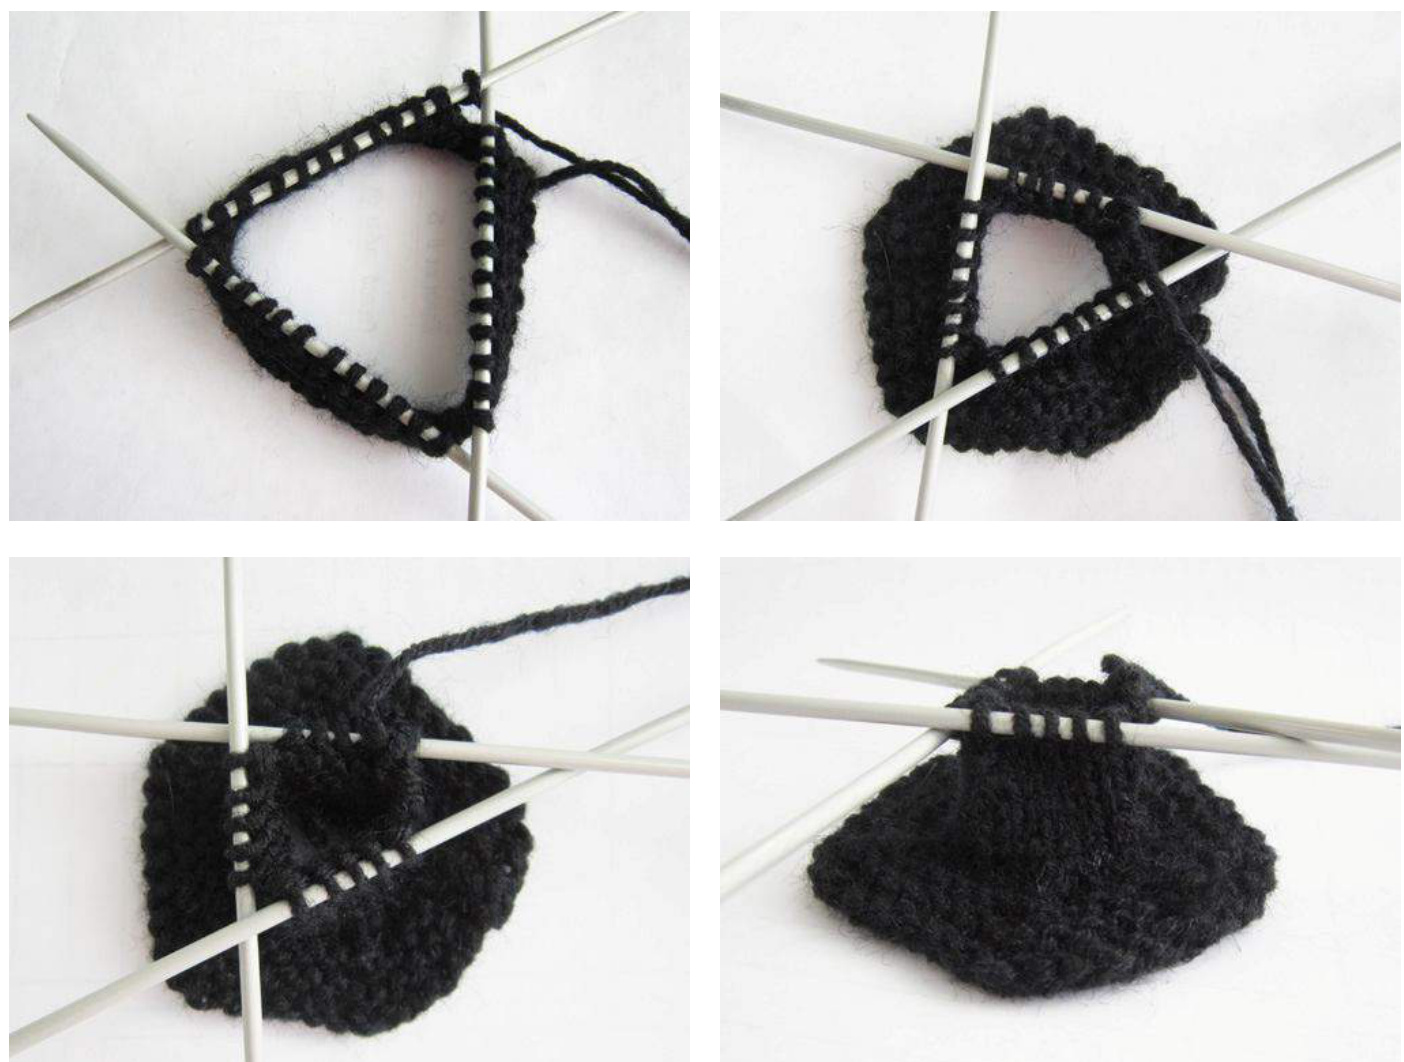
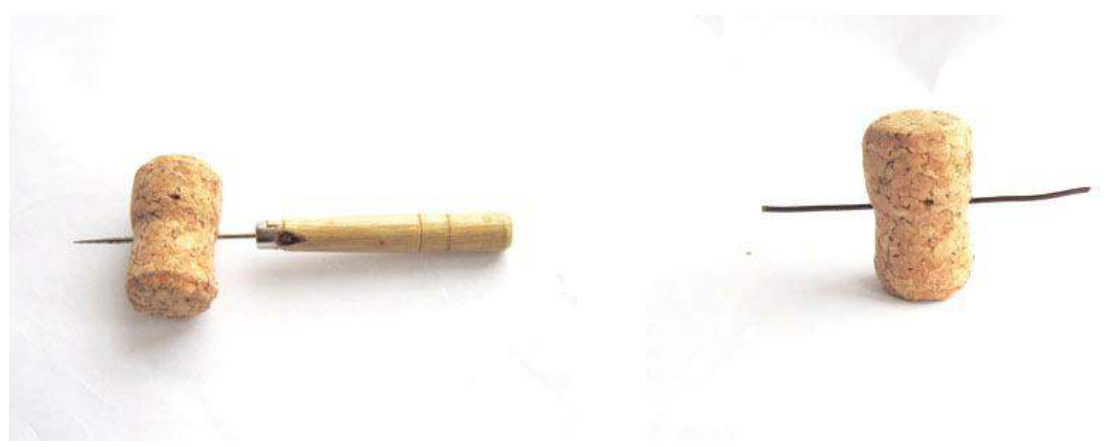
RND20: K2t0g, K3 (3times ) (12 sts ) RND21-23: 3 Rnds K all (12 sts ) RND24: K2tog, K2 (3times ) (9 sts ) RND25-27: 3 Rnds K all (9 sts ) RND28: K2tog, K1 (3times ) (6 sts ) RND29-33: 5 Rnds K all (6 sts ) RND34: K2tog (3times ) (3 sts ) Cut yarn and thread through 3 remaining sts . Weave in ends. To do this,take the wire and cut two lengths of 3,14 in (8 cm) and 5,9 in (15 cm) - for the hands andfeet.
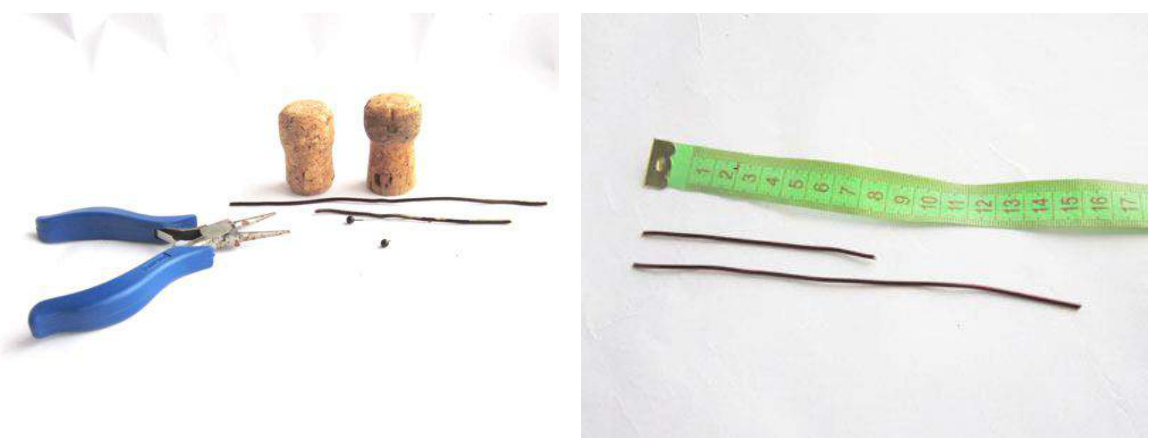
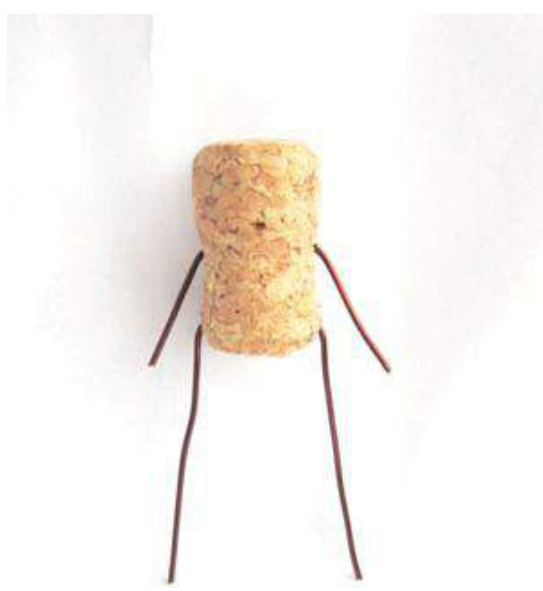
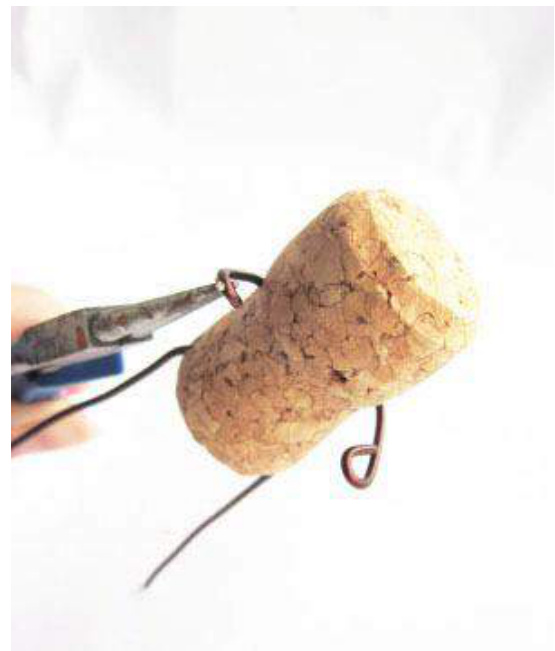
Now, an awl to make holes in the cork for pens and threading wire. Similarly, do legs.

Bend the wire at the half way shape as "n"
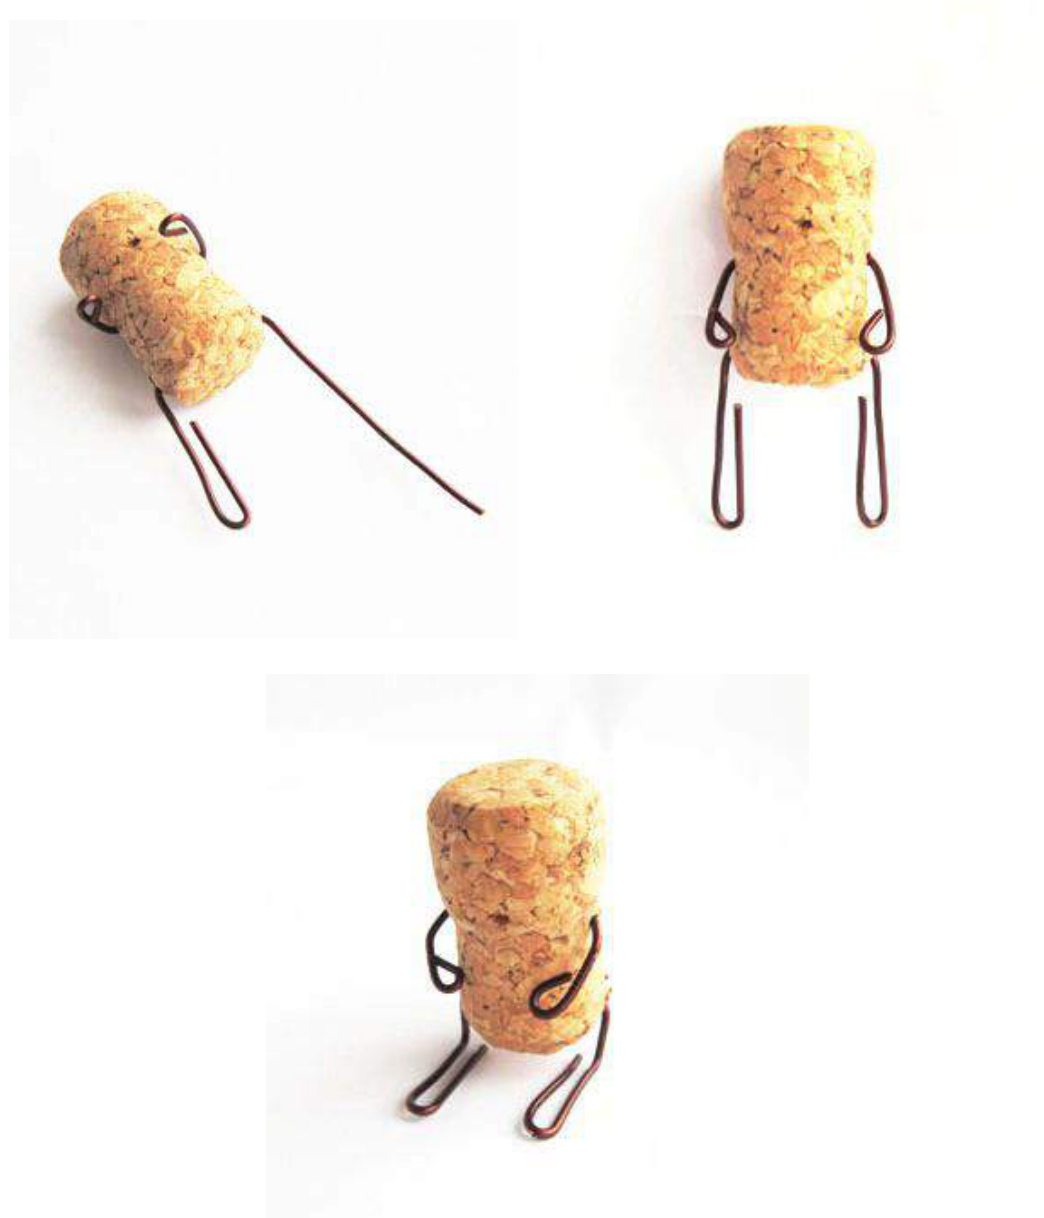
Bend the wire as shown in the picture
Bend every end in half
Making eyes. Shorten pins. Insert the pin.
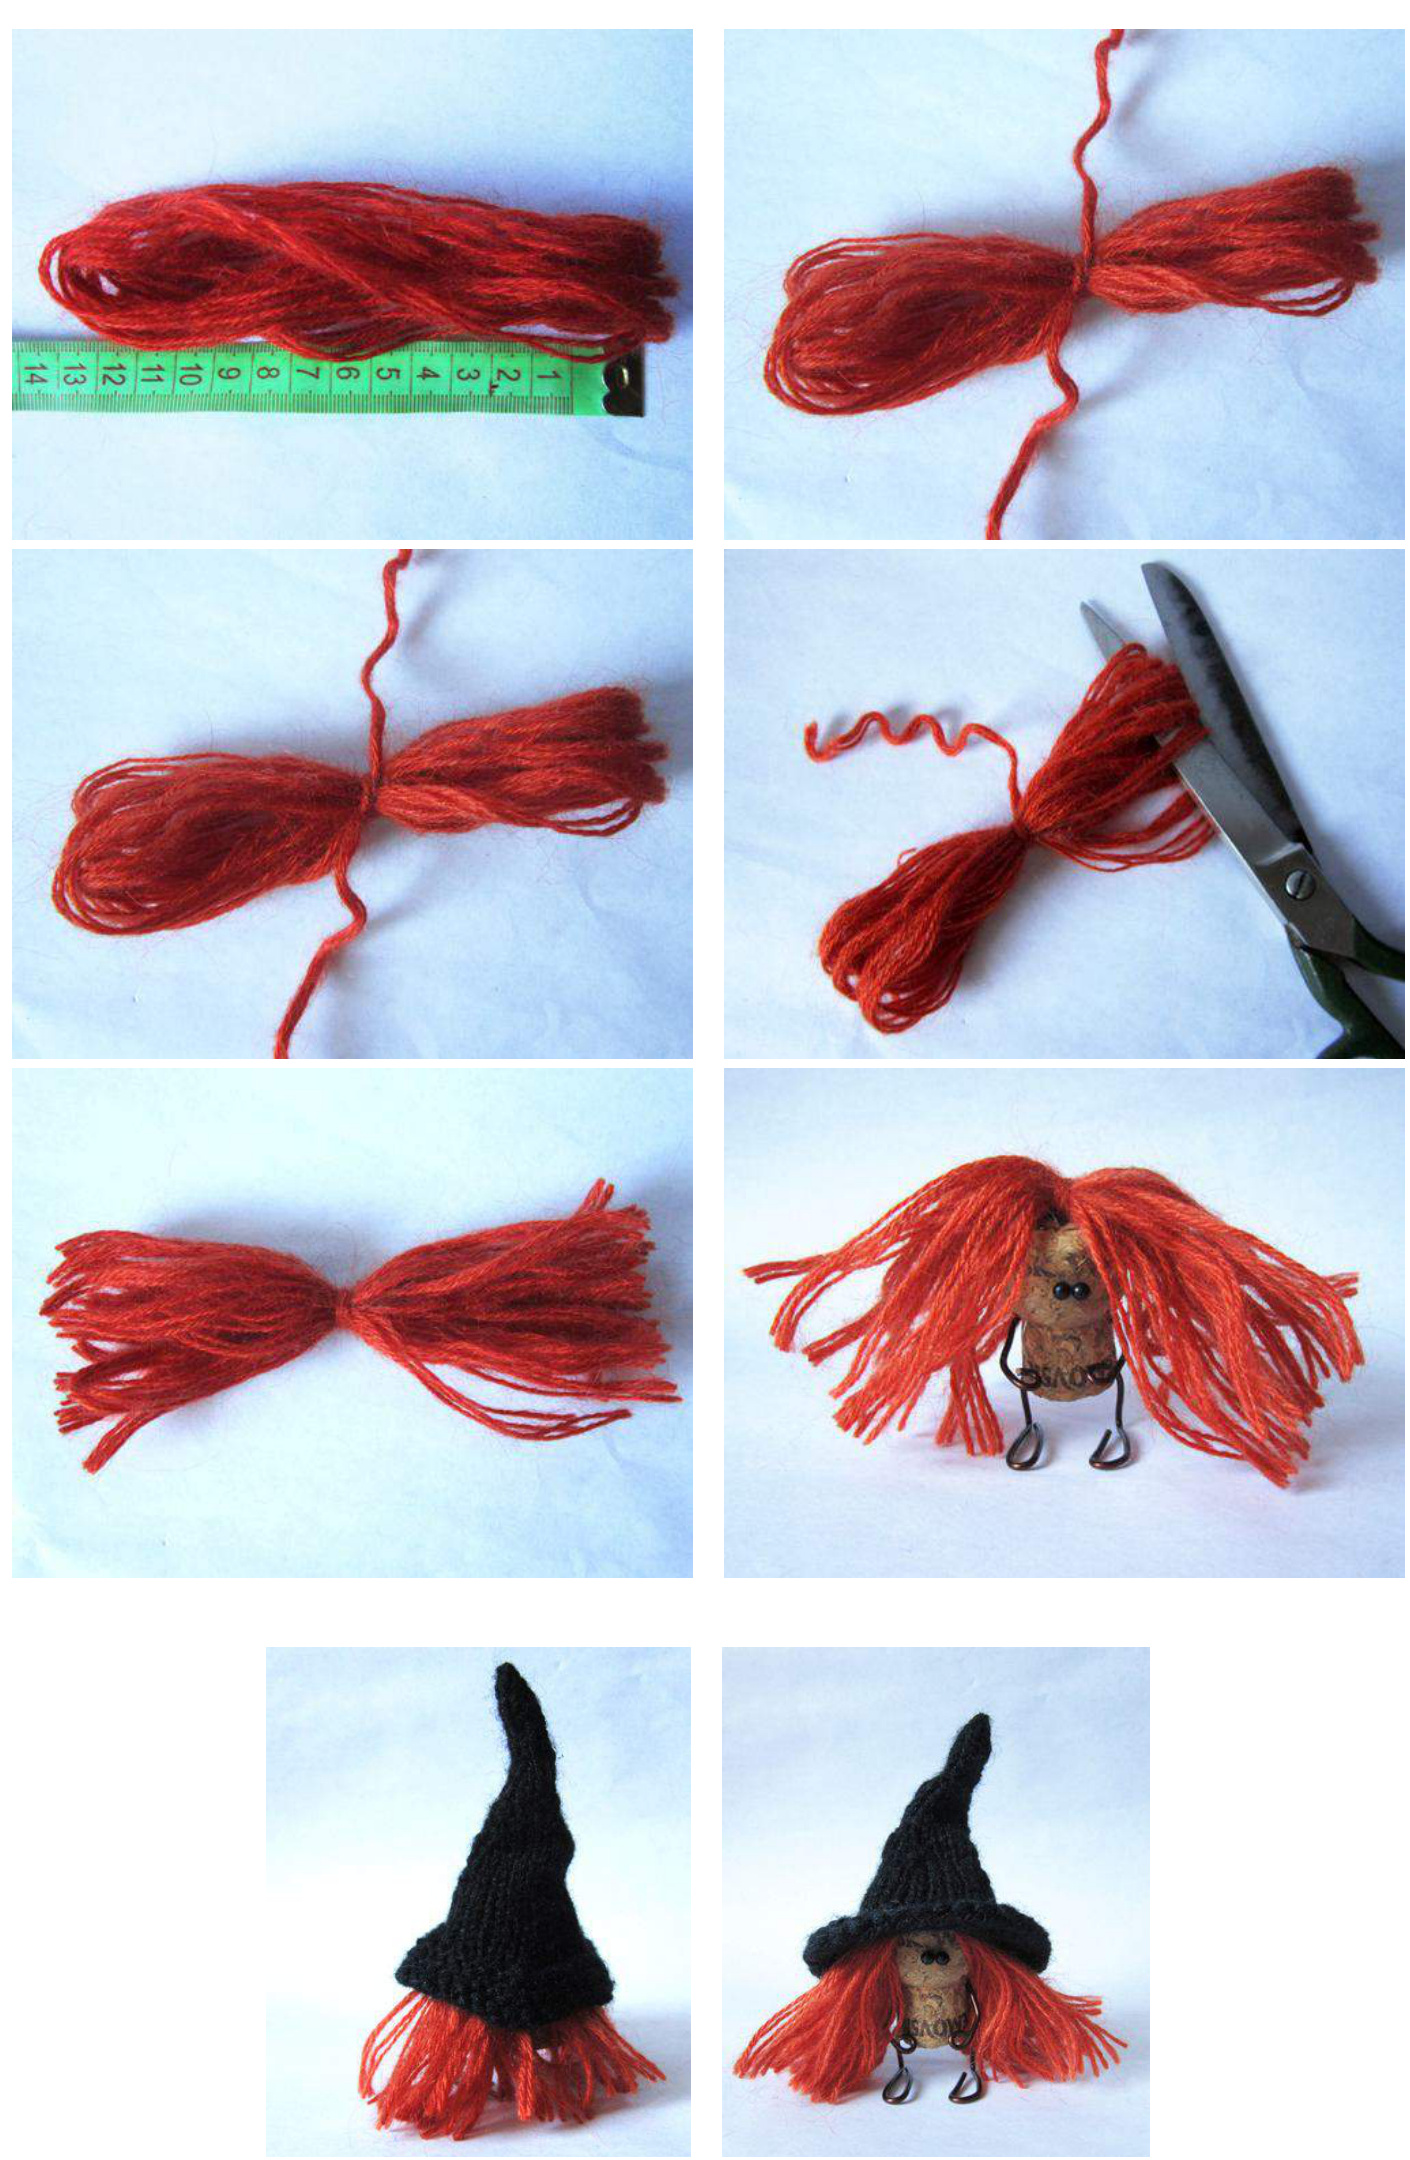
Do hair. For girls do wig. To do this, cut into yarn orange length of 5,5 in (14cm.) We pull together in the middle of the thread. Glue the head.
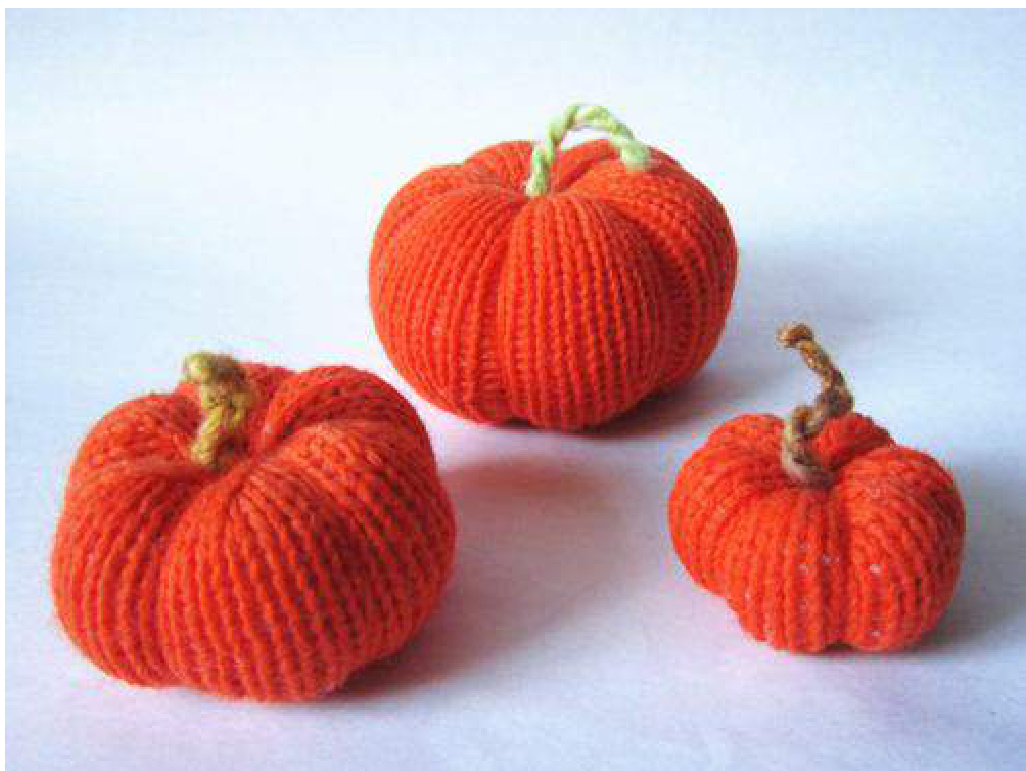
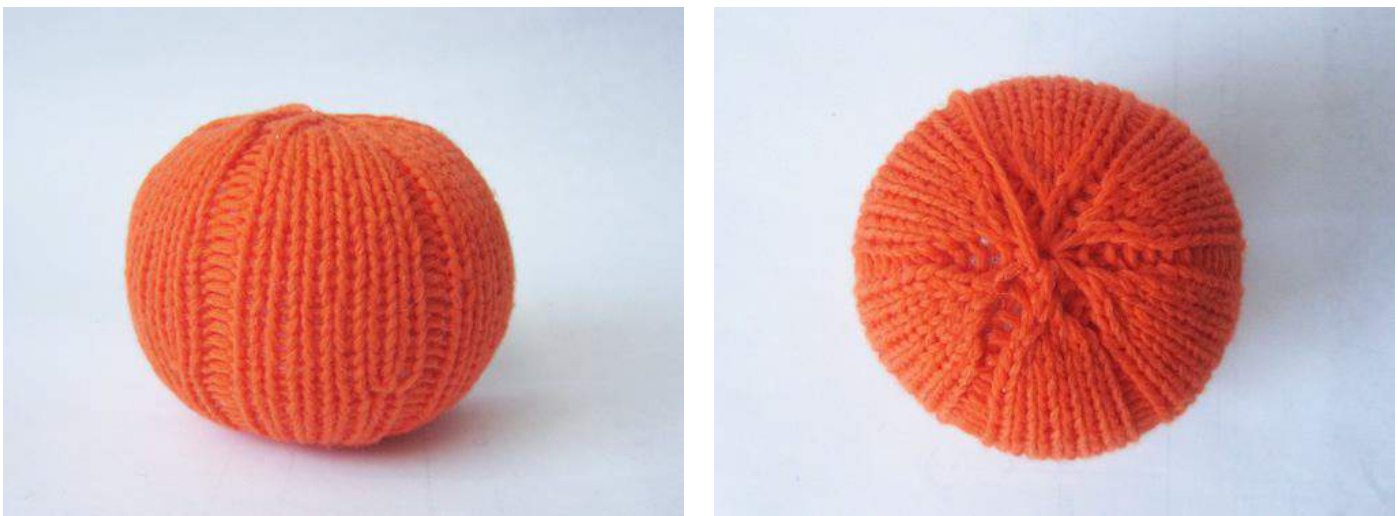
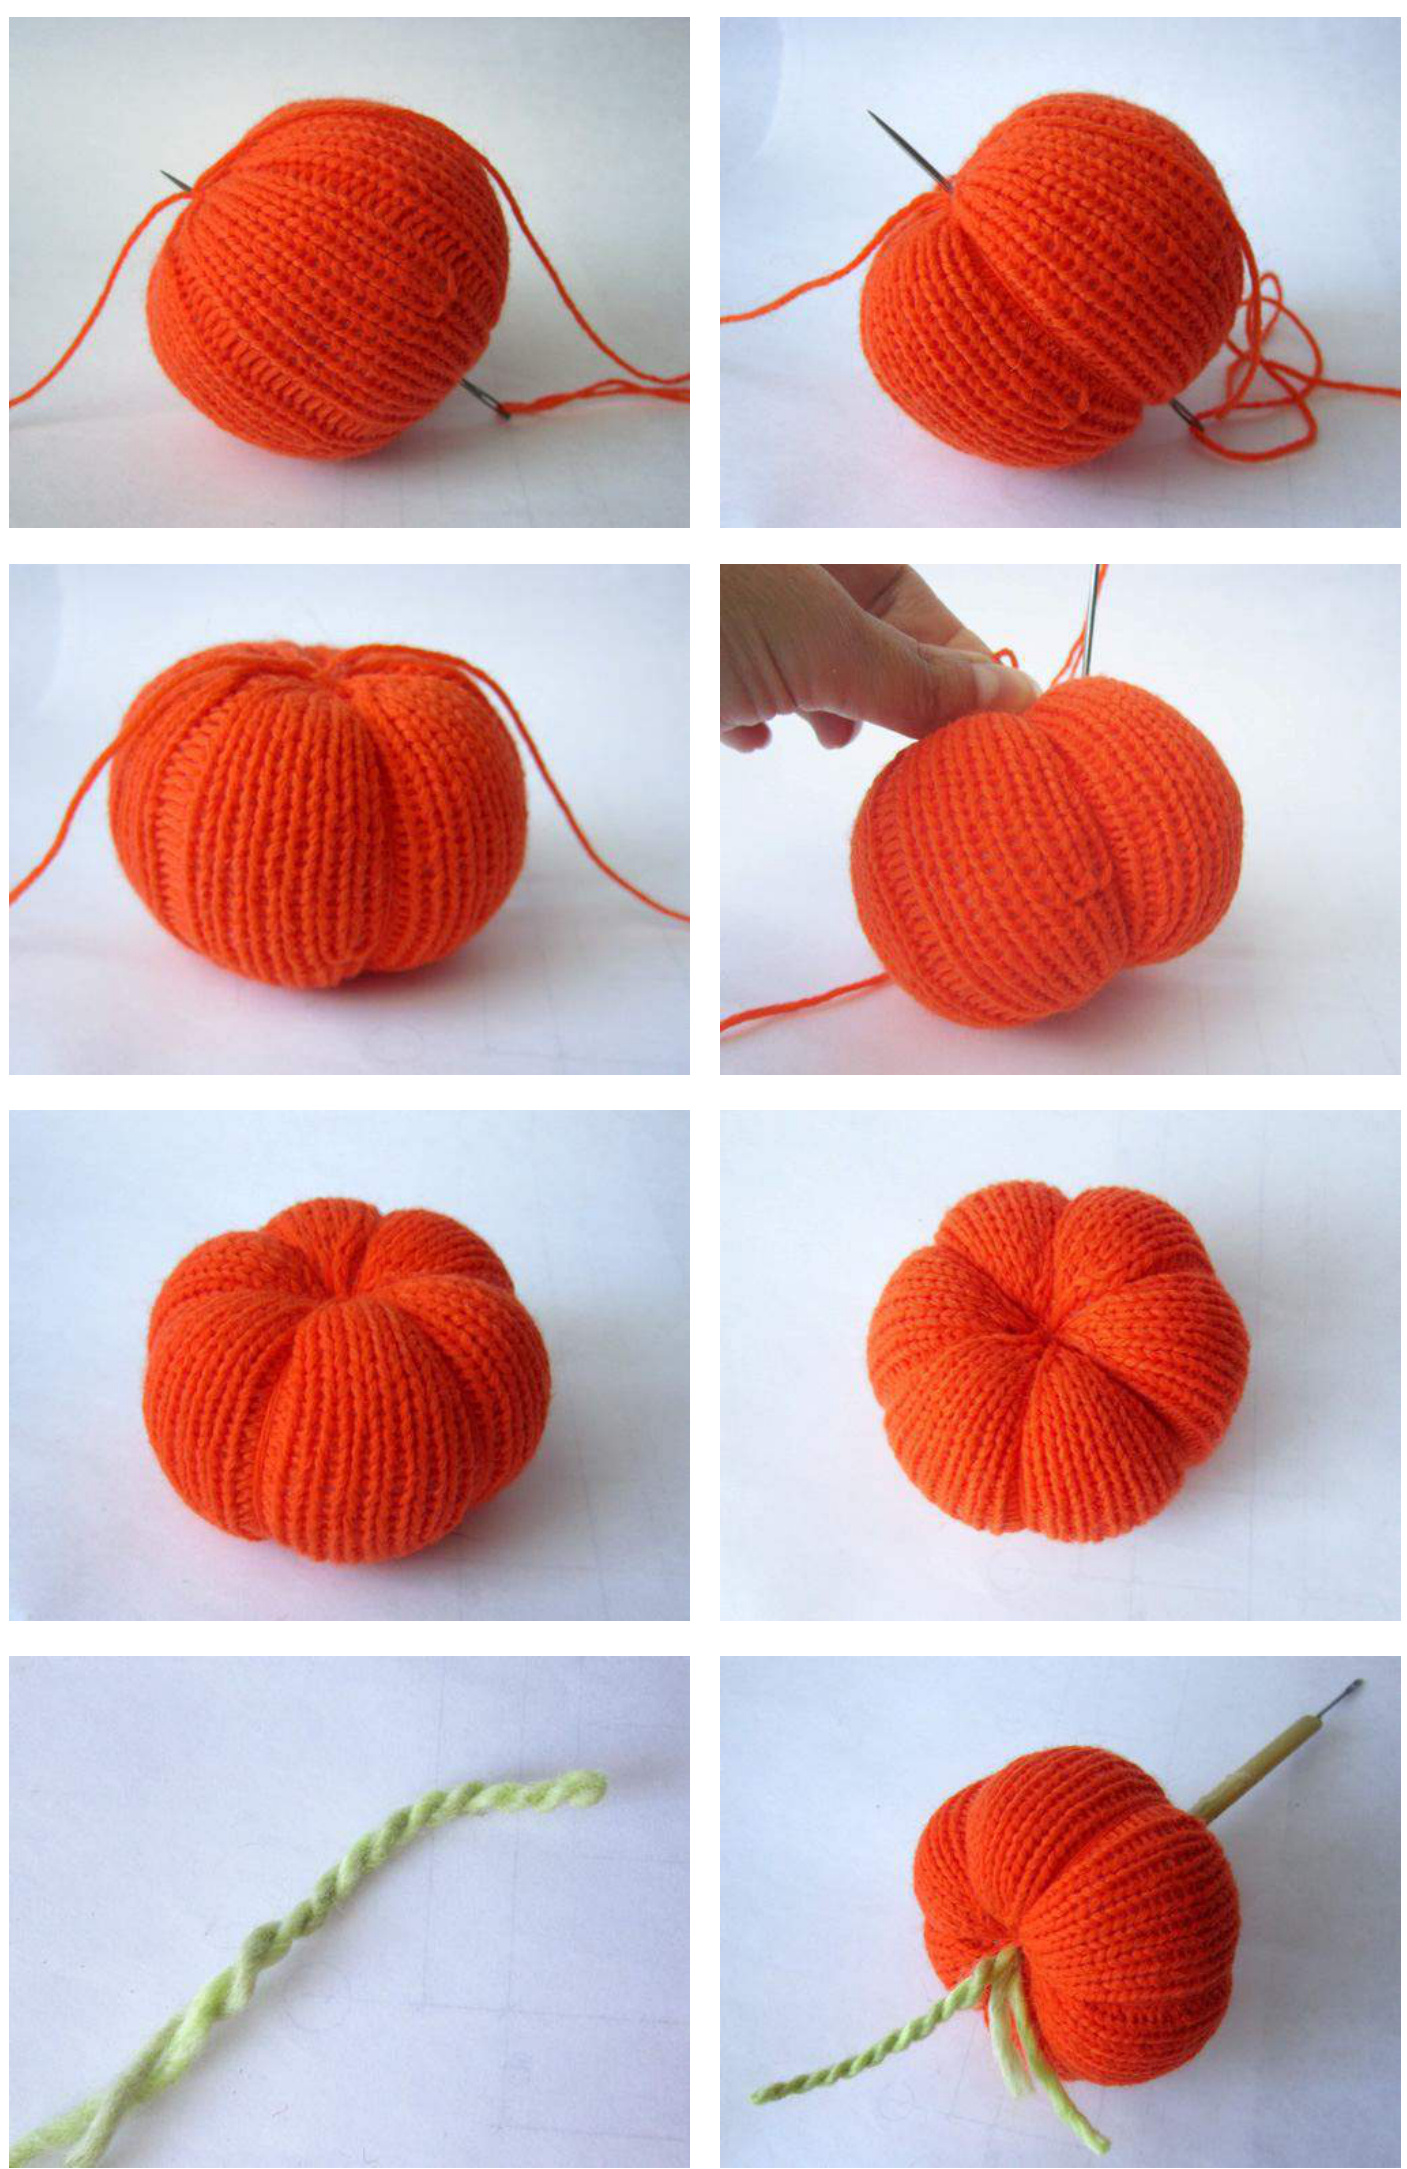
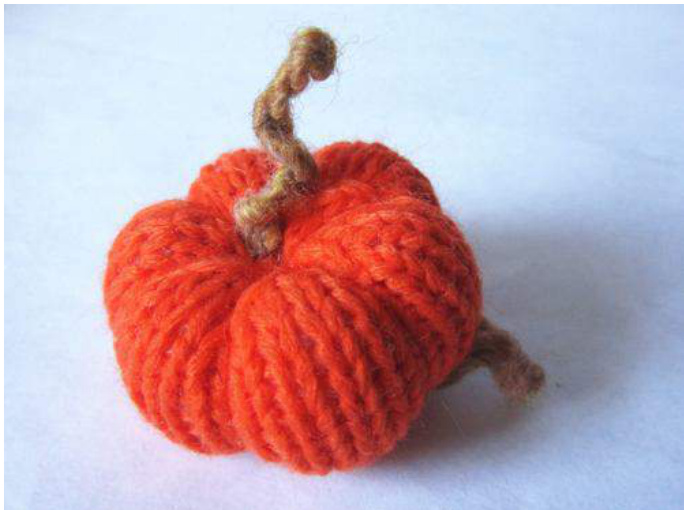
Big Pumpkin (diameter 3,15 inches(8 cM ) Knitted with orange yarn.

Cast on 9 stitches. Distribute among 3 needles and join to work in the round, being careful not to twist sts. Place marker. RND1: K all (9 sts ) RND2: Kfb , K2 ( 3times) (12 sts ) RND3: Kfb, K1 (6times) (18 sts ) RND4: Kfb, K2 (6times) (24 sts ) RND5: K3 ,P1 (6times) (24 sts ) RND6: K3,P1 (6times) (24 sts ) RND7: Kfb, K1,Kfb, P1 (6times) (36 sts ) RND8: K5, P1 (6times) (36 sts ) RND9-12: 4 Rnds K5, P1 (6times) (36 sts ) RND13: Kfb, K4, P1 (6times) ( 42 sts ) RND14: K6, P1 (6times) ( 42 sts ) RND15-32: 18 Rnds K6, P1 (6times) (42 st
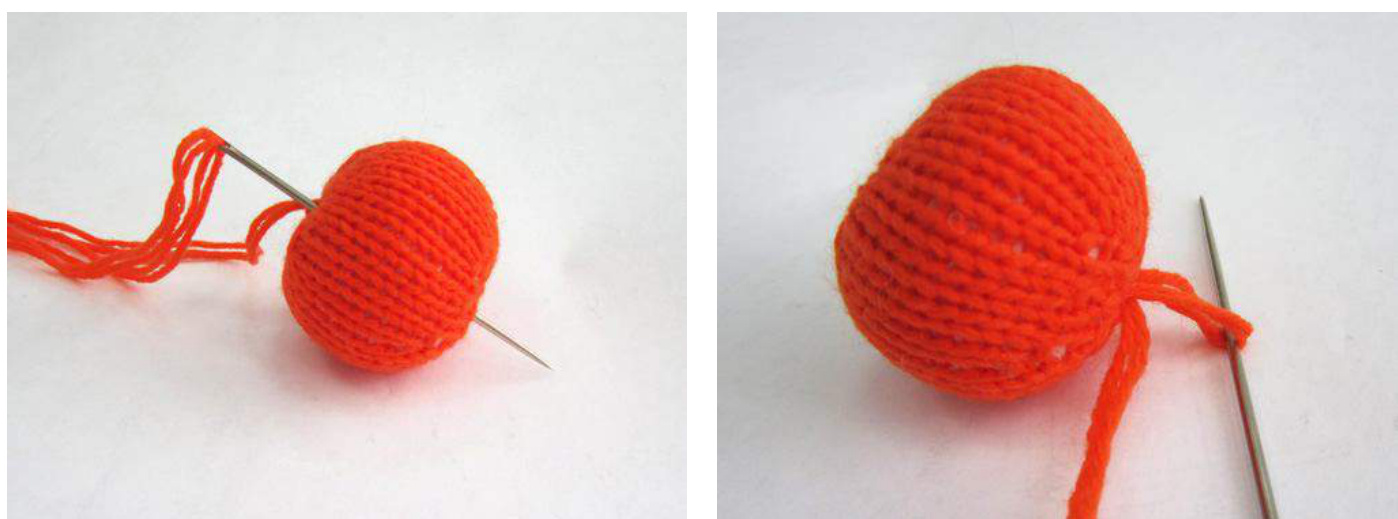
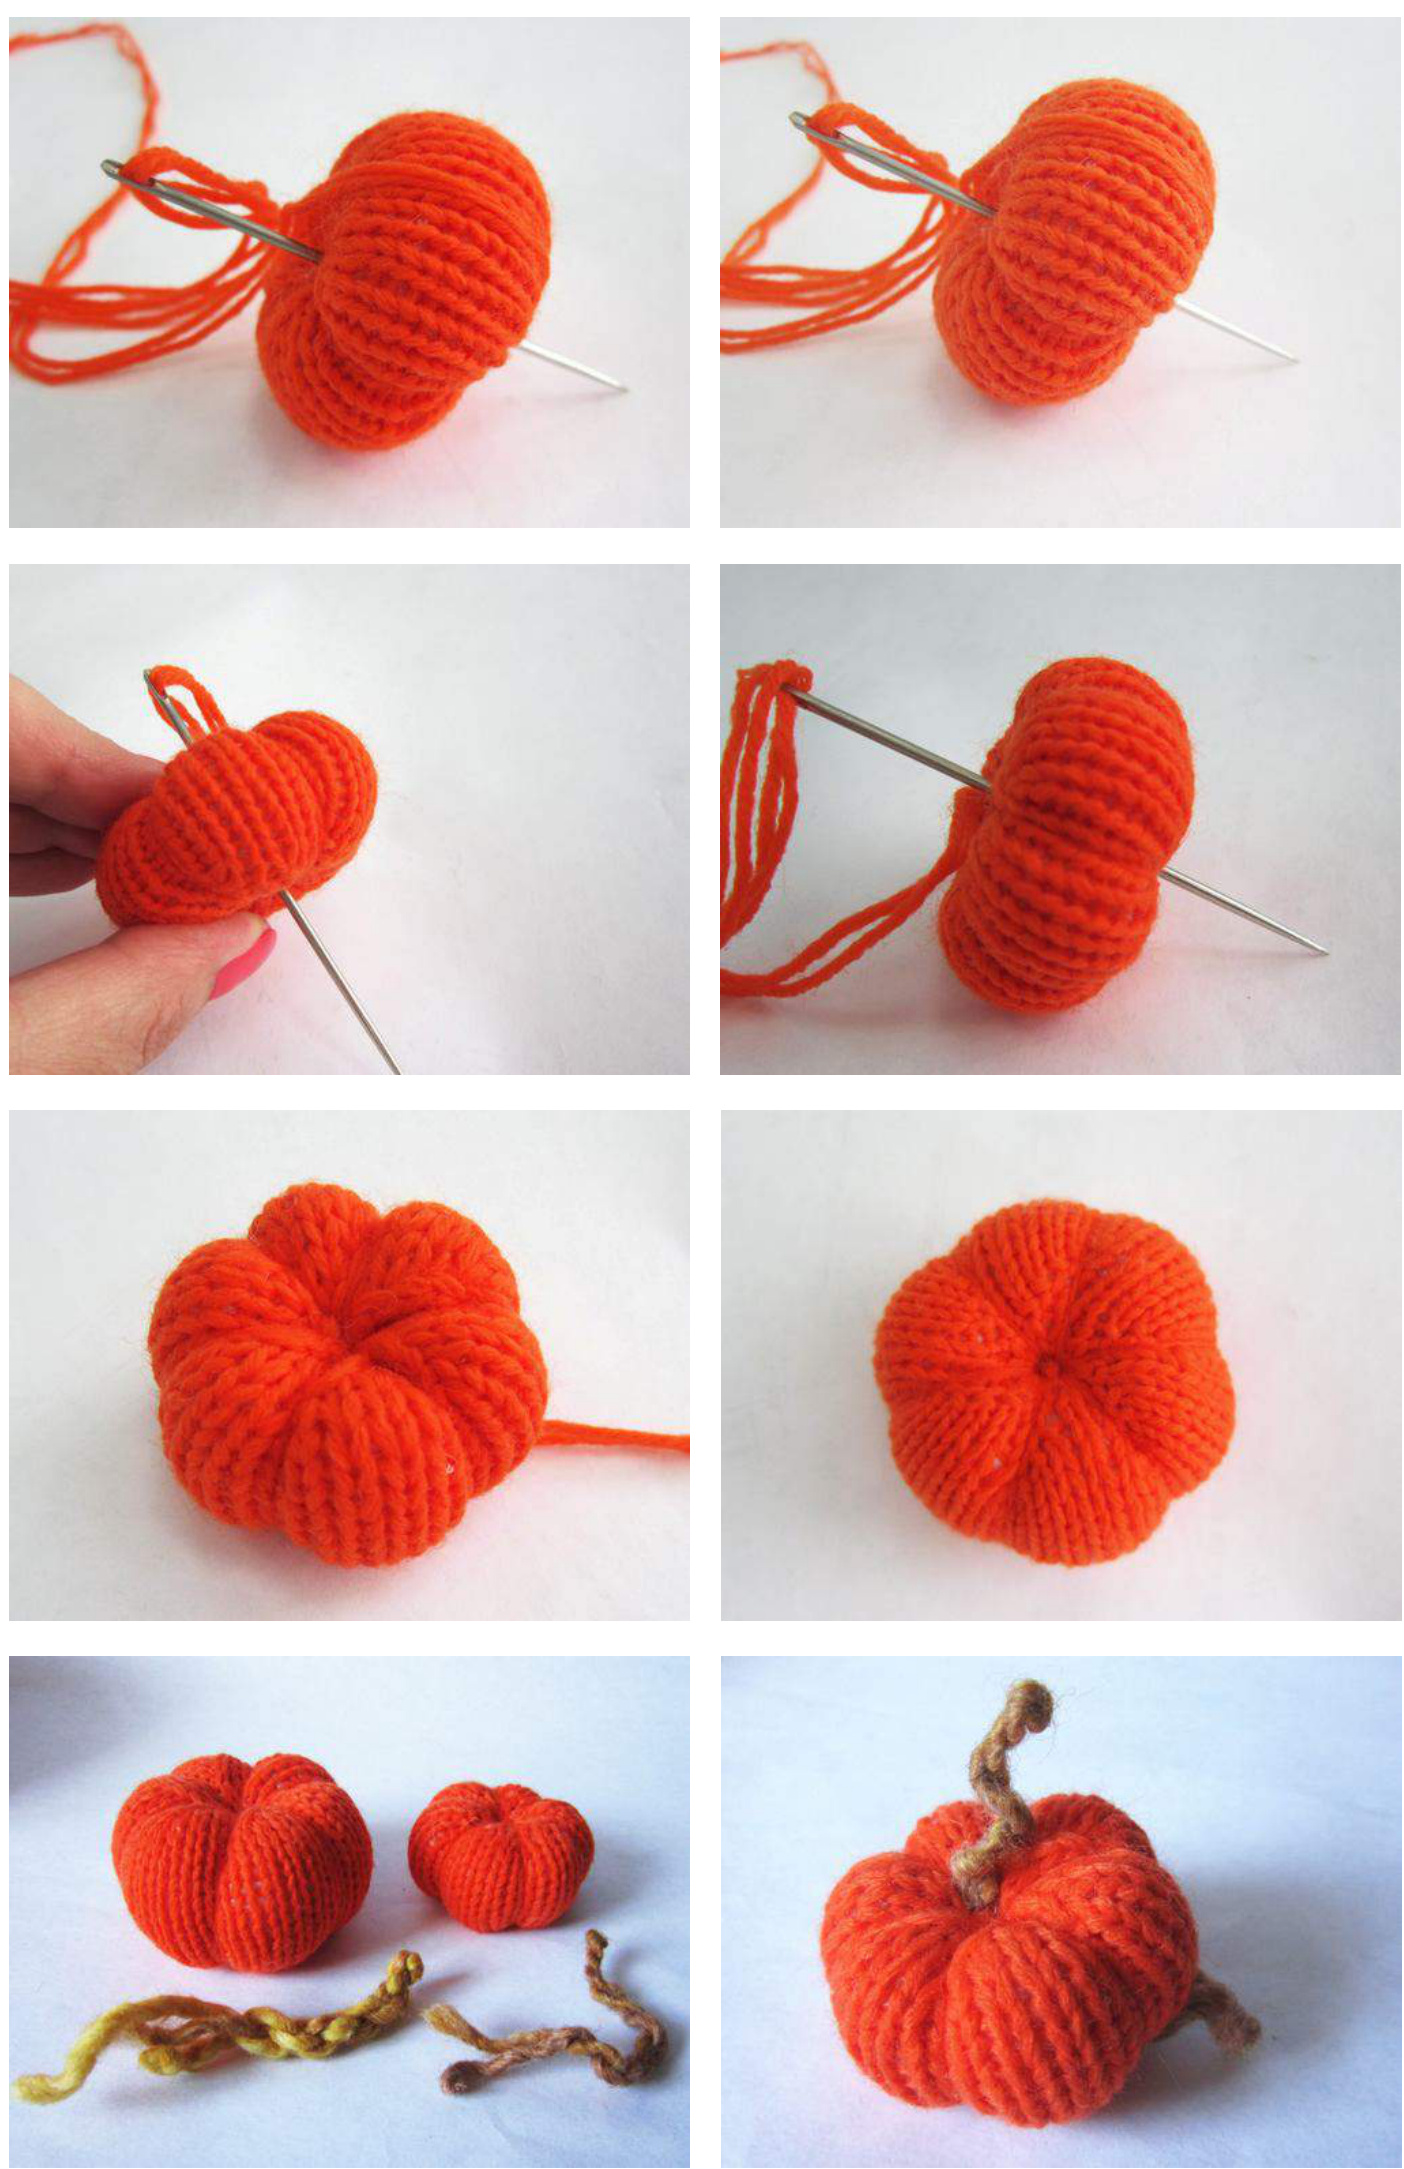
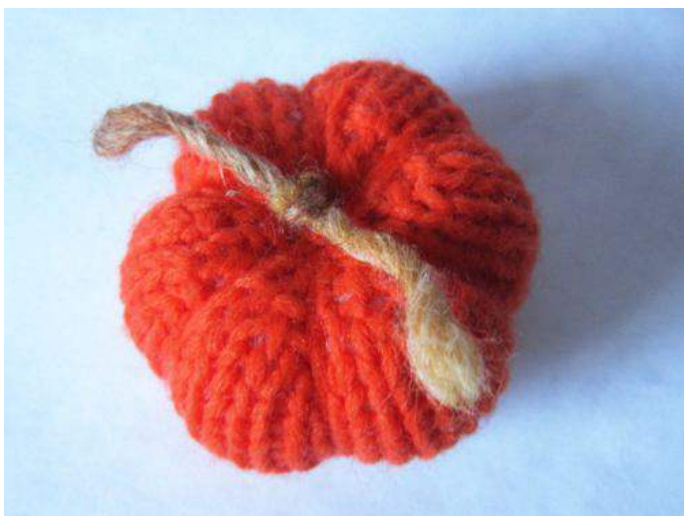
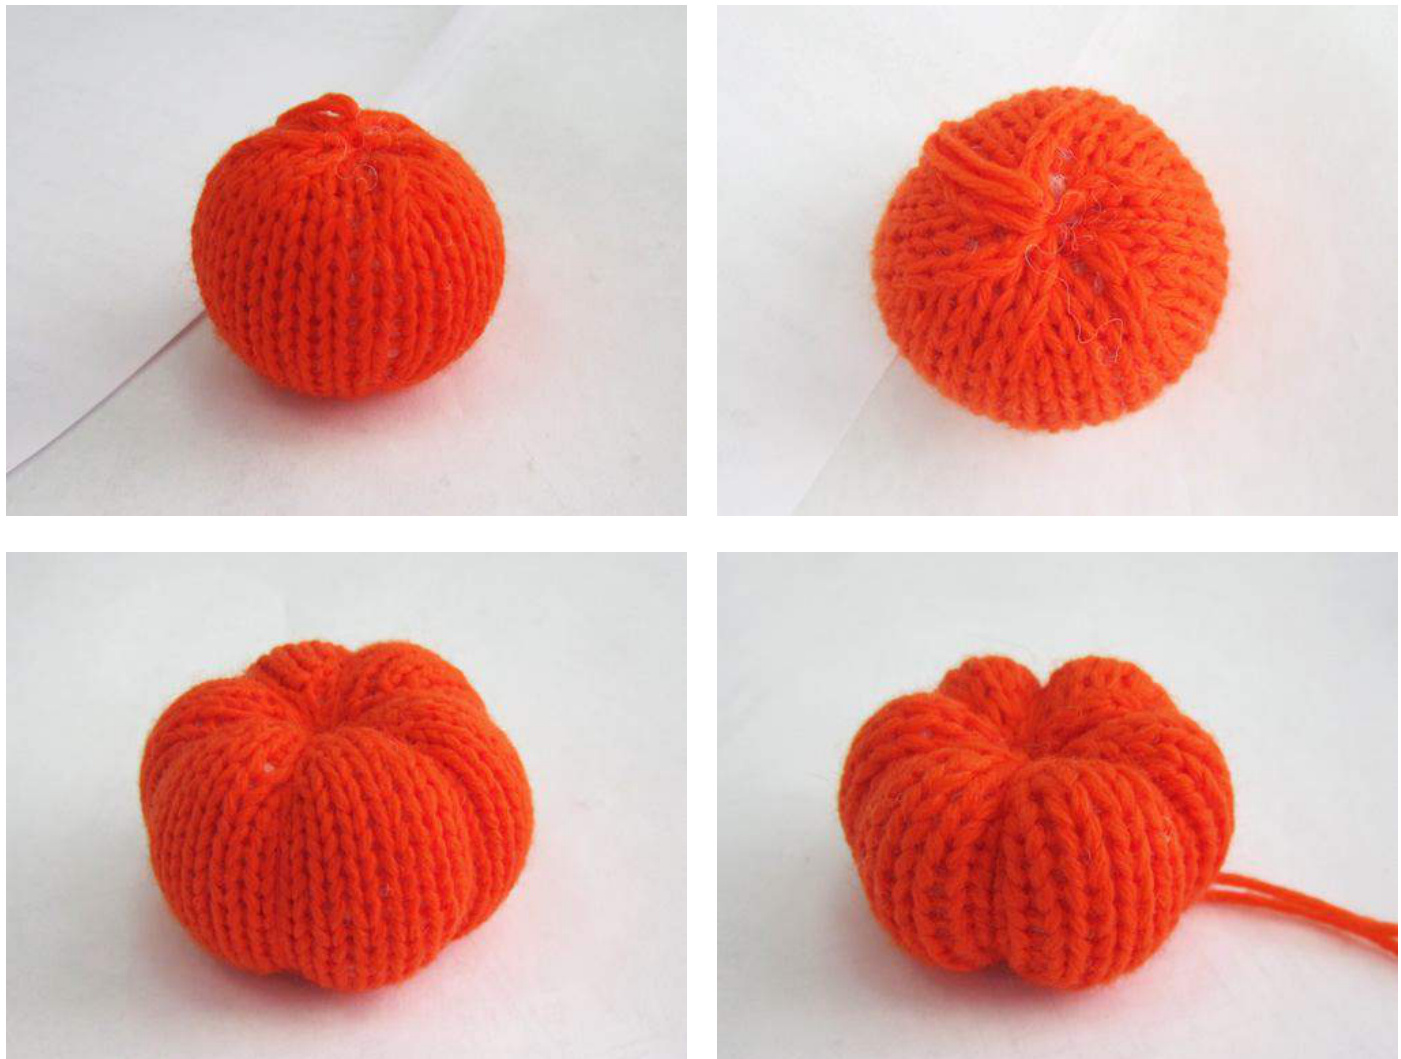
RND33: K2tog, K2, K2tog, P1 (6 times) (30 sts ) RND34: K2tog, K2tog, P1 (6 times) (18 sts ) RND35: K2tog (6times) (9 sts ) Cut yarn and thread through 9 remaining sts . Weave in ends. Entwine thread, as shown in the picture. This will pull the pumpkin into segments. From the green yarn to make a ponytail pumpkin.

Midi pumpkin diameter 2,36 inches(6 cM)
Knitted with orange yarn. Cast on 9 stitches. Distribute among 3 needles and join to work in the round, being careful not to twist sts. Place marker. Knit with neck.
[RND1: K all (9 sts ) RND2: Kfb, K2 (3times) (12 sts ) RND3: Kfb, K1 (6times) (18 sts ) RND4: Kfb, K2 (6times) (24 sts ) Work decrease rounds, adding stuffing as you go Work decrease rounds, adding stuffing as you go Entwine thread, as shown in the picture. This will pull the pumpkin into segments.
Mini pumpkin diameter 1,77 inches(4,5 cM). Knitted with orange yarn.

Cast on 9 stitches. Distribute among 3 needles and join to work in the round, being careful not to twist sts. Place marker. Knit with neck. RND1: K all (9 sts ) RND2: Kfb, K2 (3times) (12 sts ) RND3: K1, Kfb, Kfb, K1 (3times) (18 sts ) RND4: Kfb, K2 (6times) (24 sts ) Work decrease rounds, adding stuffing as you go Work decrease rounds, adding stuffing as you go Cut yarn and thread through 6 remaining sts.
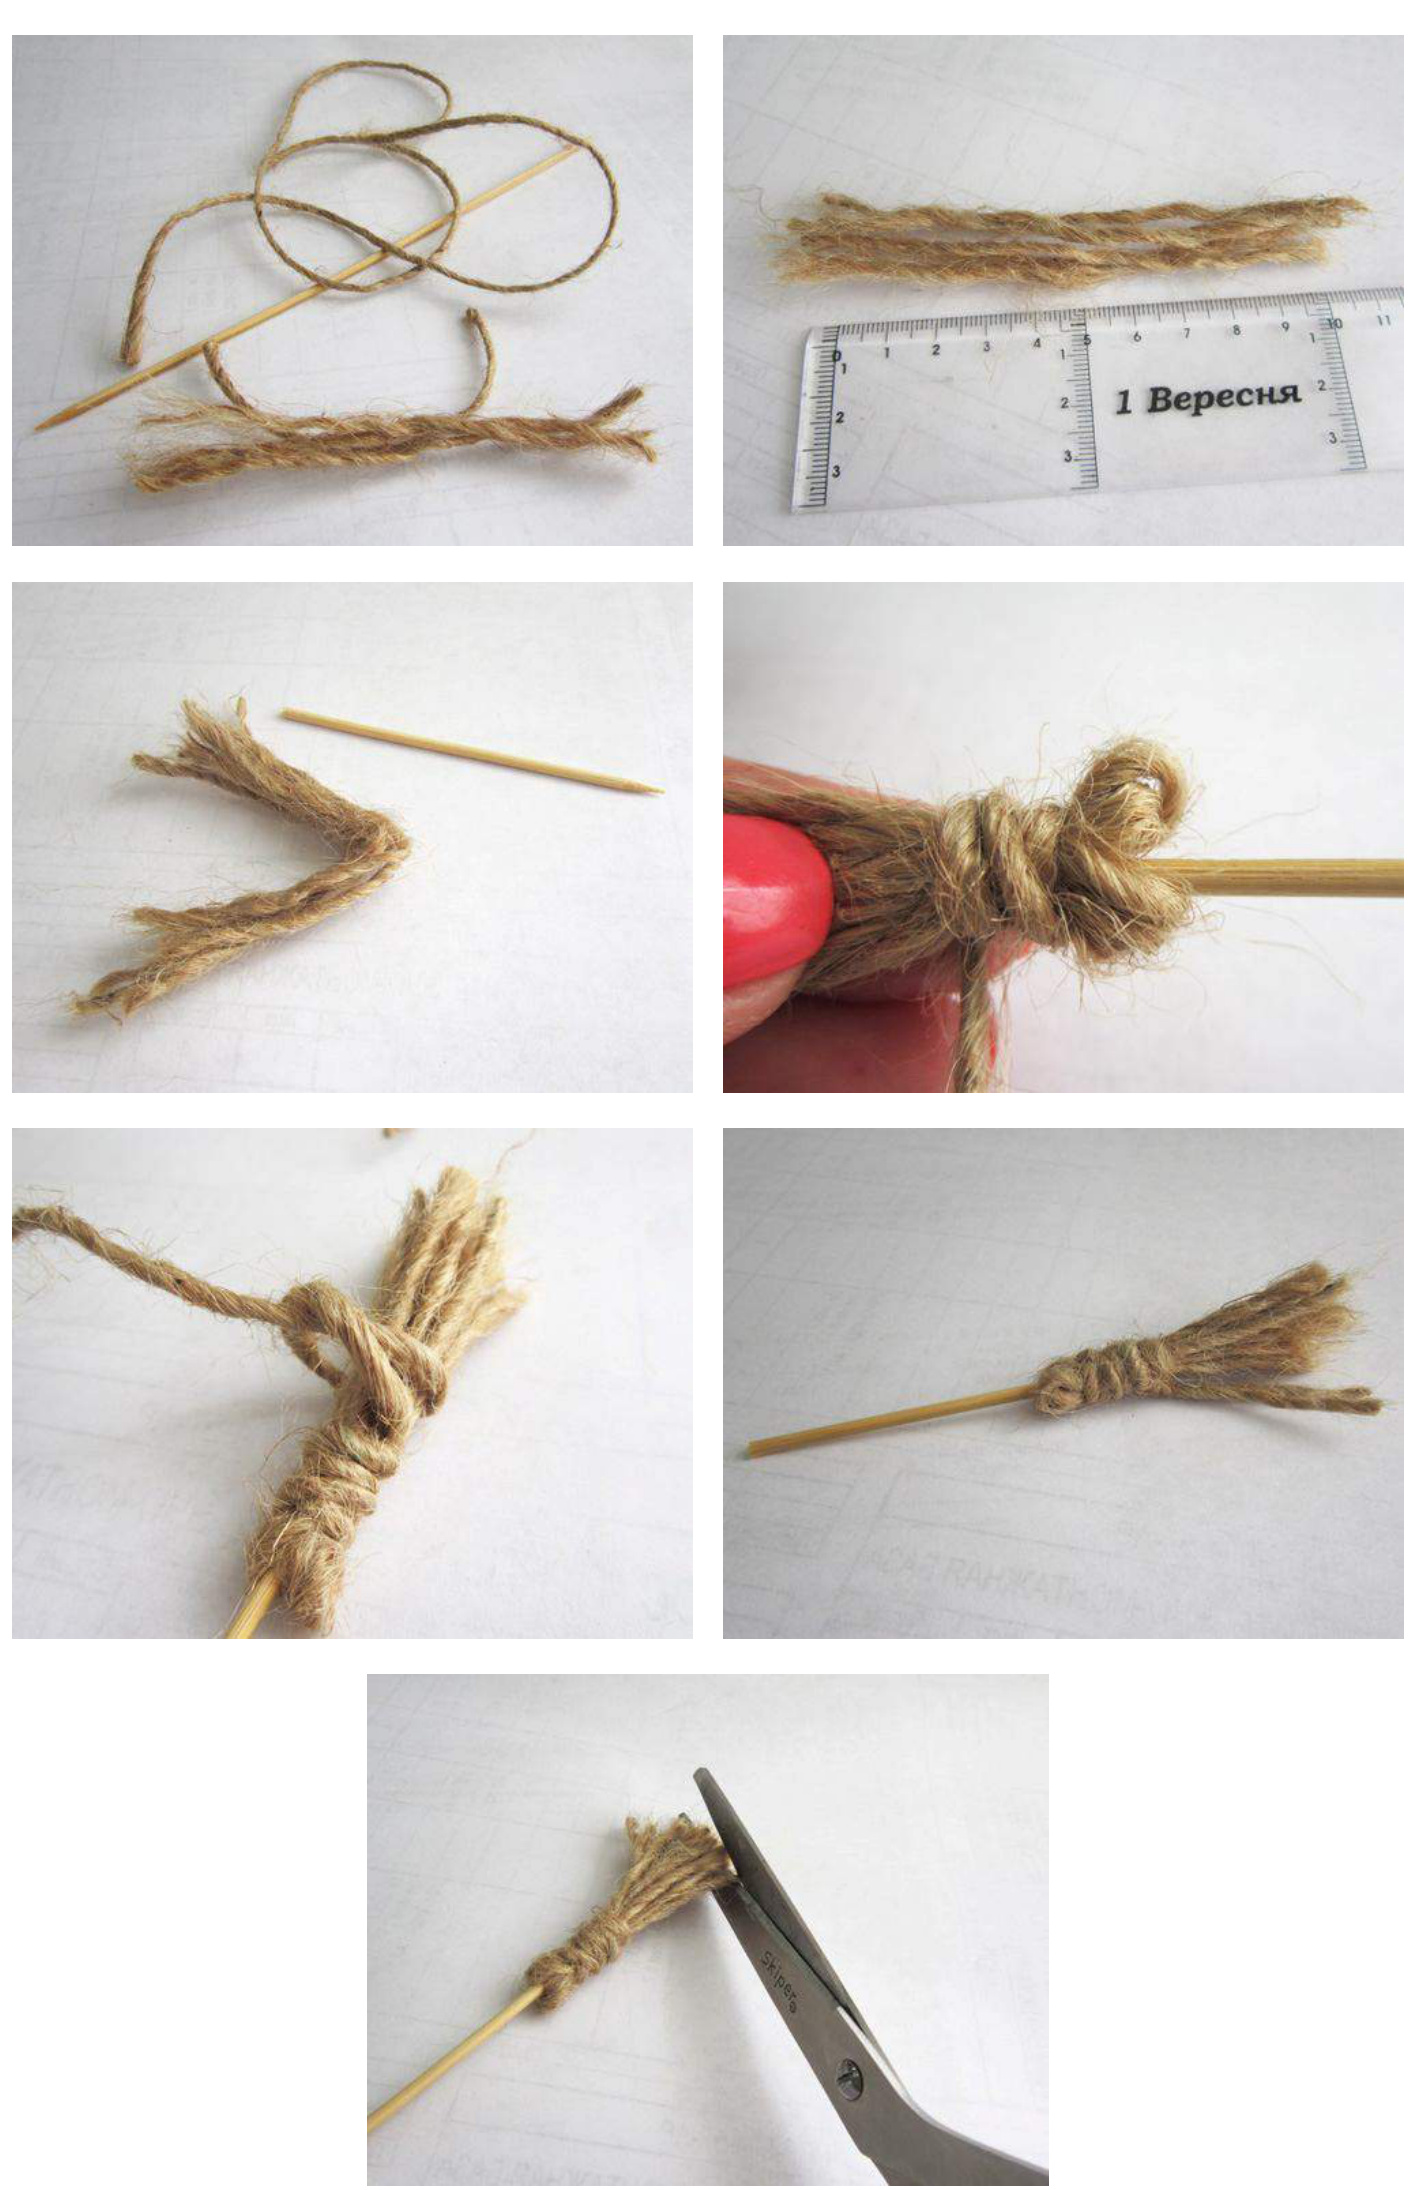
Broom
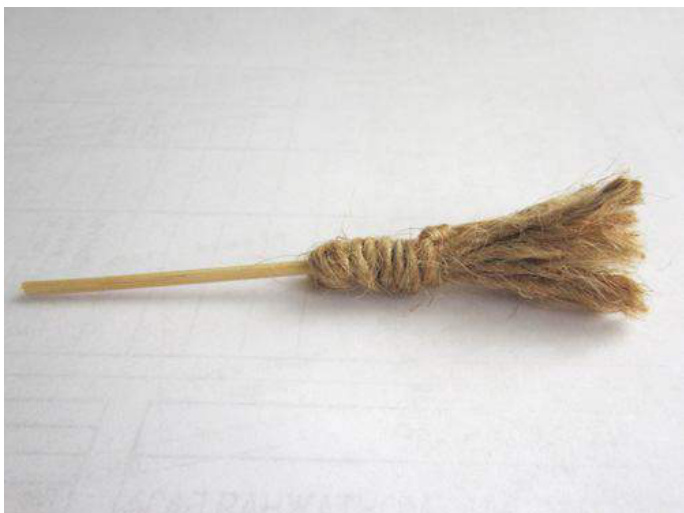
Perform as shown in the photo
That's all 8)))
Do not (re)sell, including translations to other languages; do not redistribute, including publishing on the internet. You may feel free to sell the finished products on your local bazaar, craft fairs, etc. You are not allowed to sell them on the internet. Thank you! Don't forget to show me your finished toys, please! If you have any question or find any mistake in the pattern, please feel free to contact me: My e-mail: simplytoys13@gmail.com


