BOW CHARISMA TUNIC
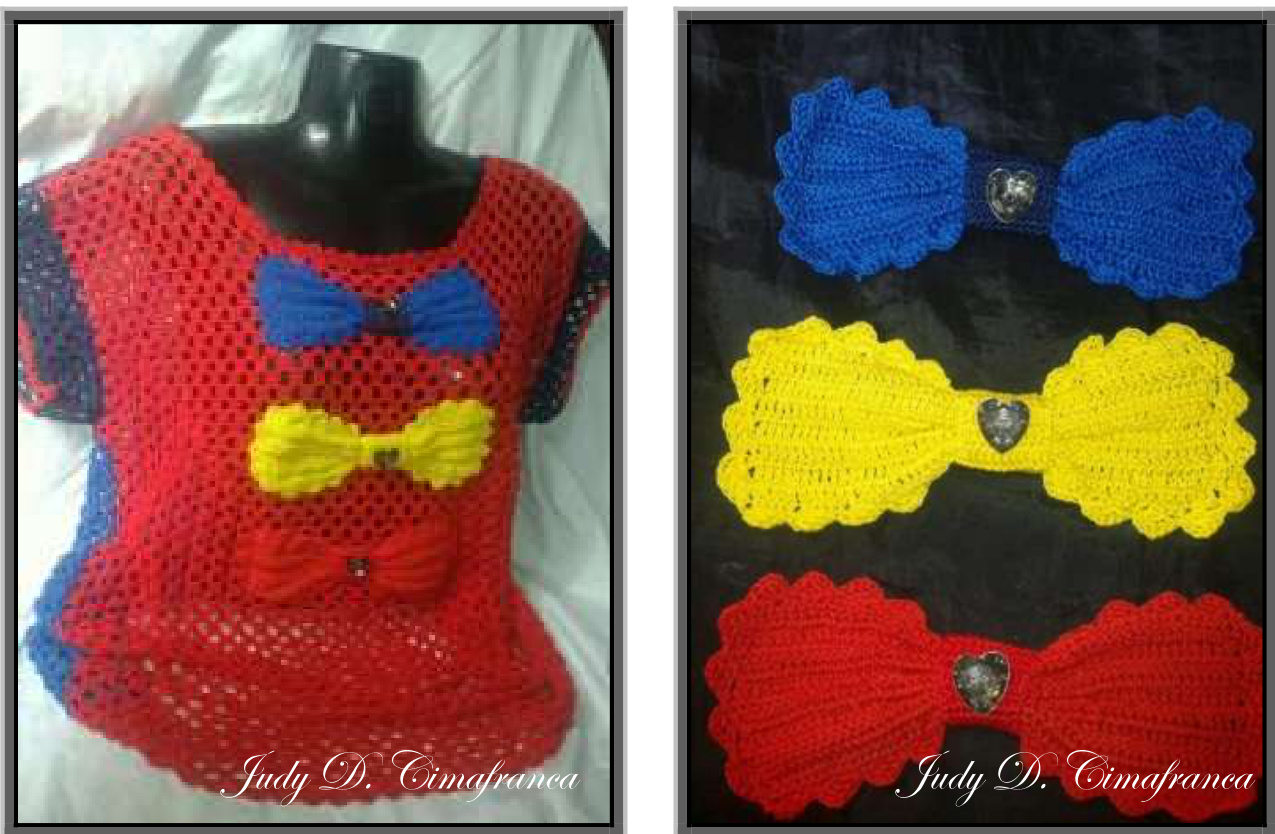
PLAIN BUT TRENDY, THIS TUNIC STYLED WITH CLASSIC GRANNY AND APPLIQUE WITH COOL BOWS, SURELY WILL MAKE YOUR DAY. Terms: US Skill Level: Easy ons given can fit women's size, large, up to 46" bust measuremen Materials: Monaco 100% cotton Shade: B21 -Dark Red, 3 balls Shade: BUT 66 - Dark Blue, 3 balls Small amount of Shade: B20 - yellow oall.amount.of Shade: B20- yellow 3 pieces -heart.shaned.glass buttons. 3 pieces - heart shaped glass buttons Sewing needle and sewing thread color of the bows. wingneedleandsewingthreadcolorofthebows. Hook Size: B-1 = 2.25 mm or size needed to obtain gauge. Gauge: Row 1 -3 = 2 % inches Stitches Used and Abbreviations: CH - chain R row or round WS - wrong side SC - single crochet Rep - repeat FO - fasten off HDC - half double crochet Beg - beginning SI St - slip stitch Sp space RS - right side of work Yo - yarn over (Original design by Judy D. Cimafranca: no reproduction of this pattern, electronic or print, without my permission, but you may sell your finished items.) Page 2
BOW CHARISMA TUNIC
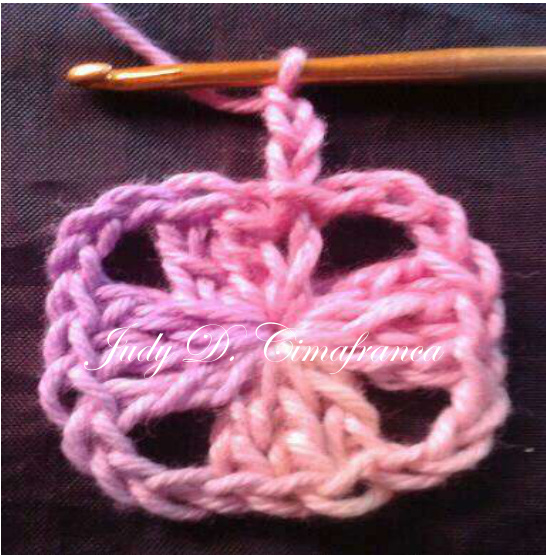
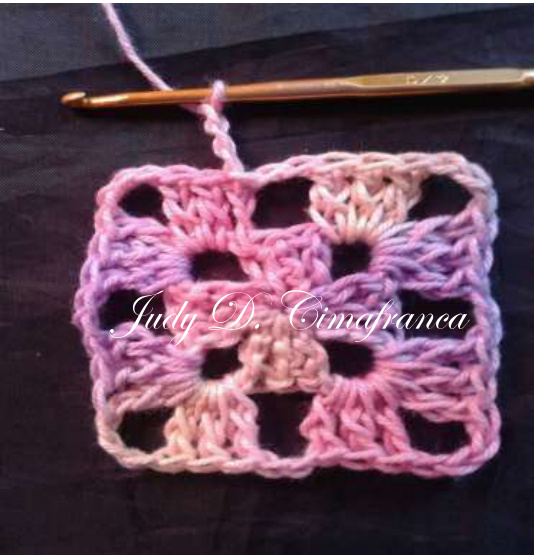
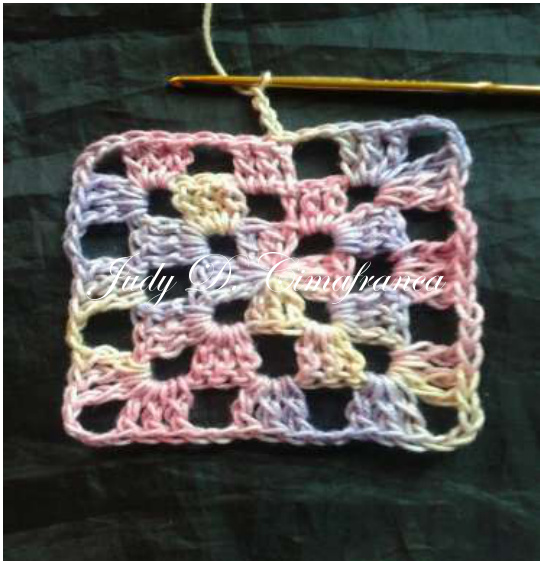
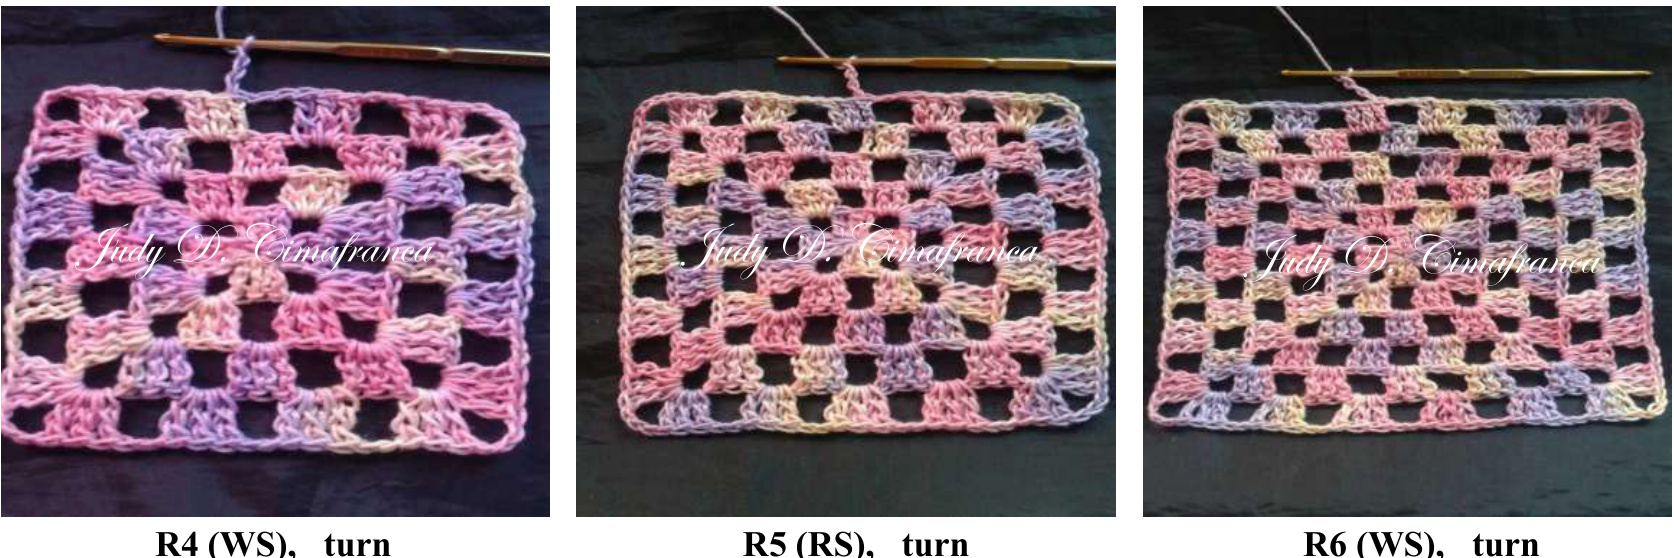
By Judy D. Cimafranca EDC - extended double crochet, Yo once, insert hook in St, pull through one loop, Yo once, pull through two loops, Yo once, pull through two loops. Pattern Notes: Use DC St to obtain small size item and reduce number of Beg CH for the bow to obtain small bows, for xl sizes increase no. of rows in making the classic granny square based on the size of your bust. TUNIC Make 2 Pieces of CLASSIC GRANNY SQUARES for front and back part. R1(RS): Leave 2 inches tail, CH1 (must be loose) + [3 CH (counts as first EDC), 2EDC in 4th CH from hook, CH3] 3x all around to form 4 corner square, pull the tail to close the center ring, secure by tying in one of the stitches or tuck ends, join with Sl St in 4" Ch of beg CH-4, turn. (12 EDC, 4 CH3 sp or 4 corners of square). R2(WS): [(CH 3 counts as first EDC), 2EDC, CH3, 3EDC in CH3 Sp or 1" corner, CH2] around, Join with Sl St in 3rd CH of Beg CH-3, turn.(32 EDC, 4 CH3 Sps or 4 corners, 4 CH 2Sps inbetween). R3 (RS): Rep process as R2. (48 EDC, 4CH3 Sps or 4 corners, 8 CH 2 Sps in between). R4-R25(WS): Rep process as R3. As rows increases Ch 2 Sps in between increases, but 4 corners remains. FO. (Please see Photo Tutorial below). PHOTO TUTORIALS
R1 (RS), turn
R2 (WS), turn
R3 (RS), turn (Original design by Judy D. Cimafranca: no reproduction of this pattern, electronic or print, without my permission, but you may sell your finished items.) Page 3
BOV CHARISMA TUNIC
By Judy D. Cimafranca
BREAST PART, ADDITIONAL ROWS UNTIL NECKLINE R1 (RS): In one piece of square just made, insert hook into 2"d CH of CH-3 Sp of 2"d corner of square, CH 3, 2EDC into CH-2 Sp, CH2, (3EDC in each CH-2 Sps, CH2) across, CH 5, turn. [27(3EDC), 26 CH-2 Sps)] R2(WS): [3EDC in each Ch-2 Sps, CH2], across, ending with ! EDC on last St, CH3, turn. [ 26( 3 EDC), 27 CH-2 Sps)l. R3 (RS): (CH3, counts as 1EDC, 2 EDC in CH-2 Sps, CH 2) across, ending with 3EDC, CH 5, turn. Ist Rep R2 and R3 alternately, ending with 3 EDC, CH 5, tur SHOULDER SHAPING RIGHT SIDE R10(WS): 3EDC in next CH-2 Sp, CH2, and in each 9 CH-2 Sps across, 1EDC, CH3, turn. [9 (3 EDC, 10 CH-2 Sps)]. turn.9(3EDC,10CH-2Sps). R12 (WS): 3EDC, CH2 in each 8 CH-2 Sp, ending with 1 EDC in last St, CH3, turn. [8 (3 EDC), 8 CH - 2 Sps]. R13 (RS): 3EDC, CH 2 in each 8 CH-2 Sp, CH 5, turn. [8 (3EDC), 7 CH-2 Sps]. (Original design by Judy D. Cimafranca: no reproduction of this pattern, electronic or print, without my permission, but you may sell your finished items.) Page 4
BOW CHARISMA TUNIC
By Judy D. Cimafranca R14 (WS): 3EDC, CH2 in each 7 CH-2 SP, 1EDC in last St, CH3, turn. [7(3EDC), 7CH-2 Sps] R15 (RS): 3EDC, CH 2 in each 7 CH-2 Sps, CH4, turn. [7(3 EDC, 6CH-2 Sps]. R16 (WS): 3HDC, CH 2 in each 2 CH-2 Sps, 3DC, CH2 in 2 CH-2 Sps, 3EDC in next 2 CH-2 Sps, 1 EDC in last St of previous 3 EDC, FO. Rep process same as right side shoulder shaping but start your CH 3 + 2 EDC on the 10" CH-2 Sp of Previous Row 9.
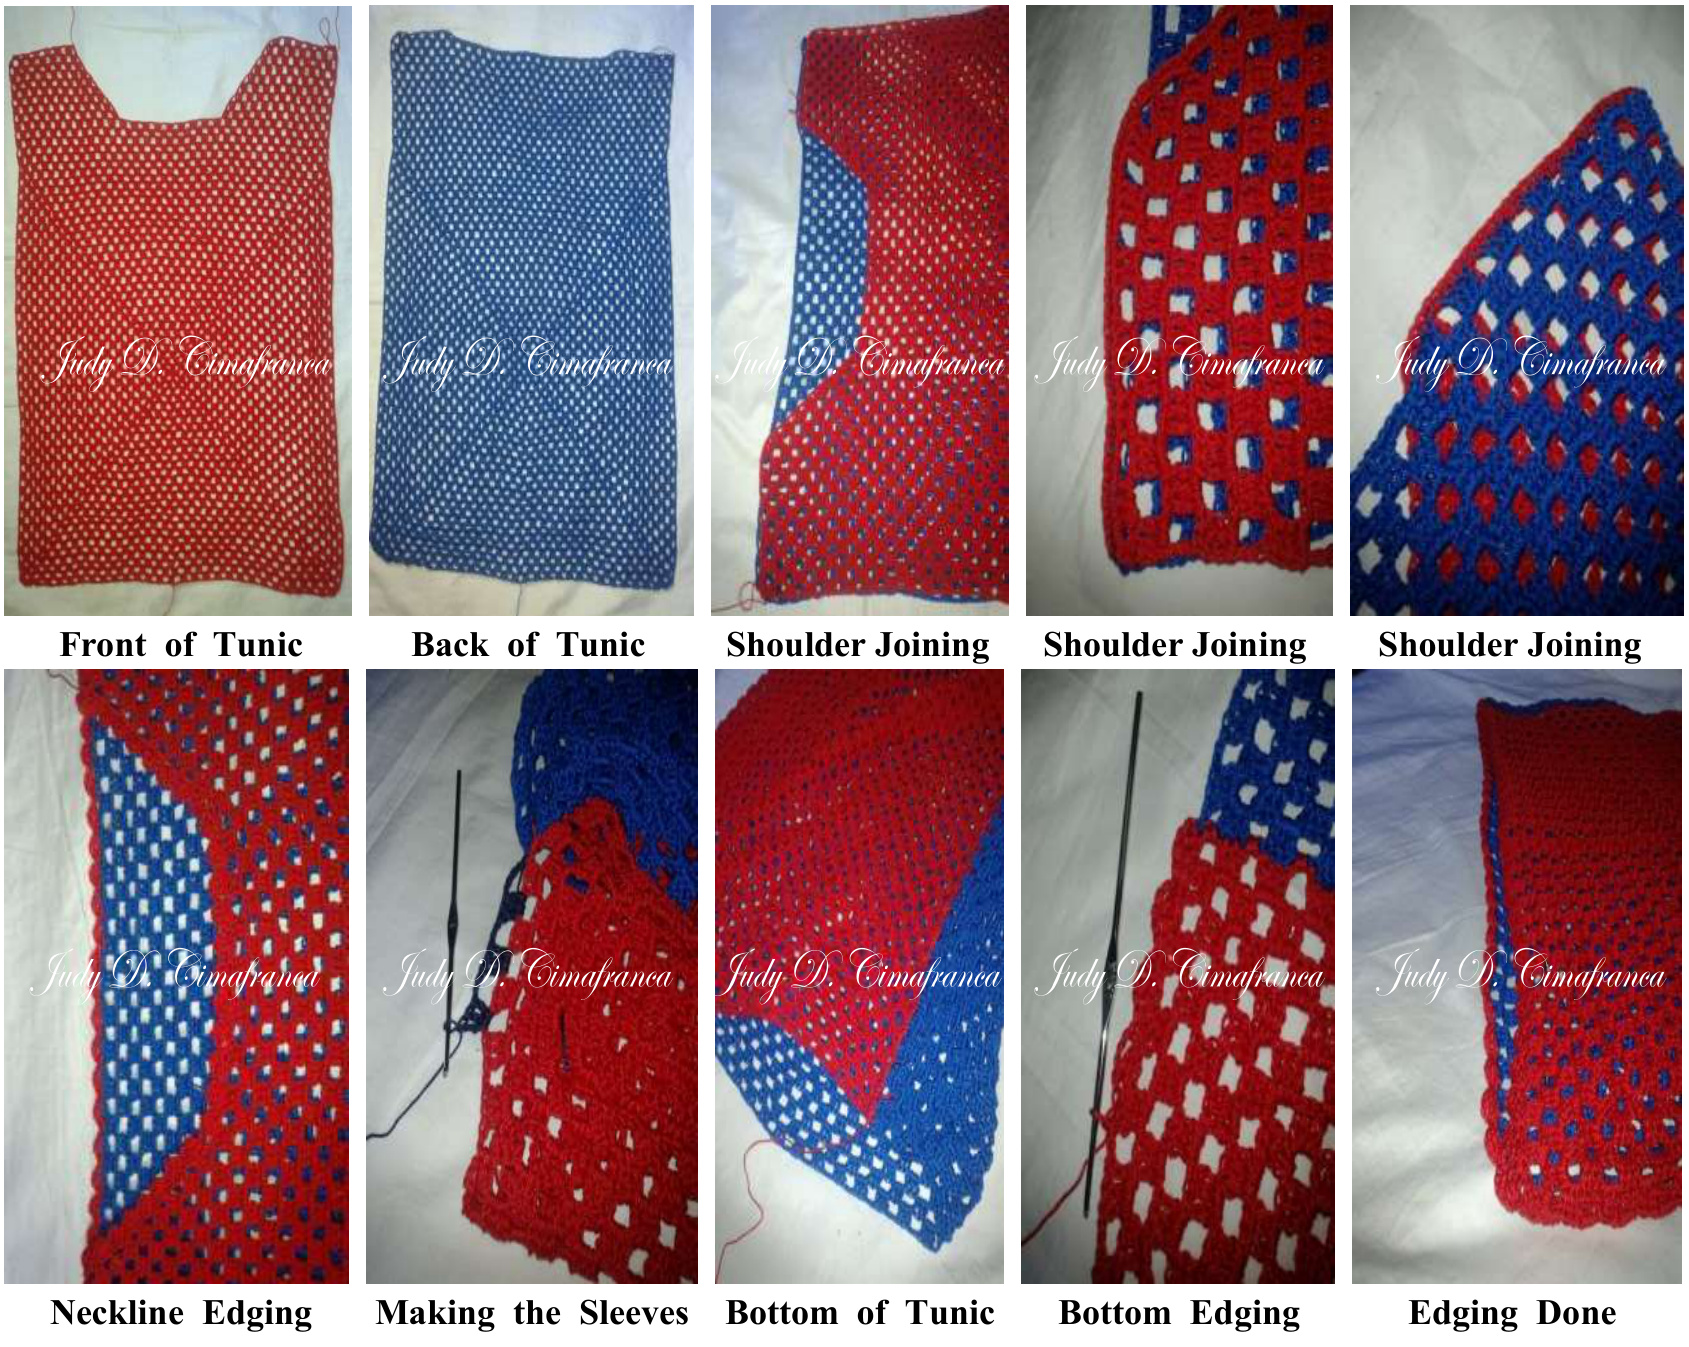
BACK SHAPING
In 2"d piece granny square just made, Rep process of Breast Front Part, R1(RS) - Row 15 (RS) R16 (WS): 3HDC, CH 2 in each 2 CH-2 Sps, 3 DC, CH2 in CH-2 Sps, 3EDC in next 2 CH-2 Sps, CH3, (3 SC, CH2 into CH-2 Sps) Rep 14x, CH3, 3 EDC in next 2 CH-2 Sps, 3DC, CH2, in CH-2 Sps, 3 HDC, CH 2 in each 2 CH-2 Sps, SC in last St, don't fasten off.
ASSEMBLY
With Front piece and Back piece RS facing each other continue by joining the shoulder edges, Sl St, CH1, 2SC evenly, 1 Sc in each Sts across of Back piece, Sl St, CH1, 2 Sc evenly to the shoulder.FO.
NECKLINE EDGING
RS facing you, insert hook leftside shoulder neckline edge, CH3 (counts as first EDC), 2 EDC, 1 SC into the St reach by EDC) repeat all around neckline and at the back neckline. FO.
ARMHOLE
Leave 9 inches opening, evenly Sp SC in ends of Rows, across to bottom edge, FO. Same on the other side, but do not fasten off, continue for the bottom edging, CH3, 2 EDC in Same St, 1 SC into St, reach by EDC end, all around bottom. FO.
BOTH SLEEVES
R1 (RS): At the bottom edge of armhole, insert hook, [CH3 (counts as first EDC), 2 EDC in next CH-2 Sp, CH2]all around, joint with Sl St in 3rd Ch of Beg Ch-3. [19 (3 EDC), 18 CH2 Sps]. (Original design by Judy D. Cimafranca: no reproduction of this pattern, electronic or print, without my permission, but you may sell your finished items.) Page 5
top of the foot/front of the leg. Repeat these rows until this strip is finished, ending with a K row. You are now ready to work the
By Judy D. Cimafranca R2: CH 5, [3 EDC in next CH-2 Sps, CH2] all around. R3: Rep R1. R4: Rep R2. R5: Rep R1 R6: [CH3, 2 EDC in same St, 1SC in 3rd EDC of previous Rows] all around. FO. (19 scallop edging)
REFERENCE PICTURES
(Original design by Judy D. Cimafranca: no reproduction of this pattern, electronic or print, without my permission, but you may sell your finished items.) Page 6
BOW CHARISMA TUNIC
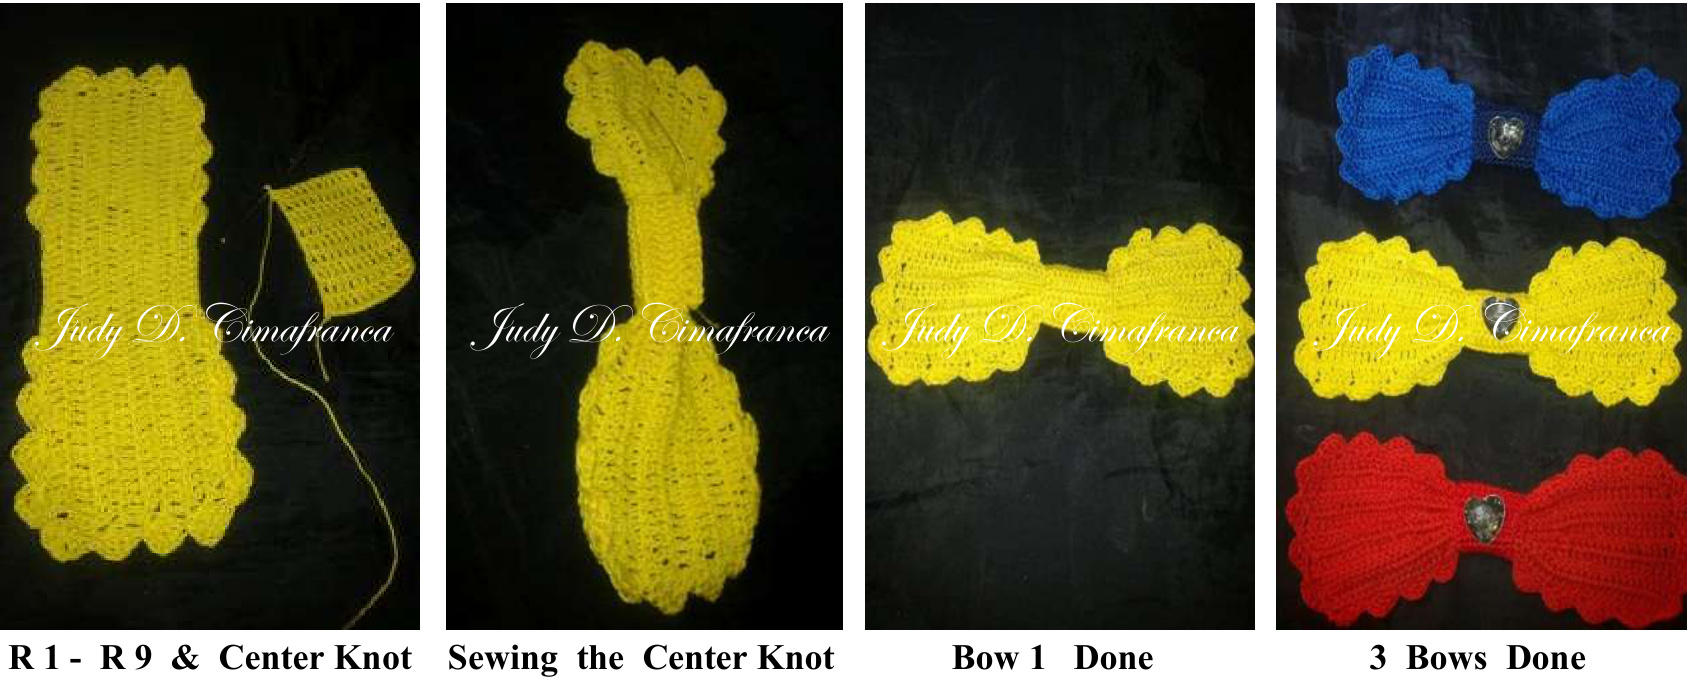
By Judy D. Cimafranca BOWS make3pieces R1 (RS): CH 52, 1EDC in 3rd CH from hook and in each 49 CHs across, CH 3, turn. (50 EDC) R2 (WS): 1EDC in each 49 EDC, CH3, turn. (50 EDC) R3 (RS)-R8: Rep R2. R9 (RS): Scallop work all around, (CH3, turn, 3 EDC in same Sp, skip 4 EDC, 1 SC in next St) 4x, Sl St in 9 EDC, Rep scallop 4x, 4x scallop on left side, Rep process around. FO. R1 (RS): CH 13, (counts as first DC), 1Dc in 3rd CH from hook, 1DC in each 10 DC, CH 2, turn. (12 DC ) R2 (WS): 1 DC in each 11 DC, CH2, turn. (12 DC) R3(RS): Rep R2 until R9 place at the center of bow, Sl St on both ends. FO. Sew the center of knot the glass heart buttons in each 3 bows. Applique the BOwS at the Front Tunic, sewing by hand. Please see herein below how -to BOwS photos.
(Original design by Judy D. Cimafranca: no reproduction of this pattern, electronic or print, without my permission, but you may sell your finished items.)
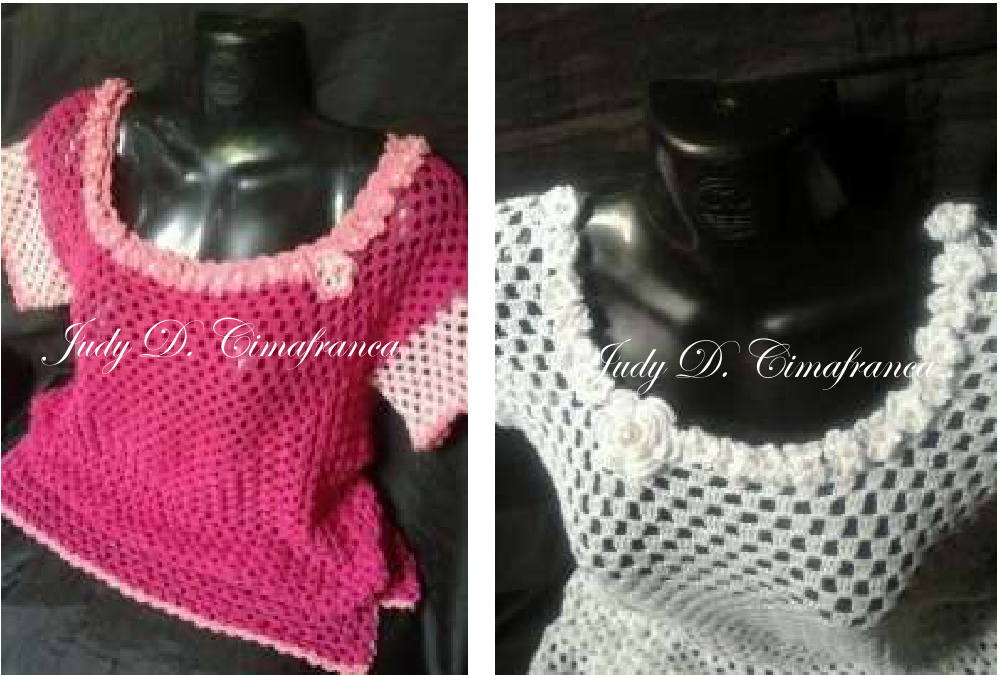
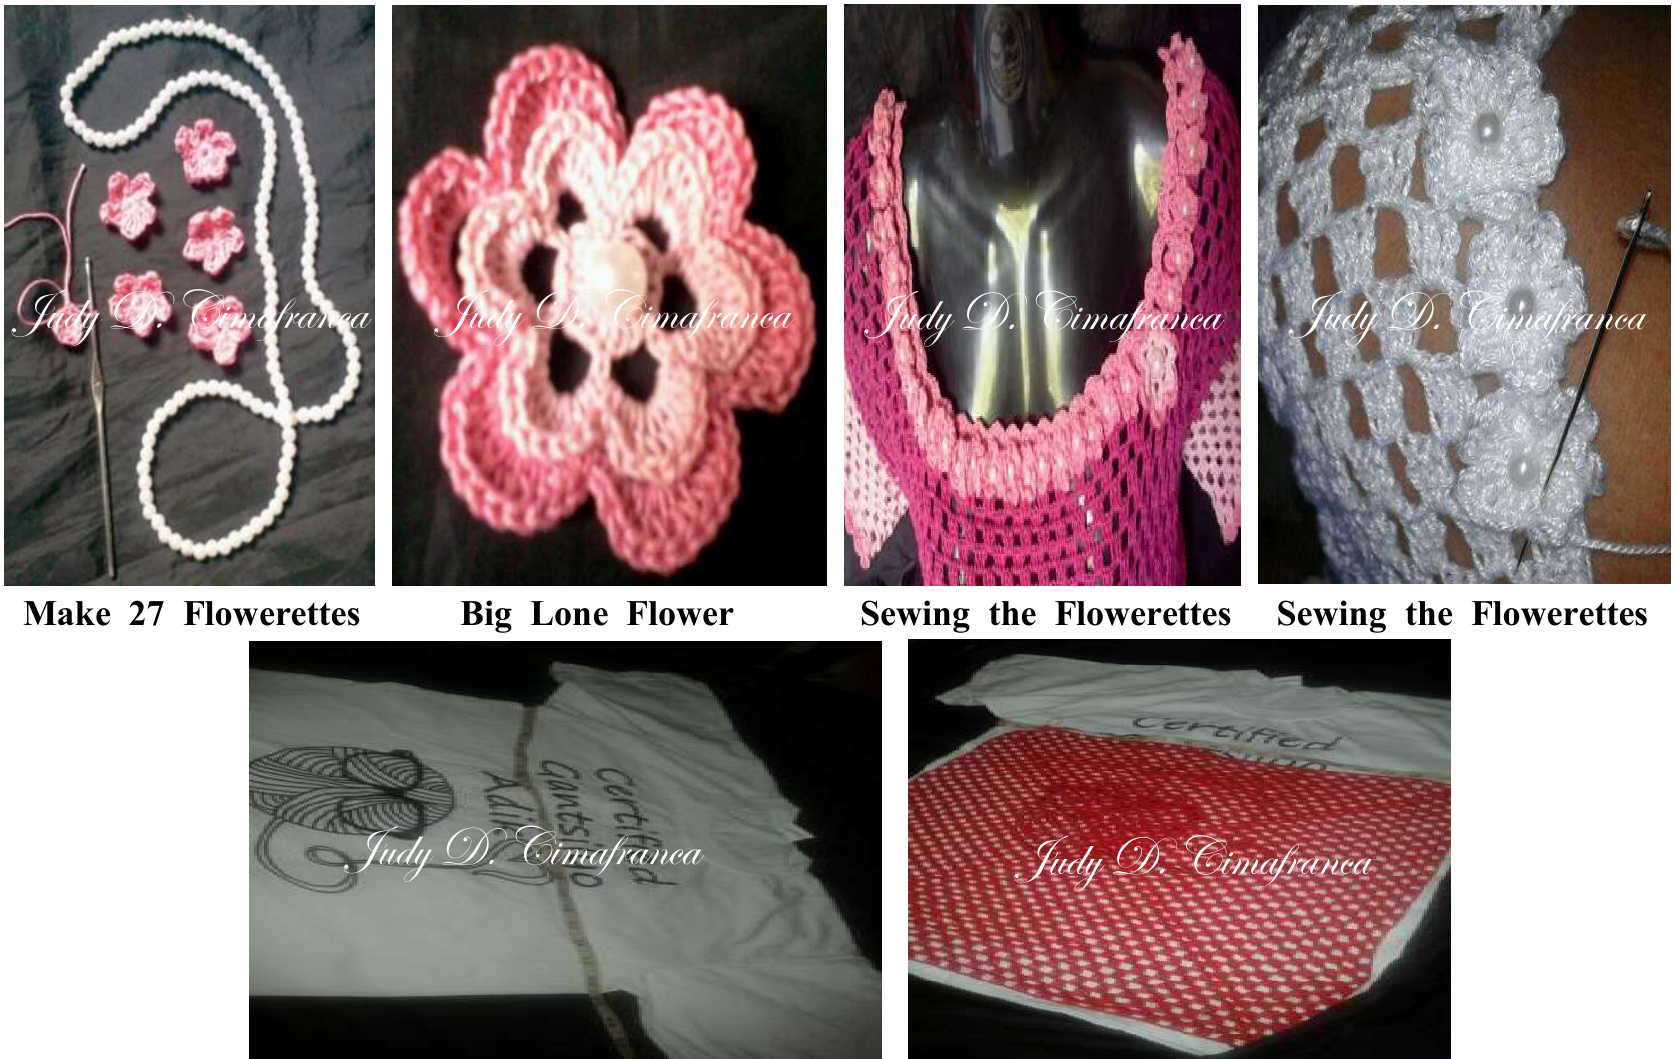
CUTE TEENY WEENY PEARLY FLOWERS MADE WITH EXTENDED TREBLE CLUSTER, ADORNED THIS TUNIC, NO NEED TO WEAR YOUR NECKPIECE. Materials: Monaco Mercerized Cotton Shade B31 - Pink, small amount Shade B34 -Fuschia Pink, 5 balls Shade B230 - very Light Pink, small amount. Big Pearl - 1 piece Small Pearls - 27 pieces Special Stitch: ETR - extended treble crochet YO twice, insert hook in ST., pull through 1 loop YO once, pull through 2 loops, YO once, pull through 2 loops, YO once, pull through 2 loops. TUNIC Repeat process on how to make the Bow Charisma Tunic, do not include Bows, instead make these Flowerettes - 27 pieces. R1: IN a ring or magic ring, with Pink, [CH3, 3ETR cluster, CH4, 1SC}4x, pull tail to close the ring, secure, FO. BIG LONE FLOWER R1: With Very Light Pink, In a ring or magic ring, CH2, 17 HDC, pull the tail to close the center of ring, join with Sl St in CH 2 of beg CH-2. (Original design by Judy D. Cimafranca: no reproduction of this pattern, electronic or print, without my permission, but you may sell your finished items.) Page 2 By Judy D. Cimafranca R2: (CH 5, skip 2 sts, 1SC in next St) 5x, join with Sl St before CH 1 of Beg CH-5. R3: First Layer, 6 Petals - [1 SC inside CH 5 SP of previous R2, 1HDC, 1DC, 5 EDC, 1DC, 1 HDC, 1 SC] all around, join with Sl St in Beg SC. FO. R4: Join in Pink, with Sl St at the back of beg SC of R3, [CH 8, SL St at the back of Next SC of R3l 5x, join with Sl St in St before Beg CH1 of CH-8. R5: Second Layer, 6 Petals -1SC, 1HDC, 2 DC, 5EDC, 2DC, 1HDC, 1SC in CH-8 Sps of R4, all around, join with Sl St in St before first SC. FO. Sew each 27 Flowerettes with small pearls on the center, plus the Big Lone Flower with 1 big pearl on the center, all around neckline of Tunic. See picture of Tunic or it is up to you where you will place the Big Lone Flower.
To achieve a perfect tunic fit, use your fav t-shirt as pattern base.
HAPPY CROCHETING !!
(Original design by Judy D. Cimafranca: no reproduction of this pattern, electronic or print, without my permission, but you may sell your finished items.)


