Whimsical Door Chimes
Materials:
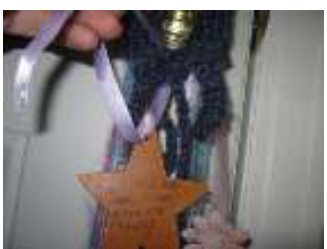
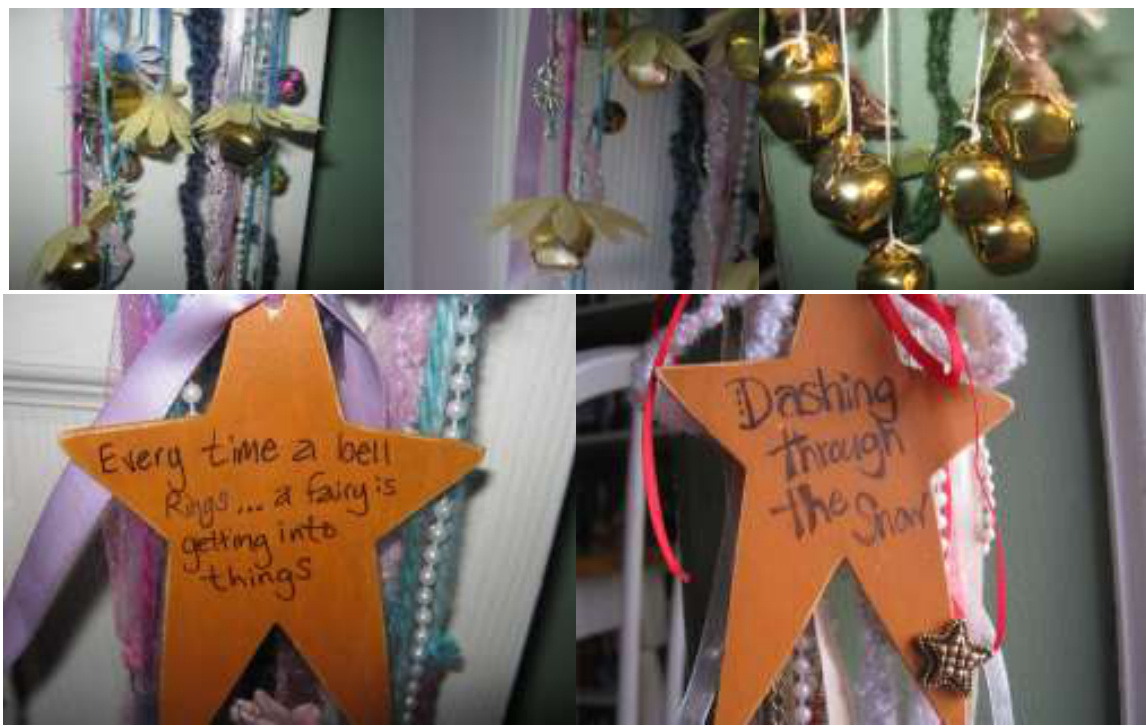
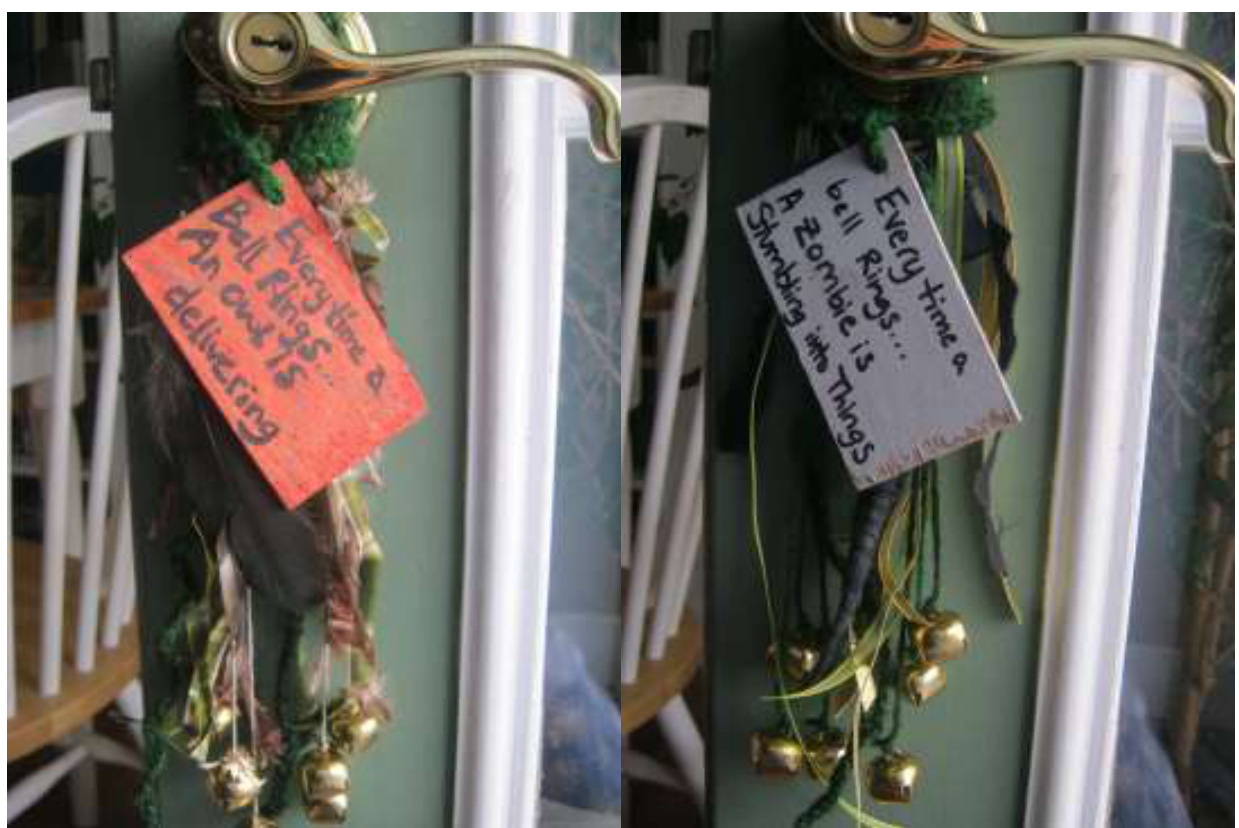
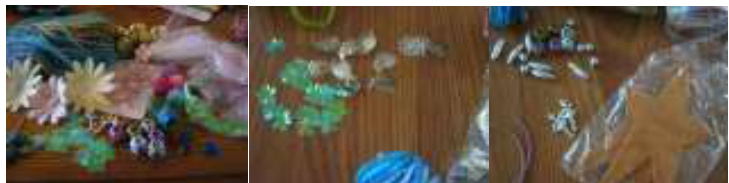
·2-US 8/ 4mm Double Pointed Needles 1 crochet hook OR a safety pin to pull yarn through holder 6 bells (I used 20 mm size) If you are using these to attract fairies use copper bells ? An assortment of beads, charms, sequins, ribbons, and other knit knacks you want to include. At least 100 yards of yarn- either bulky or worsted weight Various lengths of other yarn- probably no shorter than 20" each for chime portion. You will need 3 strands of either crochet thread or fingering weight yarn to attach the bells. Some sort of wooden shape to use for the sign- if not prepainted you will also need a paintbrush and paint, if it does not have a hole to attach, you will need tools to drill one. Permanent marker-I used a sharpie · Darning needle Possibly thread and a sewing needle depending on the size of the hole in the charms chosen and the yar weightchosen For Fairy chimes- 6 silk flowers- (the ones with the holes in the center)
Gauge: not important
Abbreviations:
K- knit P- purl sts- stitches BO-bind off
Instructions:
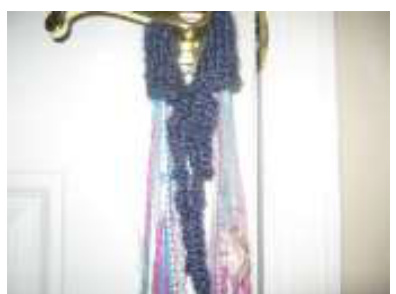
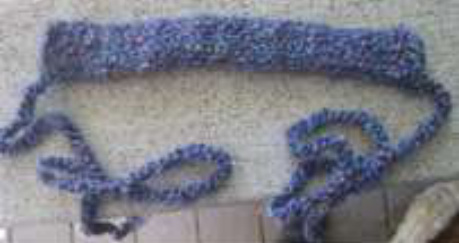
With the worsted or bulky weight yarn chosen for the doorknob hanging portion Cast on 1 stitch and either chain stitch or \*k1, turn work, p1, turn work\* until piece measures between 15-20". Tube Using backwards loop cast on;
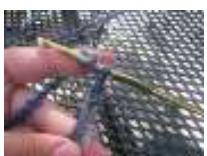
Cast on 7 stitches if using worsted weight yarn= 8 sts total. Cast on 5 stitches if using bulky yarn= 6 sts total Work these stitches in an icord (\*knit allstitches, slide then back to the beginning of the needle\*) until piece measures6" Turn work and bind off all but 1 stitch purlwise (this will ensure the "ties" are on the same side of the work With one remaining stitch either chain 1 or work the \* k1, turn work, p1 turn work\* until tie is the same length as the other side. Cut yarn and secure end. Pull piece length-wise to even out loose stitches from Icord. Take the collection of ribbons and yarn, cutting the pieces between 20- 30 inches and with the crochet hook, pull these through the tube you just competed. Adjust as desired. Add the bells with the use of the darning
All images, illustrations, and text @ Kate Agner 2015 needle and yarn that wil fit through the bell's hole. Securely knot into place. Add another bellin the same manner to the other end of the same strand of yarn. Repeat with all remaining bells. Attach sequins, charms, and beads as desired making sure they are all securely attached and have something of equal weight on the other end to balance it out.

\*If using flowers with wire, you can adjust the length by curing them around your needle or hook.
Choose a saying and write it in pencil on the wooden sign to determine how to line up the words, then with the permanent marker, write over top. Once dried, erase any pencil markings. Place tube portion over the doorknob with both ties down as though tying a bonnet. Pull on the hole on your wooden sign and tie either into a bow or a loose knot (if you want the tails dangling). If your yarn is too thick to fit through the hole in your sign you can attach the sign with a piece of lace or thinner yarn, just tie it over your bow. Straighten out as desired and admire. \*The more dangling things you add, the lighter the bells will ring. Try adding more metal items to clank against the bells if you want more music. I added metal charms on top of the bells for one of them, it added a nice tingling sound.