NORTHWOOD STITCH
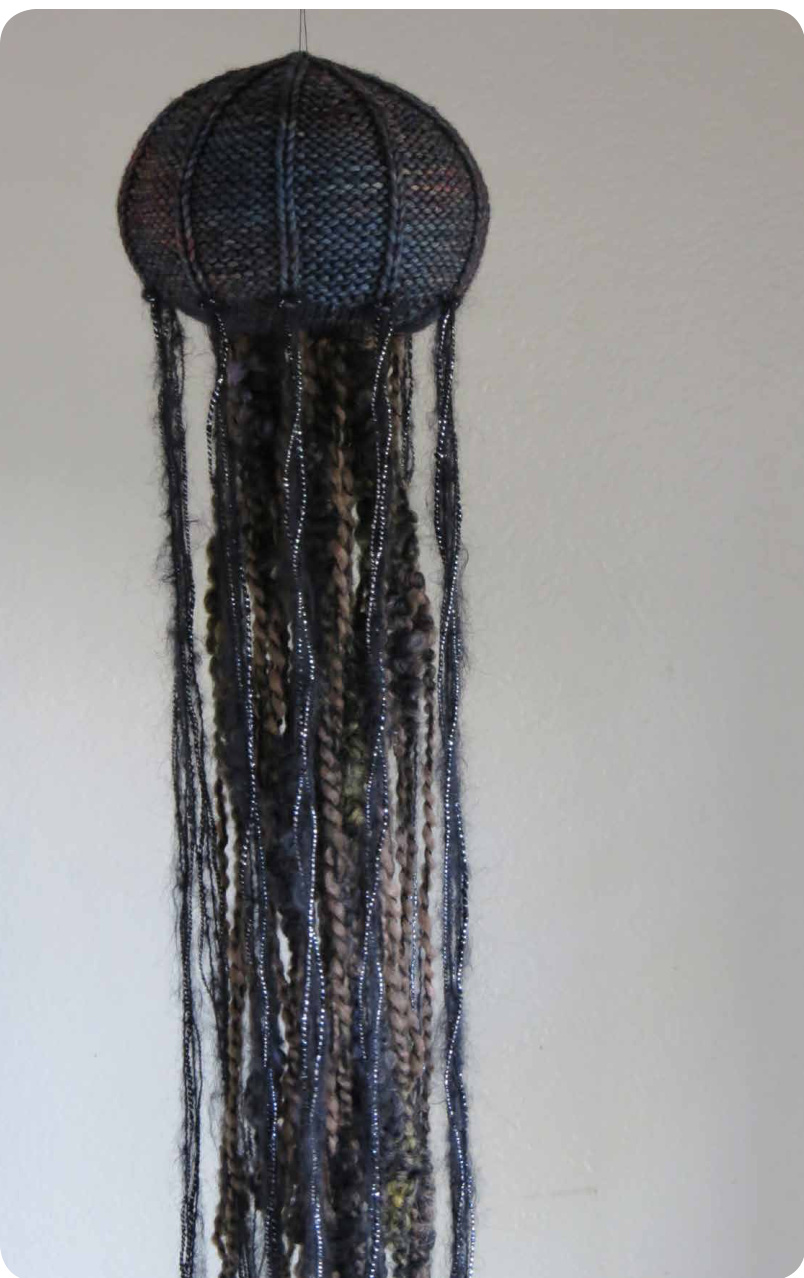
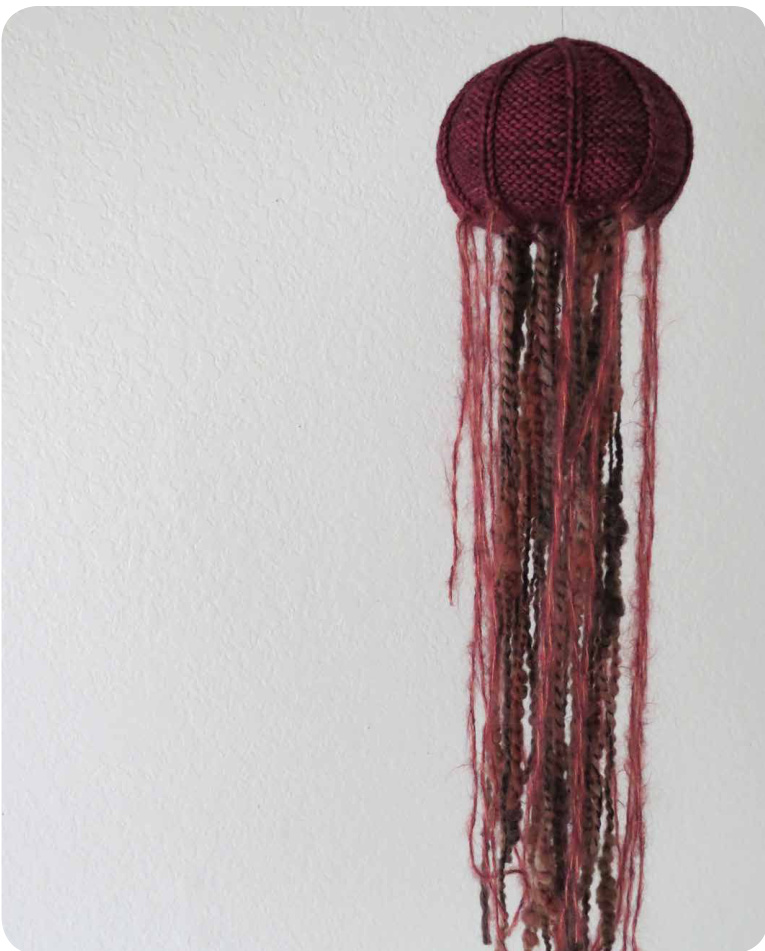
Jellyfish This simple to knit, decorative hanging jellyfish is the perfect piece for a child's room, bathroom, or wherever you want to place it.
FINISHED MEASUREMENTS
Body is approximately 15.5" (40cm) in circumference at widest part and 3.5" (9cm) in height after stuffing.
YARN
Approximately 60 yds of a Worsted Weight Yarn. Approximately 10 yds of an Eyelash or Mohair Yarn. Approximately 10 yds of a Thick and Thin Yarn. Used in: 'Red Jellyfish'; Malabrigo Rios col 49; Rowan Kidsilk Haze Trio col 794; SMC Select Baldini Colori col 1246. 'Blue Jellyfish'; Malabrigo Rios col 139; Trendsetter Yarns Duine col 116; SMC Select Baldini Colori col 1206.
NEEDLES
U.S. 5 (3.75mm) DPNS (double pointed needles) or needle to obtain gauge. NOTIONS &MISC MATERIALS Darning Needle; Stuffing; Sewing Thread, 1 Stitch Marker.
GAUGE
20sts = 4" in reverse stockinette stitch (after stuffing). Overall gauge is not important, as long as there are no spaces for stuffing to poke through. With smooth worsted weight yarn, CO 25 sts using the US 5 (3.75mm) DPNS, dividing sts between 3 needles as so: 5 sts on needle 1, 10 sts on needle 2, 10 sts on needle 3. Join in the round, careful not to twist. (Place marker after first stich worked to mark needle 1). Round 1: k around Round 2: (kfb, k4) rep around (30 sts) Round 3: (kfb, k5) rep around (35 sts) Round 4: (kfb, k6) rep around (40 sts) Round 5: (kfb, k7) rep around (45 sts) Round 6: (kfb, k8) rep around (50 sts) Round 7: (kfb, k9) rep around (55 sts) Round 8: (kfb, k10) rep around (60 sts) Round 9: (kfb, k11) rep around (65 sts) Round 10: (kfb, k12) rep around (70 sts) Round 11: (kfb, k13) rep around (75 sts) Round 12: (kfb, k14) rep around (80 sts) Round 13: p around Rounds 14-28: (k1, p7) rep around DECREASING ROUNDS Round 1: (k1, p2, p2tog, p3)rep around (70 sts) Round 2: (k1, p6) rep around Round 3: (k1, p2, p2tog, p2) rep around (60 sts) Round 4: (k1, p5) rep around Round 5: (k1, p1, p2tog, p2) rep around (50 sts) Round 6: (k1, p4) rep around Round 7: (k1, p1, p2tog, p1) rep around (40 sts) Round 8: (k1, p3) rep around Round 9: (k1, p2tog, p1) rep around (30 sts) Round 10: (k1, p2) rep around Round 11: (k1, p2tog) rep around (20 sts) Round 12: (k1, p1) rep around Round 13: (ssk) rep around (10 sts)
ABBREVIATIONS
CO = Cast On k = knit p = purl st = stitch sts = stitches rep = repeat kfb = knit through front and back of stitch p2tog = purl 2 stitches together ssk = slip slip knit
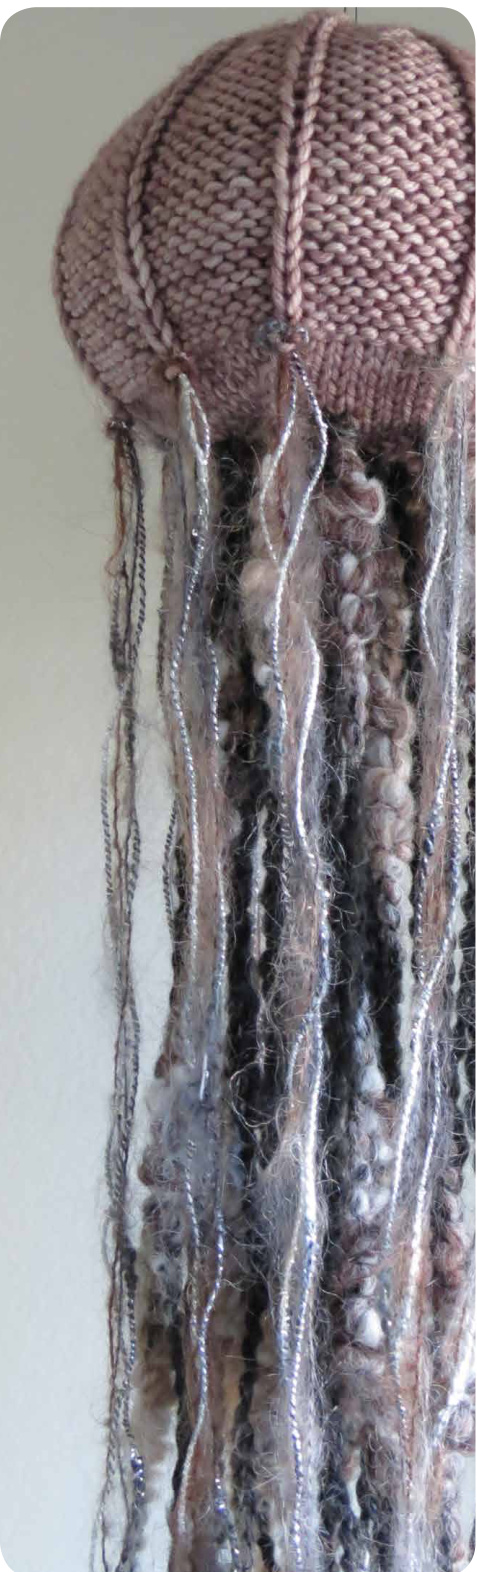
FINISHING Cut the yarn, leaving a 6" tail. Weave the tail through the remaining sts and pull tight to close hole. Stuff the piece through the CO hole, evenly distributing the stuffing throughout the body. With cast on tail, weave through the 25 CO sts, pulling the tail every few sts until the hole is closed. Weave in ends. PLACING THE OUTER LAYER OF STINGERS Before starting, flip the CO hole facing up. The jelly fish body should be divided into ten sections due to the k1, p7 rib you started on R13. At the bottom of each knit stitch of R13 there should be a small purl bump from the purl round before. Using the Eyelash or Mohair yarn, cut a length of yarn (any length is good!) and fold it in half. Using a darning needle, thread this folded end through the bottom bump.of one knit stitch of R13. Now, take the two free ends of the yarn through'the loop created by the fold and pull closed. This creates one set of stingers. Repeat this step for the remaining 9 knit stitches of R13. You should have a total of 10 outer layer stingers. PLACING THE INNER LAYER OF STINGERS Using your Thick and Thin yarn, cut a length of yarn (any length is good!) and foid it in half. Using a darning needle, thread this folded end through any knit stitch within the outer layer of stingers around the CO hole. Now, take the two free ends of the yarn'through the loop created by the fold and pull closed. This creates one set of stingers. Repeat this step for as many inner stingers as you'd like around the bottom of your jellyfish body. You may now trim your outer and inner layer of stingers with scissors if you'd like. HANGING YOUR JELLYFISH Cut twice the desired length of of sewing thread for hanging height. Tie free ends together and thread the tied end through the top of your jellyfish. Now, take the folded end of your clear sewing thread through the loop created by your tied end and pull closed. Use this new loop to hang your creature! Congratulations! You're all finished!
\*SPECIAL STITCH INSTRUCTIONS
kfb = knit front and back increase; Knit through the next stitch, but do not take it off of the left hand needle. Now, knit through the back of the same stitch and take the stitch off of the left hand needle.


The goal of Northwood Stitch is to bring you fun and clearly written patterns. If you find yourself with any questions, don't hesitate to ask.

2015Northwood Stitch denton_foreman@hotmail.com new website coming soon!


