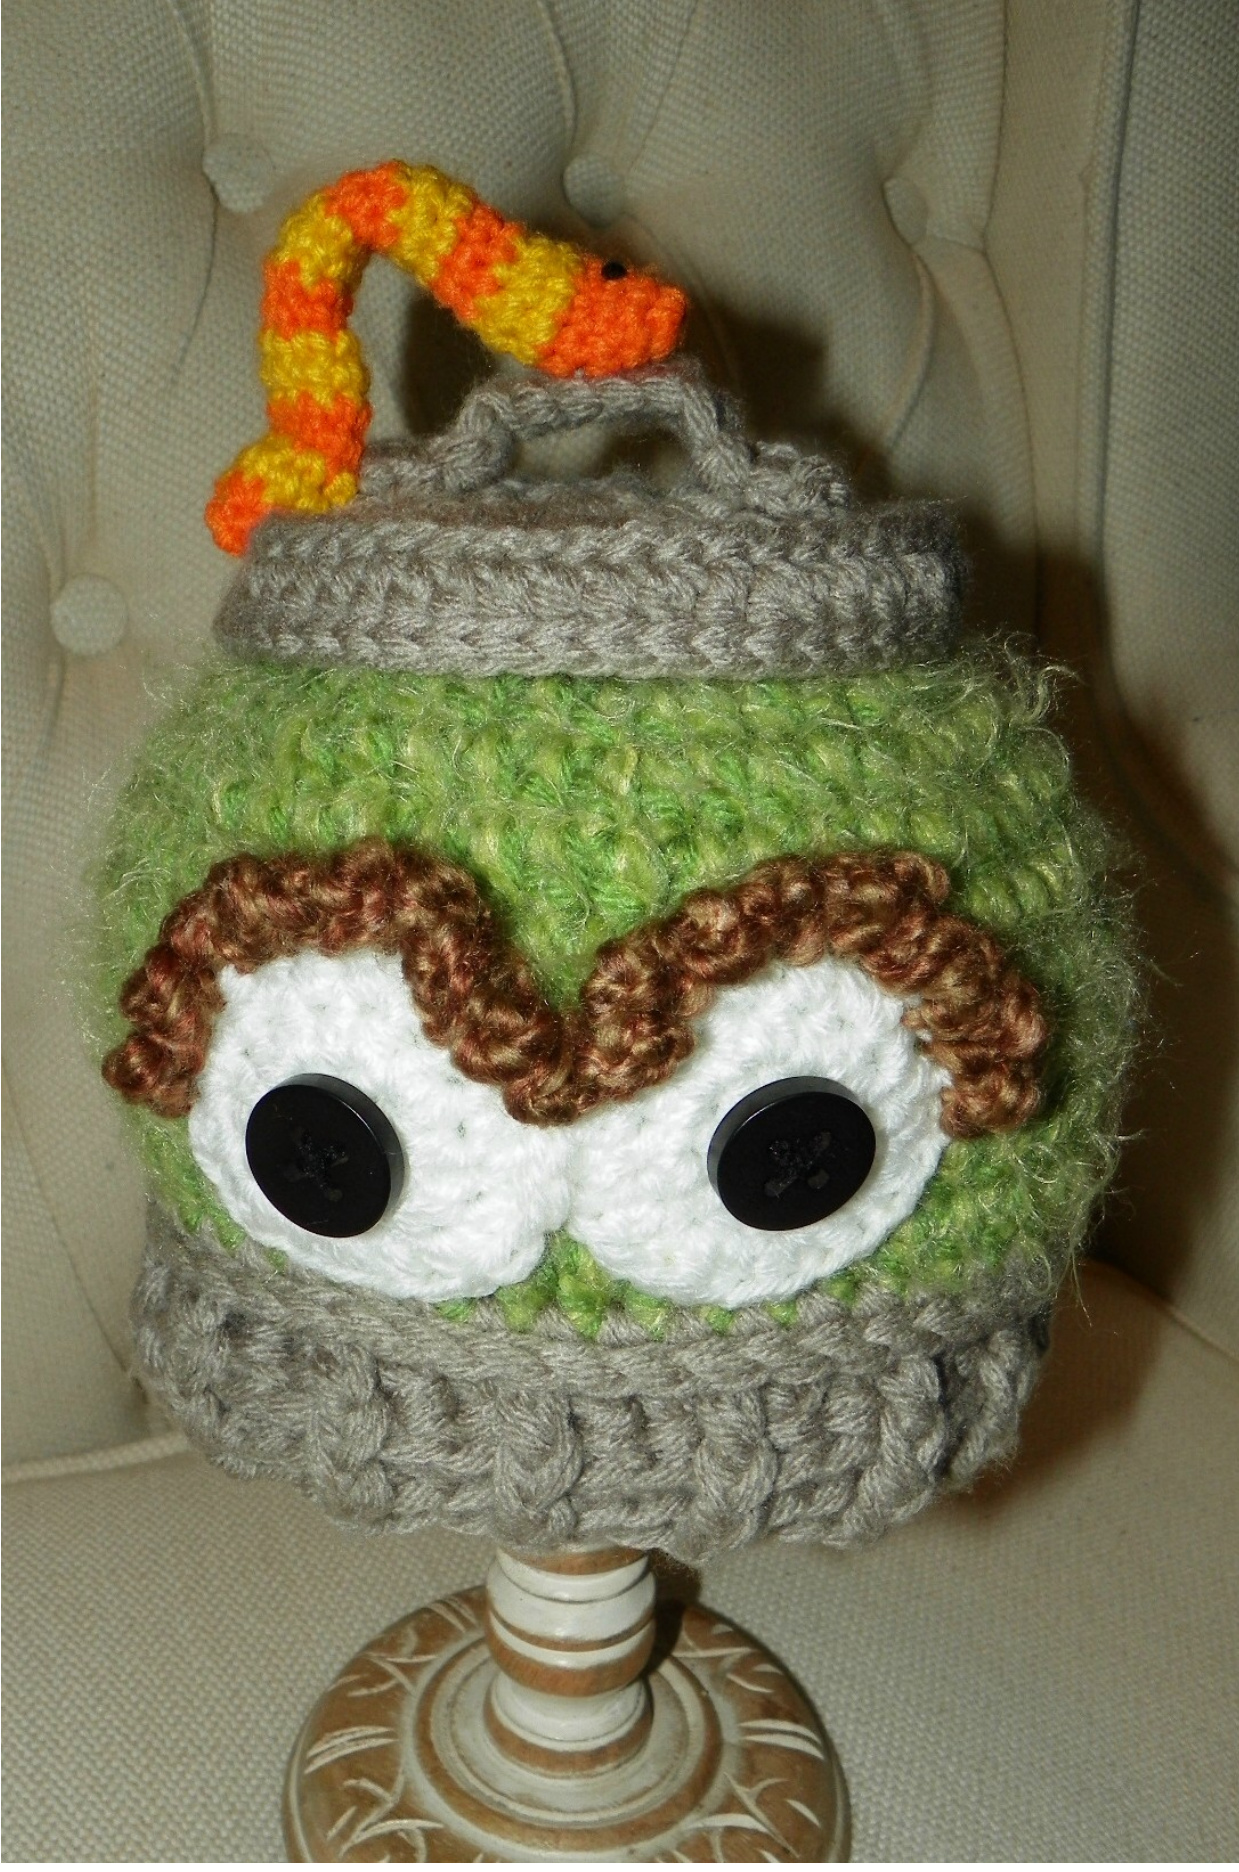
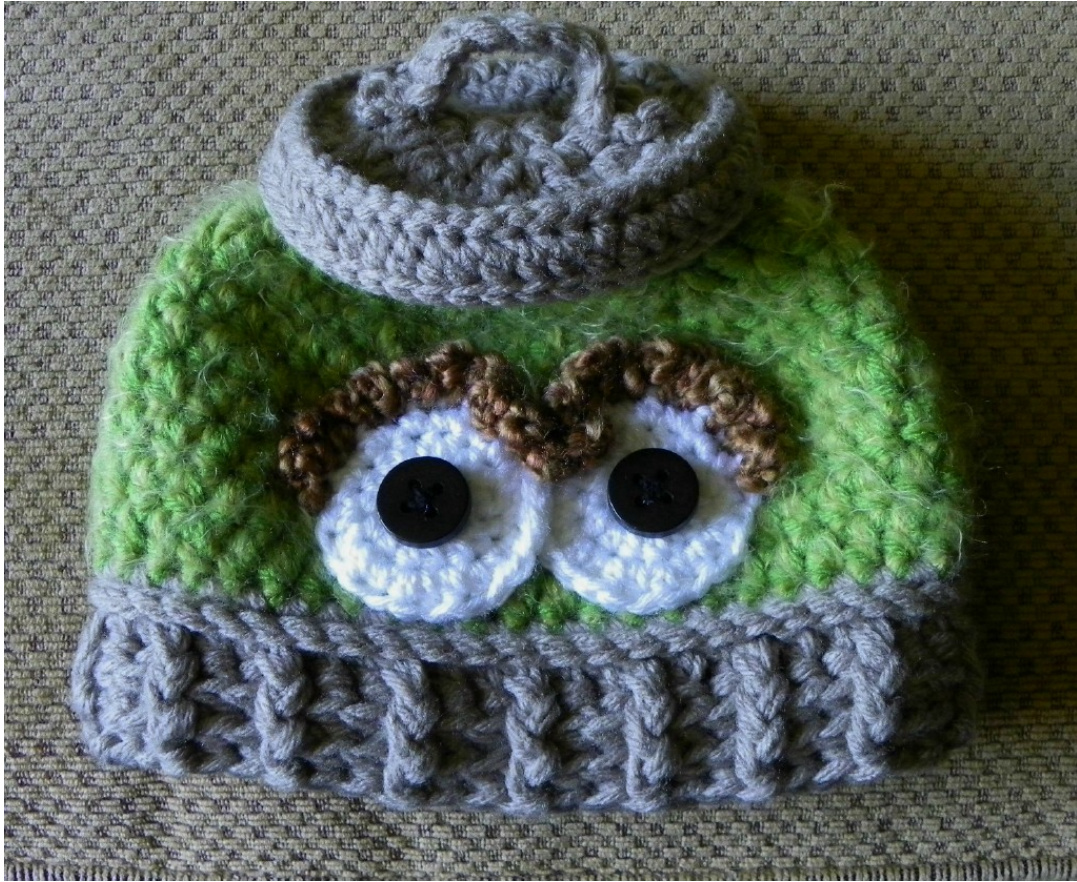
Grouch in a Can Hat Pattern Yarn Artists Designs
Materials Needed
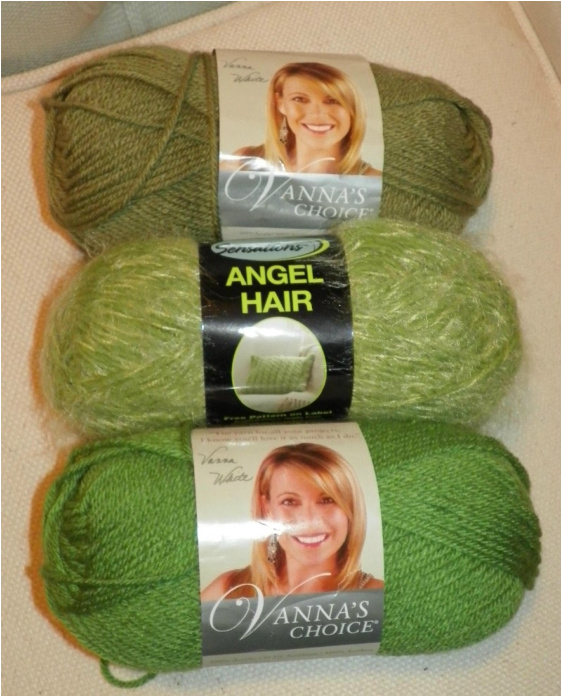
\*\*Sensations Angel Hair - Light Green (Jo Ann Fabrics and Crafts) \*\*Lion Brand Vanna’s Choice in Fern (girl hat color) or Dusty Green (boy hat color) Lion Brand Homespun - Barley or any Taupe color worsted weight yarn Small amount of white Light Gray or medium gray for trash can - I used Vanna's Choice Clay, but found out it has been discontinued. 7/8" or 1"' black buttons for eyes \*\*If you would rather not use the Angel Hair, this hat can be worked up with two strands of worsted weight yarn in your favorite grouchy color ? \*\* A little cheaper on the budget too and it will be just ascute!! Yarn Needle and measuring tape H Hook (Baby, Toddler hats) 1 Hook (Child, Adult hats) K Hook (work hat - all sizes)
Abbreviations:
st = stitch sts = stitches sc = single crochet hdc = half double crochet dc = double crochet Fpdc = front post double crochet Flo = front loops only sctog = single crochet two stitches together hdctog= half double crochet two stitches together dctog =double crochet two stitches together ch = chain Sl st = slip stitch Bpdc = back post double crochet Blo = back loops only Notes: Throughout the pattern, Chain 1 will equal a single crochet. Chain 2 will be equal to a half double crochet. Ch 3 will equal a back post double crochet. I didn't work this hat in a continuous round, because you won't be able to see the seam. This also helps to keep track of your rows. Let's get started....
Stitch Gauge
Using the K hook and angel hair and vanna's choice yarn held together: Work a 4 inch square and check gauge. Use the hook that gets you to this gauge for the hat. It is more important that you have 11 hdc in 4 inches than the same amount of rows as me. The height of the hat will be determined by the finished size listedbelow. 11 hdc x 8 rows= 4 inches square
Finished Size:
3-6 Months - circum. 14"'-17"', hat height 6.5\*'-7" 6-12 Months - circum. 16"-19", hat height 7.5"" 12-24 Months - circum. 18"-20", hat height 8" Child 3-10 years- circum. 19'-20.5" hat height 8.5"" Teen - circum. 20.5''-22" hat height 9"'-10" Adult - circum. 21.5"-22.5 hat height 9"-10" Hat Pattern for all sizes is made with K Hook. \*\* (see above) Hold both the worsted weight (fern or dusty green) and the angel hair yarn at the same time and work the hat.
Hat Pattern 3-6 Months:
Ch 3, sl st to form ring Round 1: Ch 2, 5 hdc in ring, sl st to ch 2 (6) Round 2: Ch 2, hdc in same st, 2 hdc in each st around, sl st to ch 2 (12) Round 3: Ch 2, 2 hdc in next st, \*hdc in next st, 2 hdc in next stitch\* repeat from \* around, sl st to ch 2 (18) Round 4: Ch 2, hdc in next st, 2 hdc in next st, \*hdc in the next 2 sts, 2hdc in the next\* repeat from \* around, sl st to ch 2 (24) Round 5: Ch 2, hdc in next 2 sts, 2 hdc in next st, \*hdc in the next 3 sts, 2 hdc in the next\* repeat from \* around, sl st to ch 2 (30) Round 6: Ch 2, hdc in the next 3 sts, 2 hdc in the next st, \*hdc in the next 4 sts, 2 hdc in the next\* repeat from \* around, sl st to ch 2 (36) Round 7: Ch 2, hdc in each stitch around, sl st to ch 2 (36) Round 8: Repeat round 7 until the height of your hat measures 4.5"-5\*\* Fasten off and leave a long tail to weave into hat. For the last 2" of hat continue down to the trash can instructions.
Hat Pattern 6-12 Months:
Ch 3, sl st to form ring Round 1: Ch 2, 6hdc in ring, sl st to ch 2 (7) Round 2: Ch 2, hdc in same st, 2 hdc in each st around, sl st to ch 2 (14) Round 3: Ch 2, 2 hdc in next st, \*hdc in next st, 2 hdc in next stitch\* repeat from \* around, sl st to ch 2 (21) Round 4: Ch 2, hdc in next st, 2 hdc in next st, \*hdc in the next 2 sts, 2 hdc in the next\* repeat from \* around, sl st to ch 2 (28) Round 5: Ch 2, hdc in next 2 sts, 2 hdc in next st, \*hdc in the next 3 sts, 2 hdc in the next\* repeat from \* around, sl st to ch 2 (35) Round 6: Ch 2, hdc in the next 3 sts, 2 hdc in the next st, \*hdc in the next 4 sts, 2 hdc in the next\* repeat from \* around, sl st to ch 2 (42) Round 7: Ch 2, hdc in each stitch around, sl st to ch 2 (42) Round 8: Repeat round 7 until the height of your hat measures 5.5"\* Fasten off and leave a long tail to weave into hat. For the last 2?’ of hat continue down to the trash can instructions.
Hat Pattern for 12-24 Months:
Ch 3, sl st to form ring Round 1: Ch 2, 7 hdc in ring, sl st to ch 2 (8) Round 2: Ch 2, hdc in same st, 2 hdc in each st around, sl st to ch 2 (16) Round 3: Ch 2, 2 hdc in next st, \*hdc in next st, 2 hdc in next stitch\* repeat from \* around, sl st to ch 2 (24) Round 4: Ch 2, hdc in next st, 2 hdc in next st, \*hdc in the next 2 sts, 2 hdc in the next\* repeat from \* around, sl st to ch 2 (32) Round 5: Ch 2, hdc in next 2 sts, 2 hdc in next st, \*hdc in the next 3 sts, 2 hdc in the next\* repeat from \* around, sl st to ch 2 (40) Round 6: Ch 2, hdc in the next 3 sts, 2 hdc in the next st, \*hdc in the next 4 sts, 2 hdc in the next\* repeat from \* around, sl st to ch 2 (48) Round 7: Ch 2, hdc in each stitch around, sl st to ch 2 (48) Round 8: Repeat round 7 until the height of your hat measures 6"\* Fasten off and leave a long tail to weave into hat. For the last 2"' of hat continue down to the trash can instructions.
Hat Pattern Child 3-10 Years:
Ch 3, sl st to form ring Round 1: Ch 2, 8 hdc in ring, sl st to ch 2 (9) Round 2: Ch 2, hdc in same st, 2 hdc in each st around, sl st to ch 2 (18) Round 3: Ch 2, 2 hdc in next st, \*hdc in next st, 2hdc in next stitch\* repeat from \* around, sl st to ch 2 (27) Round 4: Ch 2, hdc in next st, 2 hdc in next st, \*hdc in the next 2 sts, 2 hdc in the next\* repeat from \* around, sl st to ch 2 (36) Round 5: Ch 2, hdc in next 2 sts, 2 hdc in next st, \*hdc in the next 3 sts, 2 hdc in the next\* repeat from \* around, sl st to ch 2 (45) Round 6: Ch 2, hdc in the next 3 sts, 2 hdc in the next st, \*hdc in the next 4 sts, 2 hdc in the next\* repeat from \* around, sl st to ch 2 (54) Round 7: Ch 2, hdc in each stitch around, sl st to ch 2 (54) Round 8: Repeat round 7 until the height of your hat measures 6.5"\* Fasten off and leave a long tail to weave into hat. For the last 2" of hat continue down to the trash can instructions.
Hat Pattern Teen:
Ch 3, sl st to form ring Round 1: Ch 2, 9 hdc in ring, sl st to ch 2 (10) Round 2: Ch 2, hdc in same st, 2 hdc in each st around, sl st to ch 2 (20) Round 3: Ch 2, 2 hdc in next st, \*hdc in next st, 2 hdc in next stitch\* repeat from \* around, sl st to ch 2 (30) Round 4: Ch 2, hdc in next st, 2 hdc in next st, \*hdc in the next 2 sts, 2 hdc in the next\* repeat from \* around, sl st to ch 2 (40) Round 5: Ch 2, hdc in next 2 sts, 2 hdc in next st, \*hdc in the next 3 sts, 2 hdc in the next\* repeat from \* around, sl st to ch 2 (50) Round 6: Ch 2, hdc in the next 3 sts, 2 hdc in the next st, \*hdc in the next 4 sts, 2 hdc in the next\* repeat from \* around, sl st to ch 2 (60) Round 7: Ch 2, hdc in each stitch around, sl st to ch 2 (60) Round 8: Repeat round 7 until the height of your hat measures 7"'-8"\* Fasten off and leave a long tail to weave into hat. For the last 2"’ of hat continue down to the trash can instructions.
Hat Pattern Adult:
Ch 3, sl st to form ring Round 1: Ch 2, 10 hdc in ring, sl st to ch 2 (11) Round 2: Ch 2, hdc in same st, 2 hdc in each st around, sl st to ch 2 (22) Round 3: Ch 2, 2 hdc in next st, \*hdc in next st, 2 hdc in next stitch\* repeat from \* around, sl st to ch 2 (33) Round 4: Ch 2, hdc in next st, 2 hdc in next st, \*hdc in the next 2 sts, 2 hdc in the next\* repeat from \* around, sl st to ch 2 (44) Round 5: Ch 2, hdc in next 2 sts, 2 hdc in next st, \*hdc in the next 3 sts, 2 hdc in the next\* repeat from \* around, sl st to ch 2 (55) Round 6: Ch 2, hdc in the next 3 sts, 2 hdc in the next st, \*hdc in the next 4 sts, 2 hdc in the next\* repeat from \* around, sl st to ch 2 (66) Round 7: Ch 2, hdc in each stitch around, sl st to ch 2 (66) Round 8: Repeat round 7 until the height of your hat measures 7"'-8"\* Fasten off and leave a long tail to weave into hat. For the last 2"’ of hat continue down to the trash can instructions.
Finishing the hat
Trash Can instructions for all sizes... With K hook and two strands of light gray worsted weight yarn
Holding hat upside down with the back facing you... Round 1: Sl st, ch 1, sc in each st around (total will vary based on size) Round 2a: (In FLO) sl st around hat in front loops of the sc that were just made in round 1 Round 2b: (In BLO) sl st in back loop of the sc from round 1, ch 3, dc in each of the back loops around hat Round 3: Ch 3, bpdc in next st, fpdc in next st, \* bpdc in next 2 sts, fpdc in next st\* repeat from \* around hat Round 4: Repeat round 3 until desired length of the hat has been reached (about 2") Hope this wasn't too confusing. Just note that round 2a and 2b are both worked into the single crochets made from round 1. Tie off and leave a tail for weaving in ends. Trash Can Lid work with 2 strands of gray worsted weight yarn. Use H hook for baby/toddler and use I hook for child/teen/adult
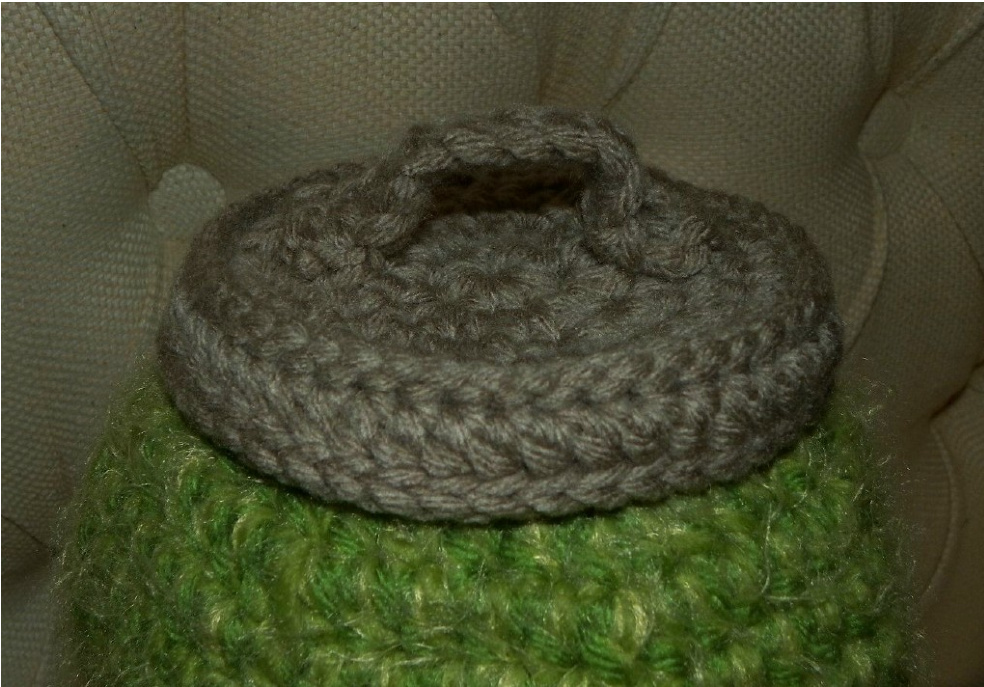
Ch 4, sl st to form a ring Round 1: ch 2, 9 hdc in ring, sl st to ch 2 (10) Round 2: ch 2 hdc in same st, 2 hdc in each st around, sl st to ch 2 (20) Round 3: ch 2, 2 hdc in next st \*1 hdc in next st, 2 hdc in next \*, repeat from \* around, sl st to ch 2 (30) Round 4: ch 2, hdc in next st, 2 hdc in next st, \* hdc in next 2 sts, 2 hdc in next st\*, repeat from \* around, sl st to ch 2 (40) Round 5: ch 2, hdc in next 2 sts, 2hdc in next st, \* hdc in next 3 sts, 2 hdc in next st\*, repeat from \* around, sl st to ch 2 (50) Round 6a: (In FLO) sl st around can in flo of hdc from round 5 Round 6b: (In BLO) hdc around can in blo of hdc from round 5 Round 7: Sl st in through both loops of hdc around can. Fasten off and leave a long tail for sewing to hat. Sew the handle to lid before attaching the lid to Oscar's head. I sewed the center of the can lid to the top of Oscar's head leaving the last few rows of the lid not sewn down. This makes it look like the lid is just resting on his head.
Handle for trash lid with 2 strands of gray worsted weight yarn. Use H hook for baby/toddler and use I hook for child/teen/adult
Ch 15, dc in the 4"h ch from hook, dc across. Fasten off and leave a long tail for sewing to hat. I attached the handle by sewing down the first 2 dc to the lid on each side leaving the in the middle of the handle free, so that you can slide two fingers under it. Eyes make 2- with white worsted weight yarn. Use H hook for baby/toddler and use I hook for child/teen/adult
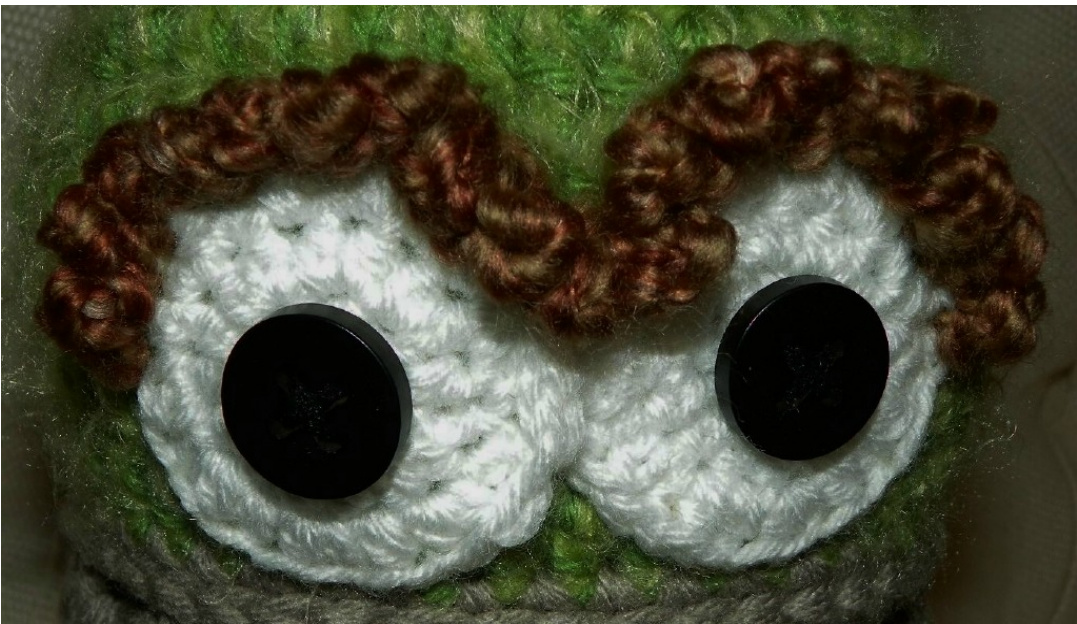
Ch 3, sl st to form a ring Round 1: ch 2, hdc 7 in ring, sl st to ch 2 (8) Round 2: ch 2, hdc in same st, 2 hdc in each st around, sl st to ch 2 (16) Round 3: ch 2, hdc in next st, 2 hdc in next st, \* hdc in next 2 sts, 2 hdc in next st\* repeat from \* around, sl st to ch 2 (24) Fasten off the first eye and leave a short tail to weave in the end. On the second eye, we will attach to the first eye by slip stitching both eyes together with four sl st stitches. Fasten off and leave a long tail for sewing both eyes to the hat.
For eyebrows we will use Lion Brand Homespun Barley or any taupe colored worsted weight yarn. Use H hook for baby/toddler and use I hook for child/teen/adult
Start by holding both eyes that have been attached. We will count from where they join at the top of eyes and count 10 sts to the right. Sl st with Homespun in this stitch. Ch 3, sl st in next stitch to left. \*ch 3, sl st to next sts to left\* repeat from \* until you have 10 furry stitches in each eye. (20 sts total) Fasten off and weave in ends. Attach 7/8" or 1' buttons to the middle of each eye. I use yarn and yarn needle, but some button holes won't allow such a large needle to fit through holes. Find a needle that will work for you
Congratulations, your project is complete!! Pat yourself on the back for a job well done ?
@ Copyright Notice: You have permission to sell the finished product locally and online. Please mention Yarn Artists as the designer of the pattern. Rewriting, reselling, distributing, or copying this pattern isn't allowed. Thank you again for your purchase and have fun
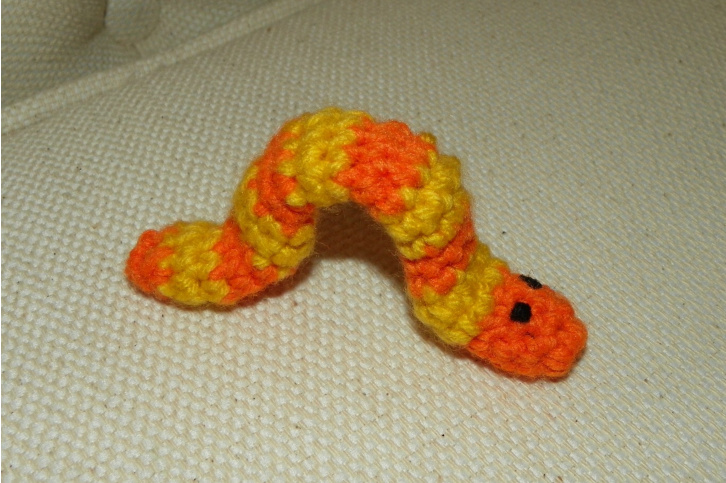
Slimy Addition
Materials G Hook Bright Yellow Red Heart Yarn Pumpkin Red Heart Yarn Small amount of black Fiber fill or 2 pipe cleaners Work slimy in a continuous round. With G hook and orange yarn: Ch 3, sl st to form a Round 1: ch 1, 5sc in ring (6) Round 2: \*1 sc in next, 2 sc in next\*, repeat from \* around (9) Round 3: sc around (9) Round 4: sc around (9) With black yarn and needle, you can make two French knots for eyes. Join the yellow, but don't fasten off the orange. You will work one at a time, just leave the orange loose in the middle of slimy and pick it up again when needed. Round 5: sc around (9) Round 6: sc around (9) Pick up the orange again and leave the yellow loo Round 7: sc around (9) Round 8: sc around (9) Continue working yellow and orange in this pattern until you have completed 5 stripes of each color... At this point I would either stuff Slimy with Fiber Fill or place two pipe cleaners inside him so he will bend. Slimy's back end...we will end with orange. Round 23: \*sc in next stitch, sctog in next\* repeat from \* around (6) Round 25: sc around (6) Leave a tail to sew Slimy shut. Tuck in yarn. Sew Slimy onto the lid with gray so that you can hide the yarn easily.