RE-BAG
Designed by Julie Weisenberger What do you do with all those plastic shopping bags that multiply in your cupboard? You knit with them, of course!
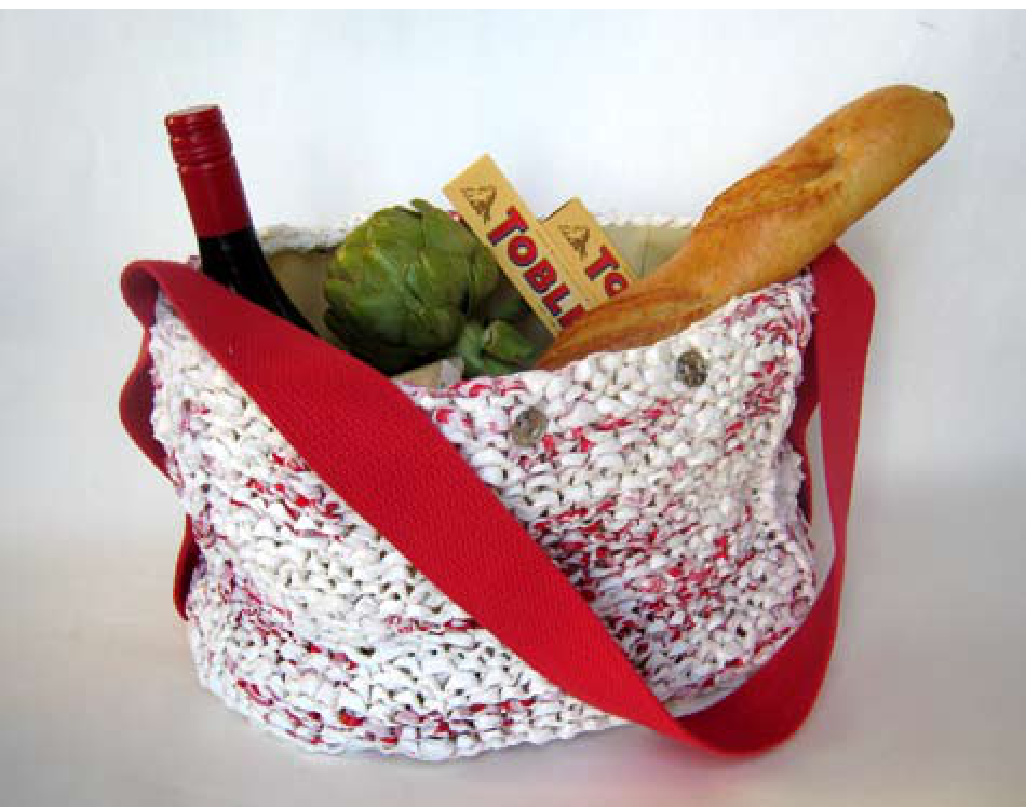
See the tutorial on www.cocoknits.com on how to cut the bags into strips. Then check out the tutorial on rag knitting because you can use that method to connect the strips into one big ball of plastic “yarn". The finished re-bag is holey and stretchy so I used an eco-friendly reusable shopping bag to line my re-bag and give it more structure and strength. I used no-sew bachelor or dungaree buttons to put everything together so this is another no-sew project!
Skills Needed
General knitting knowledge; preparation of plastic "yarn" per tutorial on cocoknits.com.
Sizes
small (large) A reusable shopping bag the same size or larger than your plastic re-bag. 2 yards of webbing and 8-14 dungaree or bachelor buttons which you will use to attach the webbing and liner bag to your knitted bag. Small bag: approx ${}^{1}{0}^{,}$ high $\times\,1\,0^{\prime\prime}$ wide $\times\;5^{\prime\prime}$ deep. Large bag: approx $12^{,}$ high $\times\,1\,2^{\prime\prime}$ wide $\times\ 6^{\prime\prime}$ deep.
Materials
Needles
24 - 29" Circ # 11.
Gauge
It's a plastic bag, who cares! At least 20-30 plastic shopping bags (the number will vary greatly depending upon the size of your bag).
Abbreviations
See www.cocoknits.com
Directions
Co 8 (12) sts. Work in garter st until piece measures 10 (12)". Leave sts on needle and around the first long edge pick up and knit l st for each ridge of garter st, on co edge pick up and knit 1 st for each co st, on second long edge pick up and knit 1 st for each ridge of garter st. (approx 20 (25) sts along each long edge and 8 (12) sts on each end.) One round knitted. Now cont in the round as follows: pl, k6 (10), pl, k sts from long edge and on the end sts pl, k6 (10), pl, k sts from second long edge. (This is not necessary but helps define the corners of the bag to make the placement of the web handles easier). Cont in this way until bag is desired height working the last 2 or 3 rows in garter st if desired.
Finishing
Decide which side of bag will be the RS (in sample photos, small bag has knit side turned to the outside, large bag has the purl side turned out.) Fold the top of your liner bag down (toward the outside) so it is the same height as your re-bag and fit it inside. To seal the ends of your webbing and prevent fraying, use fray check (for cotton webbing) or carefully run the cut ends over the flame of a lighter...the heat will slightly melt and seal polyester or other manmade fiber. Decide where to place buttons and mark, evenly spacing them along the webbing and around and under the bag. Make sure to overlap the webbing on the bottom of the bag and poke the bachelor button through both layers. Where you have marked, use the pointed half of the bachelor button and poke from the inside out through the liner bag, your re-bag and the webbing, securing all three by connecting the other half of bachelor button. Use the remaining bachelor buttons to connect the liner bag to the re-bag around the topedge.
Enjoy!
The pattern and photographs contained in this document are the property of cocoknits. This pattern is available for personal use only. No unauthorized reproduction, in whole or in part, or distribution of this pattern or content is allowed, Copyright $\circledcirc2007$ www.cocoknits.com


