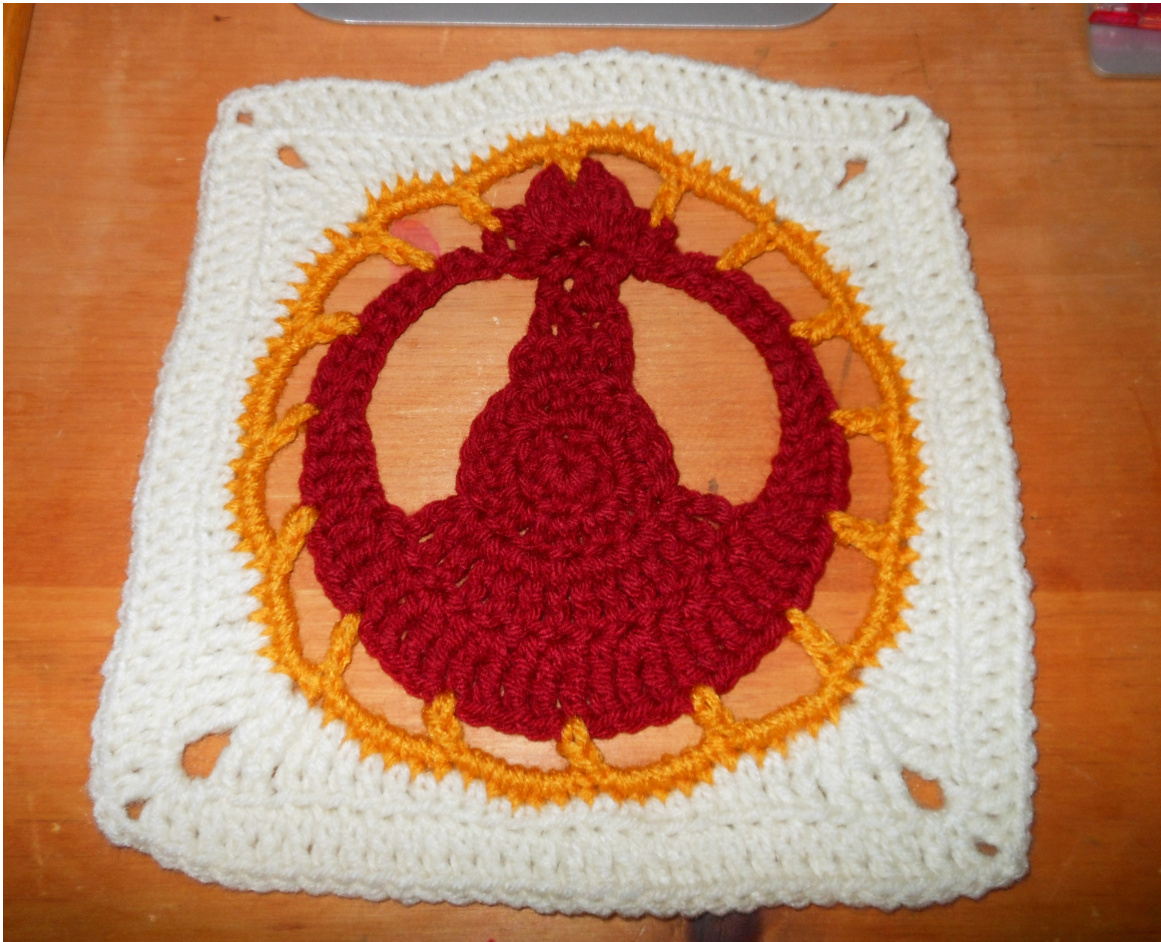
Rebel Alliance Square
Notes:
This pattern was created by Mallory Walleck and is available for free on Ravelry.com. Please do not sell the pattern itself or reprint it without crediting the author. Using an H8/5mm hook and three different colors of worsted weight yarn, the finished product measures between 8 and 9 inches. Using a different hook or adding rows will allow you to achieve a different sized result. Stitches and Abbreviations: All terminology referenced throughout this pattern is based on American crochet. If you follow British/Australian convention, you will need to look up a conversion chart, because the same names do not reference the same stitches. sl: slip stitch st: stitch sp: space ch: chain sC: single crochet hdc: half double crochet dc: double crochet tc: triple/treble crochet dtc: double triple/treble crochet BLO: back loops only dc2tog: double crochet 2 stitches together tc2tog: triple/treble crochet 2 stitches together 2dc versus dc2: 2dc indicates that you should double crochet twice in the next stitch, whereas dc2 indicates that you should double crochet in each of the next two stitches. Materials: As stated above, you will need a size H8/5mm hook as well as three separate colors of worsted weight yarn. Pictured is color A: Red, color B: Gold, and color C: lvory, but feel free to use whatever colors suit your needs or preferences. You will only need a minimal amount of each of the three colors-- I designed the square entirely out of scraps. Pattern: With color A: ch4, sl into first ch to form a ring. 1. Ch2, dc into ring 7 times, sl into top of ch2 to join. 2. Ch2, dc into same st as join, 2dc in each st around (including the ch2, you should have 18st), sl into top of beginning ch2 to join. 3. Ch2, dc in same st as join, dc4, turn. 4. Ch2, sk first dc, dc2tog, dc, turn. 5. Ch2, sk first dc, dc2, turn. 6. Ch1, sc3, turn. 7. (Ch4, dc) in first st, then sl in same st. (3dc, ch3, 3dc) in next st, then sl in same st. (Dc, ch2, dc) in final st, then sl in same st. DO NOT TURN. 8. Ch 16, tc in 4th st from left side of pillar, tc again in same st. 2tc in next 6 st. Ch 16, sl to into the first ch of the beginning ch4 from row 7. 9. Turn, sl 2, sc6, hdc4, dc4, (2tc, tc)X7, dc4, hdc4, sc6, sl2. Finish off color A. 10. With color B, join in the ch3 at the highest point of row7, ch1, sc in same st. Ch4, dc in ch2 sp. Ch4, sk the two sl of row 9, dc in first sc of row 9. (Ch4, sk3 st, dc)X12. Ch4, dc in ch2 sp. Ch4, sl in beginning sc. 1. Ch1, 6sc in each ch sp around. Sl in first sc to join. Finish off color E 12. With color C, join in the 12th stitch to the right of where you fastened off row 11 ( this should be in the first st of that particular grouping of 6 sc). (Ch5, dtc1, ch2, 2dtc) in same st as join. \*Tc2, dc3, hdc3, sc6, hdc3, dc3, tc2tog, tc. (2dtc, ch2, 2dtc) in same st.\* Repeat from \* to \* twice more, ending with a sl in the top of the beginning ch5 as opposed to performing another (2dtc, ch2, 2dtc). 13. Sl in next dtc, sl into ch sp. (Ch3, dc, ch2, 2dc) in ch sp. In BLO, dc across, doing (2dc, ch2, 2dc) in each of the ch sp. Sl into the top of the beginning ch3. Finish off and weave in ends. As stated above, this should leave you with a square between 8 and 9 inches. Should you desire something larger, simply repeat row 13, waiting to finish off until the square reachesthedesiredsize. Upon completion your square may be a little wavy, but it should straighten when attached to other squares.


