A Galaxy Far, Far Away
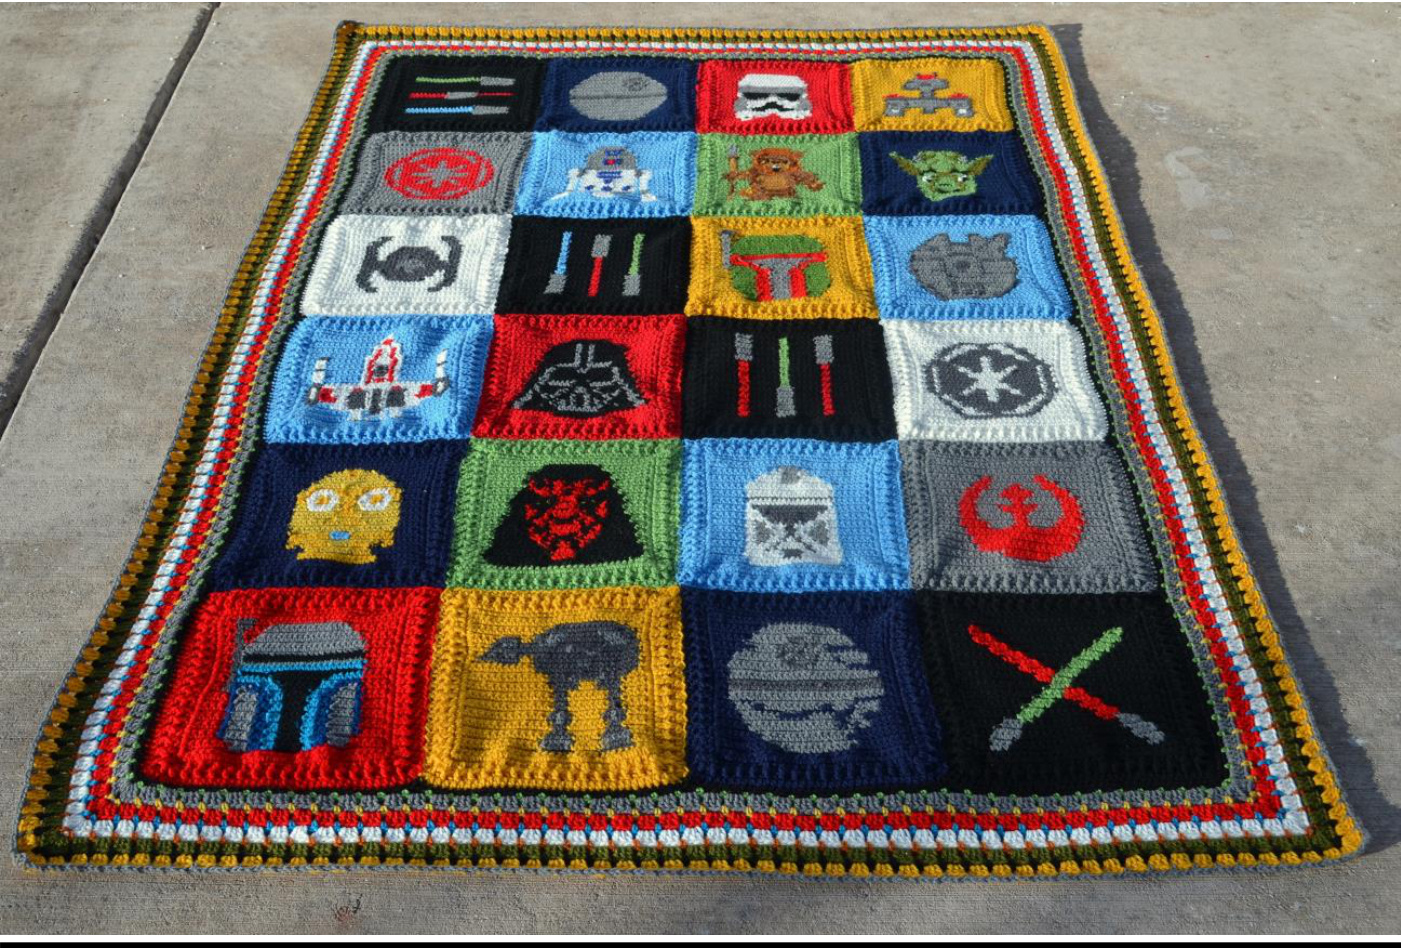
Thank you so much for your interest in my blanket! It was a labor of love and a joy to watch take shape. I hope, that if you choose to make one, you enjoy every moment of it and the joy it brings.
What you will need
SizeG hook Tapestry/yarn needle Scissors Worsted weight yarn I used 10 colors and it worked out to 1 7oz skein of each color.
GRAPHS
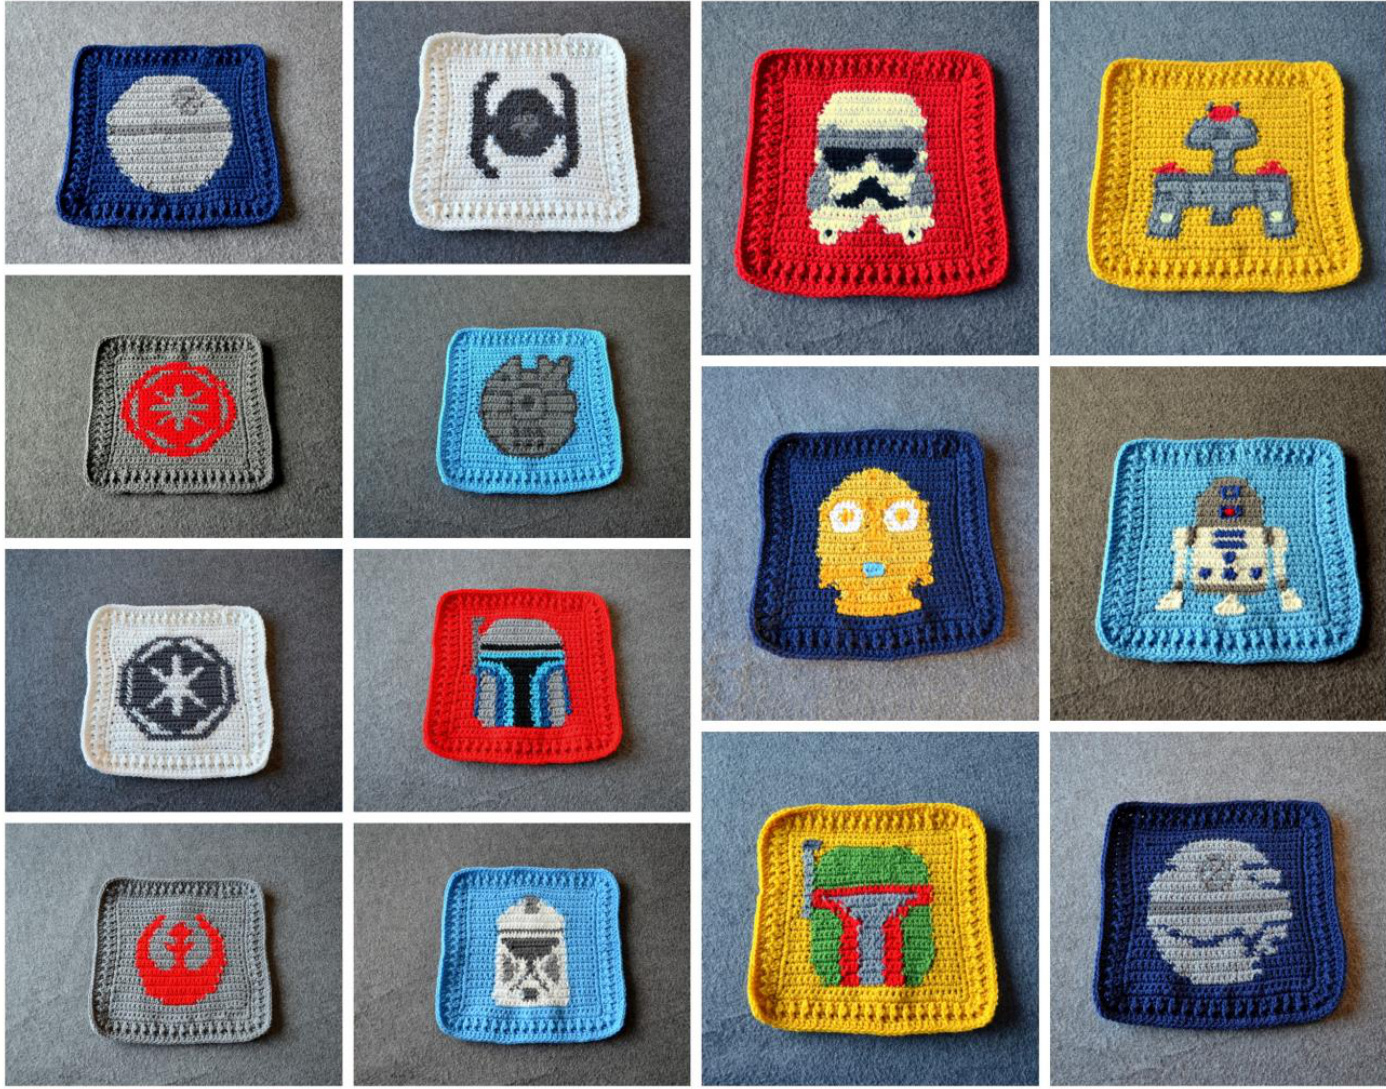
Each graph, both those from the following site and my originals, are 30x30 squares done in single crochet. I personally carry my colors behind and drop them as I finish each section. This set of five videos is a very good set of tutorials for graphing if you want to see it done. https://www.youtube.com/watch?v=Um9CHvUfFko&list=PLoruVE2y6O2euOt KWhosQjwUOpTPcXCdA First and foremost, I got some of the graphs I used from another talented designer. Here is the link to about half of the graphs used in this blanket: From the following link I am using: Death Star, Stormtrooper, Y-wing, Old Rebublic Logo, R2-D2, Tie Fighter, Millinium Falcon, Boba Fet, Empire's Insignia, C3P0, Scout Trooper, Rebel Insignia, Jengo Fett and the Incomplete Death Star. http://www.angelfire.com/space2/swcharts/crochet.html These are the square that I made with the above graphs.
Original Graphs
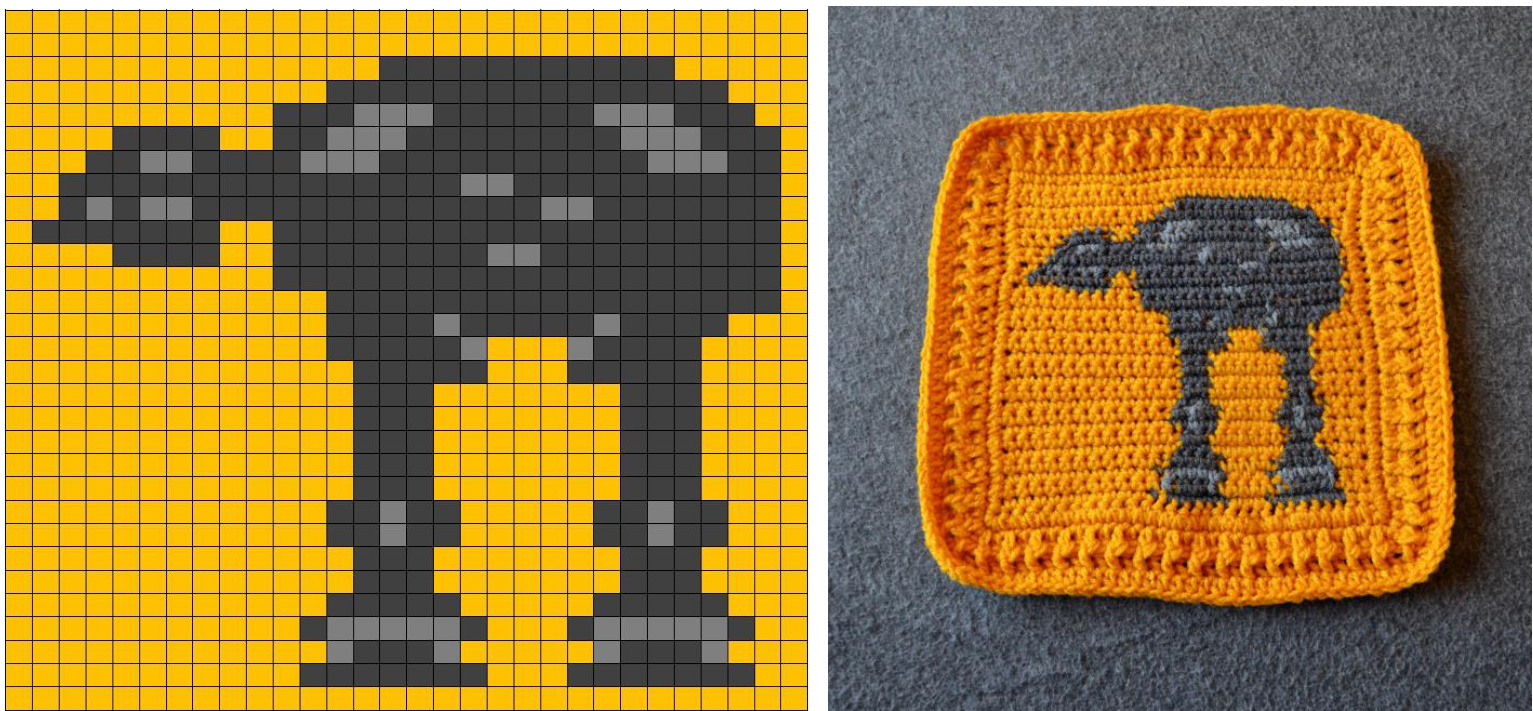
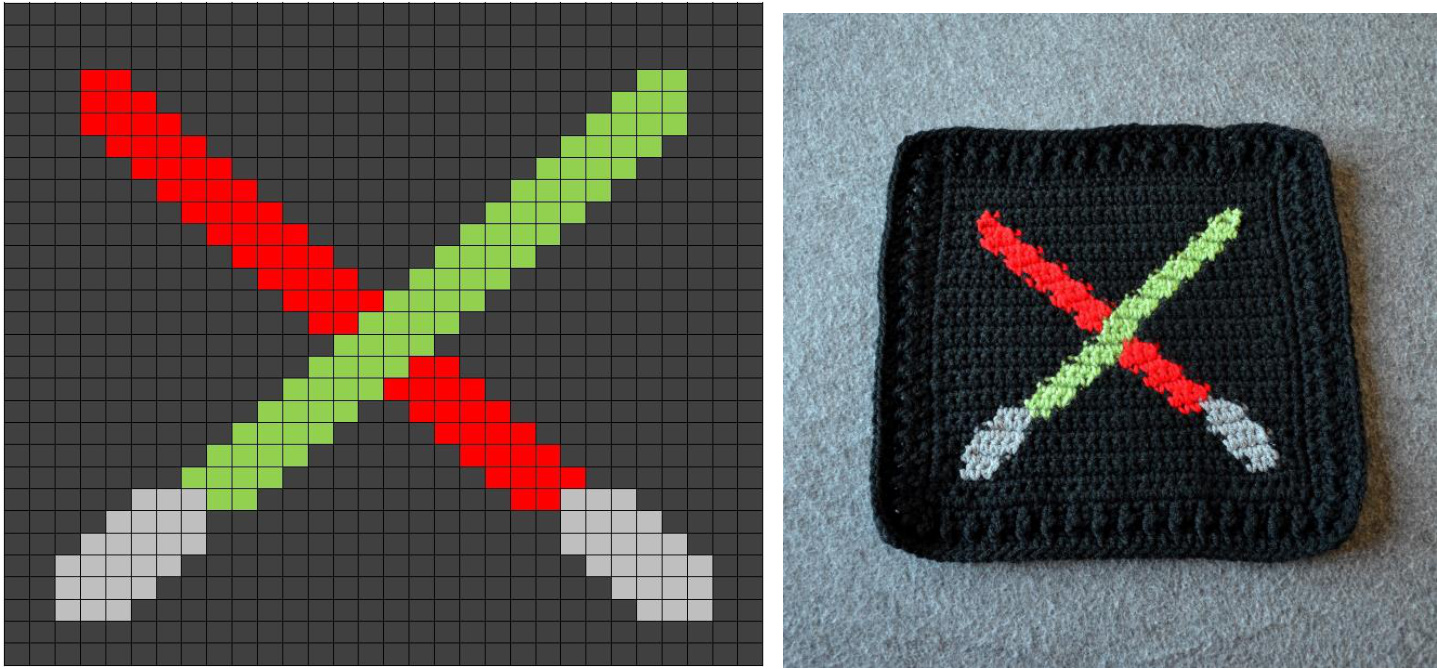
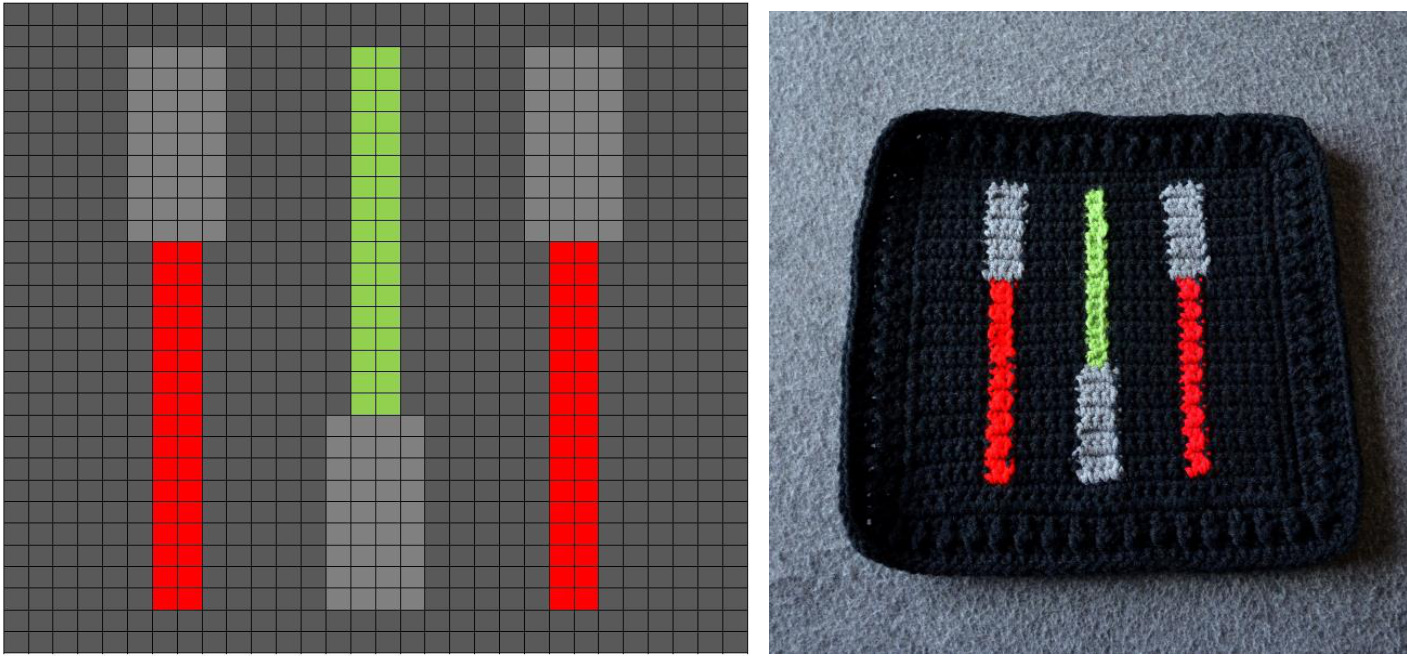
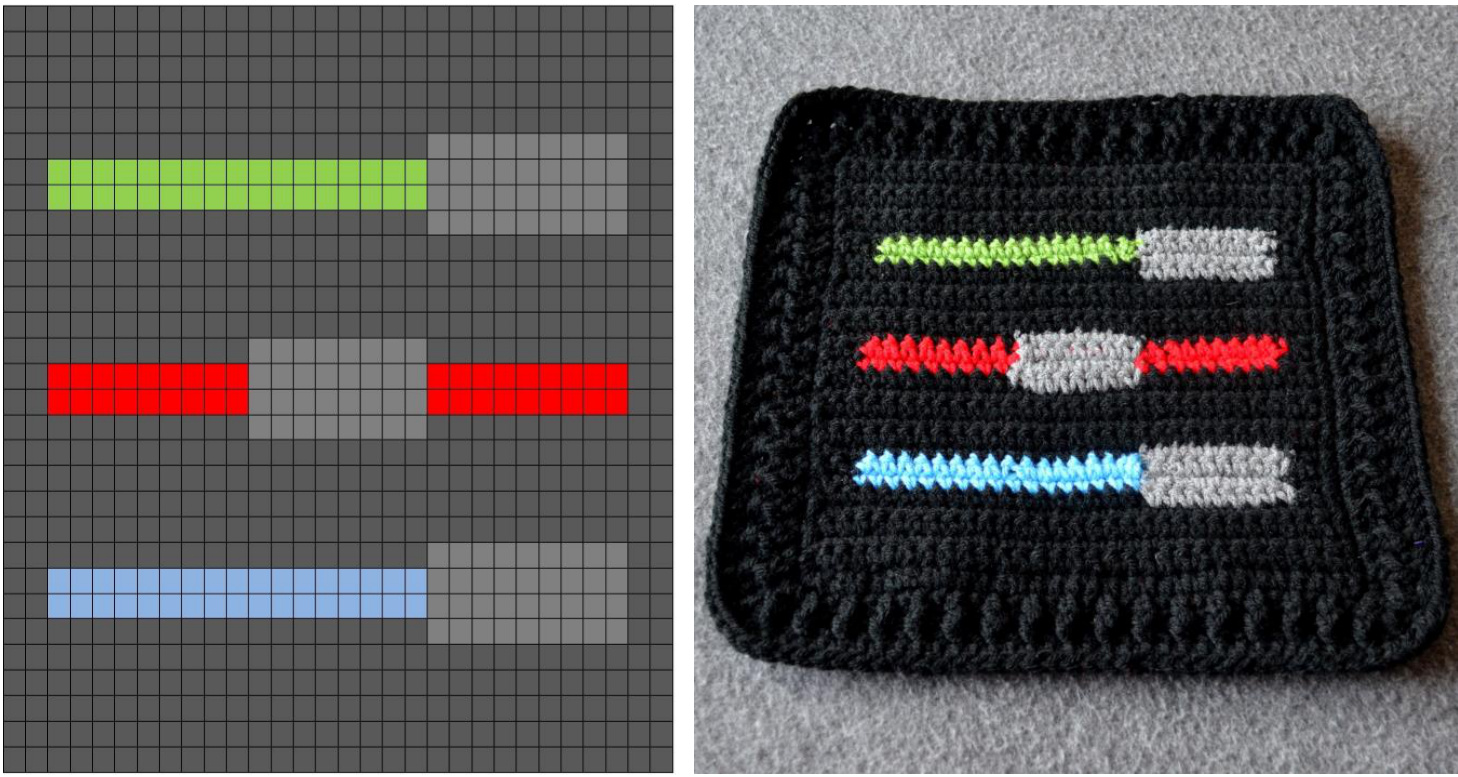
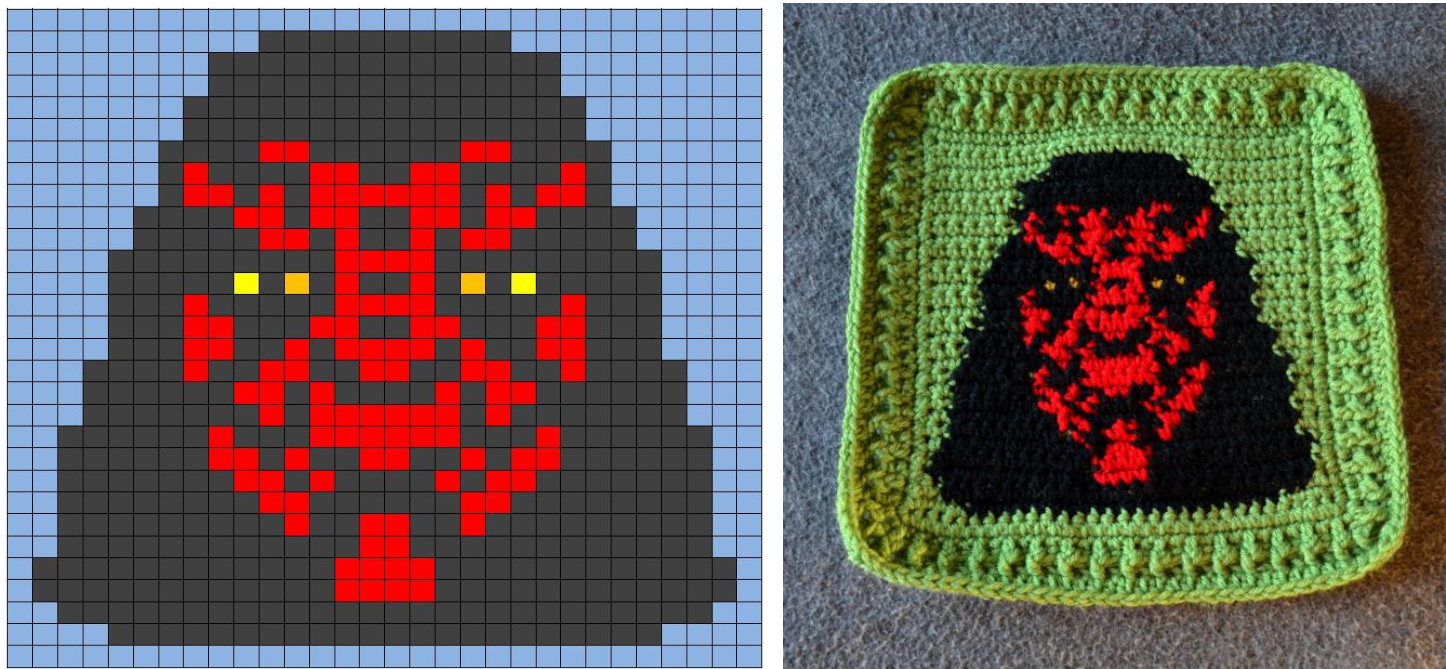
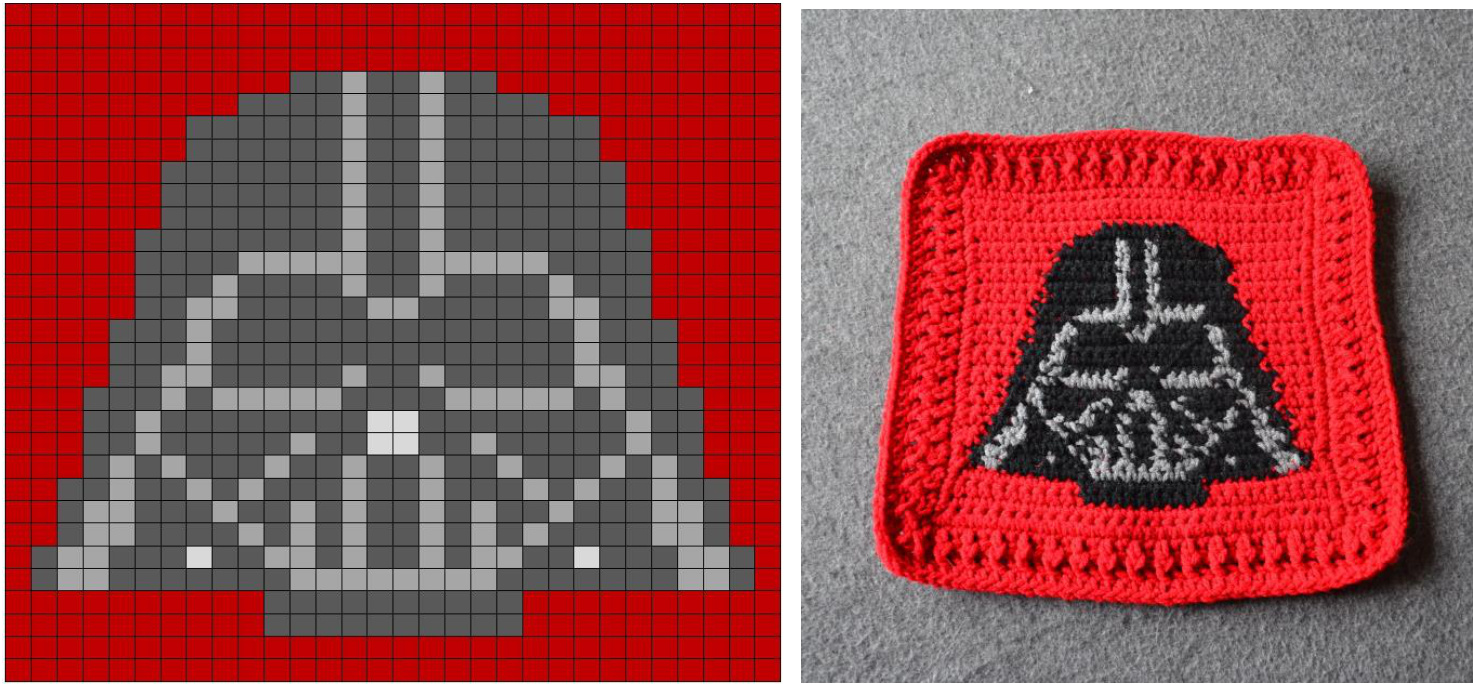
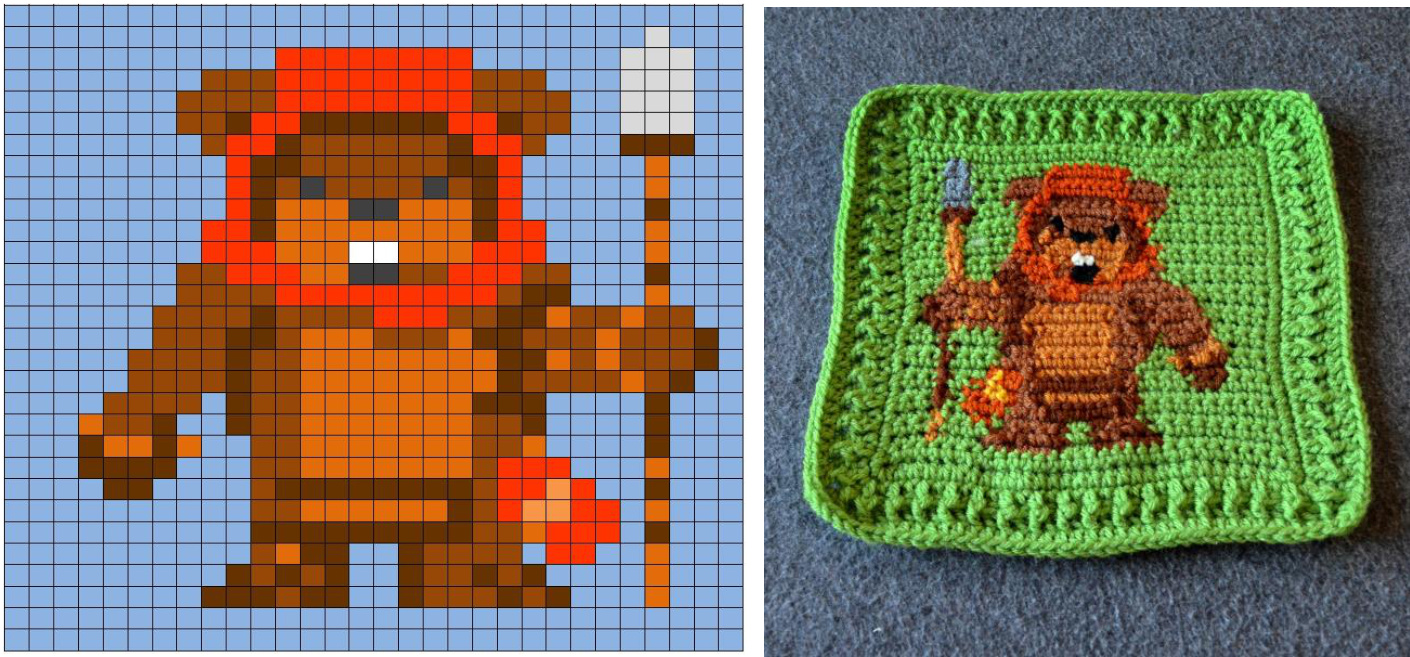
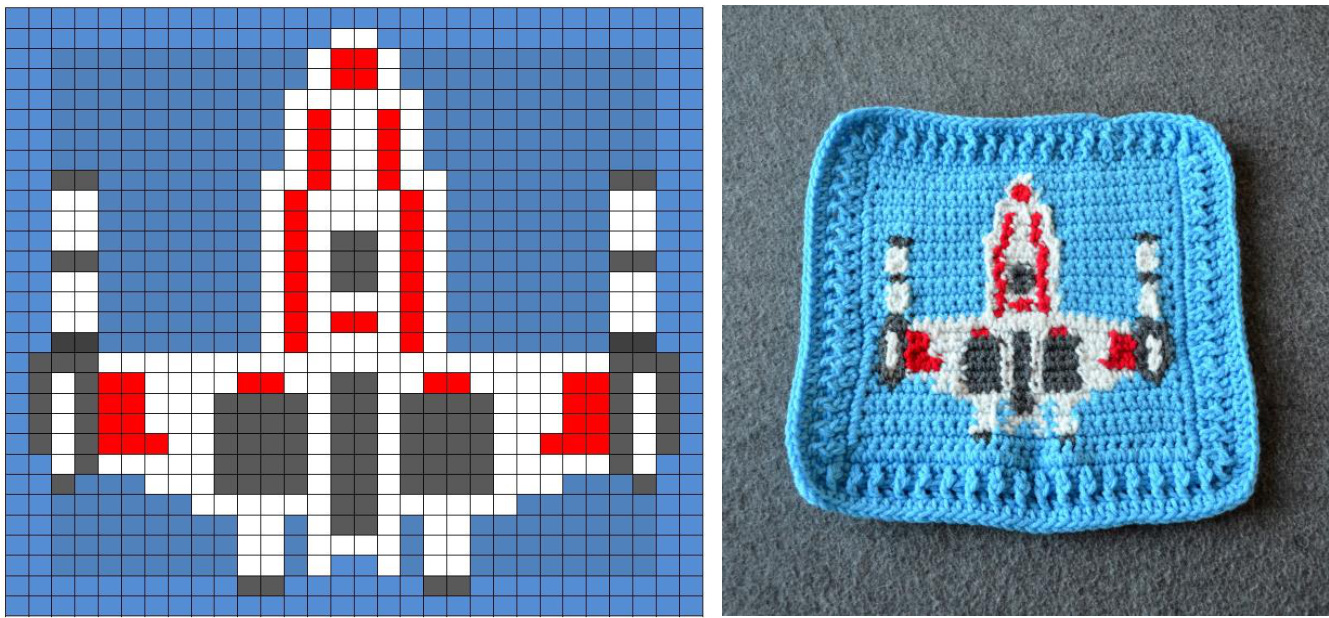
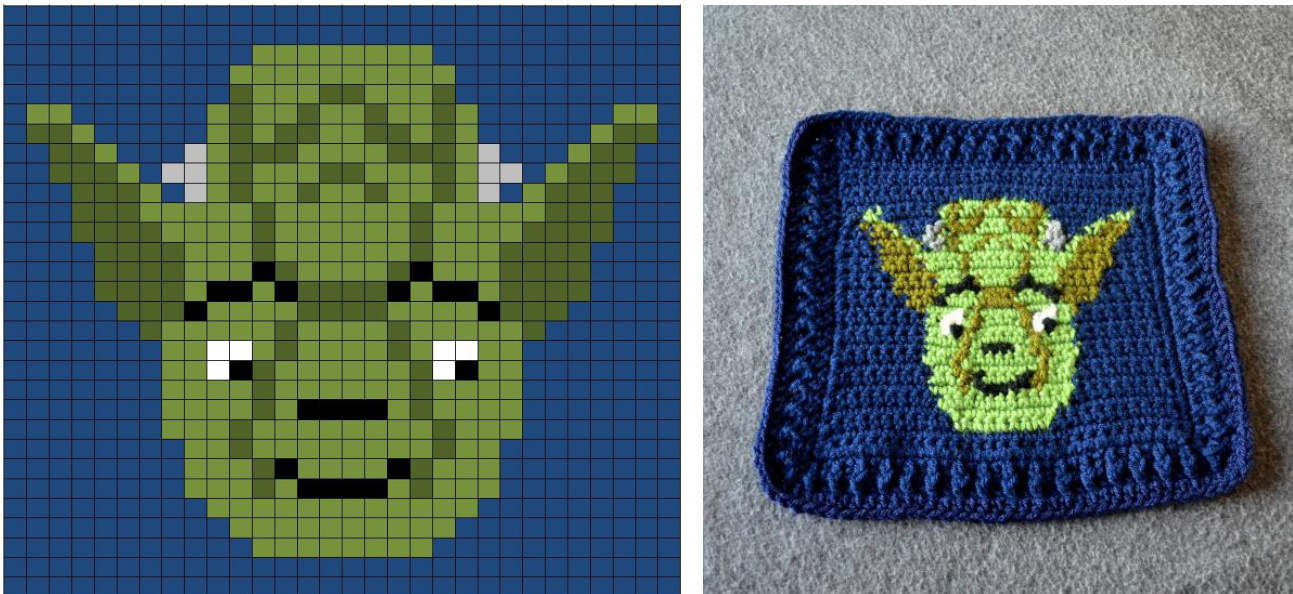
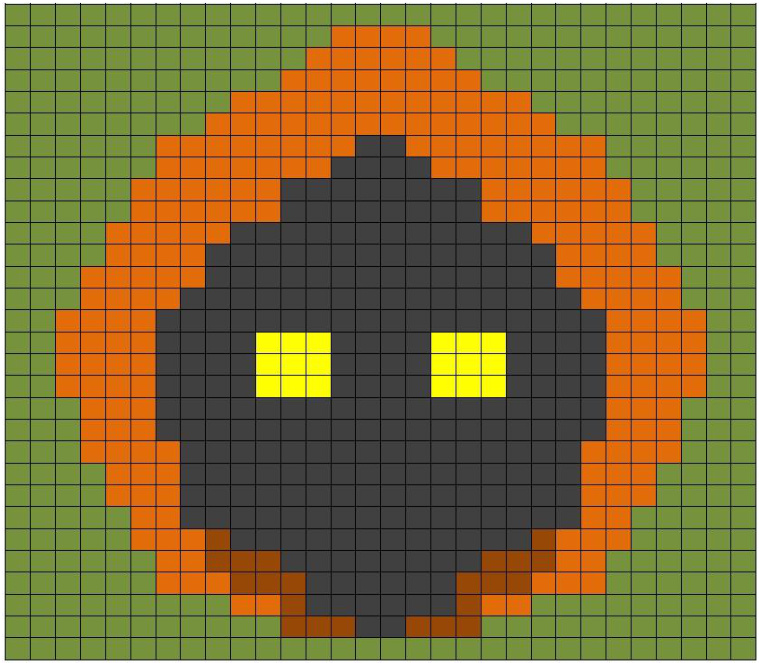
Without further ado... here are my own original graphs! Feel free to use them to make your own works of art! Colors are suggested based on a series that we all know and love but have fun with it! I would love to see what you make! The turning chain in this project will not count as a stitch.
AT-AT
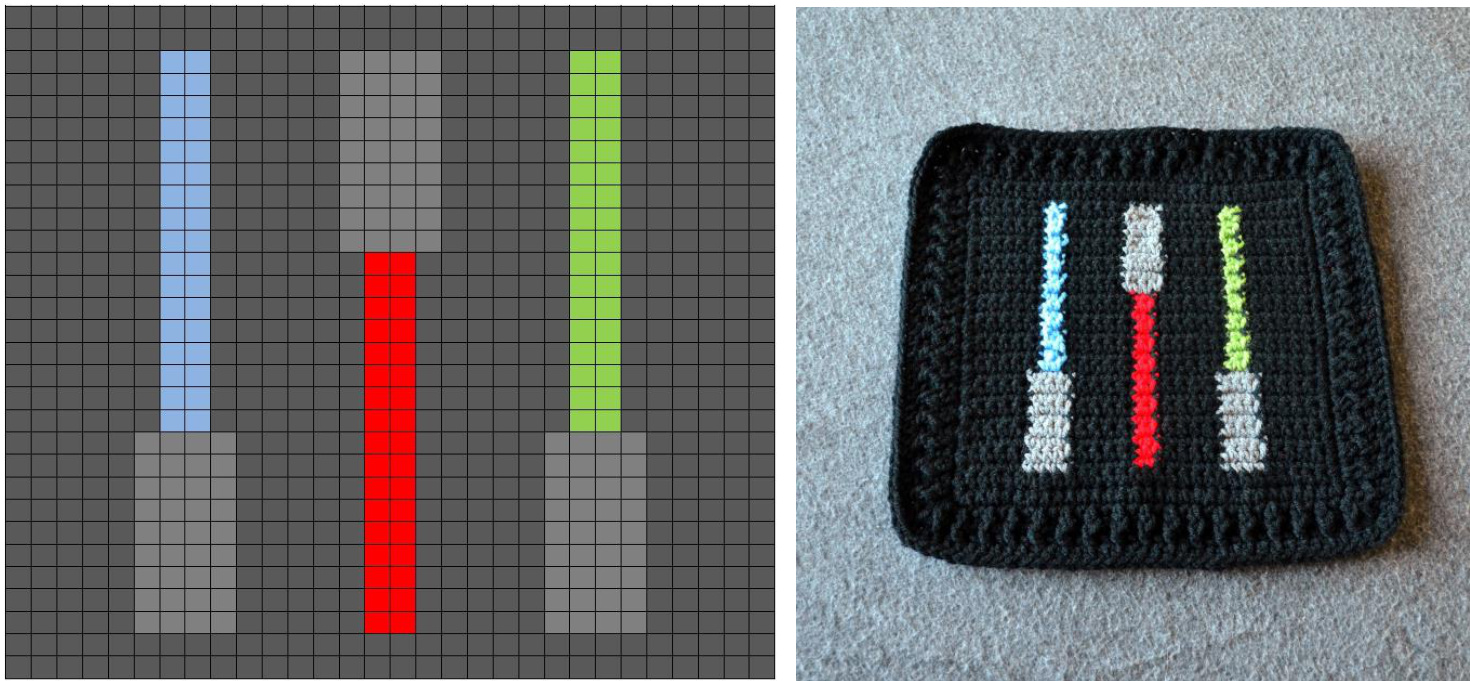
Three Lightsabers
Crossed Lightsabers
Luke Lightsaber
Sith Lightsaber
Darth Maul
Darth Vader
Ewok
X-Wing
Yoda
Jawa (Bonus I did not work this one up)
When you have finished each square, tie off and weave in all of your ends. Mark what will be the front of your work.
BORDERFOREACHSQUARE
Round 1: Using the main color for each square, join in any stitch with a standing single chain. Single chain in each stitch around with a third single chain in each corner. Join with a slip stitch to the top of your standing single chain. Round 2: Chain 2 (or a standing half double chain) and work a half double chain in each stitch around, working 3 hdc in each corner stitch. Join with a slip stitch to the top of your chain 2. Round 3: Chain 3 (or a standing double chain) and front post double crochet in the next stitch. Back post double crochet in the next stitch. \*around. Join with a slip stitch to the top of your chain 3. Round 4: Chain 2 (or a standing half double chain) and half double chain in each stitch around again working three hdc in each corner stitch. Finish off and weave in your ends.
JOINING METHOD
There are a thousand and one ways to join squares... I've tried quite a few of them and none work quite as perfectly as the Zipped Ladder Stitch. You can find the tutorial for this here: http://www.ravelry.com/patterns/library/zipped-ladder-stitch-tutorial---invisible. join-technique
BLANKET BORDER
Round 1: Work a row of single crochet around the entire edge of your blanket. In the joins between each square work a s2tg to ensure a nice smooth edge for your blanket. http://www.crochetme.com/glossary/single-crochet-two-together-sc2tog.aspx Round 2: I delight in using the Giant Granny Patches Border to edge this blanket. I feel that it just sets the whole tone and brings all of the bold colors together. I start with Round 4 of the pattern and continue out until I'm happy with how it looks! This is the chart I used to design my layout. I'm including it in the chance that you might find it useful.
| 1 | 2 | 3 | 4 |
| 5 | 6 | 7 | |
| 6 | 10 | 11 | 12 |
| 13 | 14 | 15 | 16 |
| 17 | 18 | 19 | 20 |
| 21 | 22 | 23 | 24 |


